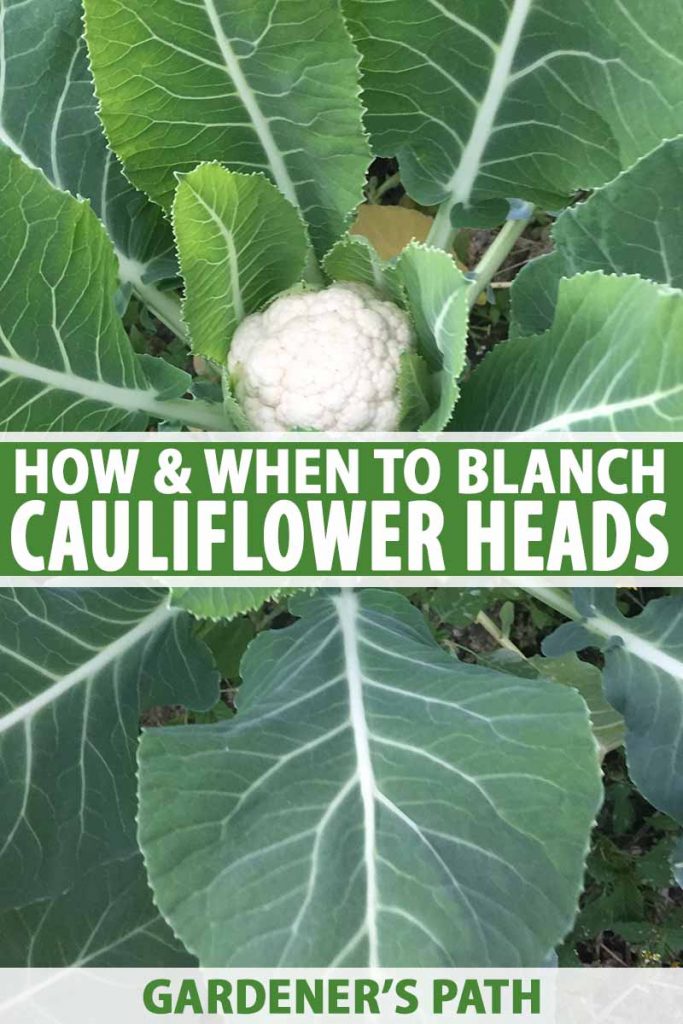
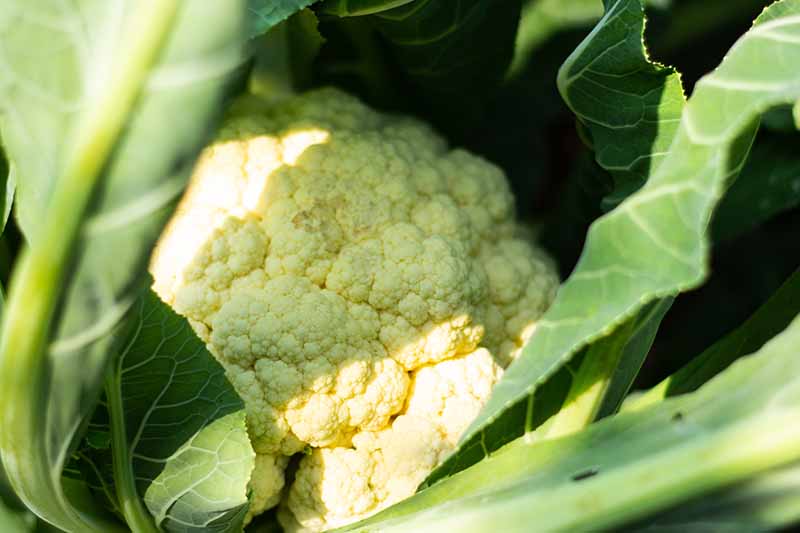
Many different varieties are available in shades of green, orange, purple, and white. White types need to have their heads sheltered in order to produce a crop with a snowy color and sweet flavor, in a process known as blanching. This isn’t the same thing as the practice of par-boiling veggies by dunking them in boiling water before plunging them into an ice bath that you’re probably familiar with. We link to vendors to help you find relevant products. If you buy from one of our links, we may earn a commission. In this brief article, you will learn when and how to blanch cauliflower with its own leaves.
When the Time Is Right
About a month after sowing, healthy cauliflower plants will be lush with leafy foliage. At this time, the first tiny heads should begin to appear. Check our our cauliflower growing guide if you are just getting started.
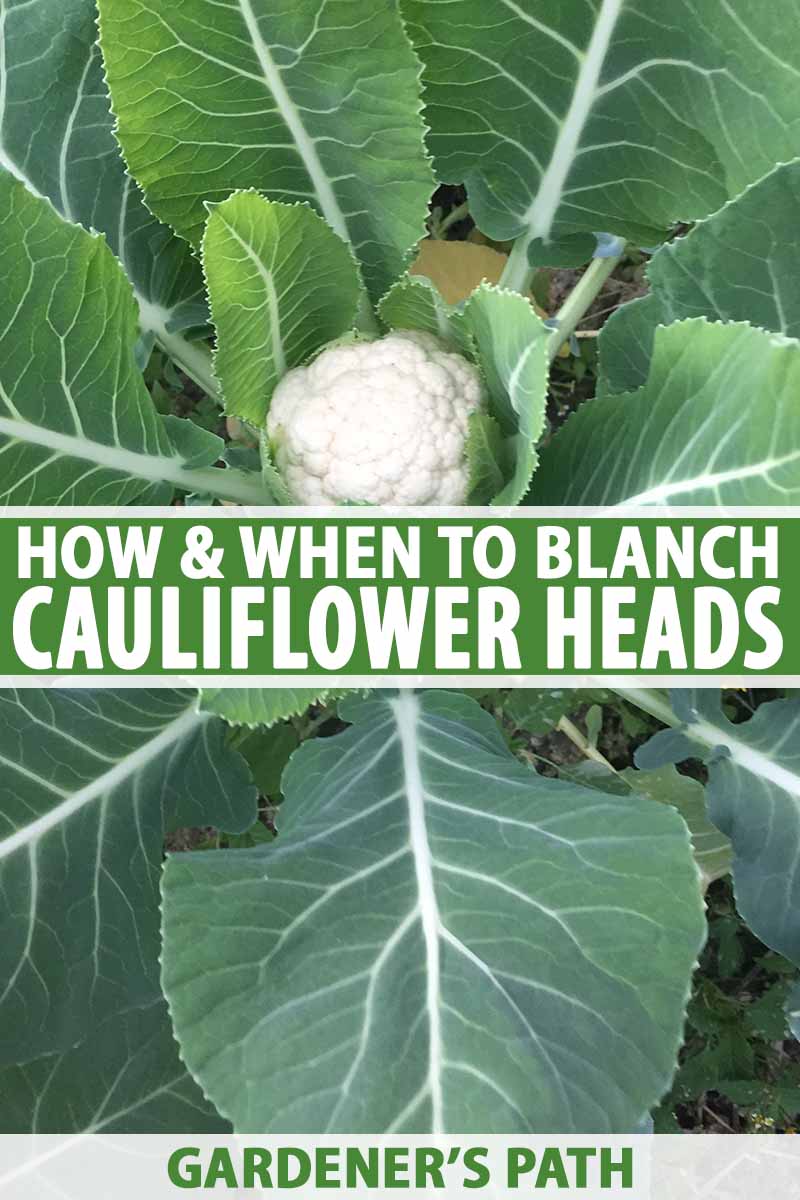
Some cultivars, like ‘Early White Hybrid,’ have foliage that grows upward and outward, away from the heads. This does little, if anything, to shade the developing heads from the sun. These varieties require blanching by hand to protect them from damage.
Others, such as ‘Snowball Self-Blanching,’ will naturally wrap their inner leaves around the maturing heads. Often this is enough to successfully shelter them from the intense rays, but they, too, can benefit from gardener intervention. It may seem like a no-brainer to buy the self-shielding type. However, considerations such as flavor, head size, length of the growing season, and price may make other types more appealing to some gardeners. Watch plants closely when seedlings reach the one-month mark, because you should begin sun protection on a dry day before the heads are 3 inches across, for the most appetizing crop. If you start late, or skip blanching altogether, you are likely to still produce an edible crop. However, the curds may be discolored or even sun-scorched, and the flavor may become bitter.
How to Go About It
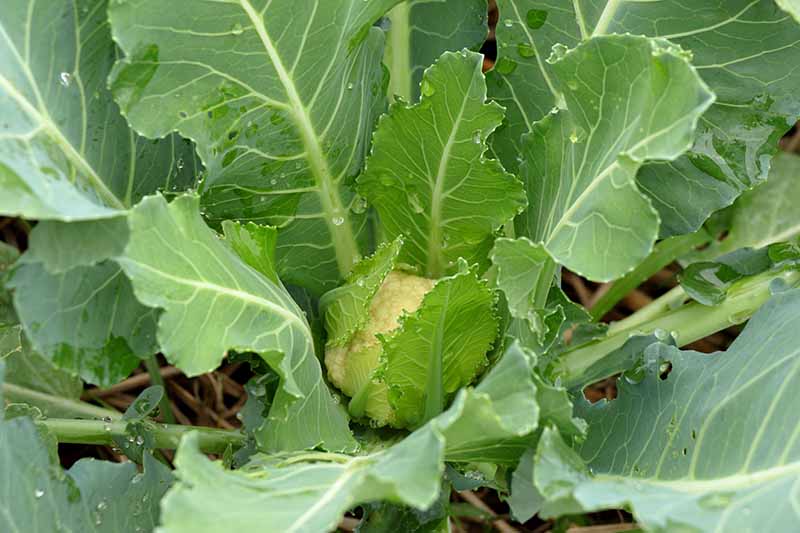
If you’re not sure whether you have a self-blanching variety or not, look at how the leaves are growing. If they are wrapping around the developing head and effectively shielding it from the sun, you may not need to take any protective action.
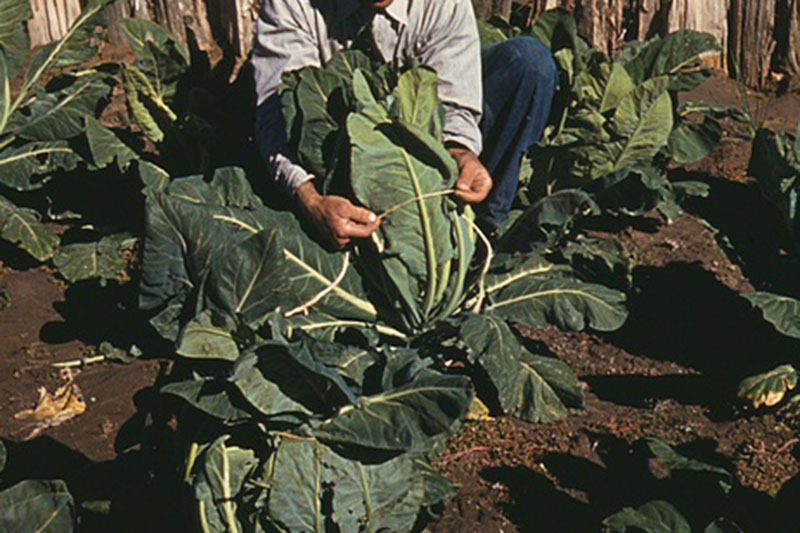
However, if the leaves are growing up and away from the head, this could leave your crops vulnerable to the sun’s rays. In this case, you’ll need to take steps to make the leaves cover the heads. Here’s how to do it. It’s very easy. Imagine peeling a banana in reverse.
- Choose a large leaf with which to begin.
- Gently bend the leaf inward over the center of the plant. Hold the leaf in place.
- Grasp a second leaf in the same fashion, and fold it over to meet the first, over the center of the plant. Hold the tops of both leaves together in one hand.
- Use your other hand to gently bend a third leaf inward to meet the first two. Grasp all three leaves together in one hand, over the center of the plant. 5. If necessary, bend a fourth leaf inward to meet the other three, to effectively hide the developing head.
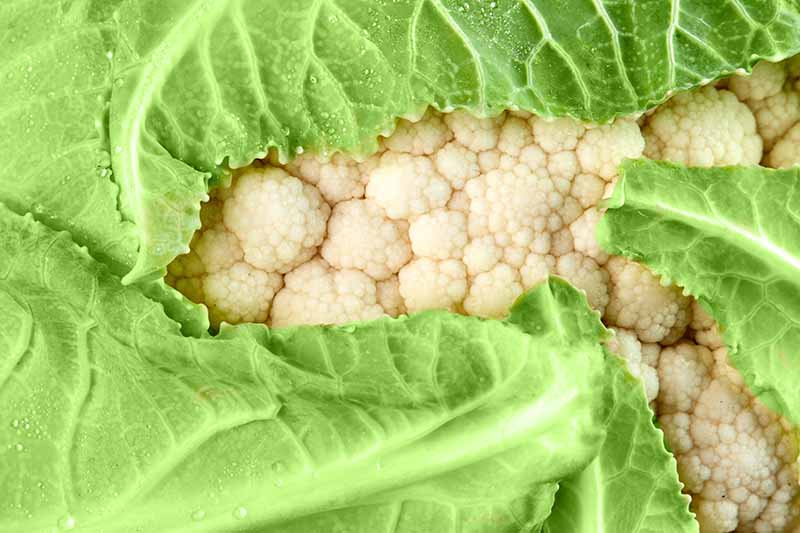
- Use twine, rubber bands, or clothes pins to loosely bind the leaves you are grasping together. Secure them either at the top or around the middle, so they go over and around the head, completely covering it. Imagine peeling a banana in reverse again. We have to make the open peels stay closed. However, we also need to leave some room for airflow, for peeking in to monitor progress, and to allow the head to reach its mature dimensions of six to eight inches in diameter. This is why we bind them loosely. Alternative methods include bending large leaves over the head until they touch the ground, and weighing them down with a brick or rock, or placing a large container over entire plants. I’m not a fan of these methods, for two reasons: First, they can reduce airflow and lead to fungal growth. And second, by enclosing the ground, it can create a moist space that’s attractive to nibbling slugs and snails. Here’s a tip: Blanch on a dry day, after the morning dew has evaporated. This way, no moisture gets trapped near the curds and fungal growth is inhibited. That’s all there is to it!
Harvest Ready
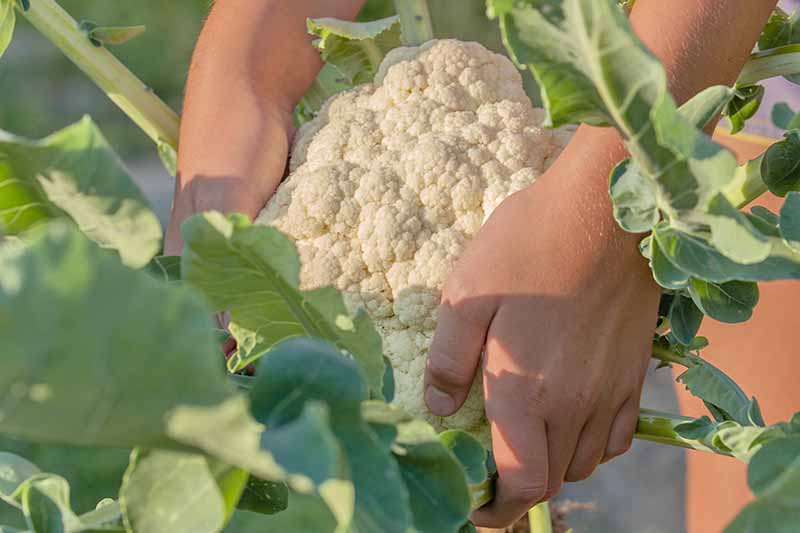
Check developing heads every few days by peeking in between the leaves. Keep an eye out for any hidden pests, and treat as needed. Learn more about controlling cauliflower pests here. In one to three weeks, they should reach their mature dimensions and be ready for harvest. When the time is right, simply unbind the leaves to reveal your crop.
In addition, if your self-blanching varieties do not seem to have enough foliar coverage, or if you are experiencing a heatwave, don’t hesitate to gather and bind their outer leaves to prevent the heads from discoloring. Read more about harvesting cauliflower here.
Add cauliflower to this year’s garden planner, and get ready to reap the rewards of a challenging crop well cultivated! And be sure to visit our sister site, Foodal, for tasty and nutritious cauliflower recipes. We love hearing from our readers. Do you have any advice for cauliflower growers? Have you tried blanching your crops in previous years? Please share your stories in the comments section below, and don’t forget to tell us what zone you’re growing in! Learn more about growing cauliflower with these useful guides: :
9 Cauliflower Head Disorders and How to Avoid Them 11 Reasons Why Your Cauliflower May Not Form Heads Why Is My Cauliflower Fuzzy? Troubleshooting Tips for Ricing in Curds
© Ask the Experts, LLC. ALL RIGHTS RESERVED. See our TOS for more details. Originally published on January 9, 2020. [lastupdated]. Uncredited photos: Shutterstock.