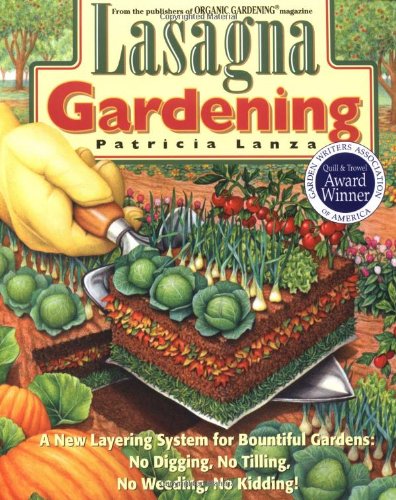
For some people it just begins to take too much time, or too much energy. I used to plant my garden the old-fashioned way too. I would put in all that effort and my harvest would be mediocre at best. I would always be disappointed, but I would continue to plant year after year. It is in the blood you see. My father’s family line is full of yeoman farmers who made their living from working their own land, some more successfully than others. I just can’t stop myself from growing things. Lasagna Gardening: A New Layering System for Bountiful Gardens: No Digging, No Tilling, No Weeding, No Kidding! It also claimed that this technique would reduce the amount of watering and weeding that you would be necessary. This method is also referred to as layer or no-dig gardening. Gardening with less work? That sounded good to me, so I decided to give it a try. I was amazed with the results. In my first year I had an abundance of yellow squash, zucchini, cucumbers, and pumpkins. The year after that I grew enormous amounts of acorn squash, okra, zucchini and other summer squash, Greek pepperoncini, and tomatoes. The tomatoes were the clincher for me that this form or gardening works. Prior to lasagna gardening I was hopeless with tomatoes. I would follow tip after tip, and even if I got the plants to survive the harvest was still well under what my friends and neighbors were getting. Once I started with the lasagna plan that all changed; I was actually giving away tomatoes. So, how do you create a lasagna garden? It is all about layering the right materials. Follow the steps below and you will be well on your way.
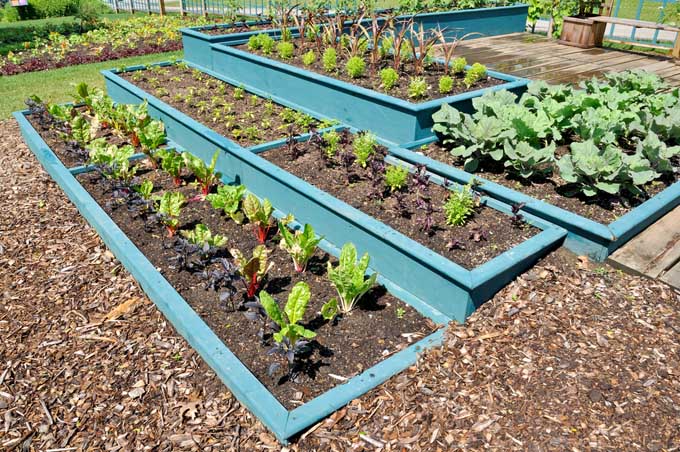
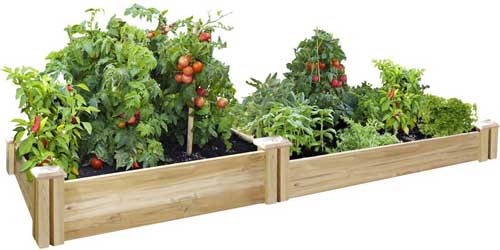
Step 1 – Create a raised bed
While it isn’t absolutely necessary to create a border for your garden, I find it to be helpful to keep your materials where you want them. The width and length of your bed can be as small or large as you like, but I would recommend that it be at least 5-6″ high. There is little necessity of making your bed higher than this unless you are trying to keep rabbits, groundhogs, or other critters out. It is simple to create a raised bed. You can simply lay out and stack large bricks, pavers, or stones to your desired dimensions. If such items don’t fit into your budget well you can also use untreated lumber. Cedar will hold up better out in the elements but untreated pine boards will work fine too. Plans can be found all over the internet for simple wooden raised beds, but I’m sure most know or can find a friend who knows how to nail four boards together and stake the box in place. The absolute easiest method of creating a raised bed is to order a kit from amazon such as the one found below. Greenes Cedar Raised Garden Kit 4′ x 8′ x (10.5″-7″)
Step 2 – Prepare the plot
Once the border is in place preparing the Bed is rather simple; all you need to do is kill the grass and weeds so that they don’t come shooting up into your garden. To accomplish this you don’t need to till the ground or spray it with chemicals; all you need are newspapers and a bucket of water. Simply dunk a newspaper page in the water and place down flat on top of the grass. The water is mainly used to make the paper heavy so that it doesn’t move or blow away. Be sure to cover all of the grass inside the border. Overlap the newspapers so that there are no seams for grass to grow through. Make the newspaper at least two layers thick. This layer of paper will effectively kill the grass and weeds by blocking out all sun and blocking out any path of escape to get to the sun. In addition the paper will eventually decompose and be turned into the soil by eager earthworms.
Step 3 – Layer organic matter
Soon after the newspaper is in place I like to begin layering the growing medium so that the newspaper stays in place. It isn’t absolutely necessary to layer in this order, but it can’t hurt. I put down about 1 to 2 two inches of each of the following materials: compost, peat moss, brown vegetation (straw or chopped brown leaves), and grass clippings. Keep layering these materials until you have 6-8 inches of organic material. The layers will settle as it rains or as you water your garden, so don’t worry too much if it exceeds the height of your border a little. You may also feel free to add wood ash, barn litter, or sand in small amounts if you have it handy.
It is best if you begin your bed in late fall or early winter; this will give some of the leaves/straw or grass time to decompose a little and be turned into your soil by earthworms. That being said, it can still be done in the spring and used that year with good results.
Step 4 – Plant
When it comes time to plant seeds or put previously started plants into the ground you are working with a loose soil. Simply pull back some of the organic material on top and place your seeds or plants below in the soil. Cover over seeds loosely with soil and organic material and be sure to water. This isn’t terribly different from traditional planting save for the fact that the soil is much better. You may also find that because the soil is so rich that you can plant your seeds and plants just a little closer together, however be sure to allow for good air circulation.
Step 5 – Mulch
Mulching your garden helps keep weeds down and it keeps moisture in the soil so that you don’t have to water very much. You can mulch with any organic material that you wish, but one of the great things about this type of gardening is that you now have a place to put some of your grass clippings. I mulch with grass clippings every time I cut the grass. When I first started doing this my fellow gardeners thought I was crazy; they thought I would end up with all kinds of grass and weeds growing around my plantings. Of course that never turned out to be true. The grass tends to dry and thatch together forming a very effective barrier. One caveat though, if you are have extremely wet weather go light on this or any mulch as you don’t want to drown your plants.
Another benefit to mulching with grass is that it is nitrogen rich, so you don’t need to supplement with over the counter fertilizers for nitrogen loving plants. Too much nitrogen can be detrimental, so be sure to mulch with carbon rich materials as well to keep your soil well balanced. Such mulch includes the aforementioned dried leaves and straw, or compost that includes these as well as other woody or brown parts of plants.
Step 6 – Maintenance
At the end of the planting year be sure to put the garden to rest by cleaning out the remains of any unwanted plants. Cover the bed with compost and a thick layer of chopped leaves. If you don’t have any trees in your yard I’m sure you can find a neighbor who has leaves free for the taking. If possible cover the bed with black plastic. The plastic will keep the leaves in place when the winter winds blow and it will help keep the soil underneath just a little warmer. In the spring remove the plastic and add more peat moss, compost, and any other amendment you might find necessary and begin all over again planting and mulching as necessary.
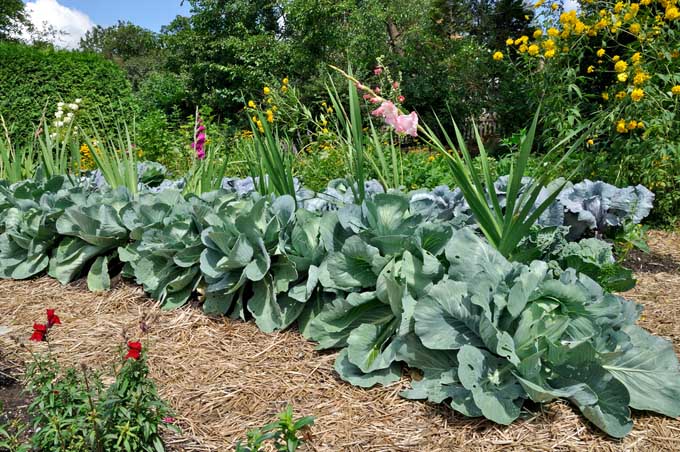
Results
This is truly a superior way to plant a backyard garden. Your back and legs aren’t going to hurt as much. You will spend less time in the garden doing tough or tedious tasks like weeding and watering. The rich soil will attract beneficial earth worms that will not only turn and enrich the material you put into the bed but will also begin to improve the soil beneath the bed.
I much prefer a hard copy rather than an e-format for a book such as this as I can carry it with me and not worry about getting dirt or other substances on it that may ruin sensitive electronics. My now dog-eared but serviceable thanks to Rodale’s (the publisher) quality bindings. What about you? Do you currently practice or plan on implementing no-till gardening? Let us know you thoughts in the comments below! And if you enjoyed this guide, you’ll love some of our others:
What Is a Survival Garden? Tips to Grow Your Own The Scientifically-Backed Benefits of Companion Planting 15 of the Best Cover Crops for the Home Garden
© Ask the Experts, LLC. ALL RIGHTS RESERVED. See our TOS for more details. Uncredited photos: Shutterstock.