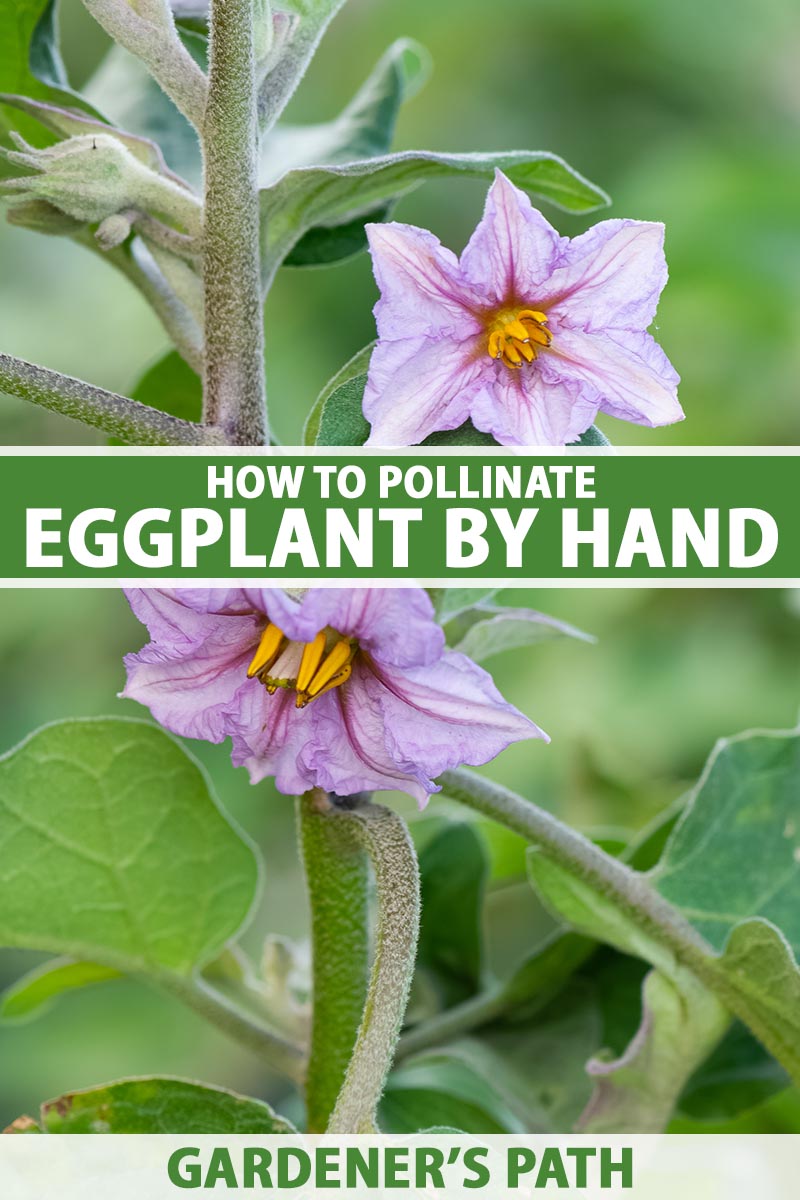
Well, it’s actually a fruit, botanically speaking. But in the culinary world, we treat it as a vegetable. Also called “aubergine” and “brinjal,” the eggplant is a member of the nightshade or Solanaceae family, along with tomatoes, peppers, potatoes, and petunias (yes, really). And as with tomatoes, eggplants can be tricky to grow if you don’t do just a little bit of research beforehand. We link to vendors to help you find relevant products. If you buy from one of our links, we may earn a commission. But with the right resources, your growing experience can be a smashing success. If you’re just getting started, check out our guide to growing eggplant to learn more. Once you know how to pollinate these plants, you’ll be well on your way to watching the delicate purple flowers turn into plump, savory fruits. Here’s what you’ll learn:
Eggplant Pollination 101
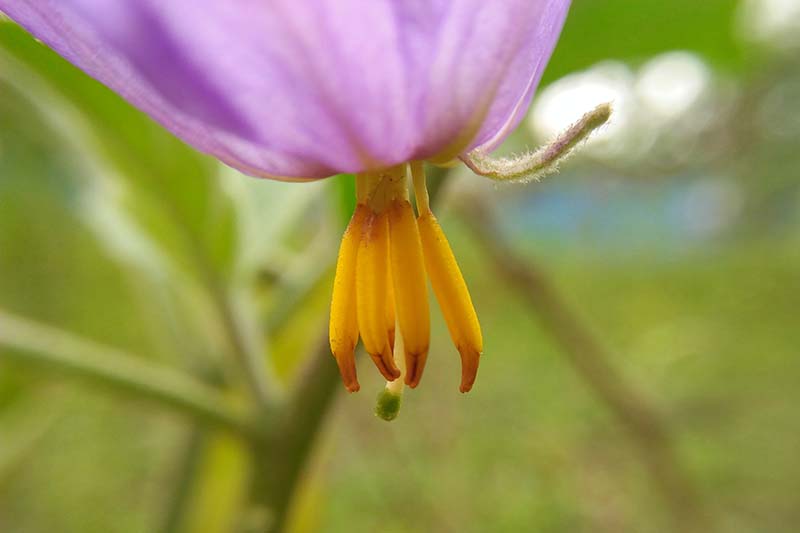
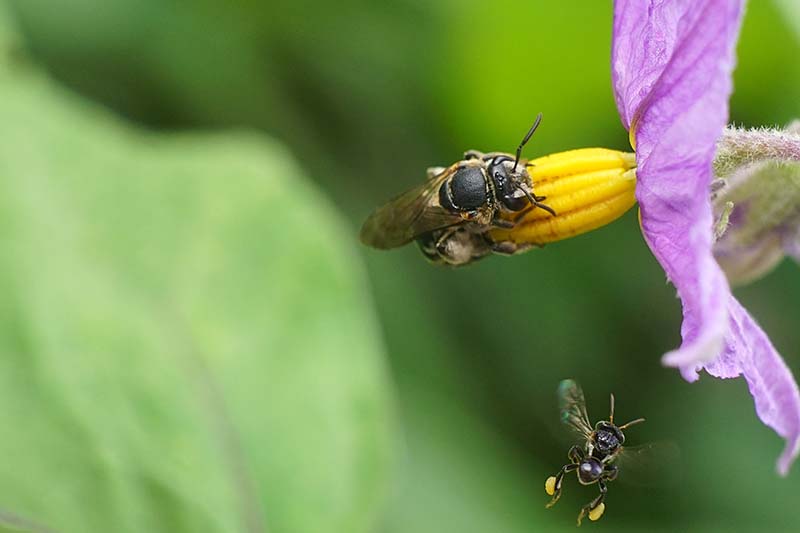
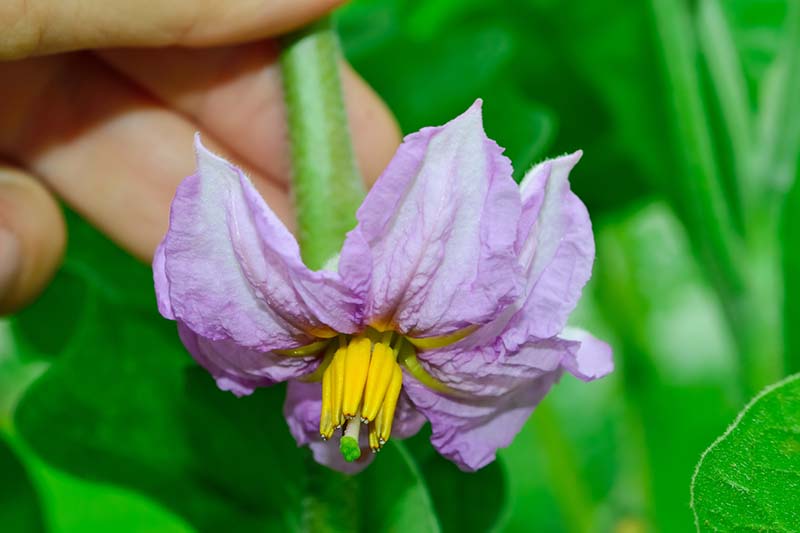
If you know anything about hand-pollinating tomatoes, then you already know a thing or two about how eggplant babies are made. But we’ll briefly cover the basics just to get them squared away. Aubergines are self-fertile, which means each individual flower contains all the parts it needs in order to reproduce. There’s a female pistil, which comprises the ovary, the style, and the stigma. And there is a male stamen, which is made up of six to 20 short filaments, each bearing long, pollen-producing anthers. Thanks to the plant’s monoecious anatomy, you can grow just one plant and produce a nice little crop of vegetables if conditions are right. But what happens next? How exactly do you get from flower to fruit? It’s all about the wind, or the bees, whichever gets to the blossoms first. S. melongena are wind- or buzz-pollinated. What does this mean? Being self-fruitful is not always the same thing as being self-pollinating. Wind pollination is what it sounds like: a brisk wind shakes the flower, moving the pollen from the male anthers to the female stigma. Buzz pollination occurs when certain types of bees land on the anthers and vibrate their bodies. The vibration shakes the pollen from the anthers and moves it onto the stigma. Bumblebees (Bombus spp.), orchid bees (Euglossa spp.), stingless bees (Melipona spp.), and sweat bees (Nomia spp.) are all examples of bees that provide buzz pollination. (For reasons that aren’t clearly understood, honeybees do not.) Once the pollen has made it onto the stigma, as long as the timing is right, it fertilizes the ovary and a fruit begins to develop. At this point, the blossom will dry up and fall off. This is completely normal and is not something to be worried about! But if blossoms drop prior to pollination, you have a problem on your hands. See our guide to figuring out blossom drop in eggplants for help! If the right bees aren’t around, or the wind doesn’t blow at the right time, or you’re growing your aubergines inside or in a protected location, the flowers might not be pollinated. Another reason for poor natural pollination is sticky, humid weather, which can cause the pollen to clump up instead of freely spreading from the anthers to the stigmas. In any of these cases, you’ll be happy to know you can easily hand pollinate these veggies. And even if you do think it’s been windy and dry enough, hand-pollinating eggplants is so easy that you might as well do it for every flower. That way, you’ll ensure a bountiful crop.
Easy Pollination Options
Here are my three favorite ways to hand pollinate aubergines. Pick whichever one is the easiest — or the most fun! The most important tip before you begin is that no matter which method you choose, the best time to hand pollinate is in the morning between 6 a.m. and 11 a.m., when the blooms are fully open. Blossoms typically last around three days each. They’re open in the morning and then close a bit in the afternoons and evenings, and then they repeat the cycle until they die. You can technically still hand pollinate them in the afternoons, but it may not be as effective.
1. Tap the Flowers
This is the simplest way to aid in pollination of your eggplants. All you have to do is firmly tap the base of each flower – where the stem attaches to the blossom – three to five times. This will help the pollen move from the anthers to the stigma. And that’s all you’re trying to do. The flower will do the rest!
2. Use an Electric Toothbrush
Because this particular method emulates one of those special bees that can do buzz pollination, it’s one with a high rate of success. According to researchers Mandeep Tayal, Jesus Chavana, and Rupesh R. Kariyat in a study published in the scientific journal BMC Ecology and Evolution in 2020, an electric toothbrush does just as good a job as the more expensive tuning forks some horticulturists use to mimic bees that buzz pollinate. It’s also a lot less expensive than procuring and hosting bees simply for the purpose of providing buzz pollination. For the home gardener, toothbrush pollination has a simpler bonus: it’s a fantastic way to get your kids into the vegetable garden. Ask your kids to bring out their used electric toothbrushes and turn them on. Obviously, don’t use toothbrush heads that are in current use! With the vibrating head of the toothbrush, help them gently touch the base of each flower where it connects with the stem on the outside. Leave the toothbrush there for three full seconds. Just like the bees, the toothbrushes’ vibrations will help move the pollen to the right place.
3. Swab the Insides
Even though each individual blossom is technically self-fruitful, it never hurts to give one flower pollen from a different flower, which mimics what bees would do by landing on more than one blossom. Using a cotton swab is an excellent way to do this. Gently rub the inside of a flower with a swab until yellow pollen comes off onto the fibers. Take the pollen-covered swab to another flower that’s in bloom and carefully touch the pollen to the stigma of the blossom. Repeat a few times with several different flowers, and then wait to see the fruits of your labor!
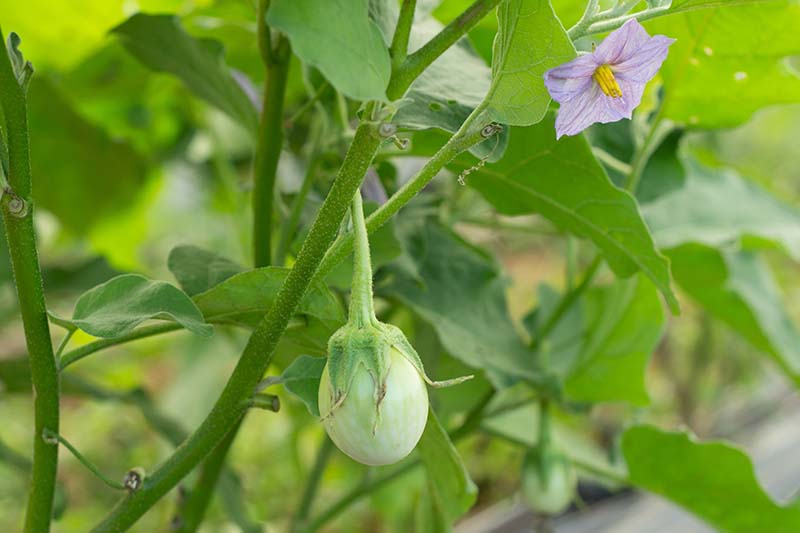
How Often Should I Hand Pollinate?
If you choose the cotton swab or electric toothbrush methods, both of which involve touching the actual anther and stigma area of each flower, just swab or buzz each blossom one time. You can come back to the plant every few days and use one of these methods again on newly emerged blossoms, but you don’t want to remove or disturb pollen on an already-pollinated bloom. Keep track of which flowers you’ve already swabbed by making a note in your gardening journal. If you choose the tapping method, you can come back and repeat it with the same flowers and with any new blossoms a few times a week. This will give those blooms the best chance of developing the delicious fruits you can’t wait to put on your plate. When you see that a flower has a firm lump at the base, a tiny developing fruit, that’s when you know your efforts worked and you’re well on your way to some delicious eggplant parmesan or brinjal curry. Now go forth and grow some delightful brinjals! Have you ever grown and hand pollinated these beauties before? Let us know in the comments section below, and share any questions or stories there, too. And for more information on growing eggplant in your garden, check out these articles next:
Eggplant Spacing: How Far Apart to Plant21 of the Best Japanese Eggplant Varieties9 of the Best White Eggplant Varieties