Easily stored in a root cellar or colder room of the home, it can sustain a family with a variety of vitamins and minerals, via its tasty and versatile flesh. Growing squash is an involved process, but it’s not difficult. Grocery stores tend to offer many types for up to about three dollars a pound as fresh produce. This means just one or two well-tended plants can produce significant savings to the family food budget. We link to vendors to help you find relevant products. If you buy from one of our links, we may earn a commission. So, which plants are the most valuable additions to your garden? Let’s find out!
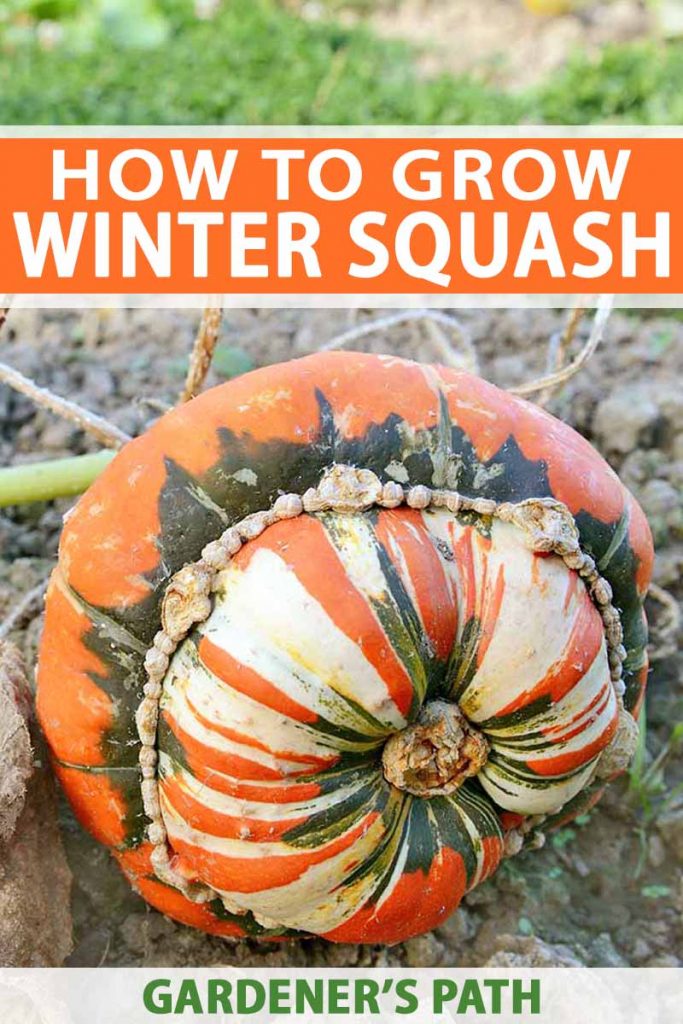
The Best Cultivars to Grow
With so many tempting species and cultivars available, choosing the best seeds for your garden plots may seem impossible. I have found that growing one or two of each of the following provides our meals with a broad range of flavors, textures, and colors:
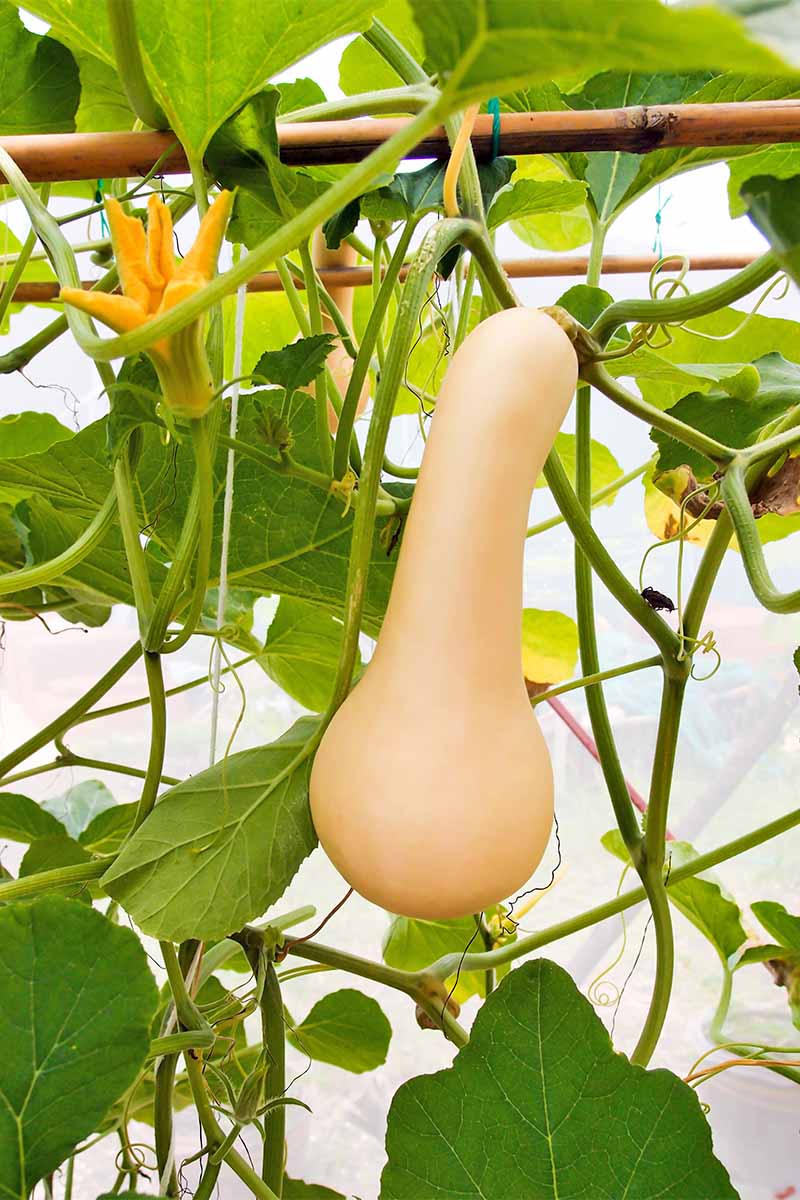
Butternut
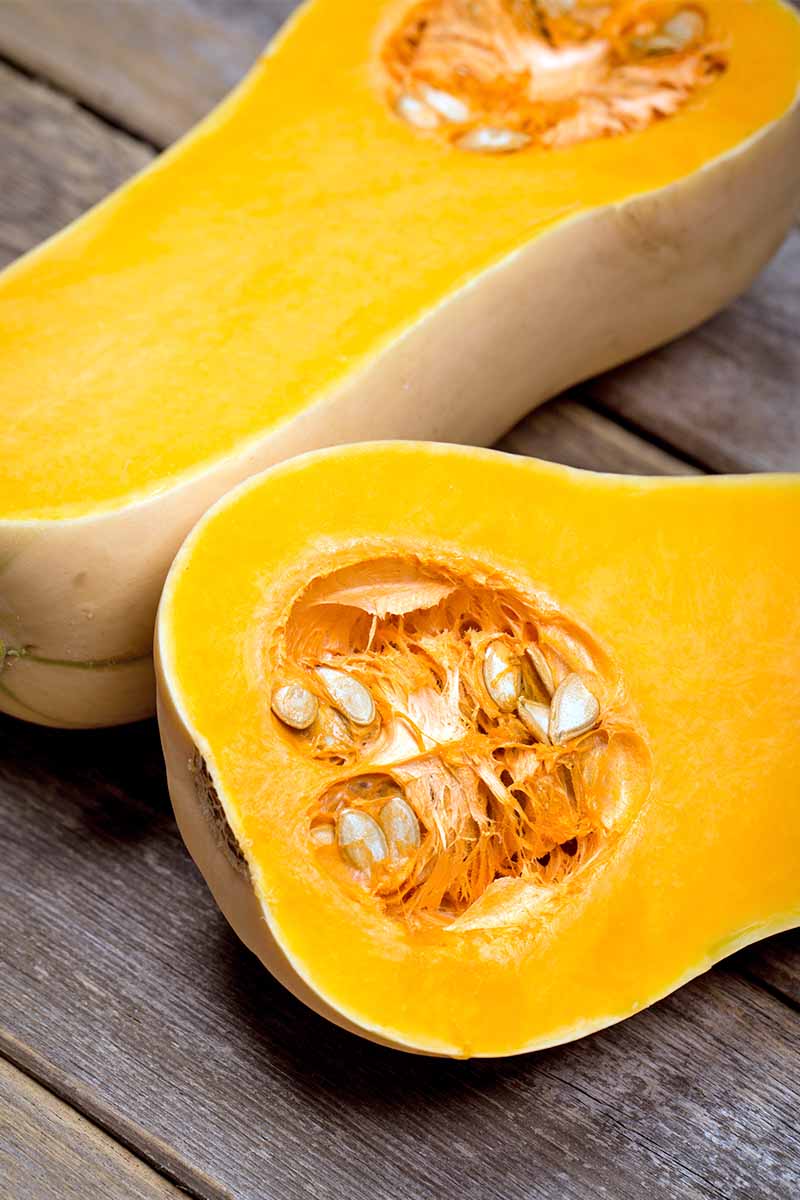
This large peanut-shaped squash can grow rather large, to a foot or more at peak size. It has tan skin that’s thinner than other varieties, sometimes with lighter stripes going lengthwise down the fruit. Inside, a strikingly bright orange fruit provides a sweet and nutty flavor. Many recipes that call for sweet potatoes can be interchangeable with this cultivar. I adore it steamed with a little butter, brown sugar, salt, and pepper. Read more about growing butternut squash here.
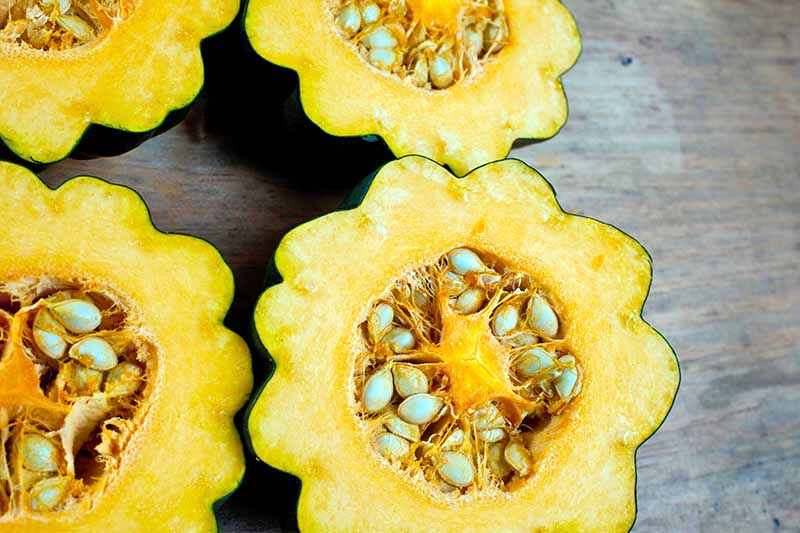
Acorn
This is a smaller squash with a mild, sweet flavor. Due to the odd folds in the exterior, it can be difficult to get the edible portion out of the peel without wasting any – something important to keep in mind that may influence the way you prepare and serve it. A three-pound acorn can feed one or two people. Baked in the oven, it’s often served in horizontal slices cut straight across the fruit to show off the pretty scalloped design, or halved and stuffed.
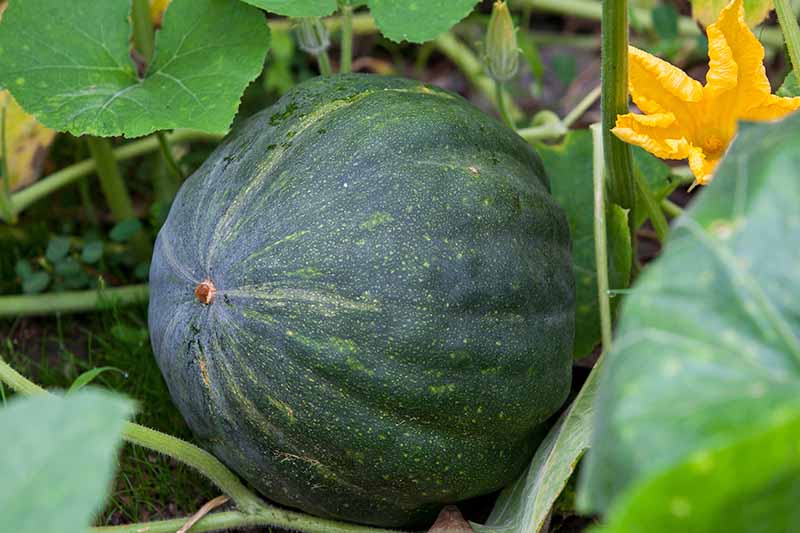
Kabocha
Last year was my first time growing this somewhat ugly breed, also known as a Japanese pumpkin. With a thicker skin that resembles a rind, it also has quite a few seeds inside. With less edible flesh to work with, you’ll want to set aside some extra space in the garden to grow more of this special squash.
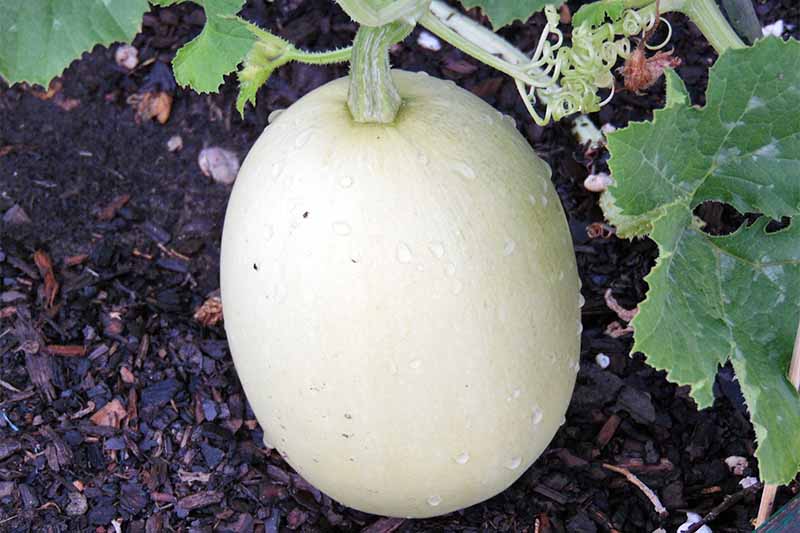
Spaghetti
Perhaps the least “wintery” of the category, the spaghetti squash has gained an insane following since the introduction of the Paleo and Whole30 diet crazes. While the long, pale or sometimes more vibrant yellow fruit is a suitable substitute for pasta (and can take the copious amounts of red sauce people like to dump on it!), purists treat it like any other squash. A little butter, salt, and pepper allow the flavors of this stringy treasure to really shine through. If space is limited, it makes sense to choose the most productive plants, and nurture them as well as you can.
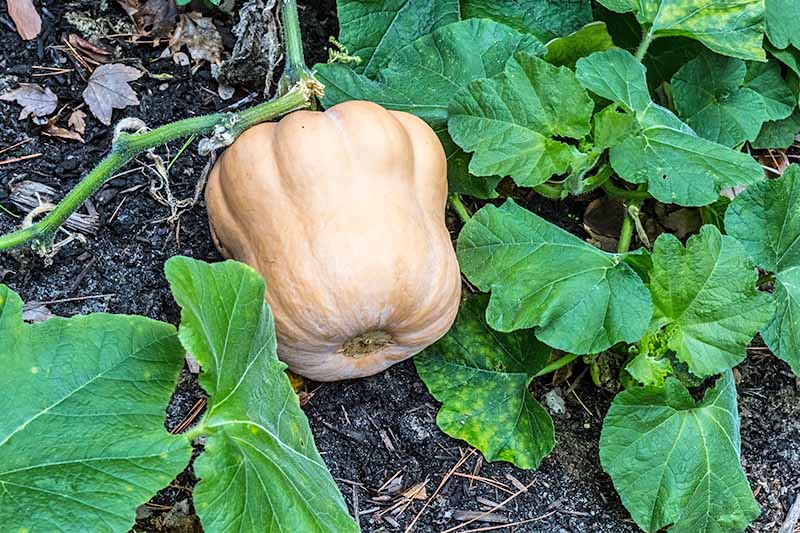
Buttercup Calabaza Delicata Hubbard Honey nut Pumpkin
While each has its own unique flavor profile, most are interchangeable in your favorite winter squash recipes. Stay tuned with our guide to where to find seeds to plant many of these popular varieties. According to Rodale’s Ultimate Encyclopedia of Organic Gardening, squash seed is viable for four years, as long as it’s stored properly in a cool and dry place. Here’s my recommendation: buy a packet of each, and try a few each time planting season rolls around!
How Many Is Enough?
Knowing the right number of seeds to sow for any plant variety can be difficult. Regardless of the species, they all spread out to take as much space as they can get. For this reason, it’s very impractical to expect many plants to thrive in a small space.
While almost all squash vines can stretch to cover many square feet, they vary in the number of fruits they can put on. Acorn squash, for example, can produce up to 24 pounds of fruit per vine, while butternut only delivers around six.
The Perfect Plot
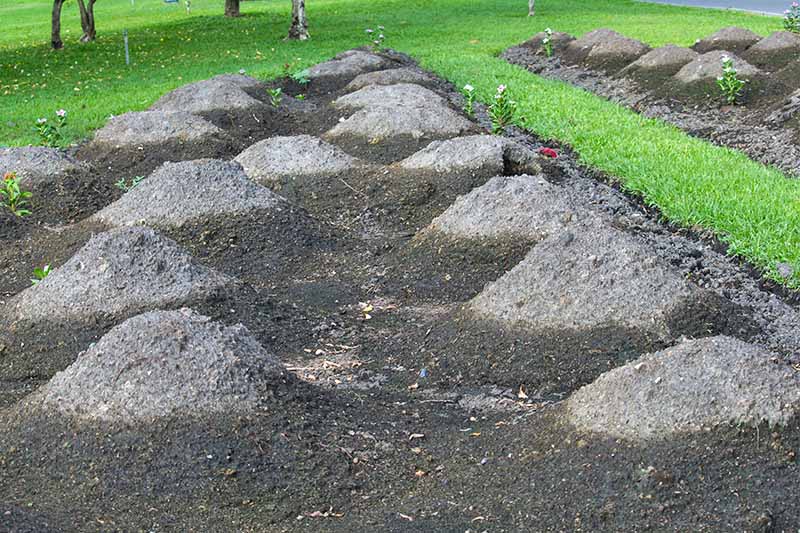
Squashes are traditionally grown in hills, or in the last row of the garden, where they can sprawl away from the more well-behaved vegetables. In my own garden, I also like to locate them near some sort of sturdy structure, such as a livestock paneling fence or other heavy wiring. They will be more likely to latch on to this structure and put the weight of the plant and fruit upon it – instead of crushing your other plants. You can also choose to locate your hills away from everything else. A lone plant can do very well in a corner of a yard or along the back area of a homestead. We have actually dedicated a good half-acre to growing nothing but vining plants, including squash, pumpkins, and watermelons! Wherever you decide to grow yours, just be certain that your plot is within reach of watering, and has access to full sun.
Hills can be created using a hoe or small spade. Create the mound of dirt to be at least 24 inches in diameter, spaced 4-6 feet apart for your bush-type plants. Increase the distance to 8-10 feet for the more traditional vining variety. For gardeners who pay close attention to the pH of their soil, you can’t go wrong with a range of 5.8-7.0 pH. Squash are hardier than some plants, and if the soil is rich in humus and has good drainage, they should thrive. One other way to ensure a fruitful fall harvest is to add compost to each hill base. Dig hills 18 inches deep. Then, alternate 6 inches of compost with 6 inches of soil, repeating until the mound reaches your desired height. This method will provide extra nourishment to plants throughout the very long growing season.
Sowing Smarts
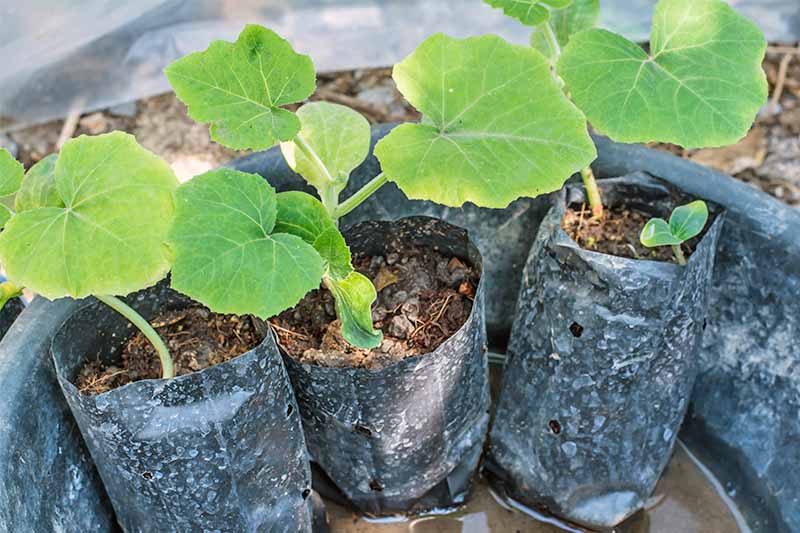
Because they need 70-100 days to mature (depending on the variety and the weather), it may make sense to start your seeds indoors. It is recommended to start your seeds in peat pots that can go directly into the ground when the weather warms up. This will cause the least amount of stress to new seedlings. For complete step-by-step instructions, see our guide to starting seeds indoors. If you choose to start seeds early, do so two to four weeks before the last frost day. Some growers like to soak their seeds overnight, because it softens the outer seed covering and allows for faster and easier germination.
Seeds should be put in the starting container 1 inch deep and on their sides, with a narrow edge facing up. A light watering should be done on the first day, and then every two to three days after that. Germination should take place within 7-10 days. When it’s time to move your darlings out to their hills, remember to plant them at the same level that they have been growing inside. If you bury them too deep or two shallow, you risk killing them. Most years, I prefer to sow seeds directly into the garden after the last frost. While this means a later harvest for my growing zone, it usually results in stronger plants and a larger harvest. I put two or three seeds into each hill, about one inch into the soil. Thin to just one plant per hill after germination. Use scissors to snip the spares, rather than pulling. This is important, since pulling one may disrupt the entangled roots of the neighboring seedlings.
Routine Maintenance for Plants
Once the seedlings are 3-4 inches tall, it’s a good idea to mulch around them. Mulching keeps the weeds down and helps the soil to retain moisture. I like to use a mixture of leaves, recycled cardboard, and commercial much. Regular watering is needed during the hottest days, especially since these will be growing in full sunlight.
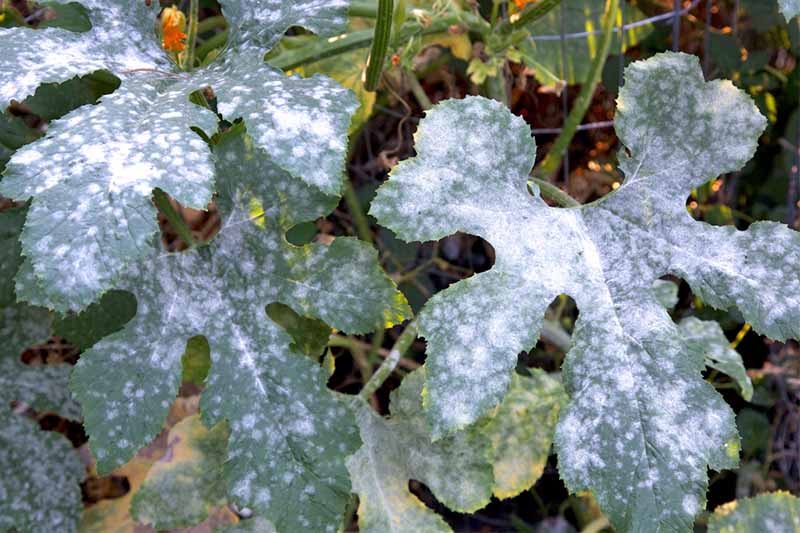
If you see leaves start to wilt at all, it’s imperative to water slow and deep until they perk back up. You can also choose to add fertilizer every two to three weeks. To avoid a possible powdery mildew attack, keep the water off the leaves and vines. Try to keep the soil moist (like a squeezed out sponge) but not dripping wet. Soaker hoses are a good option for this type of watering, allowing a hands-off approach for the busy gardener.
An Ounce of Prevention
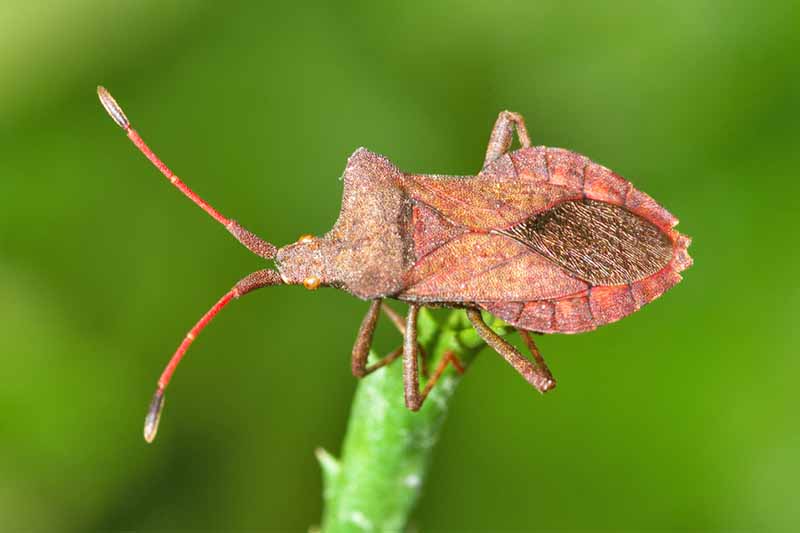
During every stage of growth, it’s important to keep an eye out for all the pests and diseases that may gravitate toward your vines. The most important weapon in your arsenal is healthy soil. Squash, like all the cucurbits, have many enemies in the form of insect pests: squash bugs, squash vine borers, striped cucumber beetles, flea beetles, and seed corn maggots. It’s best to avoid letting these pests get at your vines by using floating row covers. You can also choose to use your own organic pesticide to keep them under control. Diatomaceous earth is a formidable defense against most pests. Squash can also be susceptible to diseases such as alternaria leaf spot, septoria leaf spot, black rot, gummy blight, and powdery mildew. Gardeners have also found success planting radishes around the perimeter of each hill. Many pests that love squash also hate radishes, and radishes are a cheap deterrent. Companion planting at its finest! Just be sure to skip harvesting these radishes, and allow them to grow tall. If you like, you can harvest the seed pods after they flower, and add them to salads.
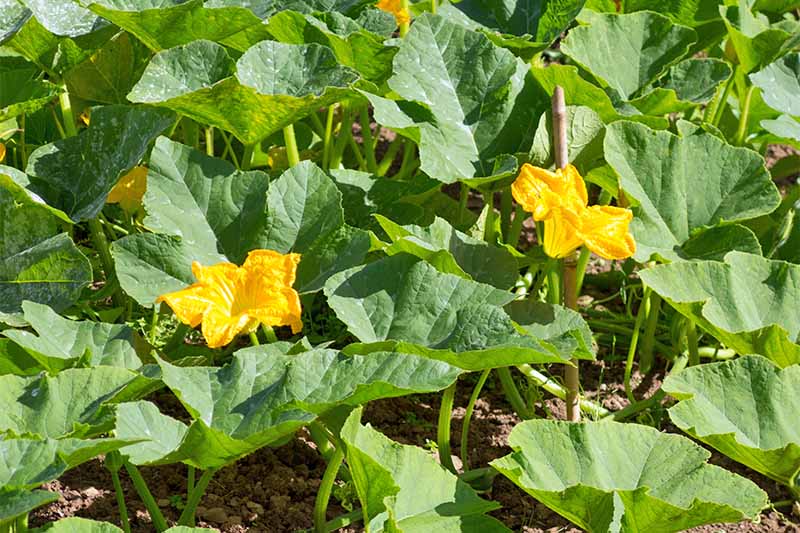
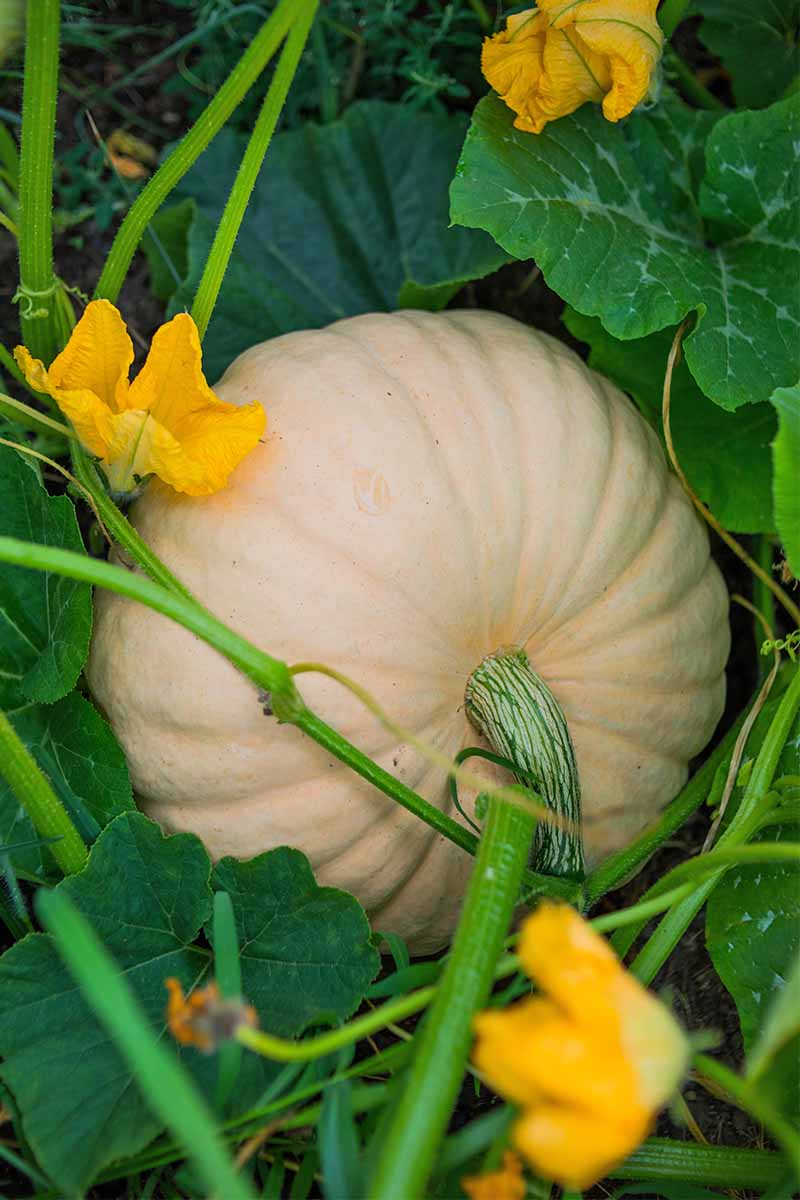
Pollination Among the Vines
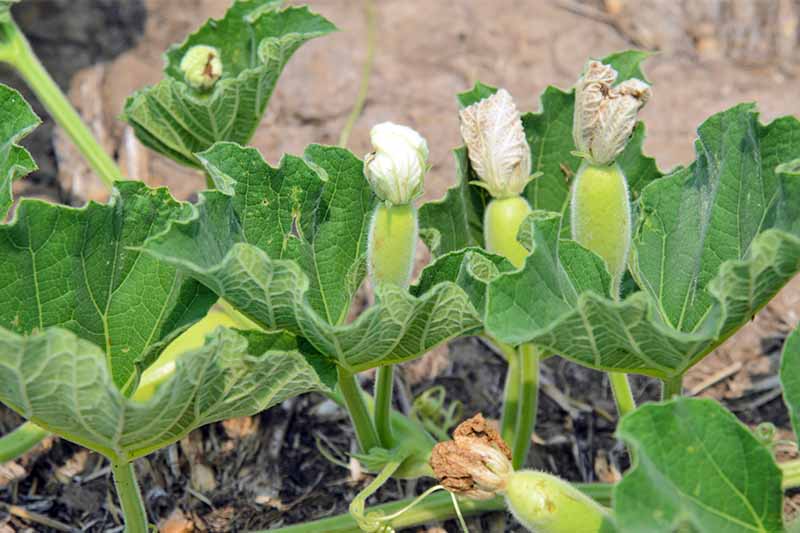
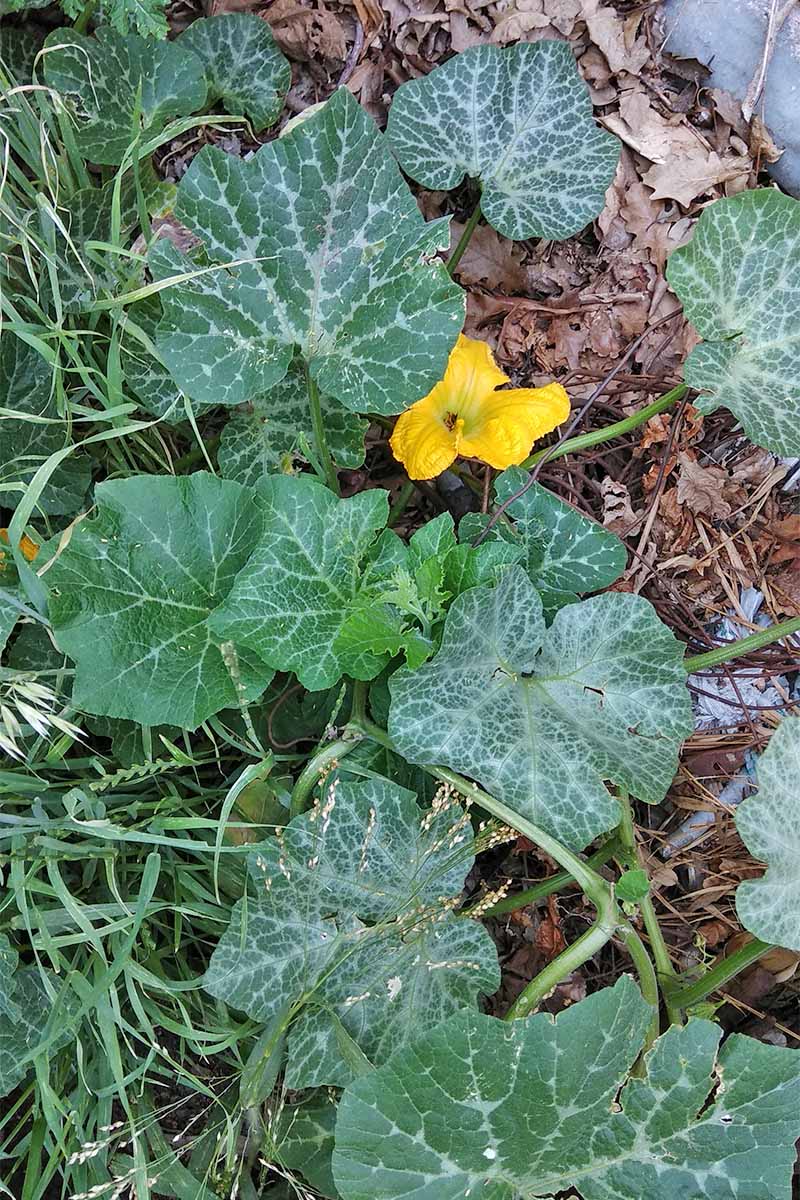
The first flush of big flowers that open will almost always be males. If it looks like you have plenty of bees and butterflies around to fertilize your blossoms, it’s okay to harvest some of those blossoms yourself, as they are edible (I’ll cover a little more on this later, so keep reading!).
You can tell the difference between a boy and girl squash by lifting her skirt. A female blossom has a bulge – a potential squash – between the blossom and the stem, just waiting for fertilization. Male blossoms grow on long, thin stems. In order to grow to full size, the female blossoms must be thoroughly pollinated. If you don’t see plenty of bees dipping in and out of your blossoms, you might want to try a little matchmaking.
How is this done? The best time to initiate pollination is around midday, when the female blossom is fully open. Follow these steps to give your squash a boost: While this type of hands-on treatment is not usually necessary, this extra step can increase your squash harvest, especially in urban regions where bees and other pollinators may be scarce.
Vine Management
If you’re just learning how to grow these wonderful edibles, you’ll probably start to wonder, “What is all this nonsense about vines taking over the garden?” I’m here to warn you that they really won’t take off until August – and then you’d better be ready with a plan!
When fruit begins to appear, cut off the vines’ runners. This will encourage the plant to put its energy into growing fruit, not producing more vines. Squash usually grow two main vines that head off in opposite directions. Each of these vines will produce a secondary vine, which also produces fruit. These secondary vines will also sprout “tertiary” vines that you will want to remove. To avoid the spread of disease amongst your vines, don’t handle them at all when they are wet.
Be very careful when handling vines at all times, as they can easily crack or break, and root systems can be destroyed from accidental uprooting. Small fruits will need to be protected from impact, as well. This is also a good time to remove foliage around the fruit if it is blocking the sun. Remove no more than one or two leaves per plant. The vine still needs its leaf system to function productively, so you never want to defoliate your plants more than is necessary.
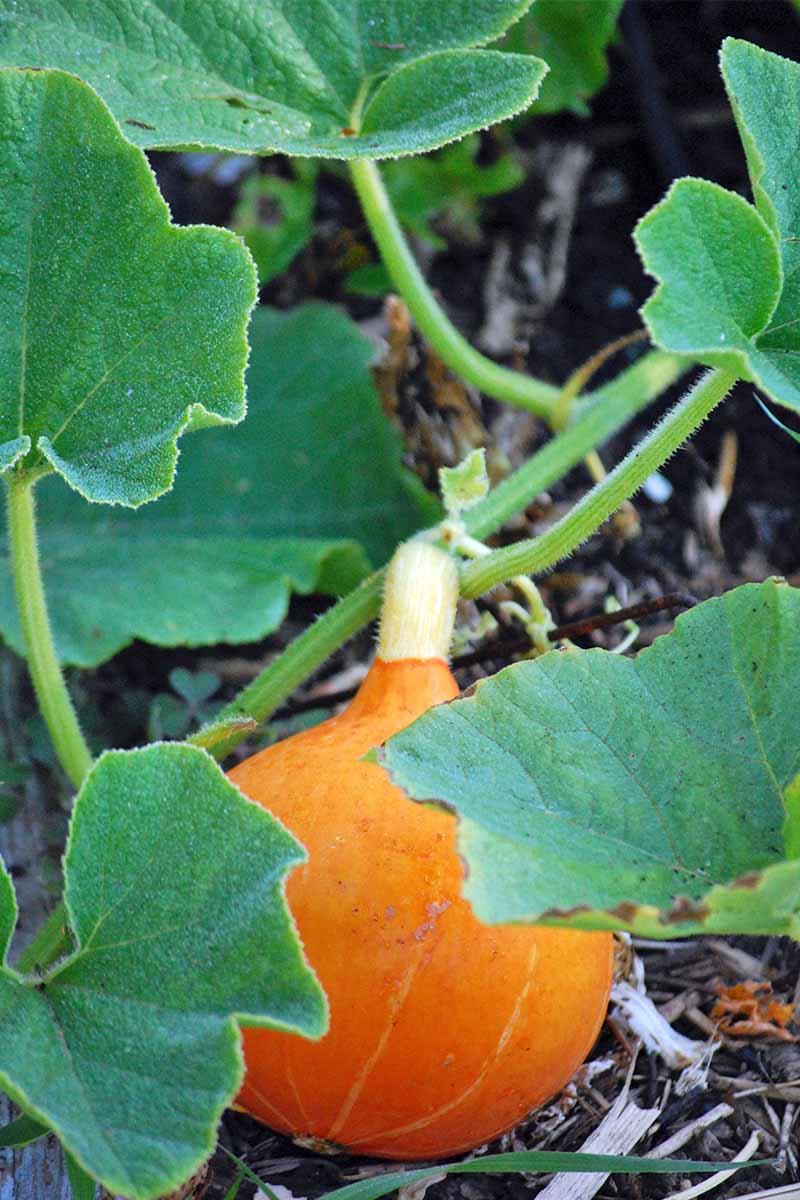
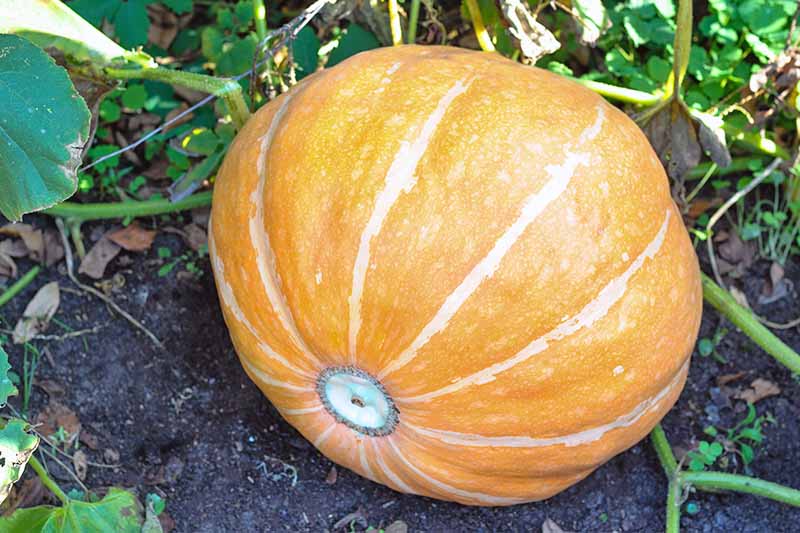
The Long-Awaited Harvest
Winter squash have very hard skin, but it takes a while for them to fully mature. Leave them on the vine until you can’t press your thumbnail into the skin, which is usually around the time of the first frost. To remove, simply clip your fruit from the vine and (if weather permits) allow them to cure in the field for one to two weeks. In areas where the frost is fast-arriving, you won’t have time to do this. Bring your harvest in anyway, and allow them to sunbathe in a sunny location in your home, such as a windowsill, for 2 weeks.
Squash should be stored at 55-61°F in a dry space. Do not wash harvested squash, but simply rub away any loose dirt. Be careful not to handle the stem area, but rather, hold it by the body. A well-cured, dry, and blemish-free squash can be kept in a cellar or other dark pantry area for three to six months! You can then wash and prepare what you need for eating when you’re ready to enjoy it.
Ways to Use the Extras
Got too many squash on your hands? This is a wonderful problem to have! As a mom of six, we rarely have this issue. But we still try to bless our neighbors and friends with extras, especially if they have any blemishes and won’t store well over the winter. Sharing is the best way to use them up quickly.
Luckily, squash is so versatile! It can be boiled, steamed, baked, or roasted. You can freeze it, and you may pressure can it. You can eat it in soup and in casseroles, whole or pureed. And you can make it into an entree, side dish, or even dessert. If you’re a fan of pumpkin seeds, you’ll be pleased to know that all types of winter squash seeds can be prepared in the same way! They make a protein-packed, crunchy snack for lunchboxes. Don’t forget to use them as an ingredient in trail mixes and granolas, too.
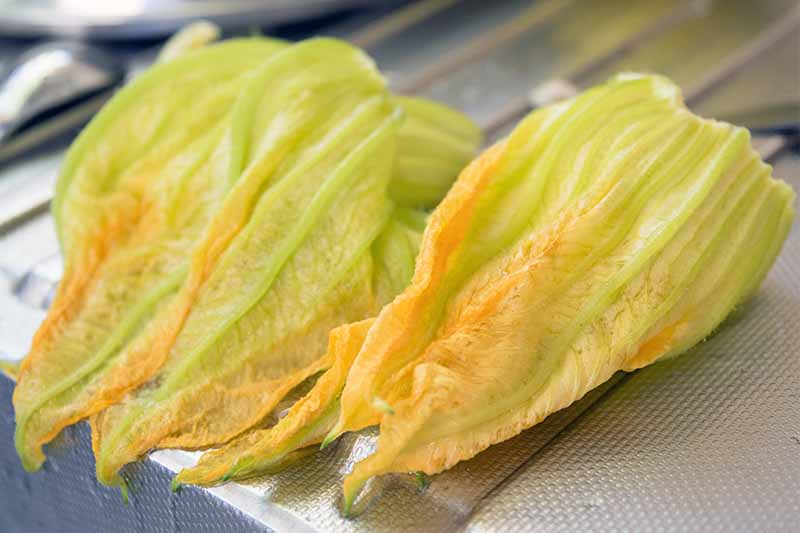
Edible Blossoms
Male squash flowers are a tasty delicacy that you can prepare at home. Just be certain you don’t take too many out of the garden at once. You will typically find that there are far more male blossoms on your plants than females, so your vines can likely spare a few. Harvest the blossoms at midday, when they are open wide. Snip each stem about an inch away from the flower. Wash gently and well by filling a bowl with cool water, and swirling them in it.
Blossoms can be kept fresh in the refrigerator in a bowl of ice water until you’re ready to use them. Twirl them dry in a salad spinner, or by twisting each one between your fingers, and lay them out to dry on paper towels. Blossoms are excellent battered and fried, but they also make lovely little purses that you can stuff with just about anything. Here’s one of my favorites, and it’s a super simple recipe: try some minced fresh herbs, a bit of lemon zest, some salt and pepper, and ricotta. So delicious!
Other Recipe Ideas
Winter squash recipes are abundant and filling. They are appropriate to serve at any time of year, but they are especially welcome during the colder months when you’re craving something warm and comforting that will fill you up. You can stuff winter squash with any number of tasty ingredients, but this recipe for Stuffed Acorn Squash with Apples, Nuts, and Cranberries from our sister site Foodal combines the sweetness of seasonal fruit with the nutty textures we associate with fall and family holidays.
One-pot meals are so appropriate for fall and winter, when you’re ready to fill a casserole dish and fire up the oven, or set up the slow cooker on the counter on a Sunday afternoon. Deliver deep flavors with acorn squash as the star in this Chicken Cassoulet from The Gingered Whisk. There are many adaptations to this classic treatment of pumpkins, butternut, acorn, and other winter beauties. Customize this recipe for pureed squash from Foodal to please your palate in any number of flavor variations. (It’s not just for Thanksgiving – especially when you grow your own!)
Finally, nothing could be more decadent during the fall season than a chocolatey dessert made with your home harvest. Try this recipe for Pumpkin Chocolate Tarts with a Pepita Crust from Vintage Kitty. You can easily swap out the canned puree for a homemade version, made from scratch.
Pounds and Pounds of Flavor
One of the best reasons to grow winter squash is that they produce such a large amount of edible delights! One seed can produce enough to make a week’s worth of dinners for a family of four. What other reason do you need to try it?
Packed with immunity-boosting vitamin A and always-good-for-you vitamin C, not to mention healthy dietary fiber, I’ve added it as a sensible complex carbo option to supplement most of our family meals. Not only are they good for you, they’re also delicious – so no one is complaining. What’s your favorite way to enjoy this amazing addition to the veggie patch? I’d love to hear your favorite preparation or cooking tips in the comments below! And if you’re wondering where the zucchini and crooknecks are, these are summer squash varieties. Check out our helpful growing guide with tips for growing these here. Product photo via Rodale’s. Uncredited photos: Shutterstock. Originally published by Lynne Jaques on August 31, 2014. Last updated August 15, 2018. With additional writing and editing by Allison Sidhu. The staff at Gardener’s Path are not medical professionals and this article should not be construed as medical advice intended to assess, diagnose, prescribe, or promise cure. Gardener’s Path and Ask the Experts, LLC assume no liability for the use or misuse of the material presented above. Always consult with a medical professional before changing your diet or using plant-based remedies or supplements for health and wellness.