We link to vendors to help you find relevant products. If you buy from one of our links, we may earn a commission. If you love cacti as much as I do, you’ll probably want to join me in making more. Let’s talk about propagating these spiky plants! This is what we’ll cover:
When and How to Handle
In general, most types of cacti like warm weather, and will propagate best during the warm summer months. Some like it hot, and most can be propagated from August to October, when nighttime temperatures are 60°F or above. These warm temperatures will help root initiation and development. Handling cacti isn’t for the faint of heart, nor the unprotected. Use leather gloves when handling these spiny plants. Sometimes leather gloves don’t even cut it, so innovate and get creative with strips of newspaper wrapped around the cactus and squeezed together on both ends for a completely hands-off approach. You could also employ tweezers or pliers. My silicone-ended salad tongs bear the spines for me. The best propagation method depends on the species you are working with. We’ll cover each method available individually below! Let’s get into it.
Cuttings
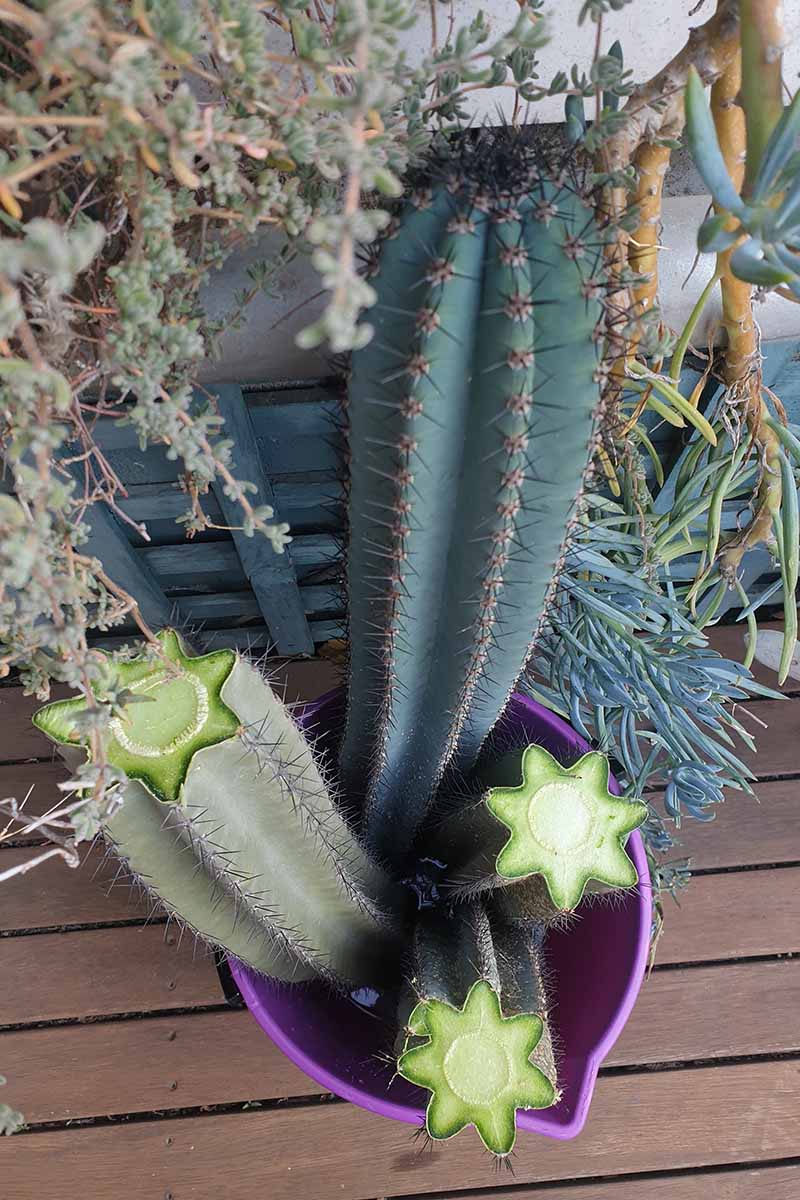
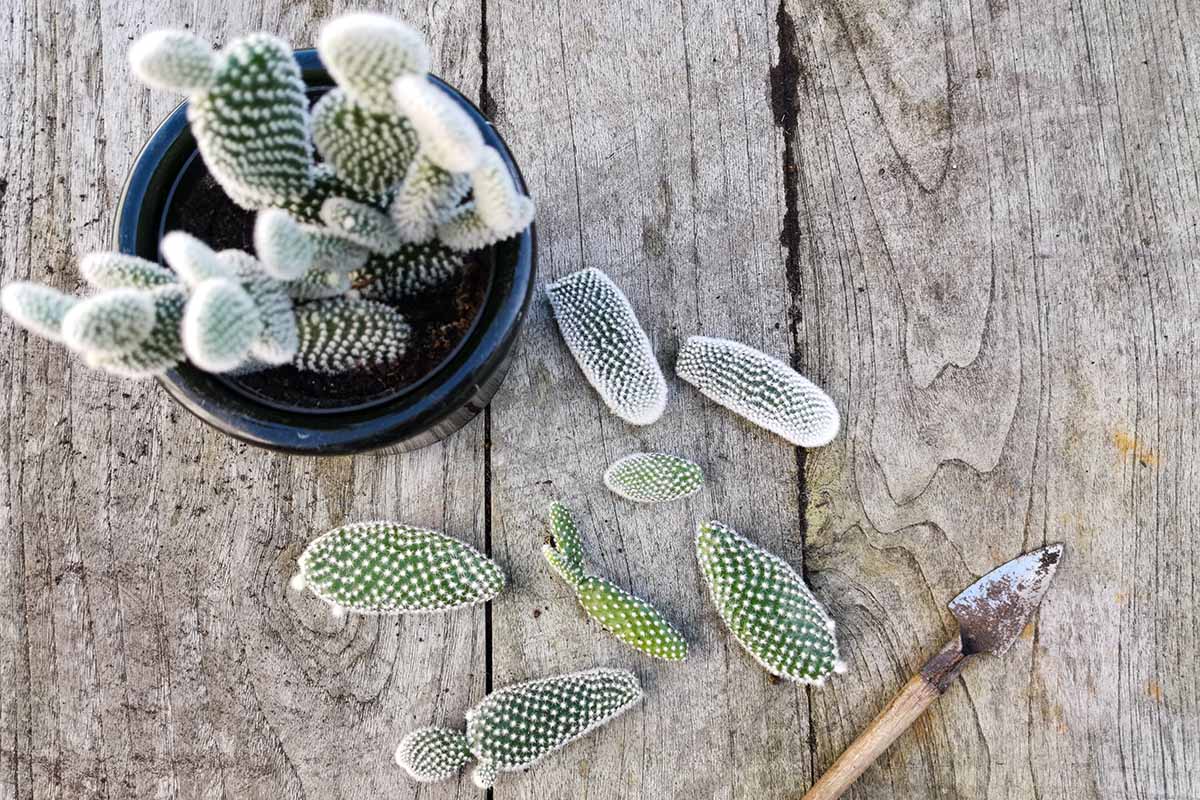
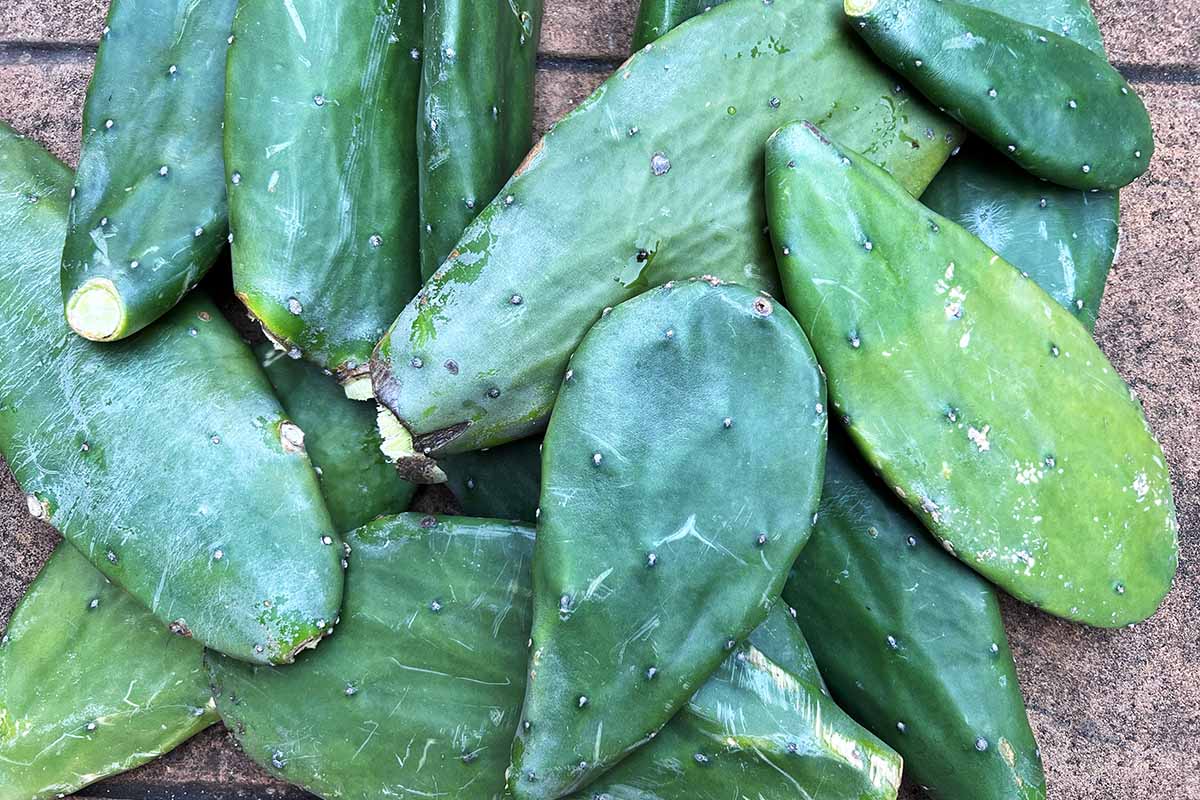
Propagating cacti via cuttings is a quick, easy way to produce large plants fast. When taking cuttings, make sure you keep the aesthetic of the mother plant in mind. For example, for pad-forming cacti such as prickly pear, or for branching cacti, cut or break off individual pads at the joint to preserve the beautiful look of the mother plant. For columnar types, cut anywhere on the stem at a 45° angle to protect the parent plant from water pooling in the cut, which can lead to rot or disease. The bottom of the cutting can be cut straight after it’s removed. The type – stem or leaf – and size of the cuttings you’ll take depends on species. Stem cuttings are most common. Cereus can give you long stem cuttings. Opuntia gives small cuttings that should be removed at the node. When taking cuttings, use a sharp knife that’s been cleaned with a 10 percent bleach solution. Clean the knife between plants, and again after every few cuts to prevent disease transmission. Remember which side of the cutting was the top and which was the bottom to make sure you don’t plant them upside down! Unlike cuttings you’d take from other plants, cacti cuttings need to dry for a few days before you plant them in the rooting medium. Allowing the cut surface to heal and callus over prevents rotting, something cacti are prone to if they’re sitting in moist soil once planted. You can also dip the cut ends in garden sulfur before planting to inhibit fungal pathogens. Choose a pot with good drainage that’s appropriately sized. Species vary, so large cuttings from big specimens might require gallon-size pots while small one may be rooted in four-inch pots. Fill the pot with an appropriate rooting medium. Equal parts peat moss and sharp or coarse sand, or equal parts pumice or perlite and peat or compost, are both good mixes for rooting cacti. The general rule here is to use half organic and half inorganic ingredients. Do not use manure, as cuttings do not need a rich source of nutrients at this point. Beyond this, the key to a good cacti rooting medium is excellent drainage. Moisten the medium lightly before planting. Plant the cutting as shallowly as possible, just deep enough so it will be sturdy and able to stand up mostly on its own. Stake tall cuttings if needed. Keep in an area with bright, indirect light and high humidity. Cover with a bag or plastic covering to help keep the humidity up if you don’t have an area with high ambient humidity available. Water very sparingly! Less is always best, as unrooted cuttings are prone to rotting if they’re too wet. It can take four to six weeks for cuttings to root, or up to several months for some species. Remove the plastic covering or move the pot to an area with lower humidity once roots form. How can you tell if your cutting has taken root? Give it a gentle tug. If there’s resistance, roots are present. New growth is another indication that it has rooted.
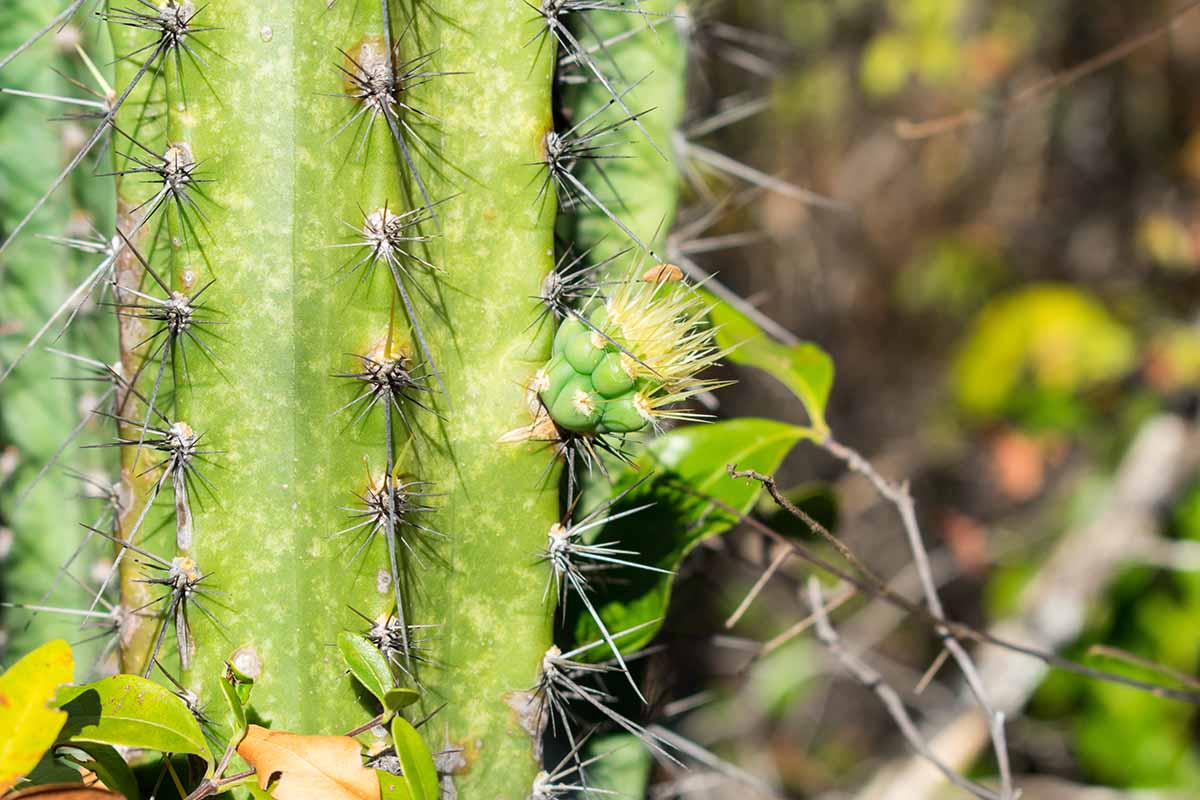
Bulbils/Offsets
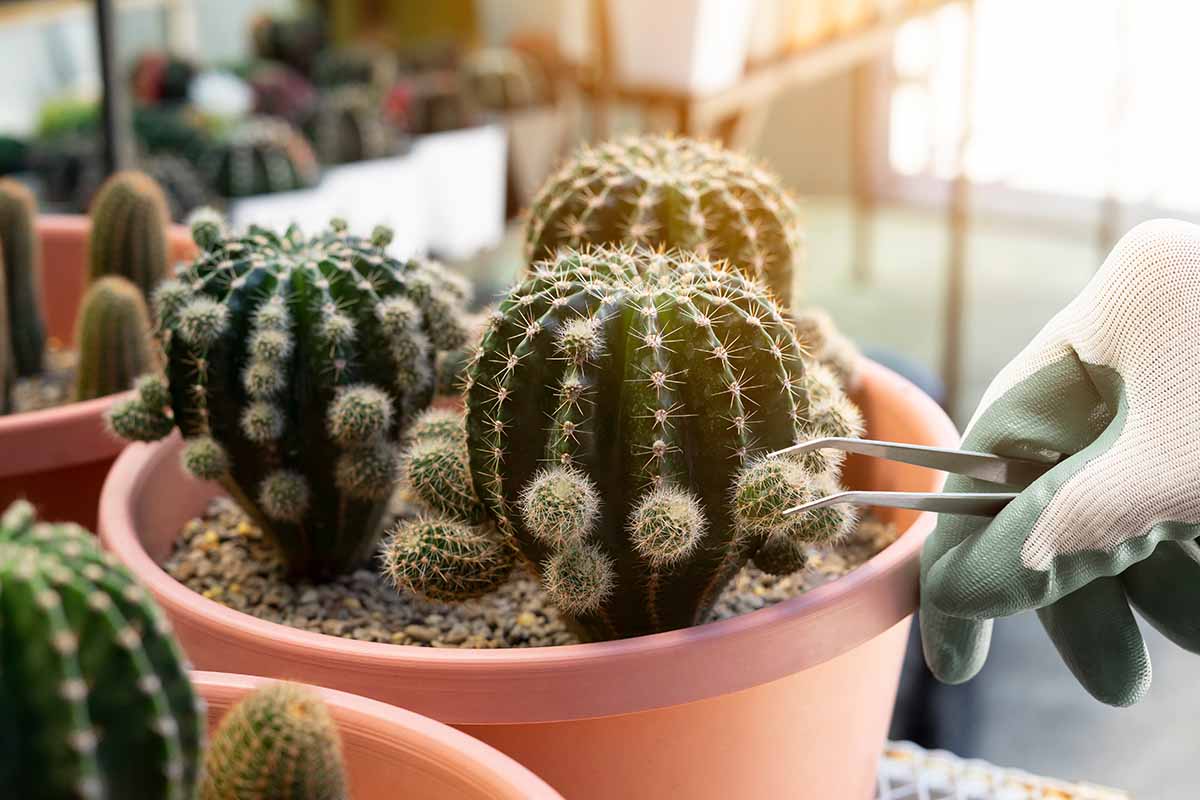
One of the reasons cacti are so neat lies in their ability to produce their own “babies.” The proper terms for these are bulbils, offsets, or pups. Agaves and aloes, for example, produce bulbils on flowering stalks. Globular cacti produce little pups on the main stem. Echinopsis offsets emerge from new growth. These little mini cacti, growing off the sides of the mother plant, are easy to remove and root. Sometimes they’ll already have little roots ready to go. The strategy here is very similar to propagating cuttings. Often, it is as simple as removing the bulbil from the mother plant by cutting or pulling it off gently, letting the cut end dry for a couple of days if it doesn’t already have roots, and planting it in a slightly moist rooting medium as described above. And voila, you have another cactus, or two, or ten!
Seeds
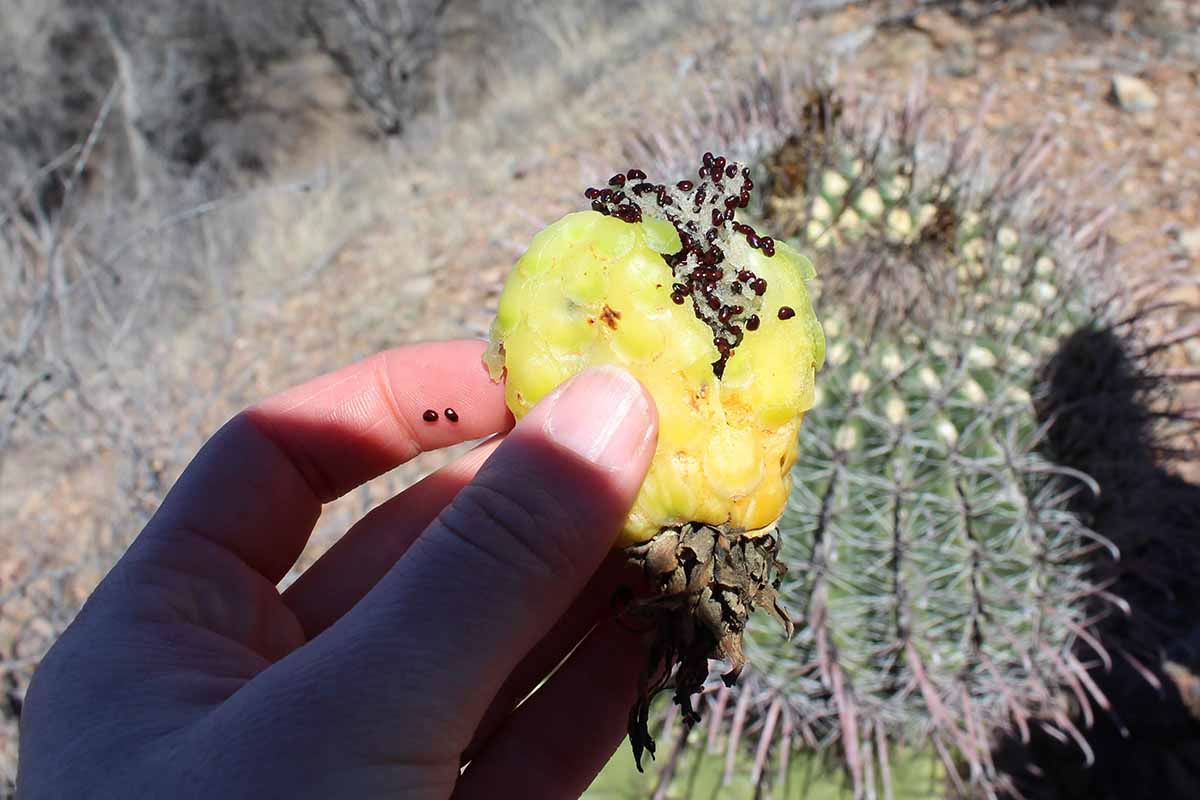
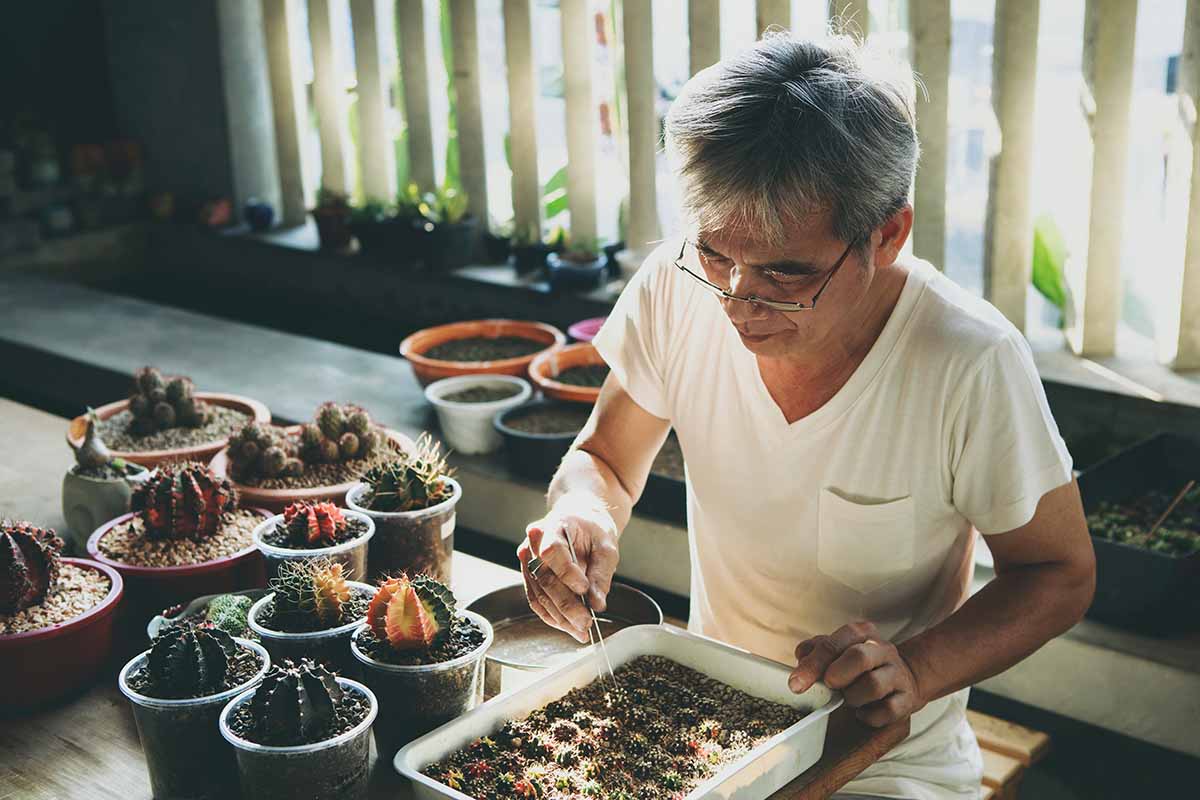
Propagating cacti via seeds is cheap, but it can take a long time before you have a big plant. You can either collect seeds from ripe pods produced on your own plants, or purchase seeds from a local nursery or online. To remove the seeds from the ripe pods, squeeze them out onto paper towels to separate them from any remaining pulp, and lay them out on a dry piece of paper towel or fine screen to dry. Fill a pot with drainage holes with one part perlite or pumice, and one part vermiculite or peat. Moisten the medium. Spread the seeds evenly on the surface and cover lightly with coarse sand. Cover the pot with plastic to maintain humidity, and place it in a well-lit spot. Keep the medium moist. Mist watering is ideal. Most species take two to three weeks to germinate, but some will take longer. When you notice germination occurring, slowly lift the cover to vent and reduce humidity, increasing the vent size each day until fully removing the cover when the seedlings are a few days old. Allow them to grow on, taking care not to overwater. Eventually they’ll be large enough to handle, and you can separate seedlings that are touching each other and plant them all into their own pots. Choose four-inch or smaller pots if available, depending on the seedling size. As each seedling grows you can transfer into a larger pot as needed. Avoid oversized pots, as these can hold too much moisture for a small cacti seedling. For the first year, don’t put the seedlings in a spot with full sun. If you wish to plant them into your garden rather than continuing to grow them indoors as houseplants, slowly introduce them to longer periods of time spent outside in the sun over a period of one to two weeks before leaving the pots there or planting them out in a full sun area.
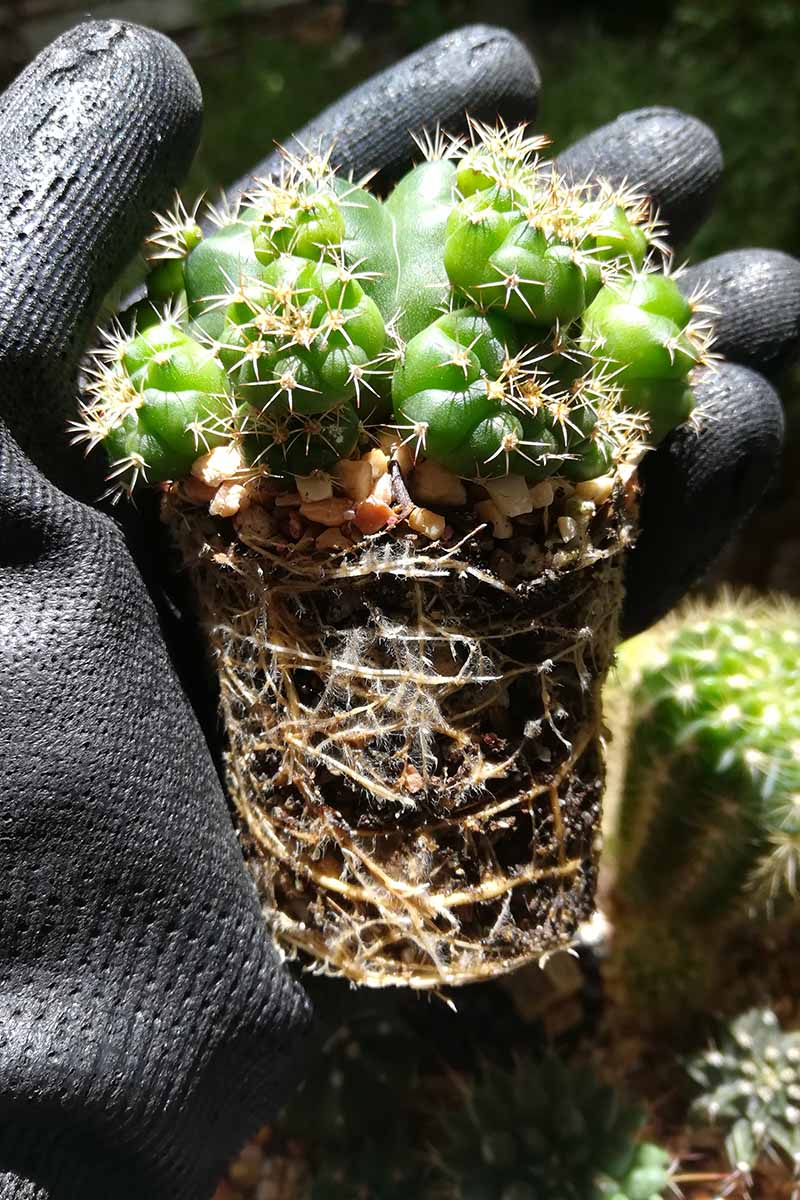
Division
Some species grow in a mat or clump, and these can be divided into new individual plants. Some make it easy for you and will divide themselves into a handful of plants when you remove them from their pot or dig them up with a shovel. For others, the roots need to be gently teased apart. Branching roots can be carefully separated into two or more pieces as well. Make sure each division has a growing point and healthy roots attached. Division is best done when the plant is dormant or dry. If you are dividing during the growing season, consider dusting the cut ends with sulfur, or letting the divisions dry for a few days before replanting. Either way, I can’t get enough. And if you’ve read this far through our propagation guide, I’m assuming you can’t either! If it’s the right time of year and you – or a generous friend – have some of these prickly guys available, why not make more? Have you ever tried propagating these bristling beauties? Let me know what type you tried and how it went in the comments below. Feel free to share your photos! And stick around to explore more in-depth cactus care and growing information, starting with these guides:
How to Grow and Care for Christmas Cactus35 of the Best Hanging and Trailing Succulents and CactiWhat to Do About Woody Stems on Your Christmas Cactus