You can extend this good fortune by saving seeds, too, so all of you can plant them in the garden next year. Seed libraries, community members, and other nearby gardeners might appreciate the extras. And of course, you’ll benefit as well, with more funds left over in the gardening budget, and the security of growing a variety that’s already a proven success. We link to vendors to help you find relevant products. If you buy from one of our links, we may earn a commission.
The Best Pumpkin Varieties for Seed Saving
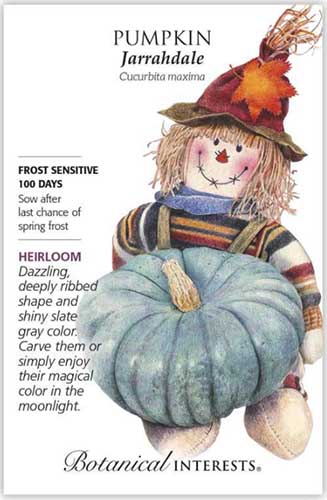
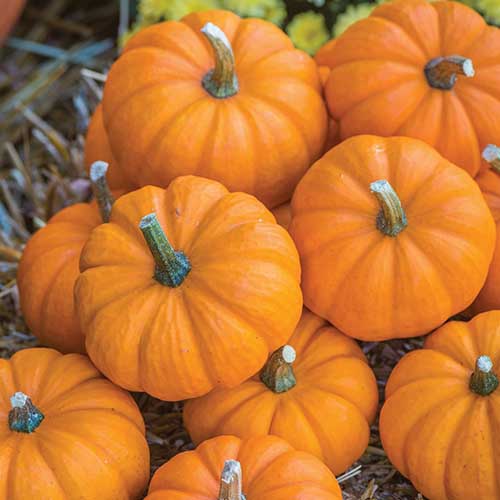
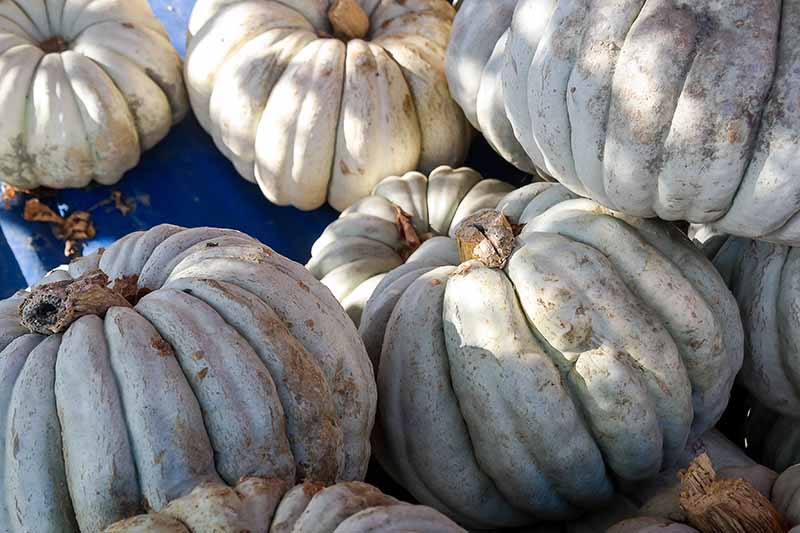
Maybe you’re eyeing that beauty from the home store you plan to carve, or a pie variety you brought home from the farmers market. Or are you wondering if you can save seeds from pumpkins you grew yourself? In any of those scenarios, this caution applies: Don’t try to save any from hybrid varieties. They’re fine to roast and eat, but saved hybrid seeds won’t grow “true” to the parent plant. This means the new plants probably won’t produce fruits that resemble the ones from your plant or the market. Nor will they possess the other qualities the hybrid was bred for, like disease resistance or high yields. If you grew these wonderful winter squashes yourself, you’ll know if you have a hybrid variety on hand. Just look at the seed packet, or re-reference the vendor where you purchased them. Any cultivars with “F1” as part of their name or description are definitely hybrids, while any described as “heirloom” or “open-pollinated” are A-okay for this project. If they have, that won’t affect the appearance or quality of this year’s harvest, but some of the pumpkins may carry seeds containing genetic material from two different parent cultivars. ‘Jarrahdale’ is one of my favorites, both because the seeds are plump and delicious to roast or save, and because the flesh of this deeply-ribbed, hazel-skinned Australian beauty is thick and sweet for cooking and baking. ‘Jarrahdale’ For your first year, of course, you’ll need to obtain ‘Jarrahdale’ seeds to grow. They’re available in three-gram packets from Botanical Interests. ‘Jack Be Little’ is a fun choice for those who are new to seed saving or gardening – or both! This heirloom produces fruits that are just two inches tall and three inches in diameter, perfect for tiny toddler hands and fall centerpieces. ‘Jack Be Little’ ‘Jack Be Little’ is available in 50-seed packets from Burpee. One other caution: If you’re fortunate enough to be growing two or more varieties of pumpkins in your garden this season, pass on this project. You can’t assure that the two types haven’t cross pollinated. This means they would germinate as a cross with unexpected qualities, and they may have undesirable traits, or produce fruit that’s unrecognizable as a pumpkin in terms of appearance. It’s better not to risk all the time, water, weeding, and fertilizing involved in growing this heavy-feeding crop, only to discover you’re growing a weird mystery squash because you planted collected seeds. Instead, buy seeds for the variety you want for next season, and try growing just one type if you want to save your own next time. It’s also worth noting that you needn’t fret if you’re growing summer squash, or other types of winter squash or gourds nearby. They won’t cross-pollinate with pumpkins. As an aside, if you adore a fruit that you purchased from a farmers market and are thinking of saving seeds from it, you’re taking a chance even if it’s designated as an heirloom. Unless you know the growers and can determine this is not the case, there’s a good chance their heirloom pumpkins also grew close enough to be able to cross-pollinate. After you’ve winnowed out the fruit from hybrids or varieties grown near each other, selecting a pumpkin for seed-saving is fairly simple. Choose one that is uniformly shaped, unblemished, and heavy for its size – and that comes from a plant that is healthy. Once you’ve made your selection, you’ll need to figure out just how much seed you’ll need to reap to assure that you can wow all you want next season. All the details you need are coming up next.
How Many Should You Collect?
Consider all your planting needs – and those of your friends – when you decide how much to save. Whether you’re planting vining or bush varieties will impact your decision. Growers typically sow three times as many vining seeds as they plan to grow to maturity, thinning the weakest seedlings, but only sow twice as many for bush varieties. Determine how many seeds you’ll need for next year, and add more depending on whether you want to save extras for other gardeners, or for seasons beyond the one that’s coming up. Remember, what you collect to dry has a good chance of staying viable for up to six years, if it’s stored properly. But also keep in mind that yours may not have a germination rate that’s quite as high as that of commercial varieties. Many of these come from laboriously hand-pollinated plants, which increases their viability (and their price!). Once you’ve determined how many you and your buddies will need for sowing, I’d add another 10 percent to the total. This will accommodate any light or small ones that end up in the mix but fail to germinate. Seeds don’t take up much room, and you can always compost any that don’t get planted in the pumpkin patch, after all.
When to Save
The ideal time to save seeds is when the pumpkin is 20 days or more past harvest. If you’ve purchased the fruit from a market or store, it’s a safe bet that it’s at least that old already. For homegrown varieties, a couple of the signs indicating ripeness include a change in color or a browning stem, along with a rind you can’t puncture with your fingernail. Learn more about when to harvest in our guide. One nice thing about saving pumpkin seeds is that there’s no rush. Any time when you’re already planning to cut into the mature fruit works, like when you carve your jack-o’-lantern in October or decide to make a pie in November. Just do the deed before the rind or flesh starts rotting.
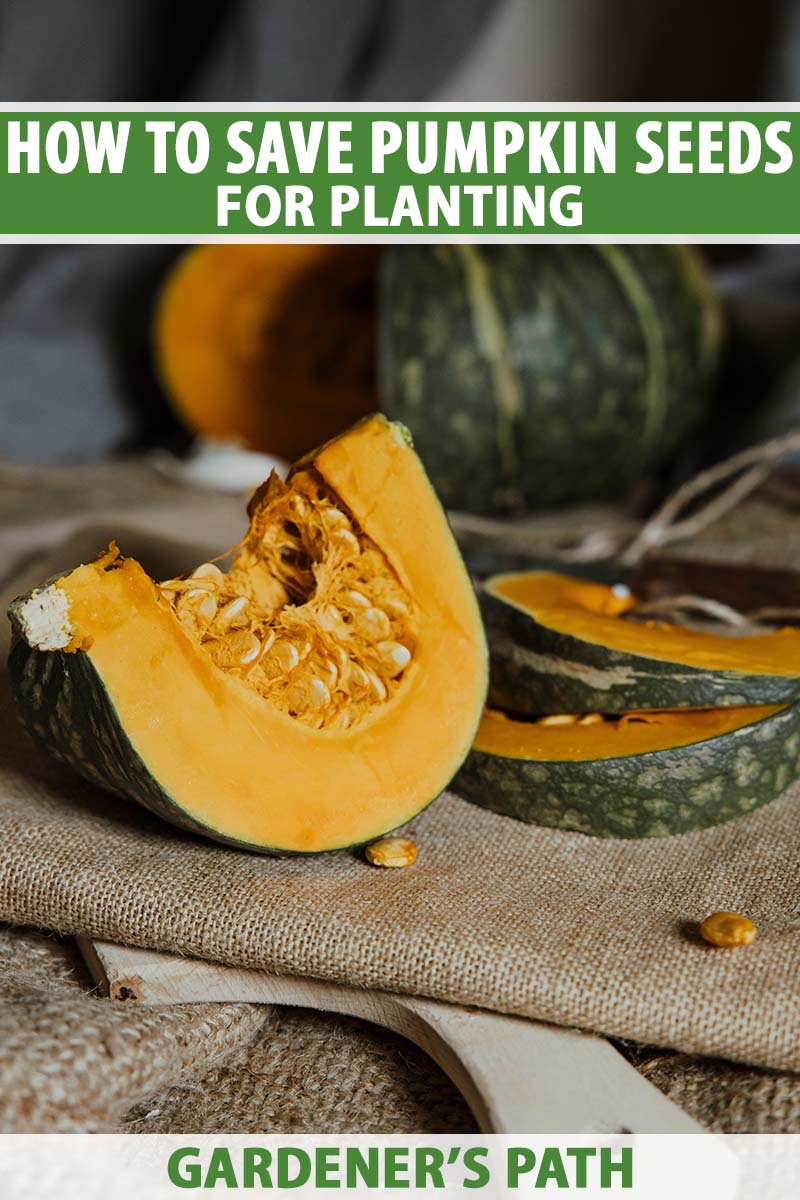
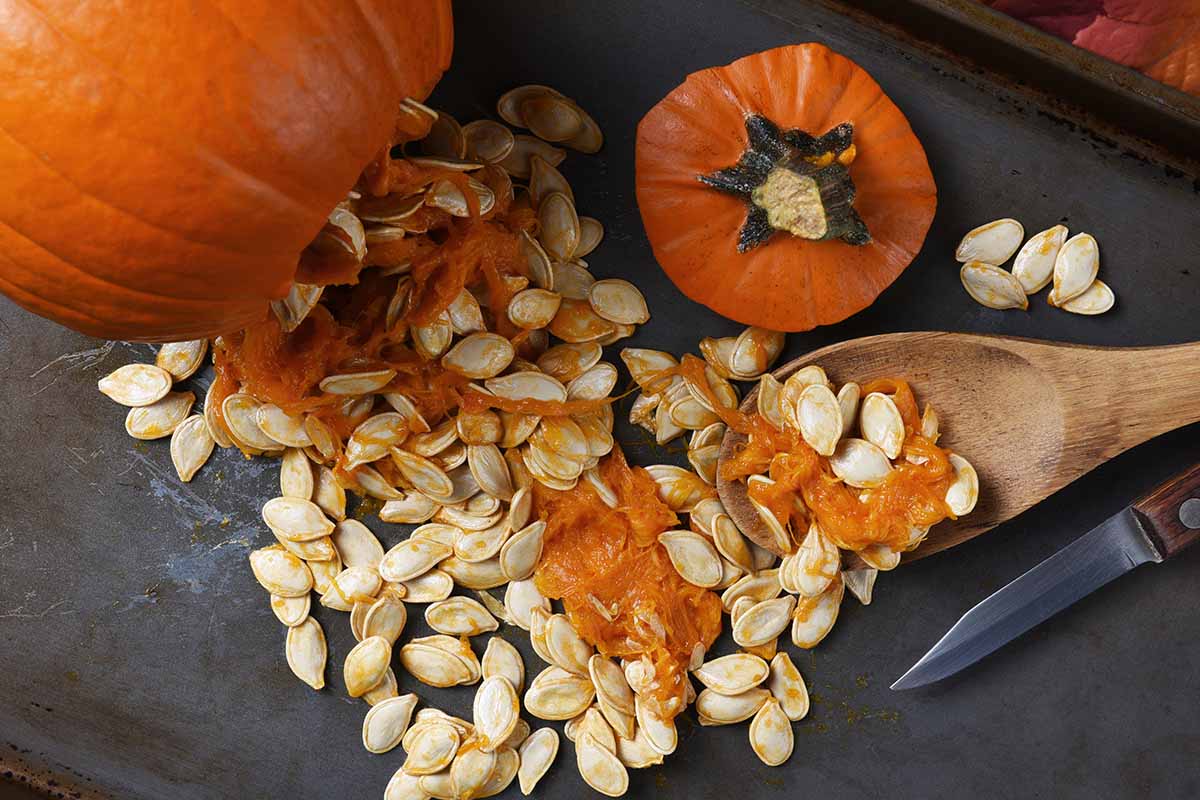
How to Separate and Dry
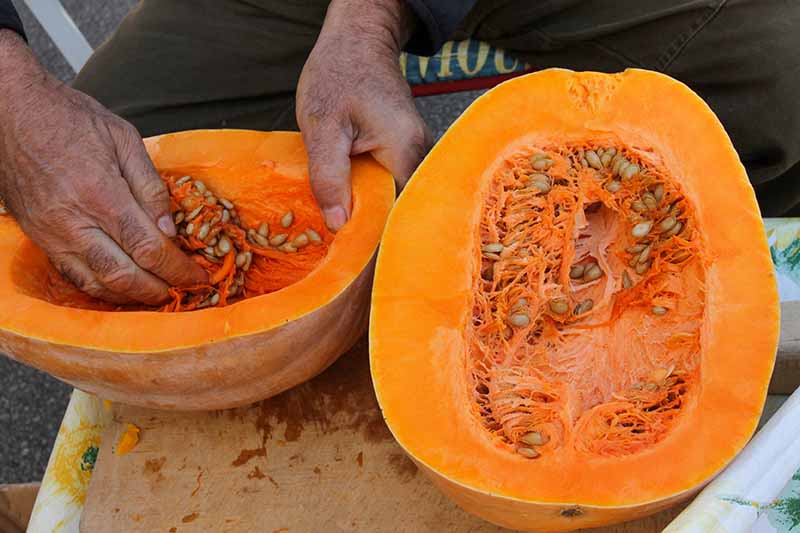
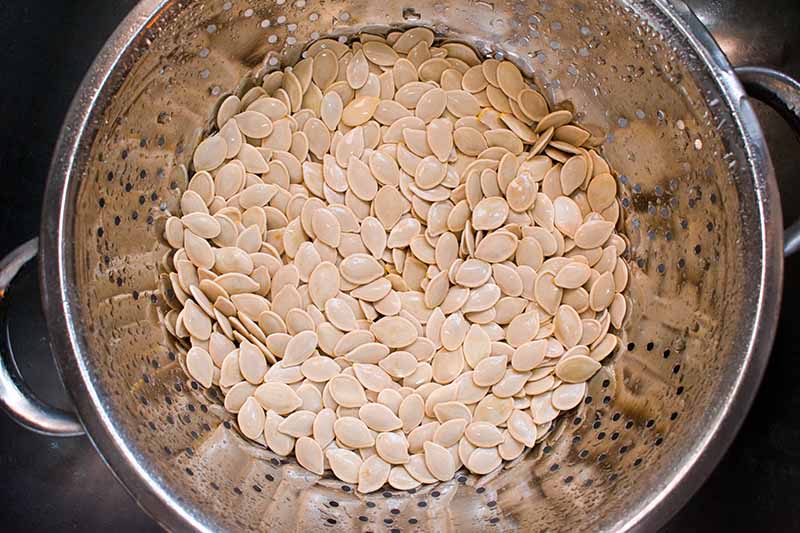
To begin, slice open the fruit. Make a vertical cut starting on one side of the stem. Slice all the way through the rind from top to bottom, and then make a matching cut down the other side. Use your hands and a metal butter knife to pry the two sides apart, revealing the seeds and pulp inside. Instead of trying to halve the stem, cut so that it ends up pulling away with one half or the other. Try to cut just deeply enough to be able to pull apart the two halves of the fruit. Any time you jab the blade in further, you risk slicing the seeds, and you want them to remain whole. You can divide the pumpkin in two with a lateral cut, too, if it’s squat or oval and easier to balance that way. But you will risk cutting into more seeds when you slice right through the center. If you’re carving a jack-o’-lantern, slice off the top about three inches down. Or, cut and lift a section of the top that includes the stem, leaving an opening for scooping out the guts. Scoop out the seeds with an ice cream scoop, a metal spoon or measuring cup with a handle, or your hands. Leave behind as much of the stringy pulp as possible, but don’t waste too much time worrying about it. Place the contents in a colander under cool running water, and use your hands to rub the seeds and separate them from the pulp. Compost the debris. Let the seeds dry completely on a baking sheet, or a piece of newspaper or parchment. This may take a few weeks, but don’t rush it. Seeds that are still moist can mildew easily, which ruins them for planting. When they’re dry to the touch, cull any that are light, discolored, or broken. If there are any remnants of dried pulp still mixed in, pick them out with your fingernail, being careful not to splinter the hulls.
Storage Tips
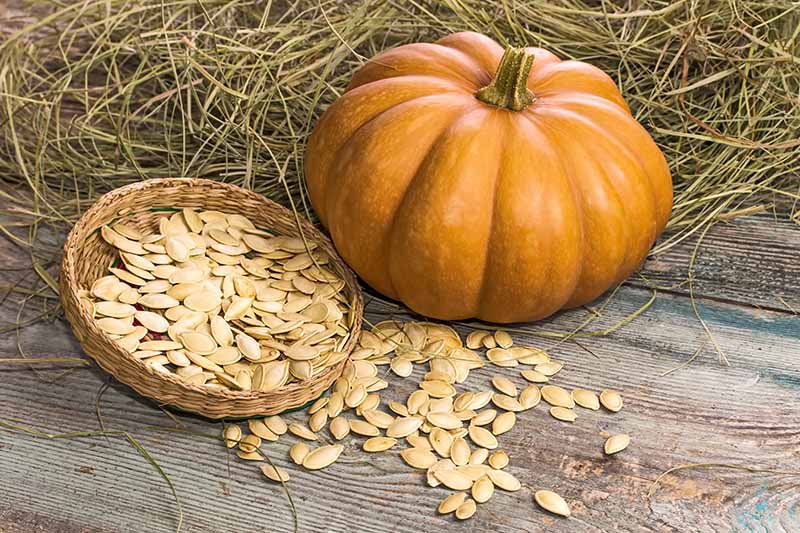
We’ve reached the neat and tidy portion of this project! Place the dry seeds into containers you’ve labeled ahead of time with the cultivar name and the date they were collected. Optimal storage choices include small paper envelopes, zipper-top bags, or even repurposed baby food jars, as long as they’re completely dry inside and airtight with the lids on. Store the containers in a cool, dry place, like a dark closet in a guest room you keep fairly cool year ‘round. If you air dry them thoroughly and then seal them in an airtight container, it’s possible to safely store these seeds in the fridge or freezer too. When I store a big batch, I usually divide it into convenient amounts, based on how many I plan to sow and the needs of my intended recipients. I then seal them in separate small kraft envelopes labeled by date and how many seeds are inside. I stick all the envelopes into a shoebox-size plastic container, close the lid, and pop it in the freezer. I get the envelopes out one by one, as needed. You can count on seeds you store this way to stay viable for three or four years minimum, and perhaps as many as six. Do you have any experience with this project already, or questions about it? Feel free to share in the comments section below, so all of us can offer help or enjoy your input. And if this coverage put you in the mood for more info on planting and eating these fall favorites, check out these pumpkin guides next:
How to Grow Your Own PumpkinsThe Best Companion Plants to Grow with PumpkinsHow to Train Pumpkins to Grow on a TrellisHow to Turn Green Pumpkins Orange After Vines Die