That’s the perfect time to take a cutting. Propagation by stem cutting lets you recreate a clone of a plant you love. That means you can have two, three, four, or maybe more of that perfect floribunda that you just can’t get enough of. We link to vendors to help you find relevant products. If you buy from one of our links, we may earn a commission. Now, for the bad news: Probably only about 50 to 75 percent of your cuttings will take. Rose lovers are constantly trying to figure out how to improve the chances that their starts will succeed, and we can benefit from all their hard work and experience. But still, even the best rose growers seem to be stuck around this success rate, for the most part. Plus, with this guide, you’re sure to be on the higher end of the success rate scale. That’s because we’ve gathered up all the best tips and experiences from rosarians around the world. Here’s what’s ahead: Is it wrong to be this excited to get my hands dirty? Then I don’t want to be right. Let’s go!
When to Take Cuttings
If you do a quick internet search, you’ll find that there are websites out there that recommend taking cuttings in the late winter or early spring. Others suggest summer is the right time. Then there are those that swear fall is ideal, while still others claim fall is the absolute worst time. In other words, there’s a bit of contradictory info out there! The truth is that the ideal timing depends on your location, climate, goals, and circumstances. You can technically root starts at any time during the growing season, but you’ll have the most success when conditions are mild, either cool or warm. Freezing weather is a no-go, and sweltering heat, when plants are stressed, isn’t a good time, either. That leaves spring and fall in most temperate zones, as well as winter in regions that don’t experience freezes. Many experts recommend taking cuttings in the fall, after all of the blossoms have faded on your plant. That’s the time when I’ve had the most success, but you do have to keep the starts indoors and alive for the entire winter if you go this route, so keep that in mind. If you want to root your cuttings directly in the garden, take them in the spring after new growth has started. I love this method for when I don’t want to put the effort into keeping a plant alive indoors for months. In my experience, rose cuttings started directly outdoors tend to take off more quickly than those you start indoors and transplant as well. Perhaps that’s because they’ve had more time to adapt to your conditions, and they don’t have to deal with the shock of transplanting from indoors to out.
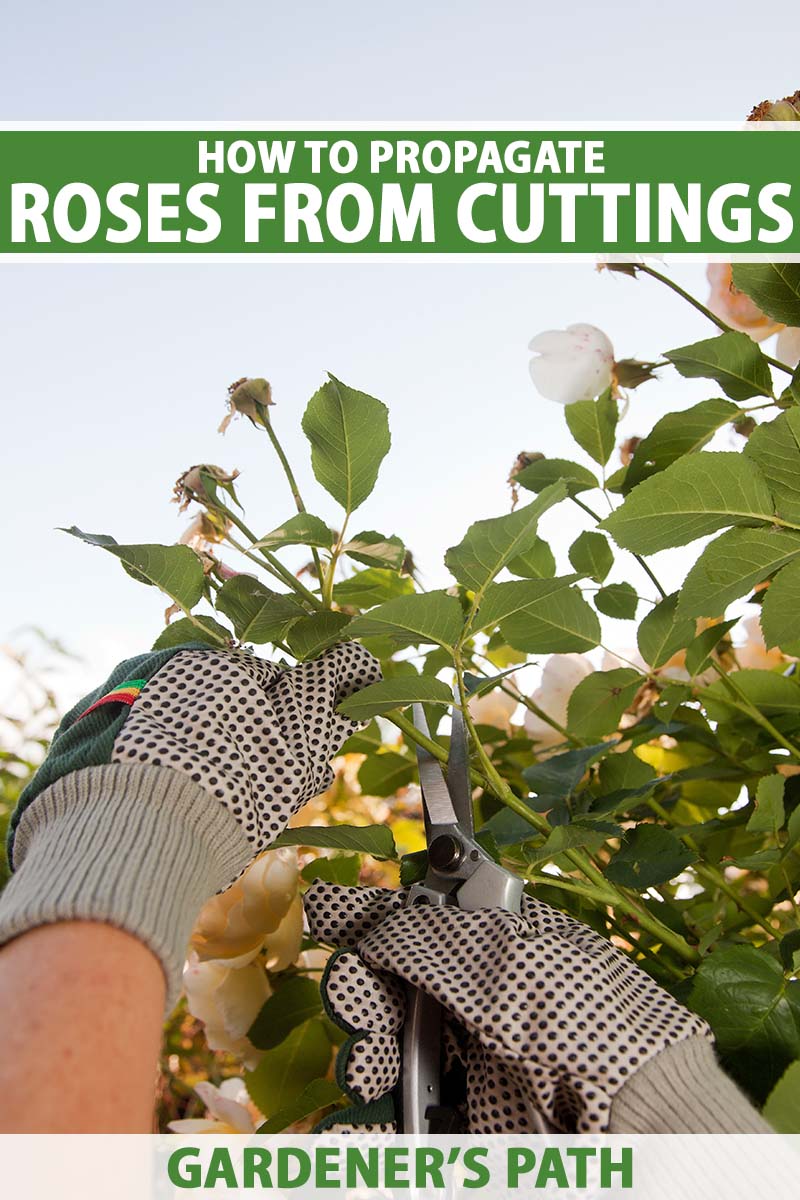
Preparing the Cuttings
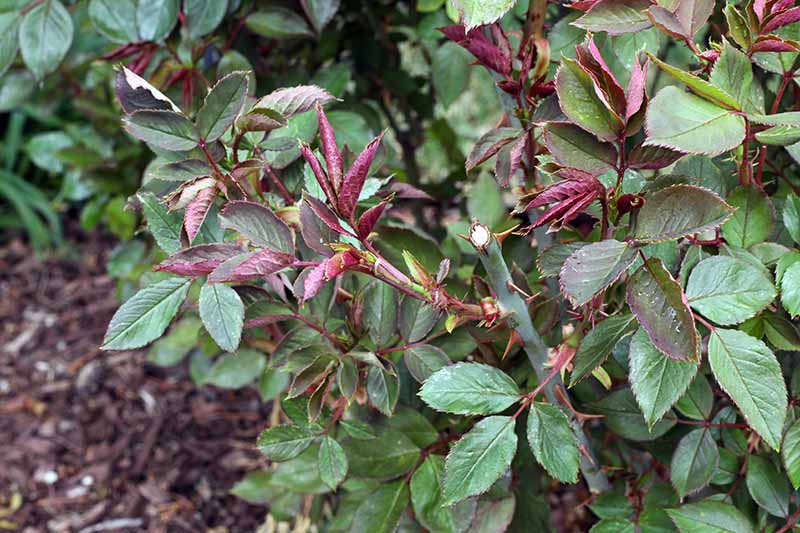
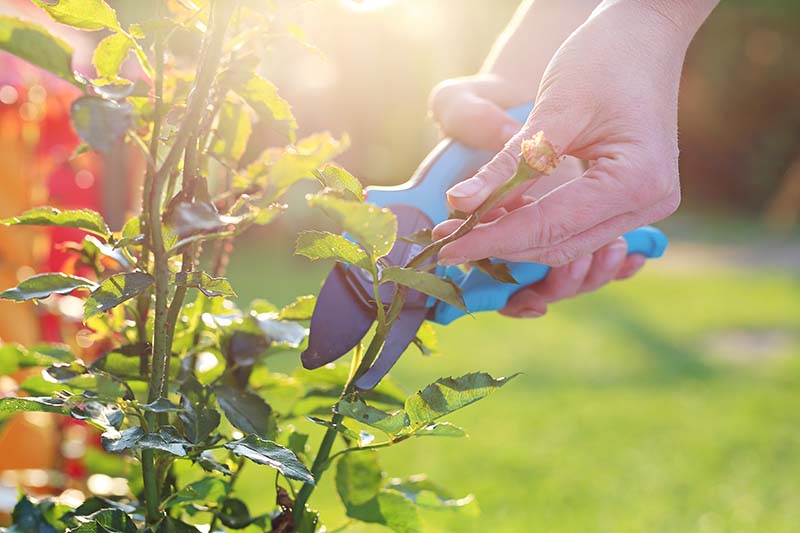
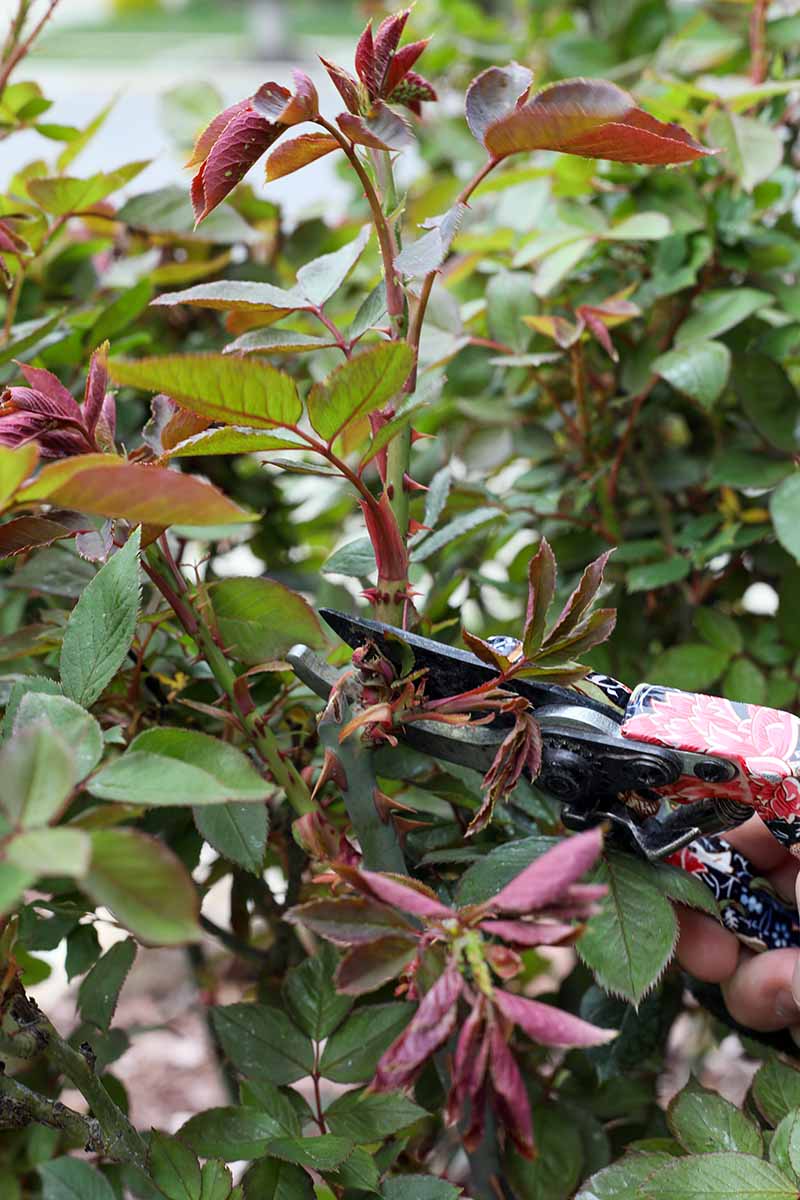
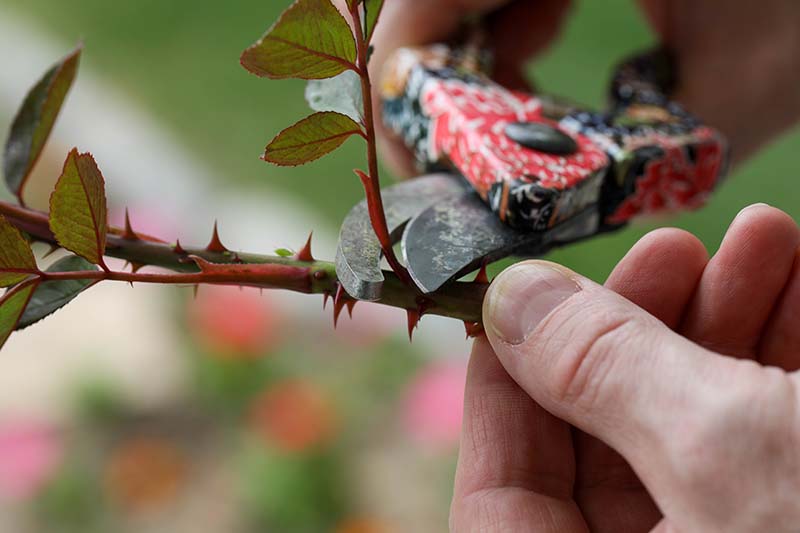
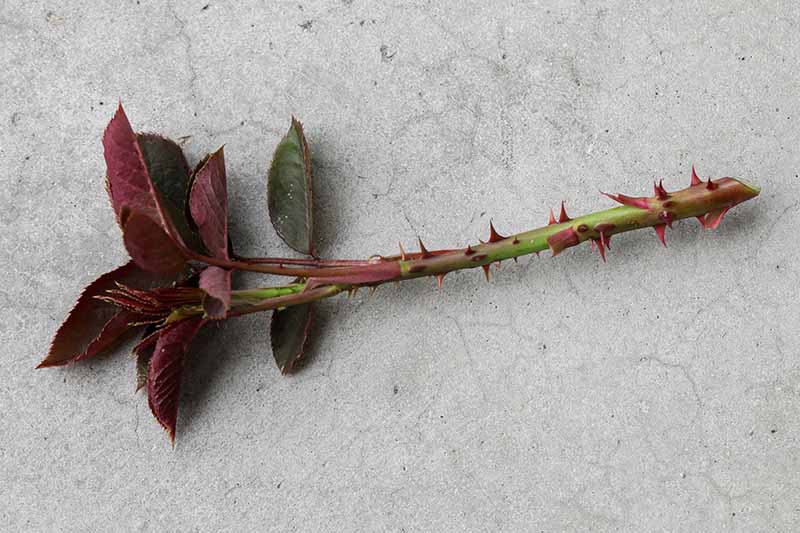
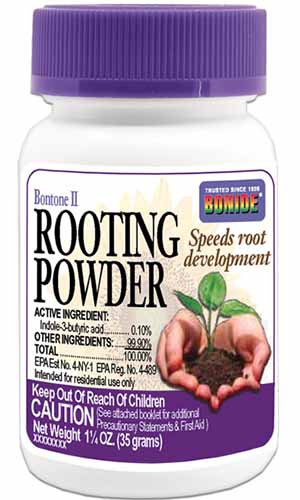
Before you put your knife anywhere near the plant, make sure you’re taking your material from a plant that is. Steer clear of anything that shows signs of rust, mildew, fungus, insect pests, or any other sort of pest or disease. If you do see any of these on your plant, don’t even think about taking a cutting. Next up, you don’t want to take old, woody stems or soft, extremely flexible material. Super new growth is often red or purple. A little bit of red (or young) growth is fine, but just make sure the majority of the stem is green where you plan to cut. You can technically take cuttings from both hard and young growth, but neither of these will typically root as well, in my experience. If you’re taking cuttings in the fall, look for a stem that has a spent flower on it, or even the beginnings of a hip, with at least six sets of leaves. Take an eight to nine-inch piece from an area with growth as thick as a pencil, using a sharp knife or clippers that have been cleaned prior to use. Make the cut at a 45-degree angle. Repeat as needed. While you’re working, bring a jar filled with water with you, and immediately put the cuttings in it. Plan to get your cuttings planted the same day you snip them, and be sure to put the cut stems back into that jar of water while you’re following the steps to follow if you’re working with more than one. Again, assuming that you are working in the fall, remove the dead flower, any hips, and the tip of the stem down to the first set of healthy leaves. For spring and fall cuttings, remove all of the leaves from the bottom half, leaving two or three sets of leaves intact. You should now have a stem that’s a little over eight inches long, with just a few sets of leaves at the top for spring cuttings, and a stem that has been trimmed at the top with the bottom half’s leaves removed for fall cuttings. Now it’s time to wound the stem. The easiest way to do this is to make a few vertical slits about half an inch long down the end of the stem to the base through the first layer all the way around the stem. Try to make at least two slits, but three or four are better. The point is that you’re trying to create a situation where the moisture is being kept in place in the soil and the air around your starts while they root. Bonide Bontone II Rooting Powder You can grab some at Arbico Organics if you don’t have it already.
Rooting in Containers
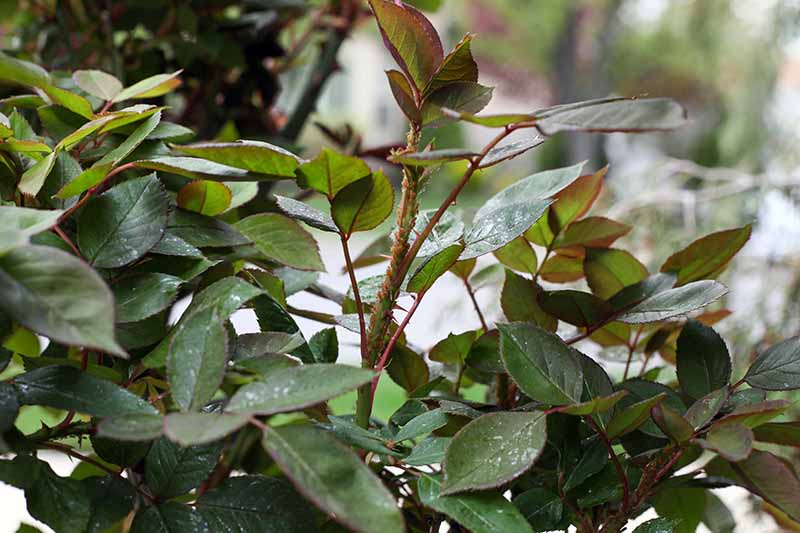
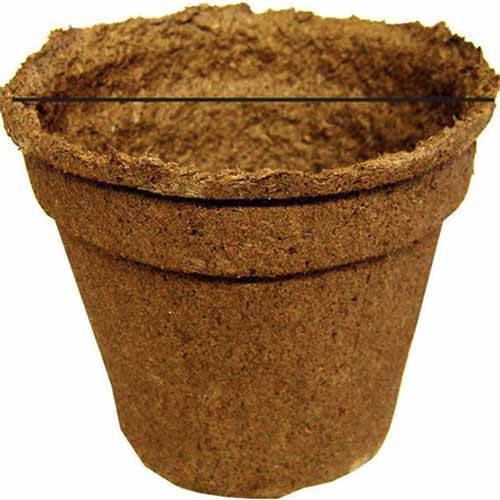
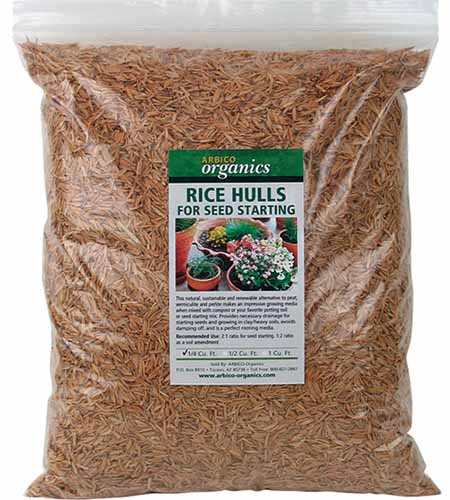
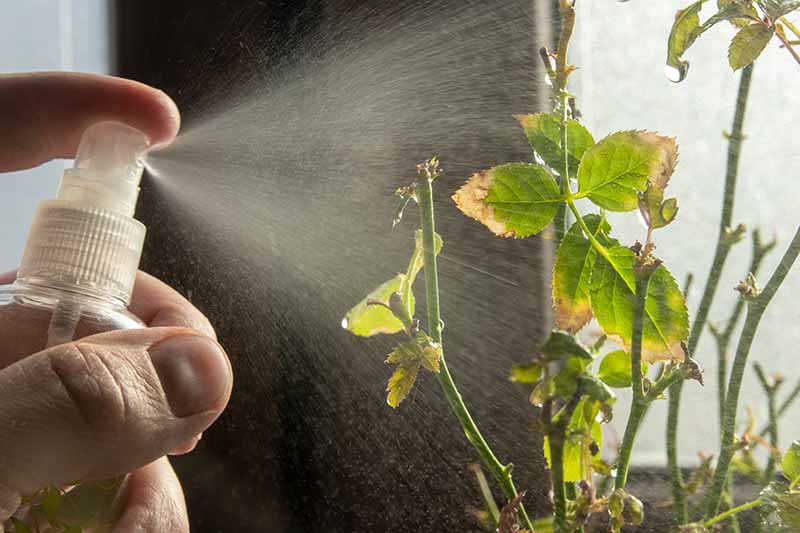
Once your cuttings are ready, it’s time to put them in your containers indoors. This is the best option if you took your material in the fall, but you can also do it with spring cuttings. I like to use five- or six-inch compostable containers which allow you to avoid disturbing the roots when you transplant your new roses. CowPots are my favorite because they don’t use any peat, which is a limited resource. They’re made out of cow poop instead – definitely a renewable resource! CowPots Biodegradable Pots If you can’t find CowPots at your local nursery, you can purchase five-inch pots in packs of 66 or 160 at Arbico Organics, or the six-inch pots come in packs of 42 or 108. Whatever you select, make sure it is about this size, with excellent drainage. Then, fill the pots with a rooting medium. I’ve found that the perfect combination to create a rose cutting medium is three parts Miracle-Gro potting mix with one part perlite. Miracle-Grow Potting Mix Miracle-Gro potting mix is widely available, including at the Home Depot. If you can’t find perlite, rice hulls make an excellent sustainable alternative. Arbico Organics has 1/4, 1/2, or one cubic foot bags available. Trust me, you’ll find plenty of uses for this versatile medium. Rice Hulls Seed Starter Soil Fill the pots a quarter-inch to the top with this mixture, and then poke a hole in the center of each pot with a chopstick or pencil. Lower a cutting into place so that half of the stem is covered by soil. Firm up the medium around it and water thoroughly. Repeat with the remaining cuttings and containers. If the rooting medium has settled after watering, add a little bit more. Now, it’s time to cover the cuttings. There are lots of options to create a mini-greenhouse over your potential new plants. Garden Cloche Plant Dome You can also cut the bottom two-thirds off of a milk jug or soda bottle and place it upended over the cutting. Or, place some chopsticks in the container and lower a plastic bag over the top. Put the cuttings in a spot where they will receive at least eight hours of indirect sunlight, but don’t put them anywhere that they will be hit with direct light. This will scorch the plants and they’ll die before they even get started. Every day, check things to make sure your new plants have enough moisture in the soil. Since they have a cover over them, they shouldn’t need additional water in the soil every day, but it’s smart to check to be sure. Mist the cuttings with water every day. After six to eight weeks if you planted in the spring, or up to 12 weeks if you planted in the fall, you’ll hopefully see new growth and if you give a cutting a little tug, it will resist if it has rooted successfully. Remove the cover and let the soil dry out a little bit for the next week or two, to accustom the plants to normal growing conditions. Dispose of any that have not rooted. Then, it’s time to harden the starts off in preparation for putting them in the soil. What that means is you need to gradually introduce the plants to outdoor life without shocking them. Since they’ve been sheltered indoors, they haven’t had to deal with direct sun, wind, and harsh rain.
Transplanting
If you choose to root your plantings indoors, eventually you’re going to want to bring them out to your garden. Here’s how. To harden the plants off, bring them outside for an hour and put them in a sheltered spot. Then, gather them back up and put them back indoors. The next day, give them two hours outside. The following day, give them three. Keep adding an hour until the plant can be outside for seven hours. On the following day, you can plant. After you’ve hardened off your rooted cuttings, prepare the soil. I like to work a good amount of compost into my soil because it helps improve drainage, water retention, and nutrition. Gently remove the rose from its container if you didn’t plant in a biodegradable one. Then, dig a hole twice the size of and as deep as your biodegradable pot or root ball, and put it in the ground. Firm the soil around it and cover it completely with soil. Water well to settle the soil. Read more about planting rose bushes here.
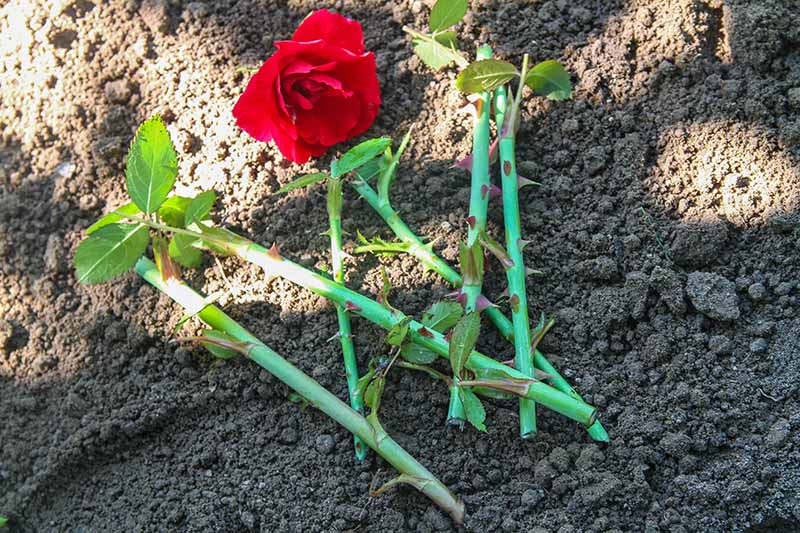
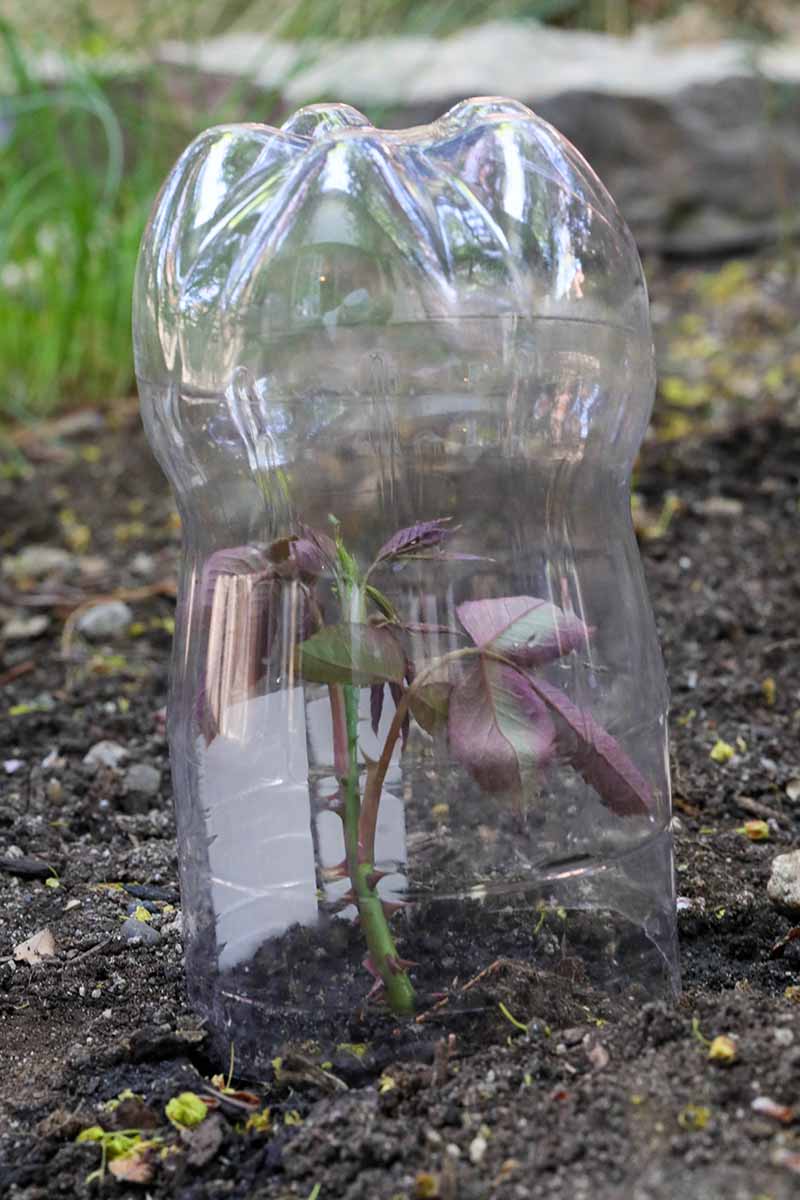
Rooting Outdoors
As a little girl, I was told romantic stories about the roses in my great-grandparents’ gardens that came from the East Coast, or even as far as England. As the stories went, the white settlers traveling west brought their rose cuttings with them in glass jars filled with water as they crossed the oceans and plains. When they arrived, they stuck them in the soil and covered them with glass jars to start a bit of their old garden again in their new home. I don’t know if these stories are true or not, but I use the same principle to grow cuttings directly in the soil. Essentially, you need to keep the cut stems alive in a bit of water after removing them from the plant and then cover them to create a warm, humid, greenhouse-like environment as they become established in the soil. Most people choose to do this process in the spring after the last predicted frost date has passed, but if you live somewhere that doesn’t freeze in the winter, you can do it in the fall, as well. The first step is to make sure you have the right type of soil for roses. Not sure if you have what it takes? Check out our simple guide to getting started with roses. Then, pick a shady spot like a garden on the north side of your property or somewhere under plenty of shade. You don’t want direct sun beating down on the plants. Next, dig a hole that is at least six inches wide and four inches deep to plant each rooted cutting in. Place the stems in the hole and fill around them with the garden soil to firm everything in place. Then, place a cover over them. If you live in an area that is fairly humid, you can skip the cover. If you aren’t sure what kind of cover will work, refer to the section on indoor planting above for some suggestions. I always use liter-sized soda bottles with the base cut off because they are so readily available from the soda lovers in my life. If the weather becomes too hot, remove the cover. What’s too hot? I’m talking above 80°F. For the next few months, you must go outside and check on your cuttings every day. If the soil feels dry, add more water. Mist the cuttings with water daily if you notice the interior of your cover drying out. I’ve never had to mist mine in the humid Pacific Northwest, but in the dry climes of the interior western US, I had to mist every day or two. Once a plant has rooted, remove the cover and let it adjust for a week. Remember, you’ll know it has rooted if you give it a gentle tug and the cutting resists. After a week, you can dig it up and move it to its permanent home. Be sure to keep a four-inch or so perimeter around the stem as you dig, and dig down as deep as your plant is tall. Plant as you would a transplant. I find that this method results in fewer cuttings taking root, but the ones that do tend to be more robust and grow faster than those started indoors. I’ve filled many-a-garden with stolen cuttings (okay, I usually ask for permission, but it sounds cooler to think that I’m running around like some sneaky rose larcenist…). Now you can expand your rose garden, too. Hopefully, this guide makes things a cinch and you’ll be drowning in rooted rose cuttings in no time. Let me know how it goes or if you run into any trouble. Was it easier or harder than you expected? Drop me a line in the comments section below! And for more information about growing roses in your garden, check out these guides next:
All About Rose Growing HabitsEverything You Need to Know About Buying Rose BushesHow to Identify and Treat Common Rose DiseasesHow to Winterize Roses