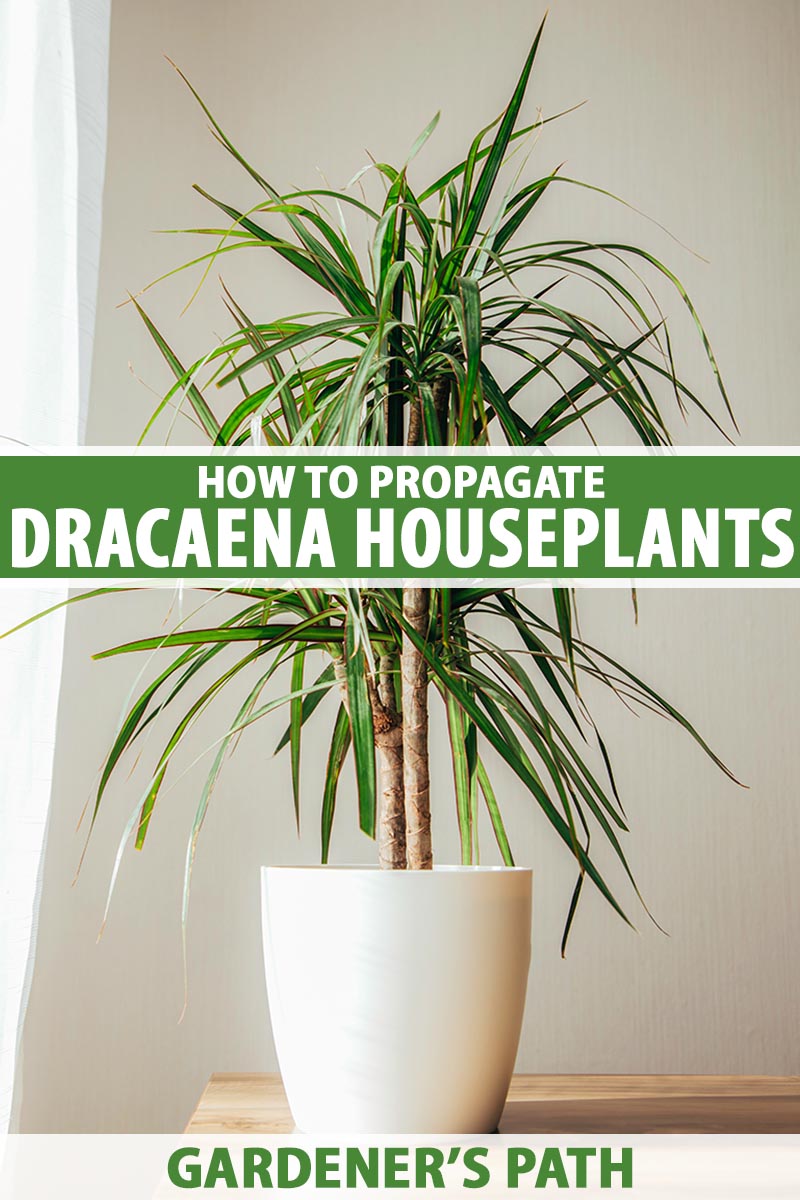
This is in part because of my (infamous) tendency to favor fuss-free houseplants, but another factor at work is how dang easy it is to propagate dracaena from cuttings. We link to vendors to help you find relevant products. If you buy from one of our links, we may earn a commission. Let’s get into how to grow dracaena from cuttings!
The Basics
There are a couple of available methods that work for propagating dracaena, but this guide will focus on the one that has the best track record, and is the easiest in practice. Follow these simple steps and you’ll be swimming in dracaena before you know it. You’ll need a few items to do this.
Dracaena Cuttings
We’ll dig into what kind of cuttings you want to take and how to snip them a little later in the article. But it’s important to remember that you can’t propagate dracaena cuttings without any on hand! If you have access to a mature, healthy specimen, that’s your ticket. Whether it’s growing in your own home, or the home of a friend, you may be able to take a few snips – with permission of course, if you’re not the owner. On that note, this isn’t the time to be chopping plants you see at the store, a botanical garden, or elsewhere. Let’s stick with houseplants that are available for sharing.
Rooting Hormone
Growing Medium
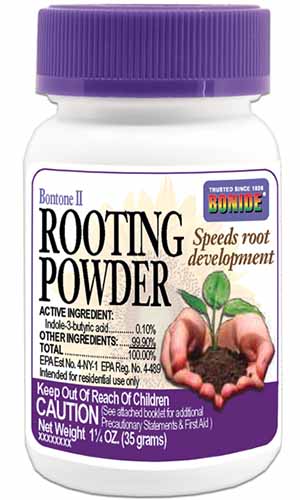
Any growing medium made for potted plants will work, though dracaena tends to prefer something slightly acidic. I’ve used Pro Mix as the medium for the plants I’ve grown, and it’s my preferred option. My wife has fantastic luck using only water, but she was born with a green thumb, whereas I work for mine every day. Bonide Bontone II Rooting Powder By default, I’ve always used Bonide’s Bontone II Rooting Powder at my house. It’s available from Arbico Organics. A little jar like this will last a long time, so it’s a smart investment if you’re interested in propagating any sort of plant from cuttings. I’ve read about people using willow branch water, but have never had luck using this as a rooting hormone myself. The science seems to work out on it, but I can’t say for sure if it works. The key quality you want in whatever medium you select is good drainage. And you can make your own with no problem. I like a blend that is four parts peat moss or coir fiber, three parts perlite, and one part sand. Add a thin top layer of compost and you’ve got something on par with store-quality potting mix. I highly recommend wetting your growing medium before you start working on propagation. Very few moments in gardening are as frustrating as when you proudly give your plants their first watering, only for the growing medium to immediately flood into a soupy mess. The best test for perfect water levels is to grab a handful of the soil in your palm and squeeze it into a ball. If the clump of soil retains its shape with little water squishing out, you’re doing well!
Containers
I’ve been using the same four-inch plastic containers for about five years now for all of my cuttings. Every year, we grow our vegetables from seed and transplant them into these larger spaces, then they sit on the shelf until we propagate more dracaena, pothos, spider plants, or whatever else we’re looking for at the time. My point is, you don’t need anything fancy to get your dracaena cuttings started. The only real requirement is an appropriately-sized container with good drainage. You’re looking for something about four inches in diameter. This could be re-used containers from yesteryear, or cut-off bottoms from milk cartons, or leftover party cups from that graduation party last spring. As long as it’s got drainage holes and is an appropriate size, it’ll work! Before you add your soil and plants, always be sure to clean and sanitize reused containers after other uses, or between gardening projects.
Sharp, Clean Tools
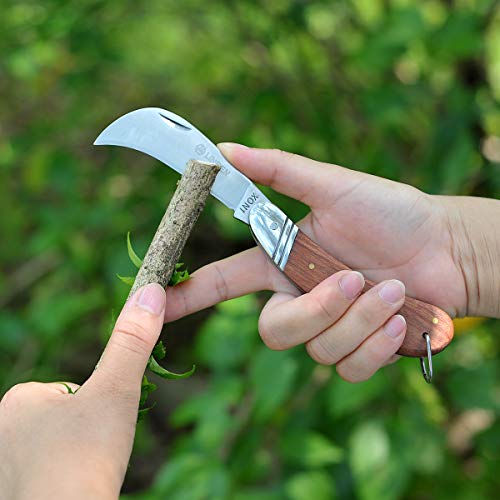
Before you get started, and after use, be sure to keep your cutting tools clean and dry! This is good gardening practice to prevent the spread of any pathogens, as well as keeping rust and gunk away from your precious tools. Your goal here is to produce a clean cut with minimal bruising and damage to the cutting, or the parent plant). Linsen Outdoor Pruning Knife It’s very, very sharp, so don’t attempt using one of these if you aren’t fully confident in your manual dexterity!
1-2-3 Dracaena Propagation
Ready to get going? The first step is to get right to cuttin’!
Procuring Your Cuttings
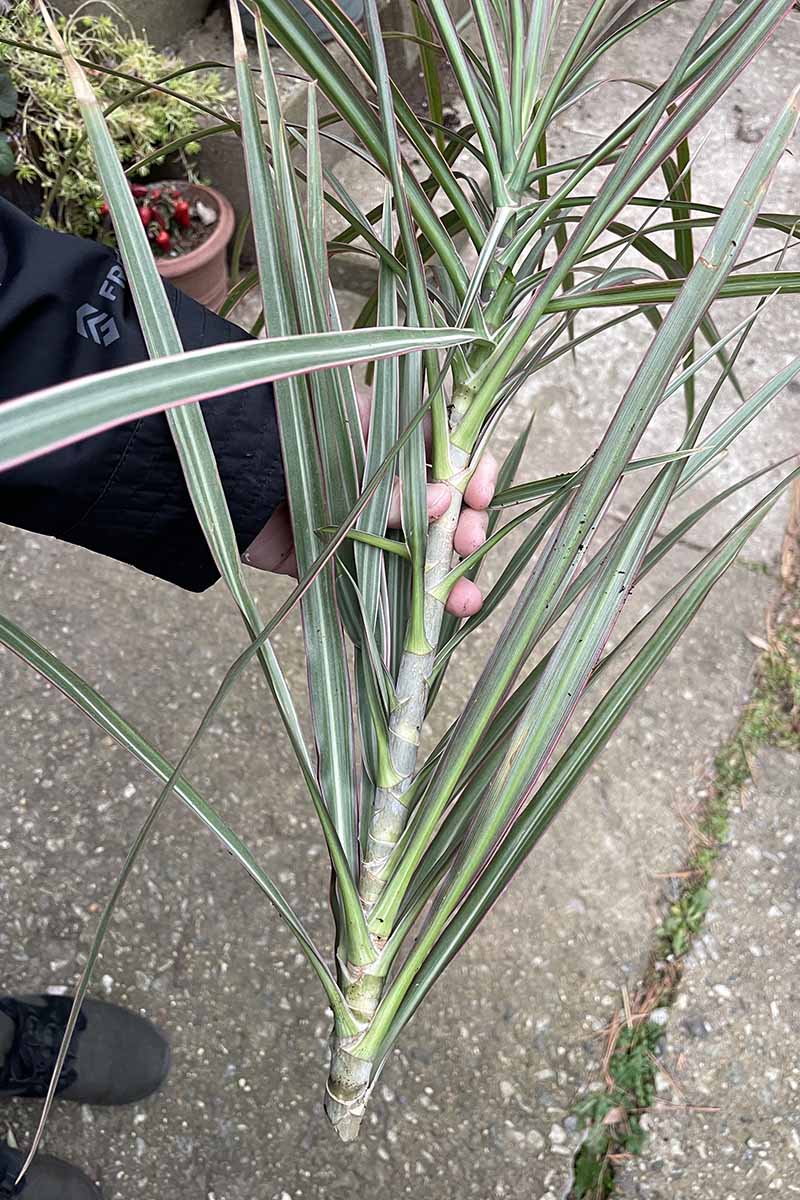
Your goal is to select cuttings that are about six to ten inches long from your parent plant. You can get away with taking smaller cuttings, but larger ones propagate just as well for this plant, so why not begin with something bigger if it’s available? That way, you’ll have a larger plant faster! The bigger your parent plant is, the more cuttings you can get away with borrowing. Many indoor gardeners will cut back and trim their houseplants once or twice a year, and this is the perfect opportunity to give your “trimmings” a second use. After you snag your cuttings, remove most of the leaves, leaving a nice little spray at the top. Imagine each cutting is a miniature palm tree, and you’re on the right track. We remove these leaves so the plant can focus on maximizing root development. When I’m working with any type of cuttings, the moment they’re borrowed from the parent plant, I drop them in water. It’s an old habit, but it’s a very good habit, so I’m stickin’ to it! I do this so the stem is immediately transitioned to a safe space after it’s removed from the parent plant. You could skip the water. Leave the cuttings out for up to an hour or so, and get your cuttings into their new temporary homes for rooting as soon as you can get to it. I think there’s a fifty/fifty approval rate on either option here depending on who you ask, so your own predilection is just fine.
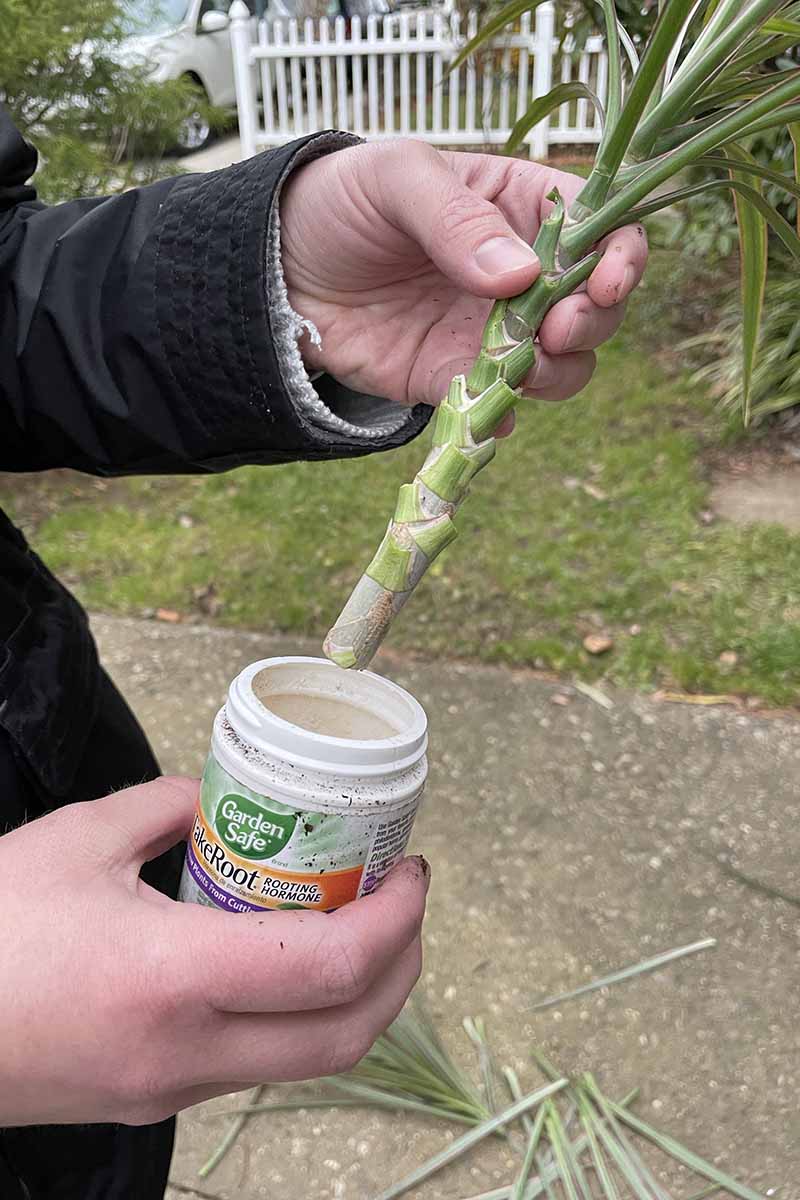
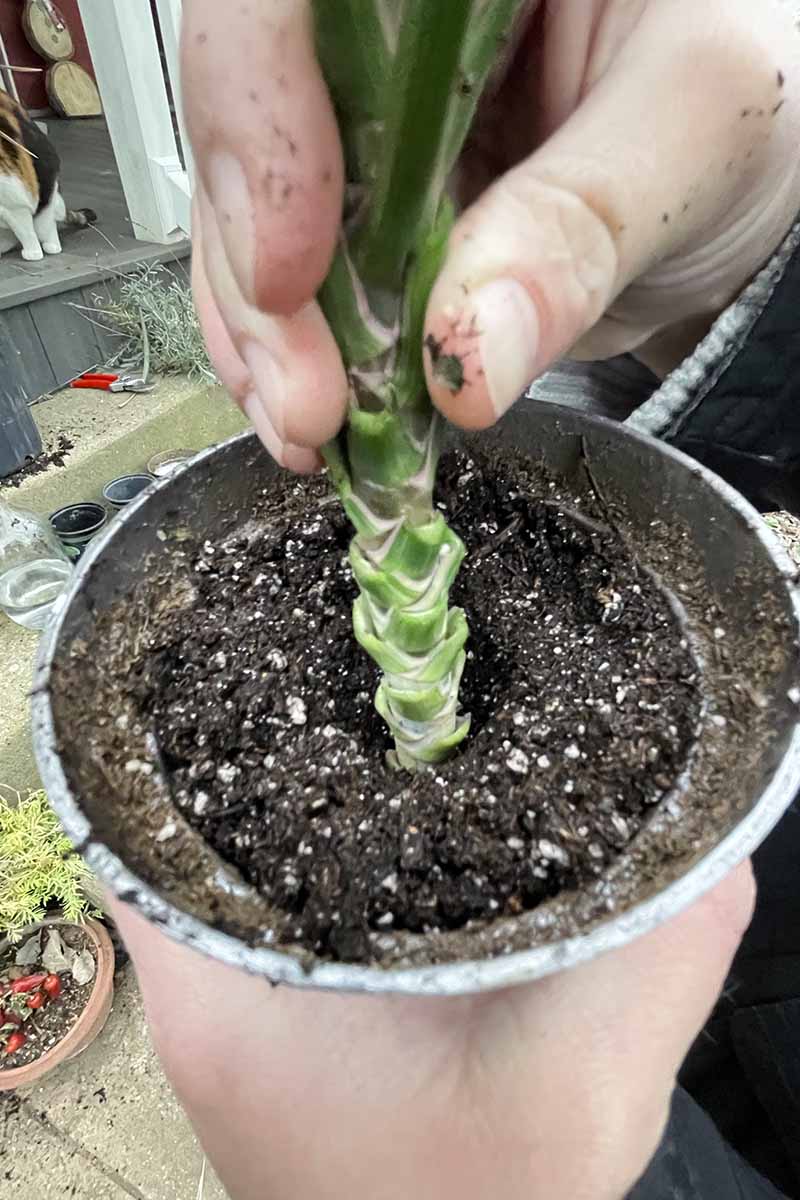
Station Your Cuttings
I’ve got two destinations to offer for your cuttings. But first, if you’re using a rooting hormone product, you want to wet the bottom of each cutting and dip it in there. Tap off any excess, back into the bottle. Some gardeners recommend against this, advocating for taking a small amount out of the bottle for each project and tossing any excess instead, but this is what I do, and I haven’t had any issues. My preferred placement is to stick the cutting right into the soil after it’s dipped. Firm the soil with your fingers so the cutting stands upright, and pow, you’re done! Okay, it’s not quite that easy. But it’s almost that easy. You want the cutting to have enough of its stem pressed into the soil so it won’t topple over. Firmly press the soil around the base of the cutting so that it doesn’t collapse or lean. You can work with the orientation of the plant so that it’s growing straight up. I like to leave a small space of soil between the bottom of the cutting and the bottom of the container it’s going in. A half inch or so will do. This plant doesn’t need much of anything – ever – by way of fertilizer, so a dusting of compost on the surface of the soil is plenty. Another option is to root your dracaena cuttings in water. You simply plop the cutting into a container – without drainage holes, this time – and wait a few weeks for roots to grow. I think it’s best to wait until the roots on your cutting are about an inch long before repotting in another container. And there’s no need to add hormone powder if you go this route. Honestly, you could keep the dracaena in its watery home indefinitely. Change out the water once every week or two and you’re donezo. “Donezo” is a great word, isn’t it? I don’t think I coined it, but I sure use it like I did. But if you decide your true dracaena propagation path is for your cuttings to grow in soil, wait until you see those roots develop, then pot it in a container exactly as described above.
Tend Your Cuttings
Keep your dracaena cuttings in a brightly lit area, but do your best to keep them out of direct sunlight to avoid allowing them to burn in the sun. If your growing medium was nice and moist, you won’t need to water the cuttings for about a week, depending on what conditions you have the plants in. Remember, you’ve basically got a stick in a cup of dirt here. If you keep watering it, the growing medium will grow saturated – and, in a word, gross – and your dracaena will rot into a stinky pile of goop. Nobody wants that, so wait to water your dracaena cuttings until they really need it. My tried-and-true test for measuring how much water a plant needs is to pick up the container it’s growing in. Does it have any weight at all? If the answer’s “yes,” then your plant probably doesn’t need water. However, if the weight feels like your plant is growing in cotton candy instead of soil, it needs a drink of water. I add a little at a time, walk away for ten minutes, and then give it another drink. This is my super-scientific trick for giving the soil enough time to absorb the first drink, and wetting its whistle for the second. At this point, you’re going to wait a few weeks to a few months for results, but your dracaena propagation project is essentially finished. Good job!
Wait! What Happens Next?
After those few weeks of waiting, your dracaena cuttings will have their very own roots. I know, it’s like kindergarten graduation; it gets me every time. But before you repot your dracaena into a larger container, wait! Starting plants from cuttings requires a great depth of patience, and rushing things along at this stage is an excellent way to sacrifice weeks of waiting. My default method for deciding when it’s time to replant any cutting into a larger container is to wait until you see roots poking out of the bottom of the pot. Once you can see evidence of that, wait a few weeks longer. I’ve always waited until my cuttings or seedlings are ever-so-slightly rootbound in the container before I consider repotting them to a larger home. Once your dracaena cuttings have this kind of root development, you’re good to repot them and start treating them like your average dracaena plant. Of course, that means forgetting to water them for weeks and tucking them away in a corner in your bedroom where you never look… Right? That’s where dracaena plants are at their happiest, so keep that going! Dracaenas are perfect gifts for both professional gardeners and people who are new to the practice. Share the wealth, even if there isn’t much to share. Propagation is very easy, so it’s not unbelievable to imagine you’ll have dozens of extra plants hanging around that need a good home. I hope this article was a helpful read for you! Let us know if you have any questions in the comments below, and feel free to share photos of your success with this propagation method. As always, thank you for reading Gardener’s Path! Next up, check out some of our other articles on growing dracaena plants, starting with these:
How to Grow and Care for DracaenaWhy Are the Stems on My Dracaena Turning Black?How to Grow and Train Dracaena Plants as Bonsai