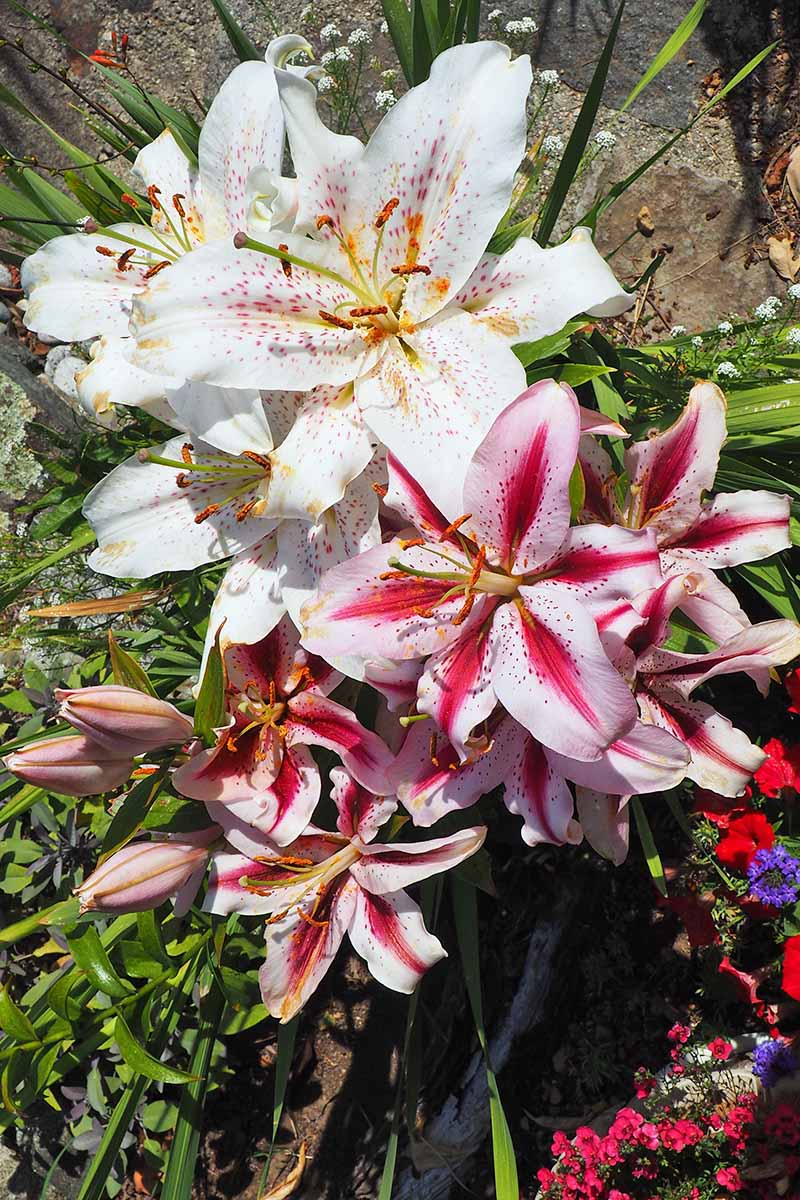
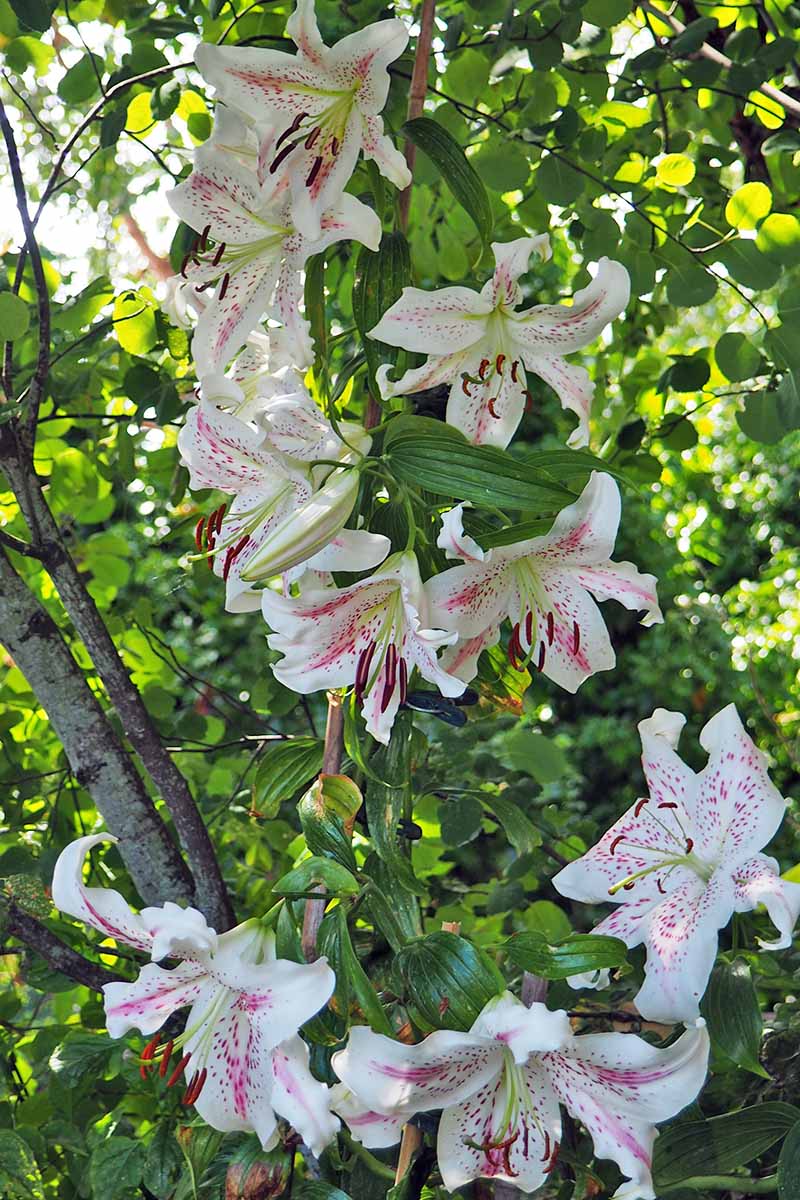
They take up very little space, work equally well in beds, borders, or containers, and are among the best plants for naturalizing in meadows and woodlands. And by choosing a selection that flowers at different times, you’ll always have something coming into bloom as the previous performers fade away. The main problem is that some of them can be quite pricey. Not to the extreme of bulb mania back in the 1600s, but some of the more exotic varieties can still put a good dent in your wallet! We link to vendors to help you find relevant products. If you buy from one of our links, we may earn a commission. It’s a simple skill to learn, supplies are minimal, and multiplying these glamorous gems can be quite easily achieved by the home gardener.
Just remember to put a descriptive tag on the stem while a given plant is blooming – it will look considerably different several months later when it’s time to propagate, and a description will help to identify it.
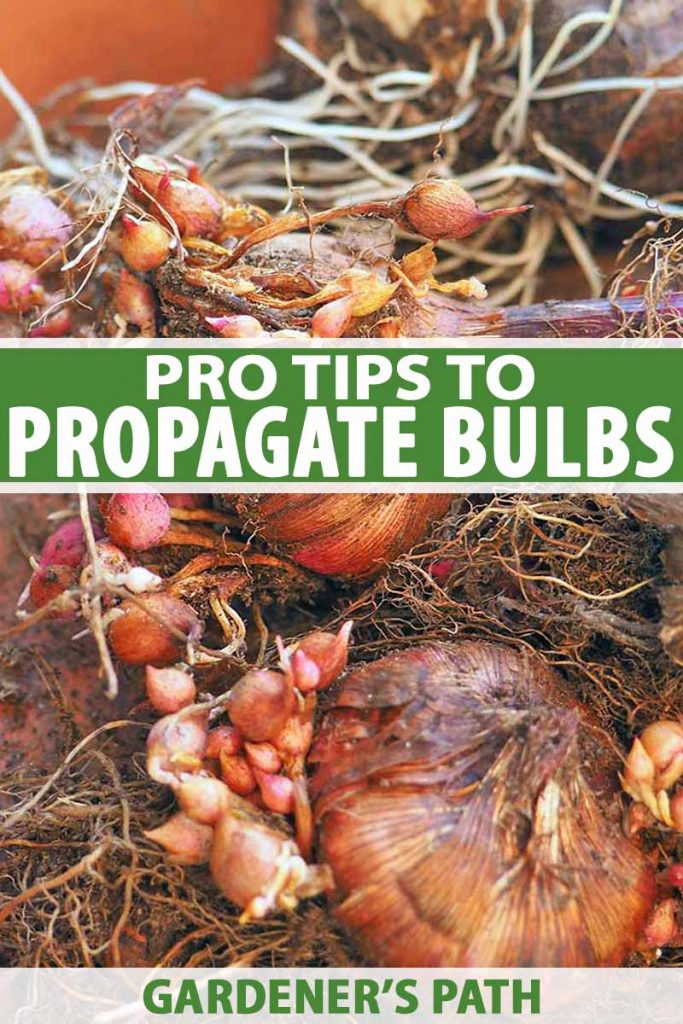
Multiplication for Masses of Blooms
Many bulbs will naturally self-propagate through the formation of offsets, bulbils, or seeds. Others need some human interaction to reproduce successfully, with the most common techniques being chipping, scaling, and scooping.
This requires a bit of attention and patience from the gardener, but the many new plants that will be produced as a result are well worth the effort. And because some new plantings can take anywhere from two to seven years to bloom, this is a practice that should become one of your regular autumn tasks. If you divide a few each year, you’ll have a never-ending supply of bloom-ready bulbs on hand to plant out when they’re wanted. Here’s the information we’re covering in this article: Let’s get to it!
The Various Types
A bulb is defined as a plant that contains everything needed for its entire lifecycle within an underground root structure that’s used to store nutrients.
Typically, these are perennials with periods of growth, flowering, seed setting, and dormancy as the topside growth dies completely back. They’re usually categorized into the following categories: true bulbs, corms, rhizomes, tubers, and tuberous roots. Let’s take a look at each!
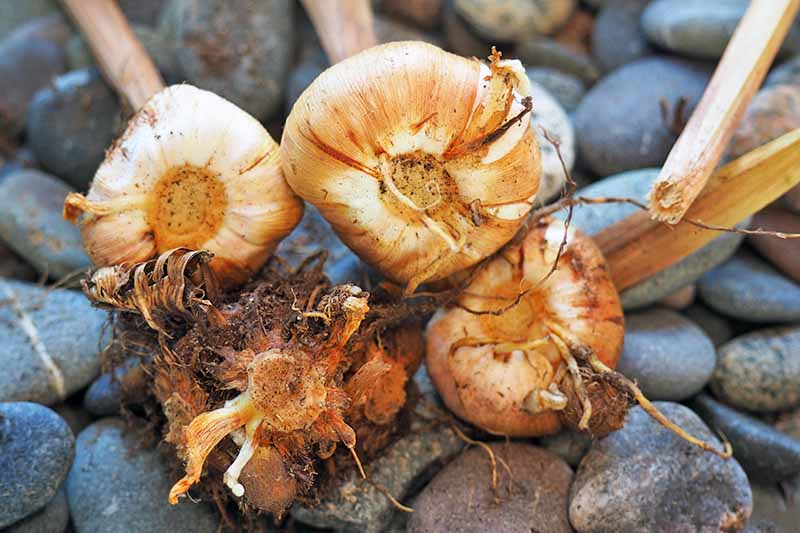
True Bulbs
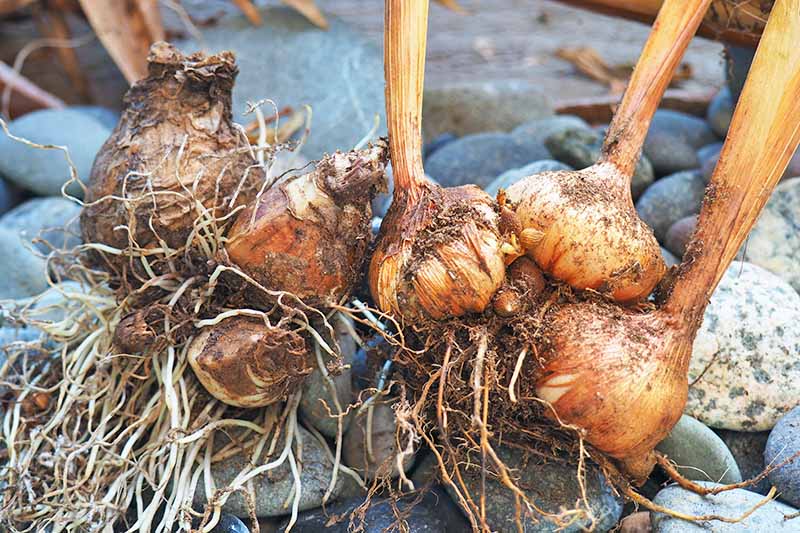
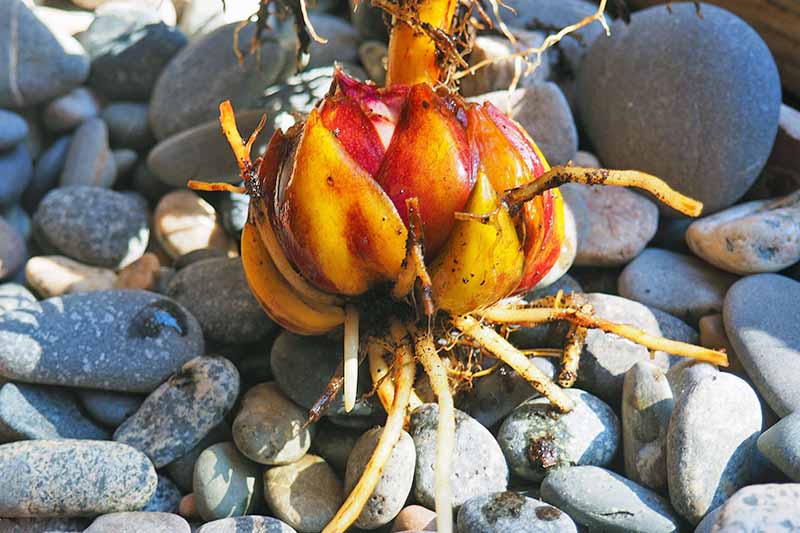
A “true” bulb has a basal plate on the bottom that roots grow from, plump scales that look like flat garlic cloves, a shoot that forms the flower and leaves, and lateral buds that develop into offsets or bulblets. Ones that have a tunic, or a paper-like covering, are known as tunicate bulbs. The tunic protects it from drying out. Examples of true tunicates are alliums, daffodils, hyacinths, muscari, and tulips. Those without a tunic are called imbricate bulbs. Imbricates need to be keep moist before planting to prevent the scales from drying out. Fritillaria and lilies are a few common types of imbricates. Find more tips on identifying bulb top and bottoms here.
Corms
Similar in function to the true type, a corm is an enlarged stem base that’s been adapted to act as a storage structure. When cut in half, the corm doesn’t have any visible storage rings as do the true bulbs. It also features a basal plate, papery tunic, and a pointed growing tip. Plants that use corms for energy storage include autumn crocus, spring crocus, and gladiolus.
Rhizomes
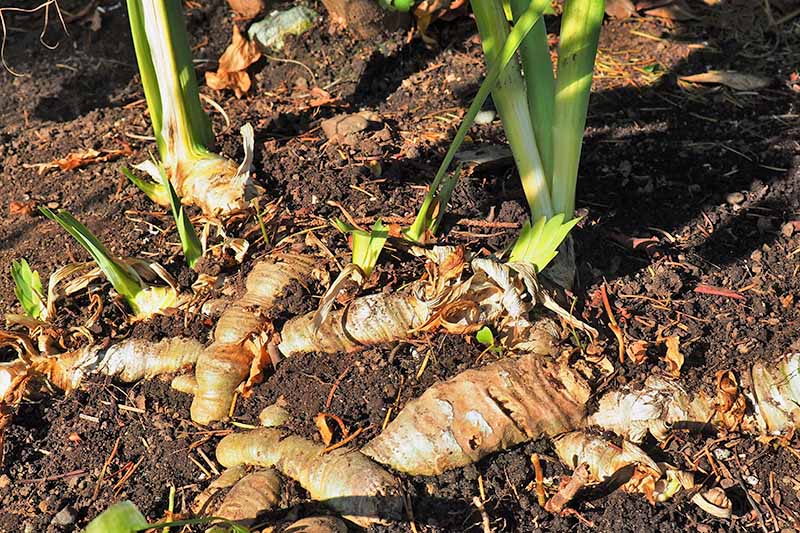
Rhizomes are different from the above in that they don’t have basal plates or tunics, and spread out horizontally under the soil surface rather than growing down. Lily of the valley and iris are common garden rhizomes.
Tubers and Tuberous Roots
Tubers are included in this category but they have a different structure, without a basal plate or a protective tunic. These includes anemones, caladiums, and potatoes. And tuberous roots, like dahlias, differ again. They have the same cycles and growth patterns as bulbs, with the structure of proper roots.
Propagation by Seed
One of the easiest propagation methods, seeds are collected from spent flower heads once they’ve dried out and opened for seed dispersal. However, reproduction from seed does not guarantee the new plant will be identical to the parent, particularly with hybridized cultivars. Pick dried flower heads and shake seeds onto a plate, then separate out the chaff. Toss the seeds in a light breeze to allow the chaff to float away, or gently blow away debris. Sow seeds on the surface of a light, loamy potting soil mix. Cover the seeds with a thin layer of sifted compost and top with a layer of fine sand. Place flats or pots in a cold frame, unheated greenhouse, or in a sheltered spot out of danger from heavy rains. Ensure the soil is kept moist but not wet. Depending on the plant, some seeds will germinate promptly, sending up a grass-like shoots, while others like to form roots first and then send up new leaves in the spring, after they’ve enjoyed a cold spell. Seedlings can be potted up in their second year, but you’ll have to be patient – some bulbs started from seed, such as tulips, can take as long as seven years before you’ll see blooms! Certain types will naturally self seed in the garden, but you’ll need to allow the seed heads to develop on the stem. Bulbous iris, crocus, and snowdrops will all self seed, but you need to be careful not to weed out their tender young shoots, which resemble blades of grass.
Division
Propagation is also possible via an array of different methods. Depending on the types that you have growing in the garden, their age, and other factors, one or more of the following techniques can be used. Read on to discover our tips and tricks for division via offsets, bulbils, scaling, chipping, and scooping.
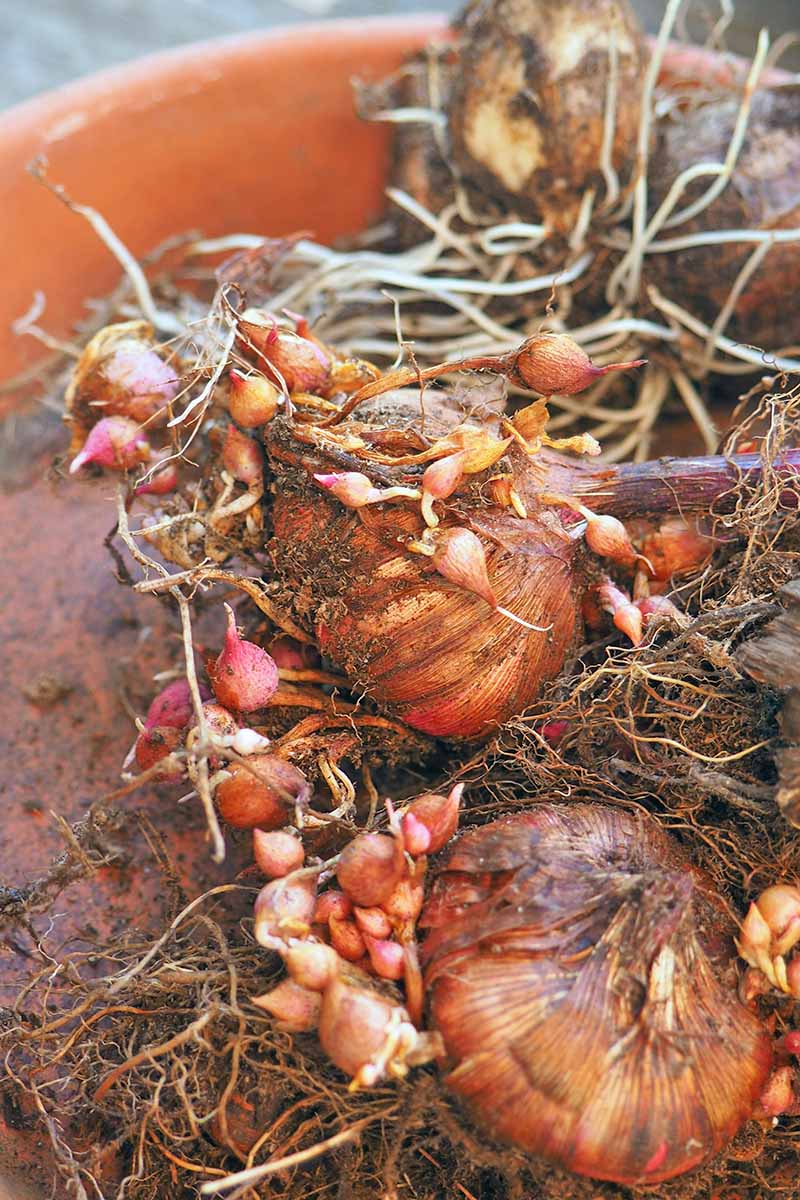
Offsets
Many varieties will reproduce with offsets, or baby bulbs, that grow alongside the mother. Offsets will be exactly the same as mother, making this method highly reliable for both hybridized cultivars and heirloom species.
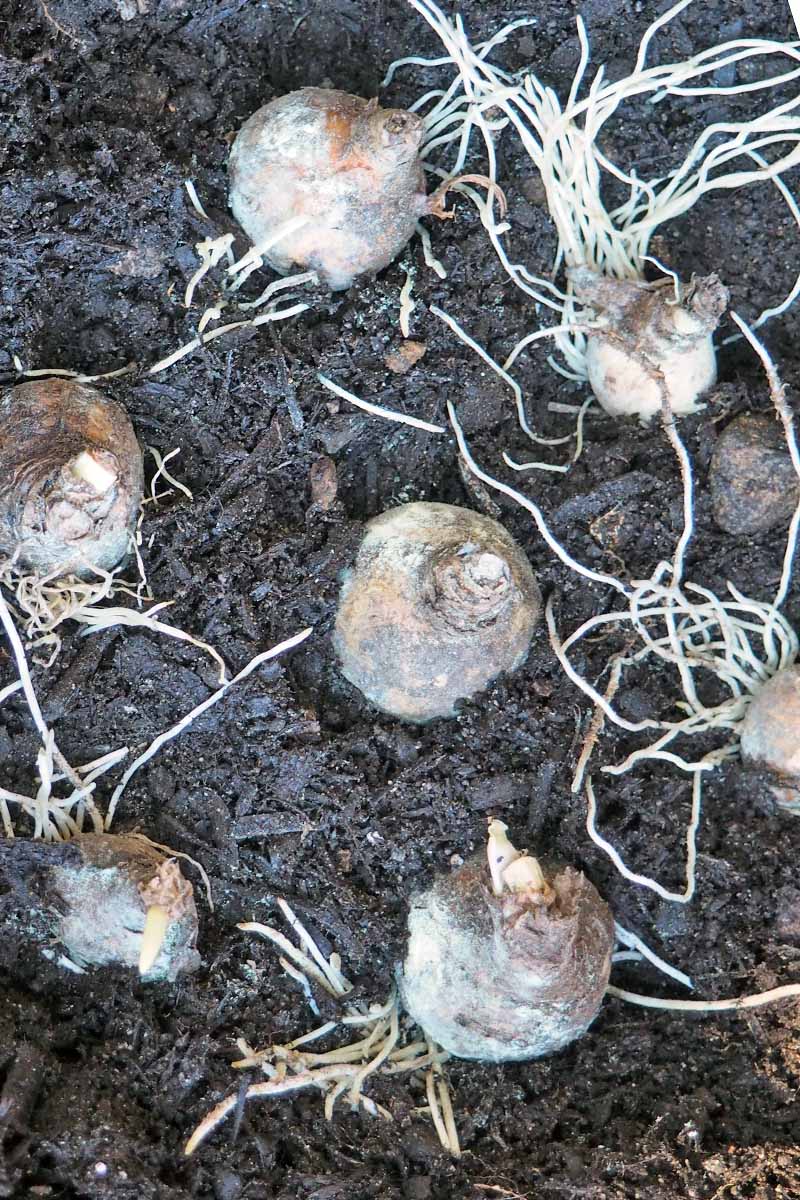
In the fall, after the foliage has died back, gently lift bulbs and detach the offsets, snapping or pulling them away from the parent. Pot up smaller ones in a rich soil amended with well-rotted compost, and place in a cold frame or sheltered spot in the garden, providing protection from winter cold if needed. Ensure the soil is moist, but not wet, and wait patiently until they’re large enough to plant in the garden. Smaller offsets may take 2-4 years before you’ll see a flower, but larger ones can be direct planted into the ground, with blooms likely the following growing season. When planting offsets, mix them in with mature bulbs to ensure a good display of blooms. Offset production can be encouraged by planting a stock (parent) bulb shallowly, or by notching the basal plate at the time of planting.
Scaling
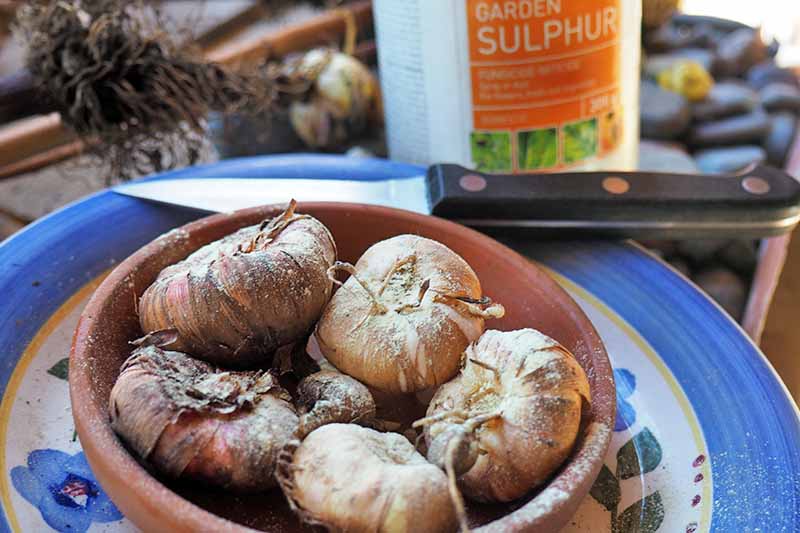
For true bulbs formed of multiple scales, like lilies and fritillaria, scaling is a good method for their propagation. This can be done before planting the parent bulb, or when lifting bulbs in autumn after their growing season is complete. Southern Ag Thiomyl Ornamental Systemic Fungicide, 2 Oz. Crocus, daffodils, gladiolus, and some lilies naturally produce offsets.
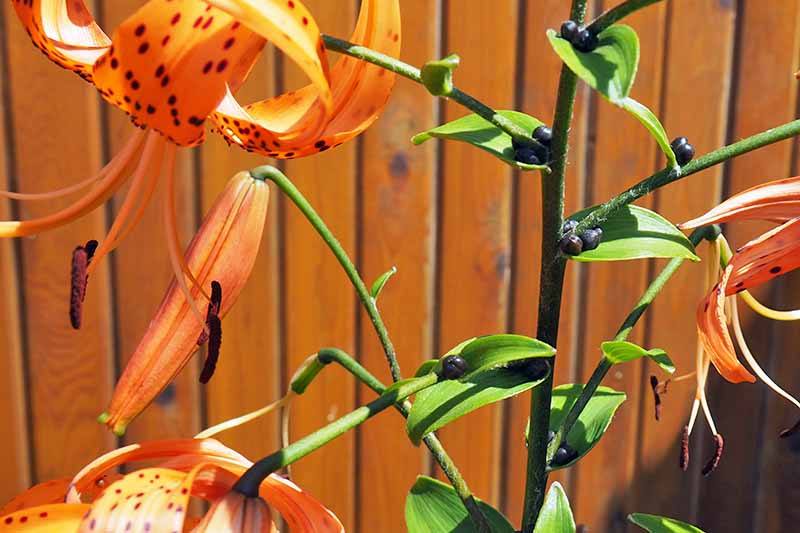
Bulbils
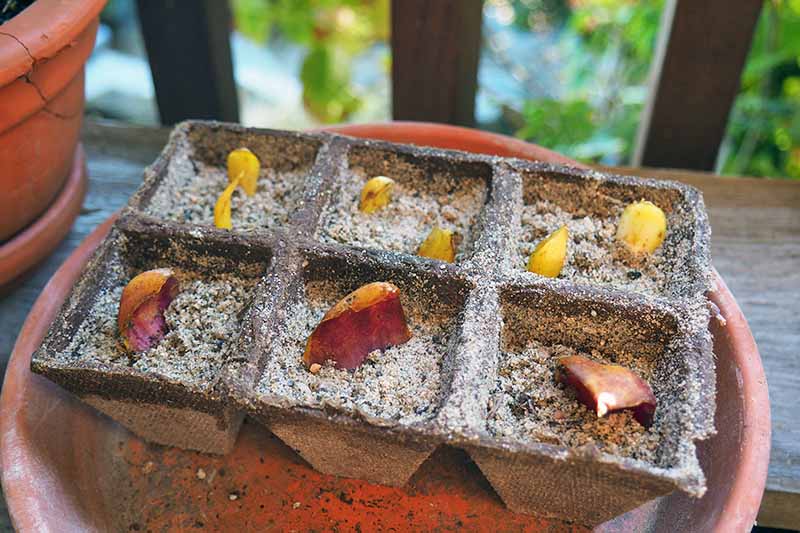
Bulbils form in the leaf axils of some lilies, including tiger and wild types. These are miniature bulbs that develop on the stem above ground, as opposed to bulblets which develop below ground on certain plant varieties. Detach bulbils when plump and ripe, then press into a pan or tray of rich, gritty soil amended with plenty of compost. Cover with 1/2 inch of soil and keep moist. Keep the pan in a sheltered, frost-free location over the winter, and plant out in large clumps the following autumn. As close to the base as possible, snap off 4-8 scales from a firm, plump bulb then dust the parent and scales with a fungicide such as garden sulfur. Press the base end firmly into a tray of sand so that each scale is standing upright. Cover with a plastic bag, fill with air, and seal. Store in a warm, dark location (around 65-70°F) for six weeks.
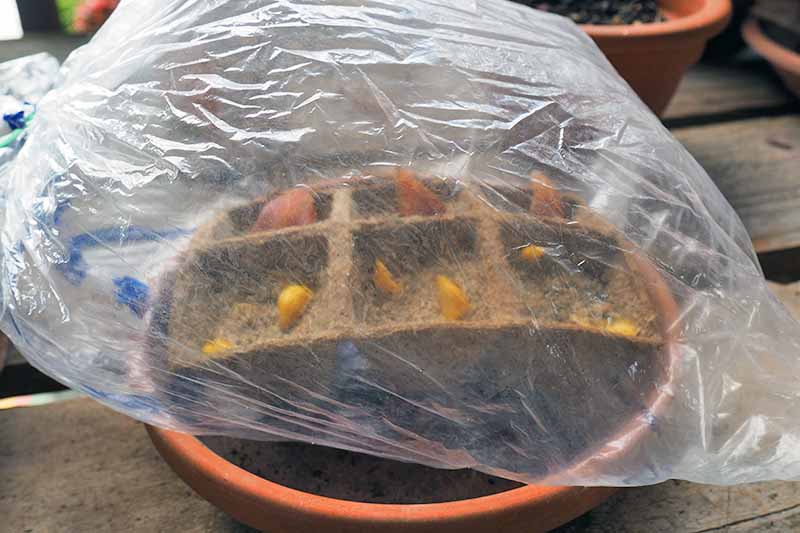
Alternately, make a mixture of 50:50 peat moss and perlite or vermiculite, and add water just to barely moisten. Place 2-4 inches of the mix in a plastic bag and lay down your scales. Shake the bag to cover the scales, then reposition them so they’re not touching. Fill the bag with air, then seal it. Store in a warm, dark location (around 65-70°F) for six weeks.
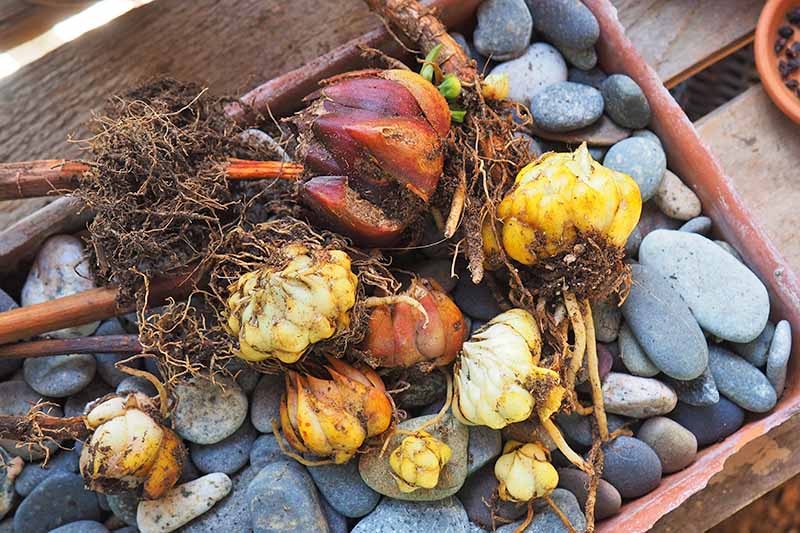
When bulblets have formed, discard any scales that have gone soft and plant the remaining bulblets with the scales in pots. Place in a cold frame or a sheltered, frost-free spot in the garden to overwinter, keeping the soil just moist. If winter temperatures in your region don’t fall below 40°F, place the scales in their plastic bag in the refrigerator for 6-12 weeks instead. Plant out in a nursery bed in the spring, spacing 4 inches apart, and in 2-3 years they’ll be producing blooms and ready for planting in the garden.
Chipping
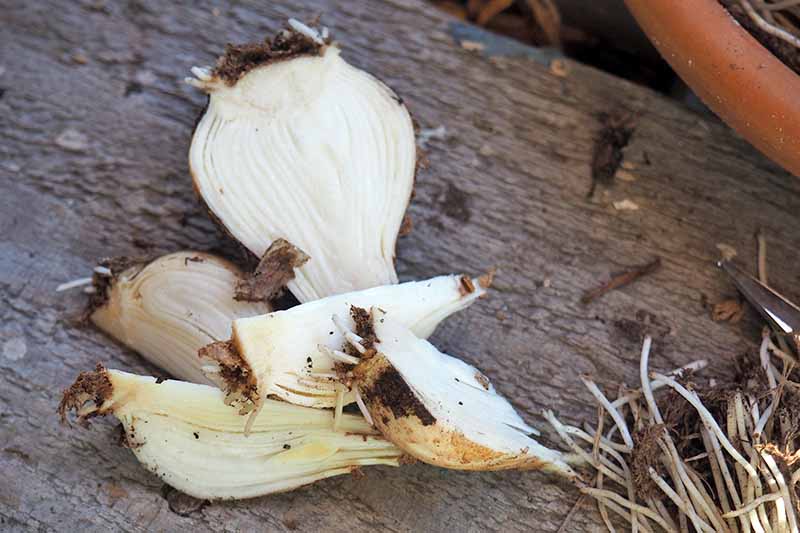
Chipping works well on plants including as alliums, amaryllis, daffodils, fritillaria, irises, and hyacinths. Use bulbs that are clean and dormant, removing any of the papery tunic and trimming any roots with sharp garden snips. Remove the top 1/3-1/2 of the growing tip and discard.
Invert so that the basal plate (the spot where the roots grow from) is on top, and with a sharp, sterile knife, cut the bulb in half. Continue to cut each section in half, ensuring each section has a piece of the basal plate attached, until you have 8-16 chips. Soak the chips in a systemic fungicide solution for 15-30 minutes, then drain on a rack for 12 hours – but don’t toss the fungicide solution.
Fill a pot with moisture-retaining peat moss, perlite, or vermiculite, then moisten with the fungicide solution, ensuring the planting medium is thoroughly moist but not wet. Press the chips into the perlite, basal plate down, then place the pot in a plastic bag. Fill the bag with air, then seal and label it with the date. Store in a dark, warm (65-70°F) location for approximately 12 weeks. Check periodically, ensuring the perlite remains moist, and removing any rotting chips if you notice them. While in storage, the layers of each chip will spread apart. Bulblets will form between the layers, just above the basal plate. Once formed, plant the bulblets into individual pots and place in a sheltered spot in the garden, ensuring the soil stays just moist. Provide protection against winter cold in a sheltered spot or cold frame, and plant into the garden the following autumn.
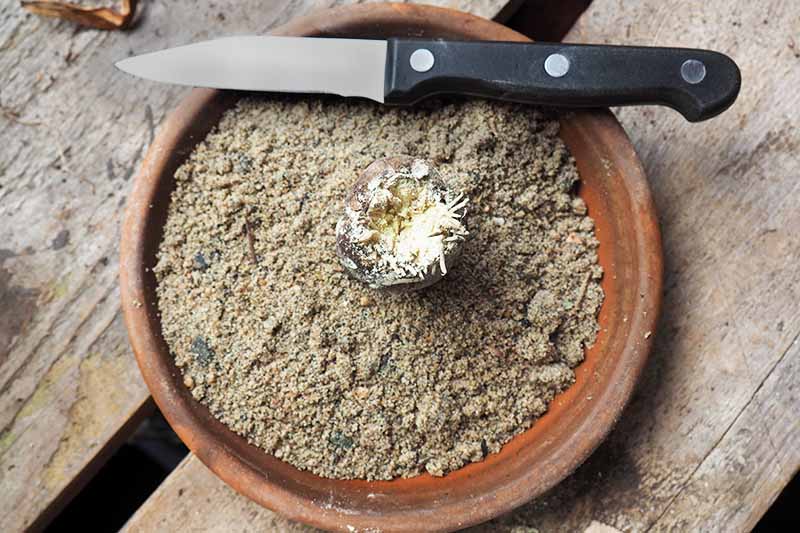
Scooping
Scooping is a method used primarily for hyacinths, and it must be done in the winter while they are dormant. Using a clean paring knife or a sharpened teaspoon, scoop out the center of the basal plate to a depth of up to 1/2 inch, taking care to leave the outer rim intact. Sprinkle the scooped end with fungicide powder, shaking off any excess. Add coarse sand to a tray and water to moisten, then press the bulbs into the sand upside down, with the scooped basal plate on top.
Place the tray in a warm (around 65-70°F), dark location, watering the sand periodically to keep it just moist. In approximately 12 weeks, bulblets will from in the scooped out section. When large enough to handle, gently detach them from the parent bulb, and pot up in individual containers in a mixture of sifted compost and fine sand, planting as you would for seeds.
Prolific Garden Beauty
While some bulbs might be considered a bit pricey, they’re well worth the cost for their outstanding beauty, delightful fragrance, and years of prolific multiplication in the garden. And for those species that are reluctant or slow to multiply on their own, you now have several methods to propagate them successfully at home. Remember to use a fungicide on any cut surfaces to prevent rot, and protect new plants from winter cold until they’re ready to be planted in the garden.
If you enjoy the gorgeous addition that these flowers make to the garden, be sure to read our other articles on how to grow them – like this one on hyacinths. Don’t forget to tell us about all of your propagation adventures in the comments below! Photos by Lorna Kring © Ask the Experts, LLC. ALL RIGHTS RESERVED. See our TOS for more details. Product photo via Southern Ag.