This unassuming bulb is used in a variety of cuisines around the world. It’s a staple in Sri Lanka, Iran, India, France, and Ethiopia, while in the US it’s something of a fine-dining delicacy. But it’s not so fancy you can’t grow it in your own garden. We link to vendors to help you find relevant products. If you buy from one of our links, we may earn a commission. In this guide, I’ll cover how the differences between the types of shallots and how to grow them in your garden. Ready to get started?
What Are Shallots?
Like ramps, leeks, and chives, shallots are species in the Allium genus, members of the Amaryllidaceae family. In some countries, including Australia, scallions are called “shallots.” But scallions, or green onions, aren’t shallots.
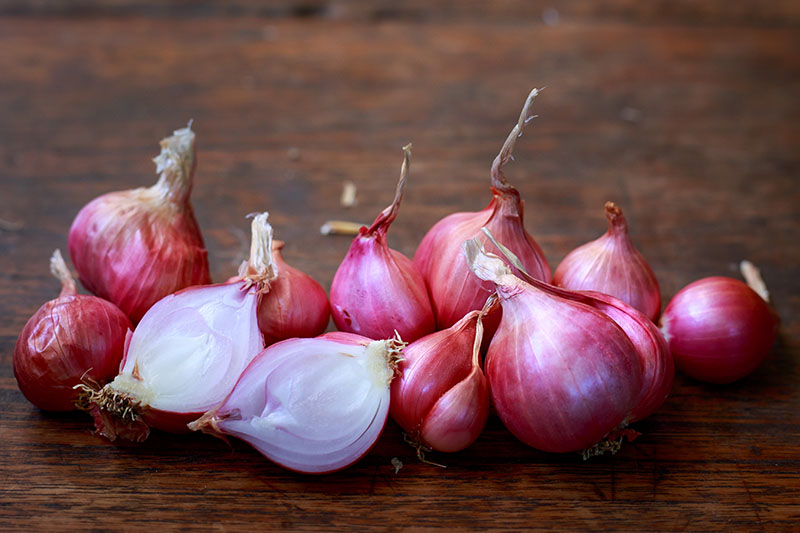
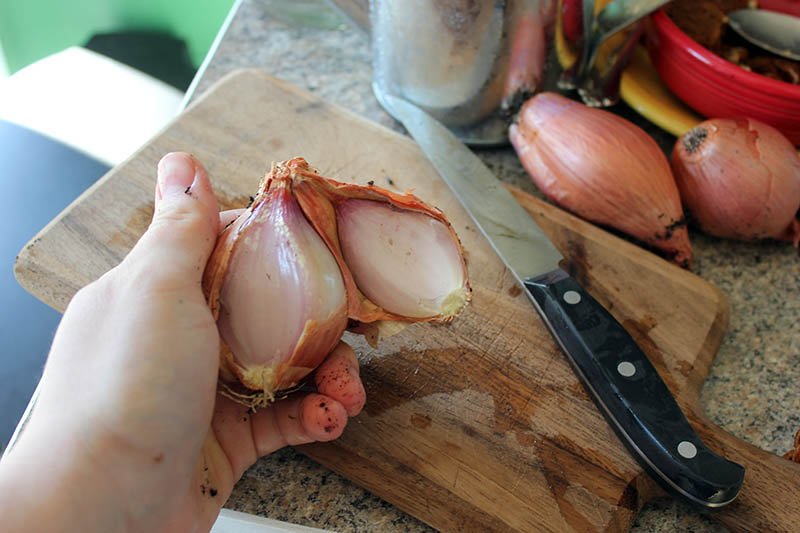
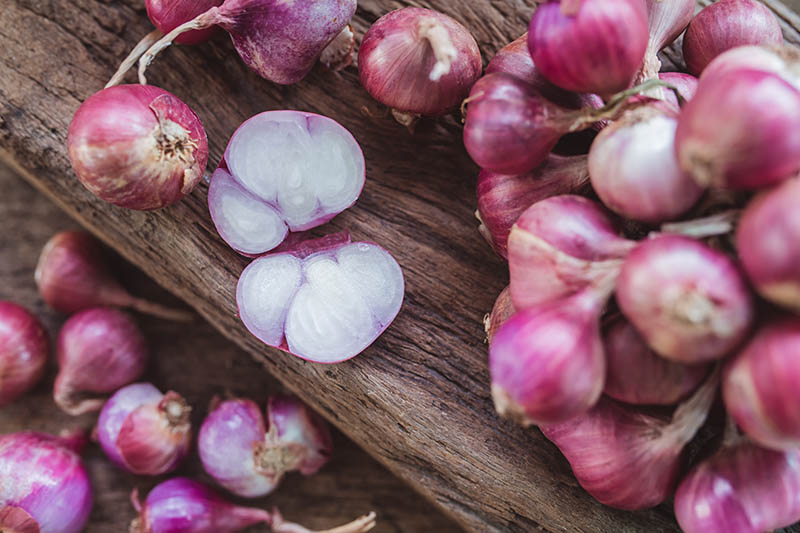
The two most well-known types of shallots are the French, A. oschaninii, and Dutch, A. cepa var. aggregatum – or a hybrid derived from one or both species. Another species, A. stipitatum, is known as the Persian shallot. It’s a type of drumstick allium that grows wild in parts of western Asia and is used in Iranian and Turkish cuisine. Similar to both onions and garlic, shallots are made up of bulbs sheathed in fine, papery skin. On the inside, they are layered like an onion, but these layers are separated into two to three garlic-like cloves.
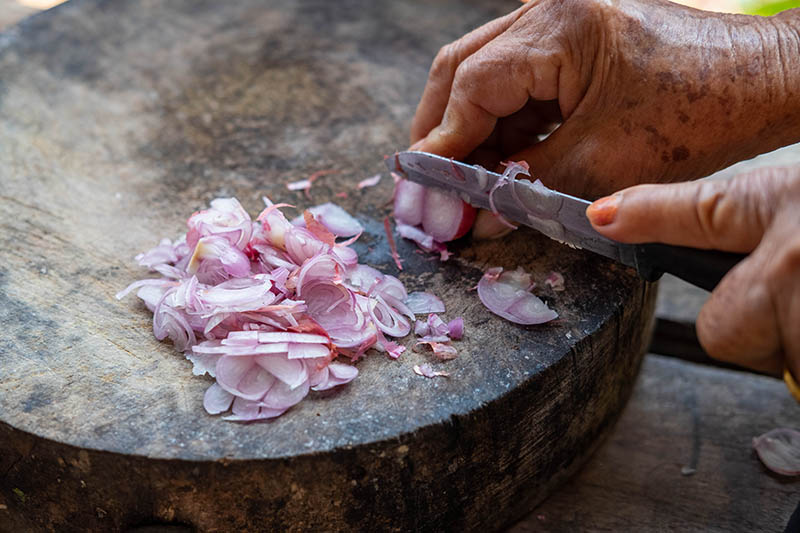
Flavorwise, a shallot has a pungent flavor, similar to an onion when it’s raw. But when it’s cooked, the shallot becomes mild, sweet, and rich, with a melt-in-your-mouth consistency. In the United States, this bulb is sometimes considered a bit of a specialty ingredient. It’s not grown commercially by large-scale operations in the US, and most shallots we find in grocery stores are imported from Europe or Mexico. But many independent farmers and market gardeners grow the tasty bulbs, so you can often find them at your local farmers market – or better still, why not grow your own? But first, let’s cover the two most common types and dig into the details of why these tasty bulbs are sometimes the subject of controversy.
French
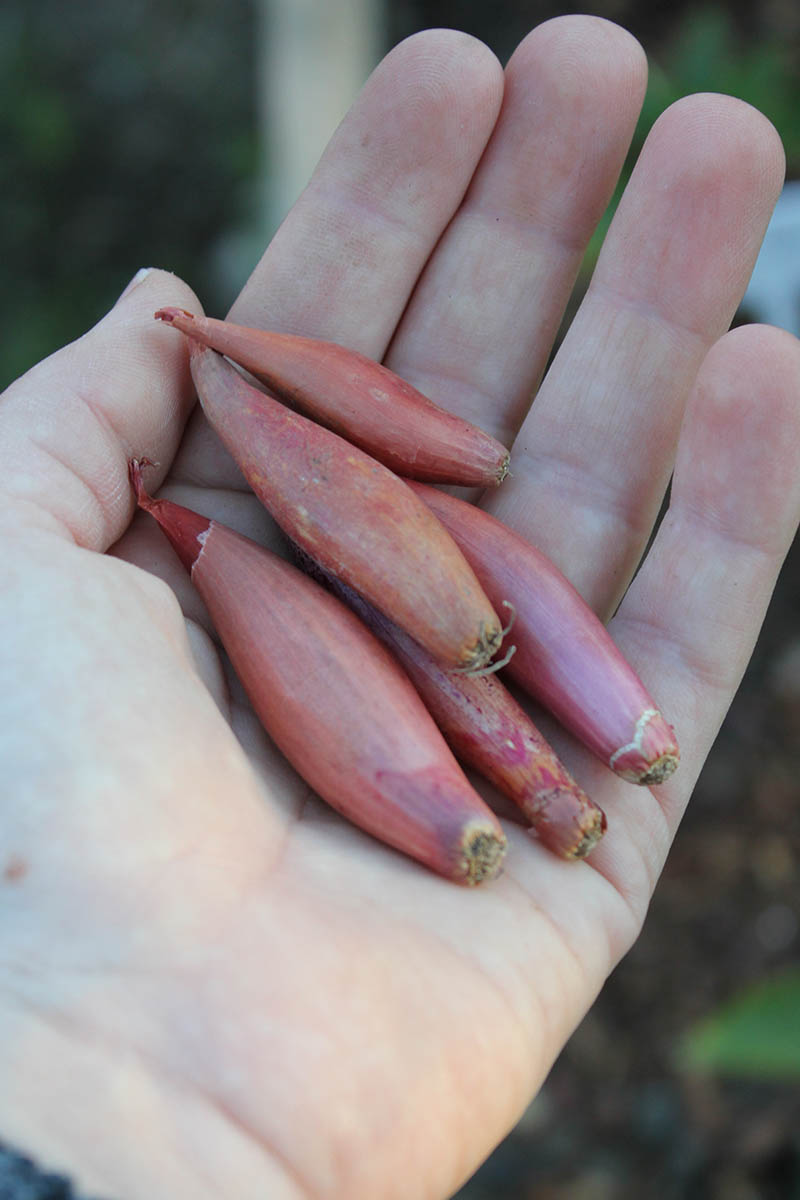
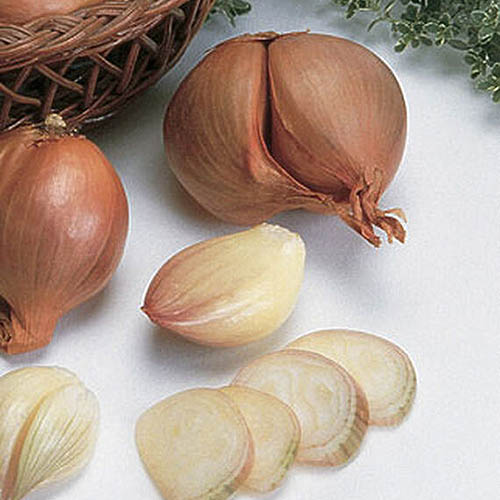
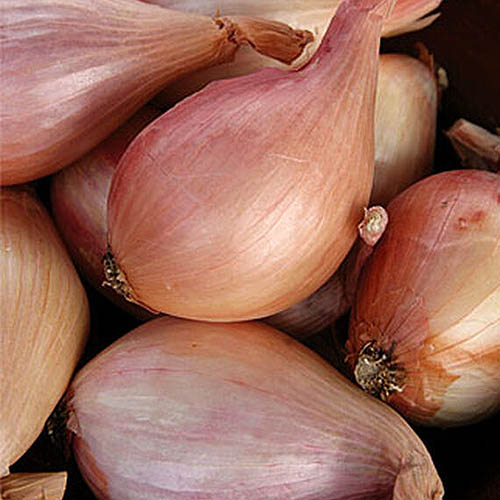
Due to the delights of an exchange student program, I have a French sister, and I’m wary of asking her about shallots. This is because French shallot growers tend to get enraged at the suggestion that anything other than a cultivar of A. oschaninii, should be labeled or considered a true shallot. French varieties rarely flower and set seed, so the only way to grow them is from last year’s sets – immature bulbs. Since they are always grown from sets, “true” French bulbs have a hard scar on the bottom with just a few hairs. This is an easy way to tell French cultivars apart from Dutch shallots, which are often grown from seed and will have a bunch of hairy roots at the base, like an onion. Other French hybrids derived from A. oschaninii and/or A. cepa var. aggregatum sport skin that’s coppery-red or gray. Notable cultivars include ‘Echalote Grise,’ ‘Longor,’ and ‘Pesandor.’ They’re expensive to purchase in France and the United States because they must be hand-planted and harvested, unlike Dutch shallots.
Dutch
Now we move on to these controversial bulbs, which the French consider to be mere onions. And they’re not wrong. The Dutch shallot, A. cepa var. aggregatum, is indeed an onion. Or, at least, it’s a botanical variety of the common onion, A. cepa.
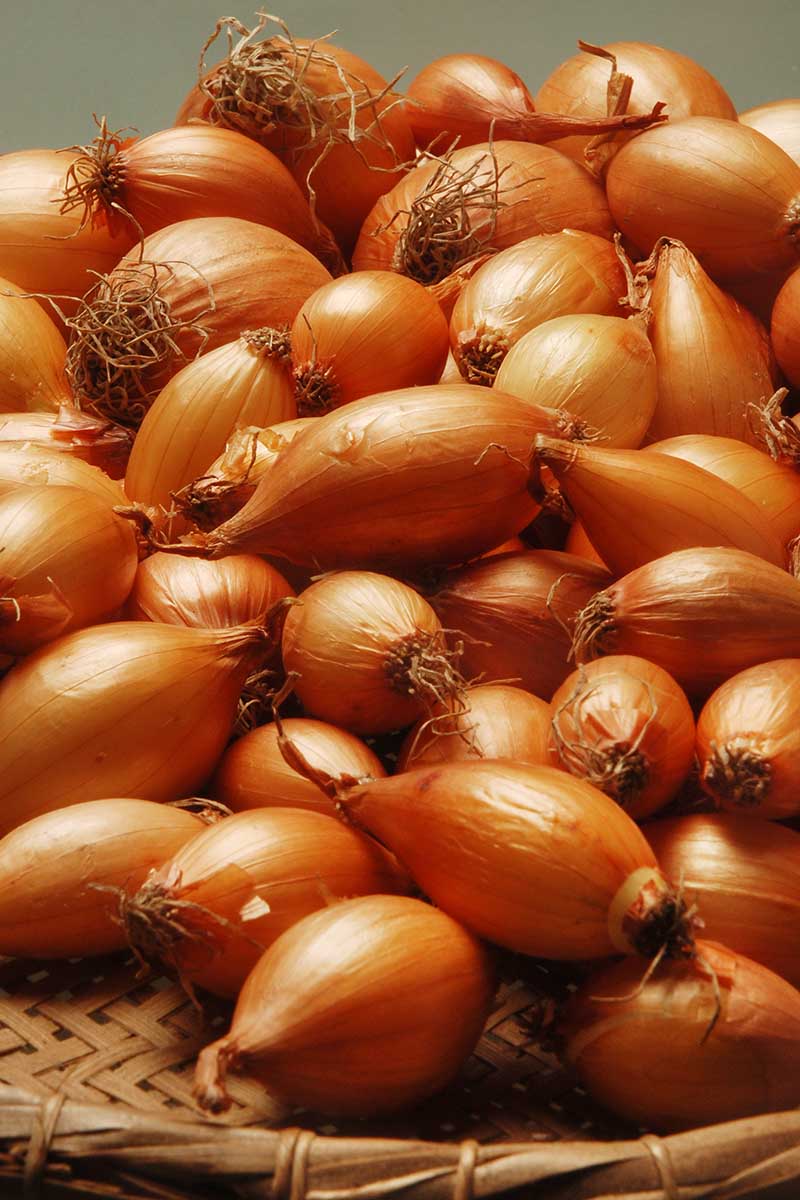
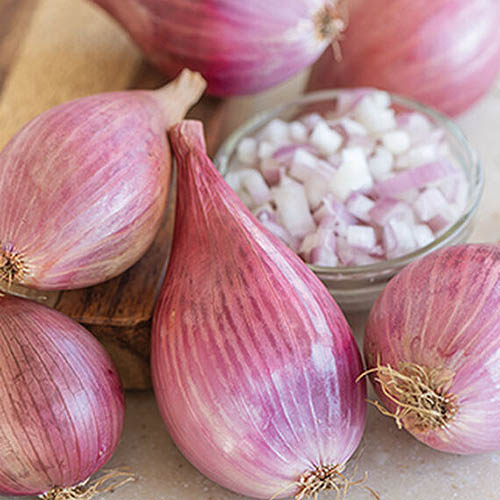
While these tasty bulbs are now considered a variety of onion, they used to be classified as their own species, A. ascalonicum. As a result, you’ll sometimes see their name written A. cepa var. ascalonicum. Instead of forming one large bulb, like the common onion, the shallot is a multiplier onion, sometimes called a “potato onion.” Each small bulb is called an “aggregate” bulb. The flavor is similar to that of French shallots but a bit sweeter, and the color is more often yellowish than red or copper-colored. The clusters of bulbs are usually larger and rounder compared to the French types that are elongated. And unlike French cultivars, A. cepa var. ascalonicum is easy to grow from both seed or sets, making this type less expensive to purchase at the grocery store.
Cultivation and History
Even though their common names suggest a French or Dutch origin, this is not the case. The exact origin of both these plants is shrouded in mystery, with a dash of confusion thrown in. The species A. oschaninii grows wild in south and central Asia.
A. cepa var. aggregatum also probably came from central Asia, but it does not appear to grow wild anywhere today. From Asia, both types of shallot made their way to India and then to Europe. The word “eschalot” first appeared in the Oxford English Dictionary in 1707. Apparently, ancient Greeks who enjoyed the bulb thought it originated in the ancient Canaanite city of Ashkelon, which is still a city today in modern-day Israel. Other spellings of Ashkelon include “Ashqelon” and “Ascalon.” From here came the Latin word ascalonia, or “onion from Ascalon,” which evolved into escalonia. The French translated that name as “eschaloigne” between the 8th and 14th centuries, and then it evolved into “eschalotte” in Middle French, and then “échalote,” which is the French word for “shallot” today. The English called it eschalot and then eventually shortened this to “shallot.” Quite the whirlwind trip through etymology, no? You can grow shallots in USDA Hardiness Zones 2-10, but planting time varies depending on where you live. If you’re in Zones 2-5, you’ll want to plant sets or sow seeds in early spring, two to four weeks before your average last frost date. Those in Zones 6-10 can plant their sets in the fall, after the first frost occurs, or in early spring.
Propagation
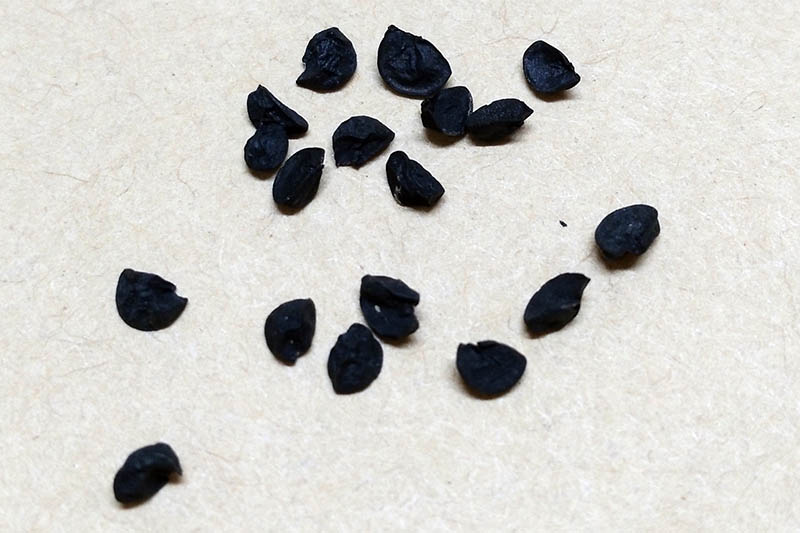
You can propagate both types of shallot from sets, and A. cepa var. aggregatum may also be started from seed. When they are started from seed, the plants produce just three to four bulbs per plant. But when you plant a bulb set in your garden, here’s what happens: a bundle of about eight to 12 bulbs will grow around the original. Before we get started, let me clear up something that has caused some confusion for me in the past. When you’re looking for seeds to plant, they should look a bit like little black raisins: These are seeds that come from the flowers that bloom at the top of the long scapes, the flower stalks. “Seed shallots,” on the other hand, refer to sets – immature bulbs that you plant out in the garden. Depending on where you buy them, they’ll either be in a cluster or separated into individual bulbs. If they are separated into individual bulbs, don’t make the mistake I did and break them apart before planting. Don’t do what I did the first time. I broke these ones apart based on a little research, and they failed to produce new growth. It’s probably because by breaking them apart, I removed the protective skin. But the French shallots I ordered after that, which were smaller and longer and which I did not break apart, started sprouting just days after I planted them. Whichever way you choose to grow them, be it from true seed or seed sets, here’s how to do it.
From Seed
There are two ways to grow eschalots from seed. You can either start seeds indoors eight to 10 weeks before your average last frost date, or sow them outdoors four weeks before your average last frost. Seed-grown shallots will produce up to four bulbs, and they’ll be ready for harvest 100-120 days after germination.
Indoor Sowing
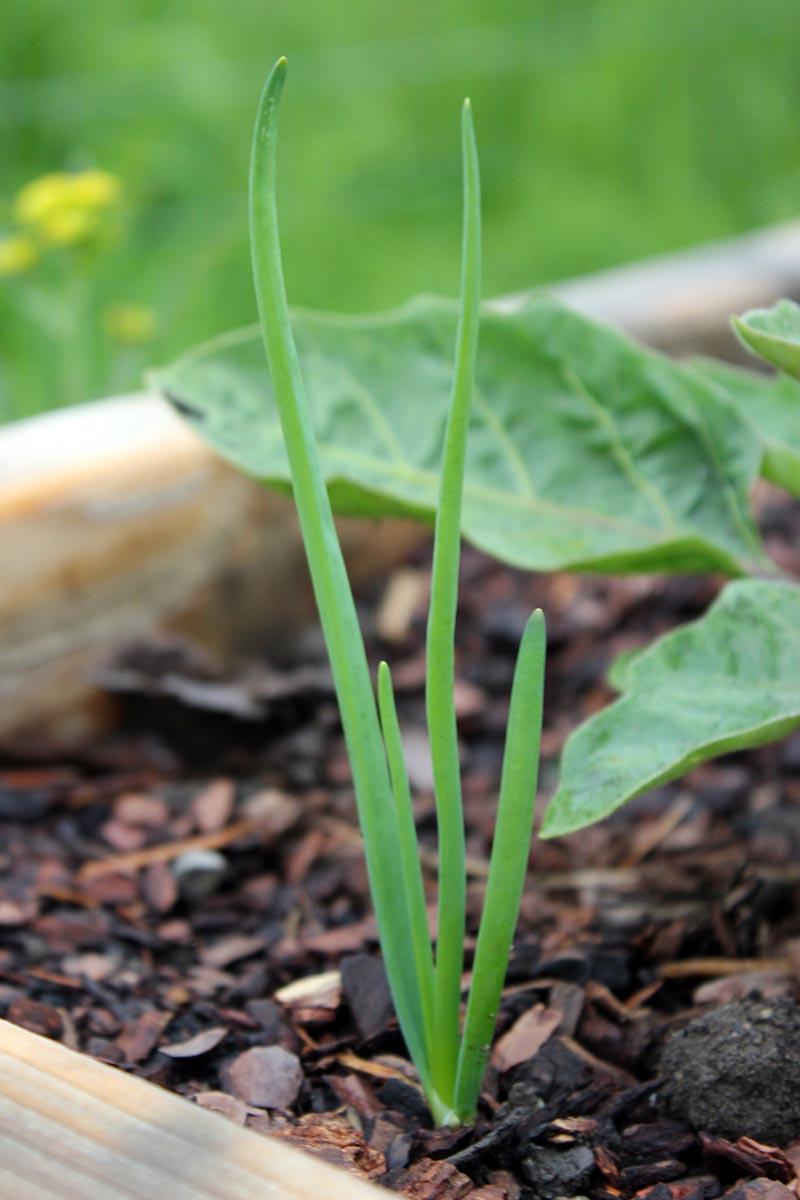
Eight to ten weeks before your average last frost date, fill seed trays with a good quality potting mix. Make one small, 1/2-inch-deep hole in each cell and drop two seeds inside. Cover with soil, spray with water, and set in a warm, sunny location. Keep seeds moist until germination, which will happen within 10-14 days. As soon as the seeds germinate, place seedlings in direct sunlight on a windowsill or under a grow light. Ideally, they will need six to eight hours of direct sunlight per day. When seedlings are two to three inches tall, thin them so there’s only one growing in each seed cell. You’ll transplant them out into the garden about eight weeks after germination, or when each plant is about five to six inches tall with at least three long, spindly leaves. To transplant, select a sunny location with loose, well-draining soil amended with well-rotted compost or manure, or mixed with a balanced 10-10-10 (NPK) fertilizer according to package instructions. Dig a hole the same size as the seed cell the plant grew in and set the seedling inside. Space each plant six to eight inches apart in rows 12 inches apart. Backfill with soil and water thoroughly. From now on, you’ll give these seedlings one inch of water per week.
Outdoor Sowing
Two to four weeks before the average last frost date in your area, direct sow seeds outdoors in a location that receives at least six to eight hours of sun and that has loose, well-draining soil. Amend with well-rotted manure or compost, or with a balanced 10-10-10 NPK fertilizer according to package instructions. Make holes that are just 1/2 inch deep and place two seeds inside each. Space holes six to eight inches apart, in rows 12 inches apart. Keep the soil evenly moist, but not waterlogged, until they germinate, and then slow watering to one inch per week. When seedlings are two to three inches tall, thin them to one plant every six to eight inches.
Growing from Sets
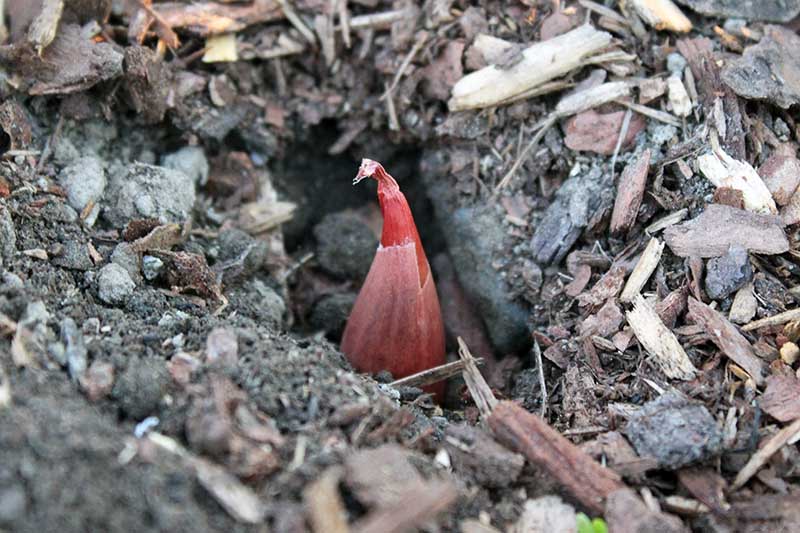
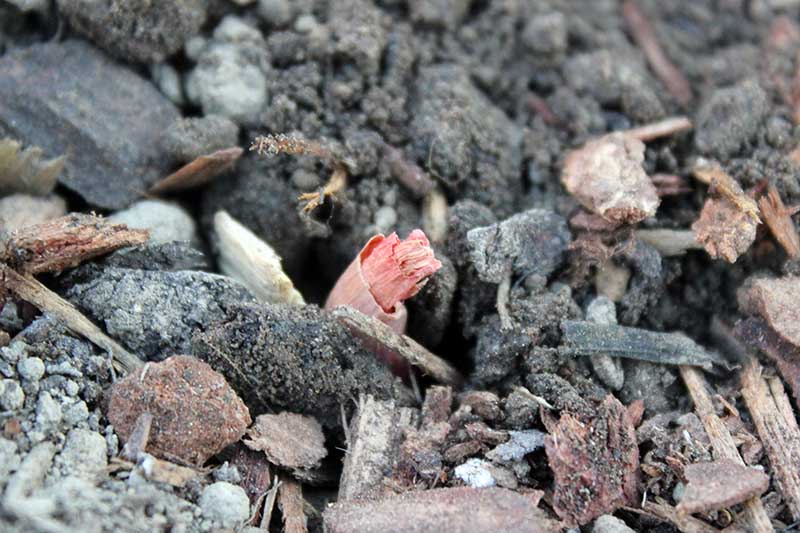
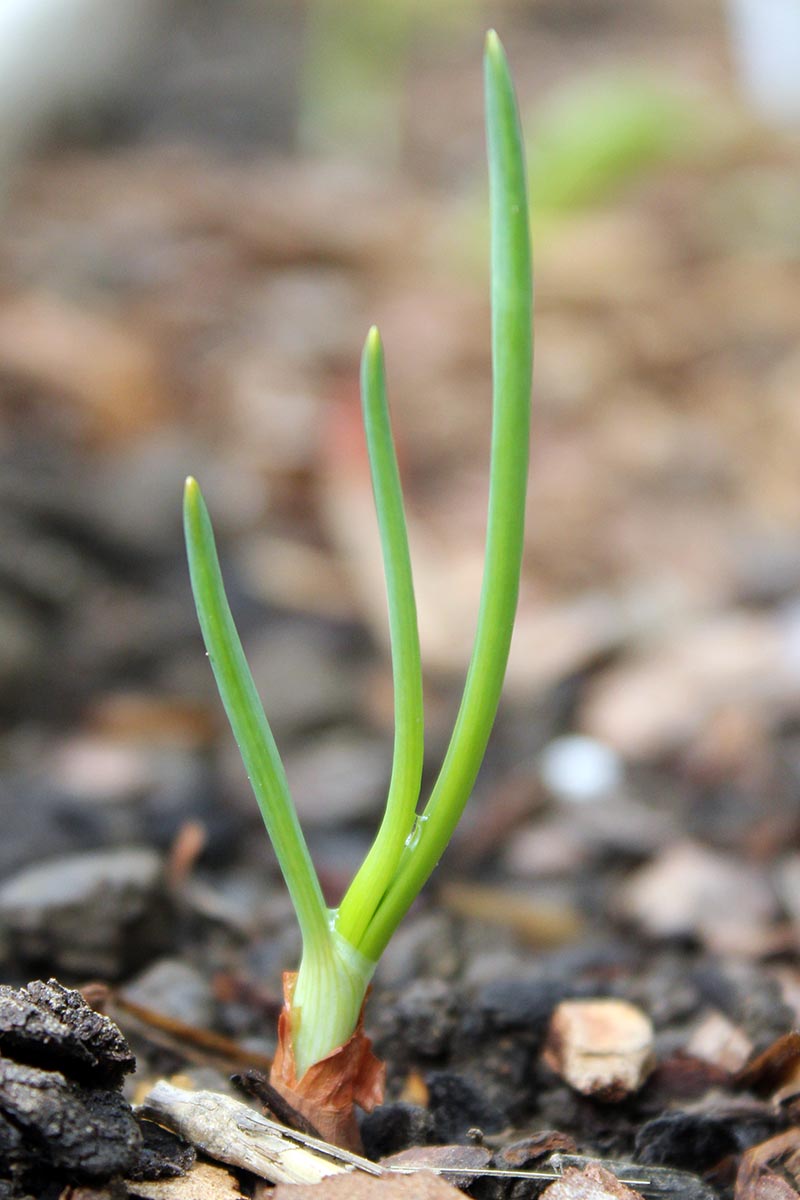
To grow these beauties from bulb sets, you’ll need to pick a location in the garden that gets six to eight hours of sun daily. If you live in Zones 2-5, you should plant them two to four weeks before your average last frost date in early spring. Gardeners in Zones 6-10 can also plant sets two to four weeks before the average last frost date in the spring, or they can plant the shallots in the fall, after the first frost occurs. The benefit to growing them during the mild winter is that the bulbs love the cold. They’ll grow bigger and tastier if they are allowed to grow a little, then go dormant after the first freeze, and then reemerge the following spring. It’s easy to plant sets. Carefully separate the bulbs before planting, but make sure you don’t make my mistake and start butchering the bulb into individual cloves! The shallots need their protective layer of skin to be intact, to prevent the bulbs from rotting. Amend the soil with 10-10-10 NPK fertilizer, or well-rotted compost or manure. Dig a hole the same depth as the bulb and place it inside, scarred side down. Backfill with soil, covering all but the very tip of the bulb, and water thoroughly. You’ll want to give the bulbs just an inch of water each week, so they are provided with consistent moisture but don’t get soggy enough to start rotting. Within a few days, you’ll see green shoots popping up. If you put your bulbs in the ground in the spring, clusters of eight or more bulbs will be ready for harvest in 100-120 days. Fall-planted bulbs take a bit longer to mature because growth will slow over the cold winter months, but they will be bigger and heartier. You can harvest fall-planted shallots about seven to nine months after you sow them.
How to Grow
Shallots grow best in loose, organically-rich, well-draining soil with a pH of 6.0-7.0. You can conduct a soil test to determine the pH and nutrient levels of your soil and amend accordingly. Due to their shallow root system, it’s crucial to keep the area around them weed-free. They’ll need one inch of water per week and will benefit from an application of 10-10-10 NPK liquid fertilizer every three to four weeks. Alternatively, you can use bone meal and water-soluble kelp powder, according to package instructions. This will give the plants an appropriate dose of nitrogen, phosphorus, and potassium. That’s what I do, and my shallots love it. To protect fall-planted shallots during the winter, you can apply a layer of organic mulch, such as straw or wood chips, around each plant. You can also do this with spring-planted sets or seeds if you want to use it as a barrier against weeds. Aside from these simple steps, there’s not much you need to do to keep your eschalots happy until harvest time.
Growing Tips
Provide plants with one inch of water per week Fertilize every three to four weeks with 10-10-10 NPK or a mixture of bone meal and kelp powder Mulch around the bulbs to keep them free from weeds and protected from harsh weather
Cultivars to Select
I’ve chosen my three favorite cultivars to share with you here: one French, and two Dutch varieties. Shallots are generally pest resistant, typically only falling prey to thrips or onion maggots.
‘Davidor’ The wine-colored skins and creamy flesh hint at ‘Davidor’s full-bodied flavor, ideal for use in a range of fine dishes. You can find packets of 200 seeds available at Burpee.
Dutch Yellow
Even though the French don’t consider ‘Dutch Yellow’ to be a true shallot, it’s an expensive find at any grocery store. Plus, the flavor is sweet and delicately rich, so why not grow them at home?
‘Dutch Yellow’ The two-inch round bulbs feature yellow skin and pale flesh. They mature in 90 to 120 days. You can find bags of 10 sets available at Burpee.
French Red
Are you looking for a classic eschalot to light up all sorts of French-inspired dishes? Then ‘French Red’ is the cultivar for you. With reddish skin and flesh and a sweet-pungent flavor, this cultivar won’t disappoint.
‘French Red’ The small, slender, one- to two-inch bulbs mature in 120 days. Find bags of 10 sets each available from Burpee.
Managing Pests and Disease
The best way to prevent disease is to avoid planting your shallots in the same area where any other Allium species have been planted in the past three years.
Pests
It’s easy to identify both major pests. Onion thrips (Thrips tabaci) look like tiny grains of rice. They’ll appear on the leaves and munch away, weakening the plant, but they won’t usually disturb the growing bulb. To get rid of thrips, you can spray the leaves with insecticidal soap or neem oil according to package instructions. Onion maggots (Delia antiqua), on the other hand, are terrible news for the bulbs and root systems. They gnaw on the bulbs, and you often won’t even notice the damage until later, when the leaves become stunted and turn brown. If you see the little white maggots on the soil surface, or slim brown flies hovering around your crops, remove the infected plants and release beneficial Steinernema feltiae (Sf) nematodes into the soil, according to package instructions. This can help save the surrounding plants from becoming infected and eliminate the fungus from the soil for future plantings.
NemAttack Pro™ Sf Beneficial Nematodes You can find a pack of 10 million, suitable for spreading on a 3,200-square-foot patch of garden, available from Arbico Organics. Larger package sizes are available as well.
Disease
While only a few pests bug our gourmet Alliums, there are a number of diseases that can weaken or kill your crops:
Pink Root
If you notice that your plants look stunted or your seedlings are turning brown, pull a plant and check the roots for traces of pink. This is the most visible symptom of pink root, a disease caused by the fungus Phoma terrestris. Overly wet, waterlogged soil provides the perfect environment for this fungus to thrive, so make sure to avoid overwatering and plant in soil that drains well. In very rainy conditions, you may want to consider covering your shallots with a row cover to avoid oversaturation if a period of heavy rain is in the forecast.
RootShield Biological Fungicide If pink root takes hold, it’s incurable. Remove infected plants and add a biological fungicide like RootShield to the soil, available from Arbico Organics.
Purple Blotch
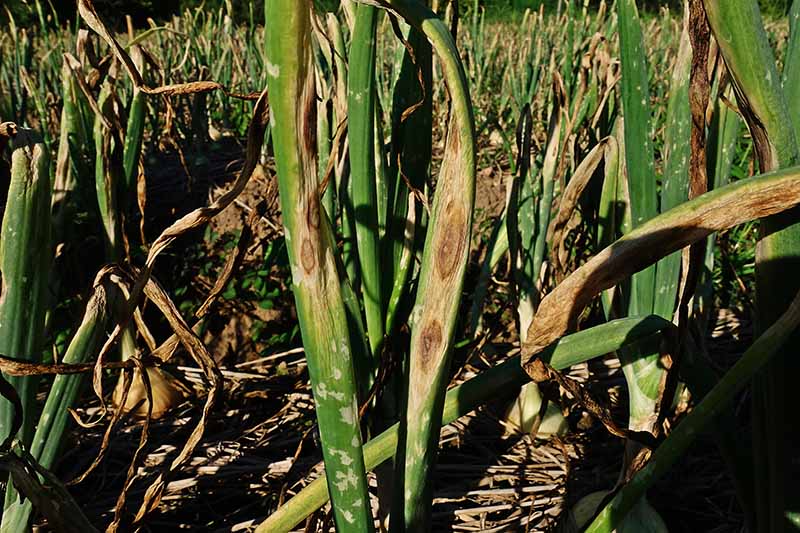
Have you seen small, oval, pale-brown lesions on the leaves? Or have they already progressed to large, purplish-brown splotches?
If this is the case, your plant may be infected with purple blotch, caused by the fungus Alternaria porri. While this disease doesn’t necessarily render bulbs inedible, it can eventually kill all the foliage, causing the plant to stop growing. The best way to prevent purple blotch is to avoid watering the foliage, irrigate only at the soil level, and spray a copper-based fungicide on the leaves the moment you see signs of infection.
White Rot
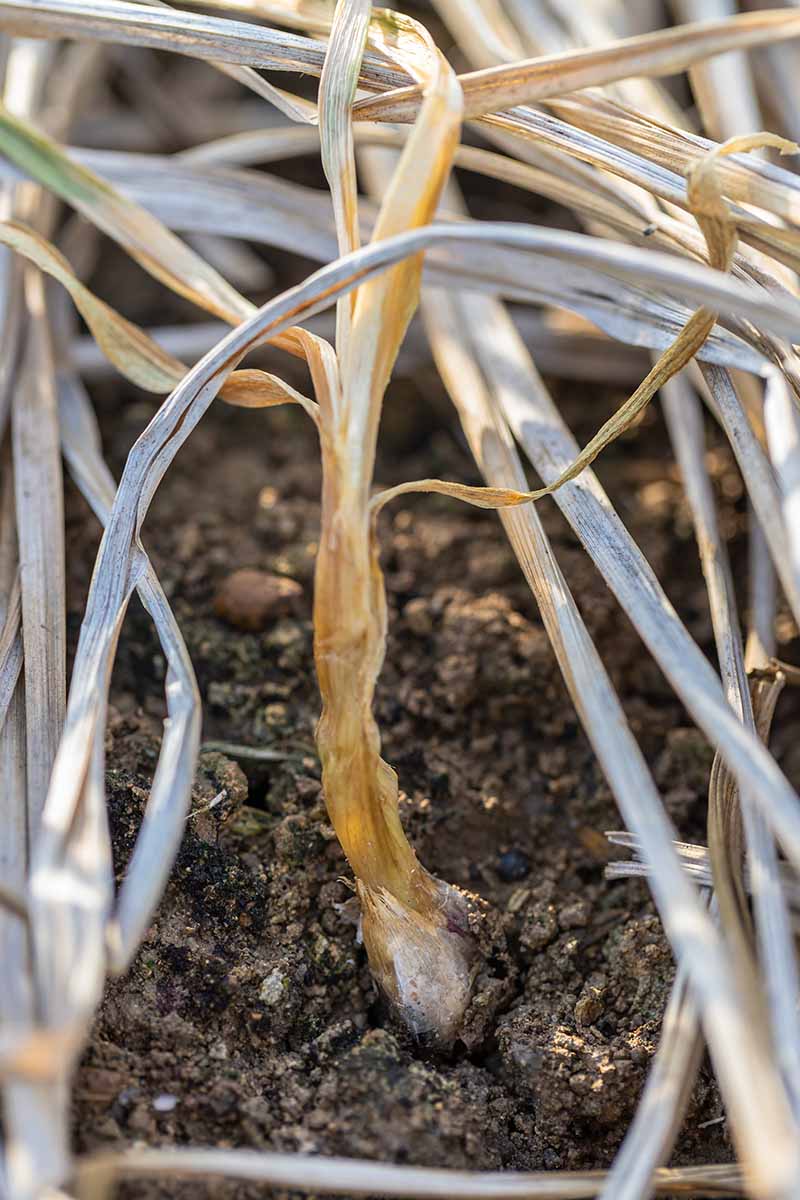
If the leaves begin to turn yellow prematurely and the plant stops growing, take a closer look at the bulb area. Do you see fuzzy white mold at the base of the plant?
If so, your Allium may be suffering from white rot, caused by the fungus Sclerotium cepivorum. This disease can destroy your entire crop and it may remain in the soil for up to 20 years. If you have an outbreak of white rot, don’t plant any Allium crops there until you’re 20 years older. That’s going to be a long wait… Alternatively, you can remove the infected soil and dispose of it somewhere that it can’t infect anything ever again. Start a fungicide rotation plan to treat the surrounding area and refill the area with fresh soil, also treated with fungicide.
Harvesting
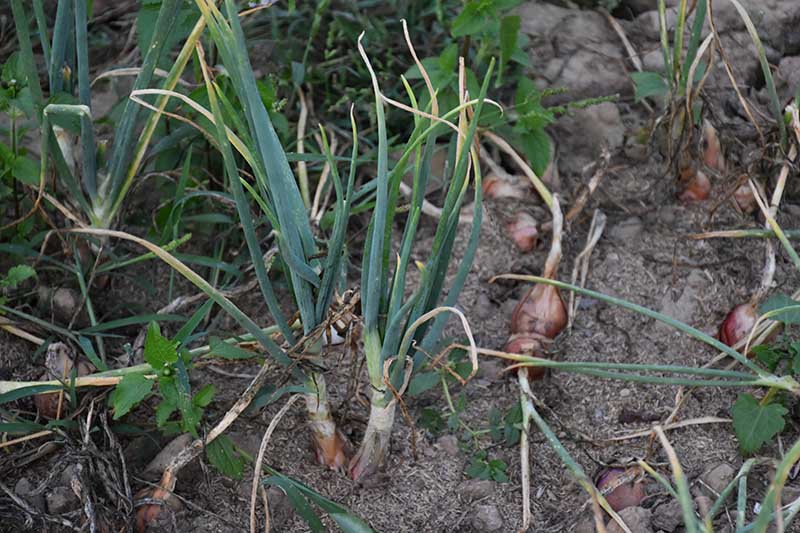
Harvest time will depend on when you planted your seeds or sets. In the late summer, for spring-planted sets or seed, or in late spring for fall-planted sets, the tops will start to turn yellow and dry out.
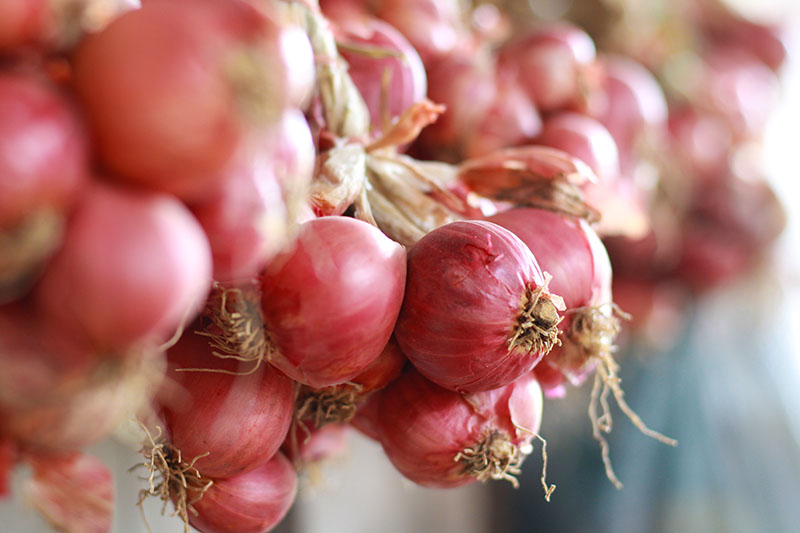
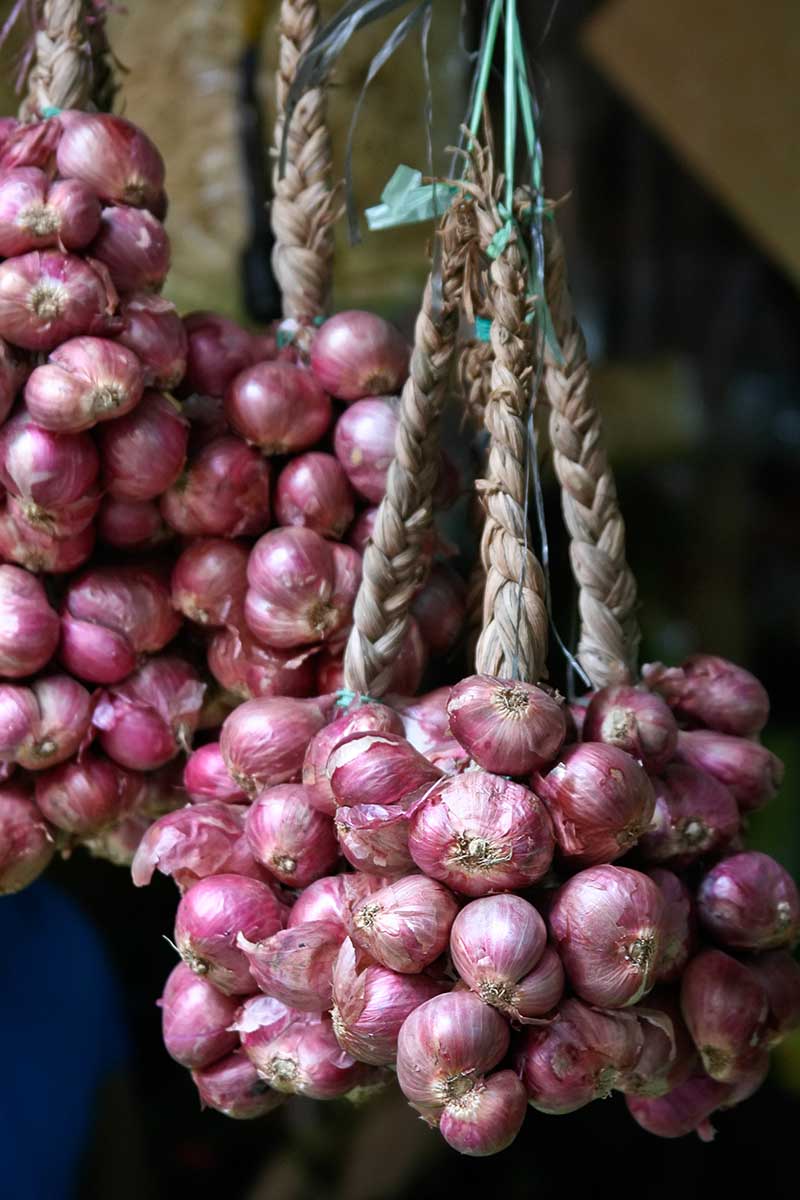
At this time, decrease watering to just 1/2 inch per week. When most of the top parts of the foliage are yellow, it’s time to harvest. Gently tug them out of the ground, one at a time. Braid the tops together and hang the braided clump to dry in a sheltered, warm spot.
After a week, remove the dried foliage and store the bulbs in mesh bags. Place in a cool, dry location and you can store them for about six months. You can also set some aside to replant next spring or fall. Learn more about how to harvest shallots in this guide.
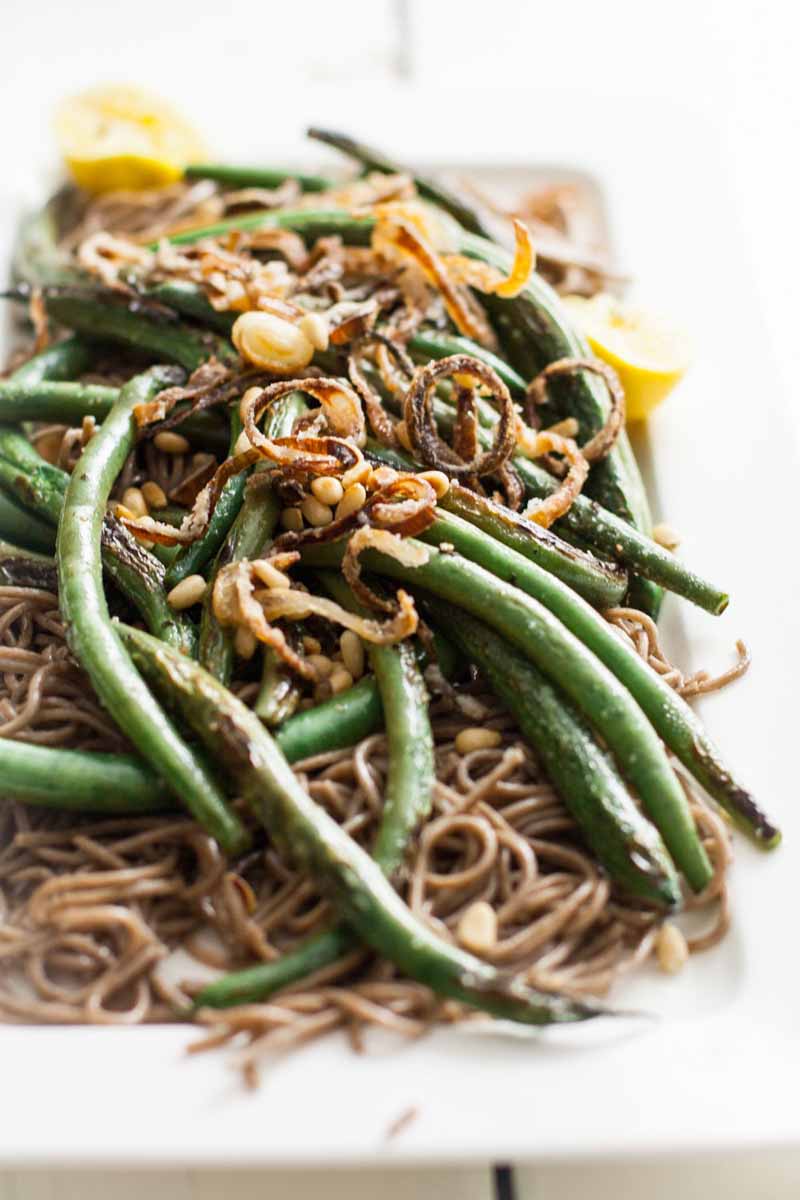
Recipes and Cooking Ideas
Now we come to the best part: dreaming about all the ways we can enjoy these tasty bulbs! One of my most favorite ways to enjoy my homegrown harvest is with this recipe for green beans and soba noodles with crispy shallots, which you can find over at our sister site, Foodal. Another top contender is this simple, wholesome dish of lentils sauteed with shallots and topped with strawberries and goat cheese, also from Foodal. Yum!
Quick Reference Growing Guide
Stylishly Sweet and Simple
While they might intimidate you with their prominence on fancy cooking shows, shallots are really quite humble.
They’re relatively easy to grow and ever so rewarding, with their delicious flavor and long shelf life. Are you growing shallots? Tell us your stories or ask us your questions in the comments section below. And remember to check out these articles next to learn more about growing alliums in your garden:
How to Grow and Care for Bulb Onions How to Grow and Harvest Bunching Onions How to Grow Chives from Seed
Photos by Laura Melchor © Ask the Experts, LLC. ALL RIGHTS RESERVED. See our TOS for more details. Product photos via Arbico Organics and Burpee. Uncredited photos: Shutterstock.