Here in southern Vermont, the snow and ice continue to fall even after the spring equinox makes her remarkable debut, seemingly teasing those of us who are itching to get their hands into the soil and begin the process of waking up the earth. Planting onions and other alliums at the very end of the winter is one of the best cures for spring fever. We link to vendors to help you find relevant products. If you buy from one of our links, we may earn a commission.
Geography Determines Your Growing Season
In some parts of the country, it is possible to have a consecutive growing season, without the threat of freezing temperatures or frost. In those places, there is no need to begin seeds indoors to escape the bitter winter cold.
A gardener or farmer can sow directly into the ground with confidence that the seeds will be warm enough to germinate and grow. If you happen to live in a region where your winters are mild enough that you don’t ever get a frost or freezing temperatures, you are very lucky! For me, gardening sometimes feels like a race against the clock to see who will win, me or those drastic New England seasons.
PART I: Starting Seedlings Indoors
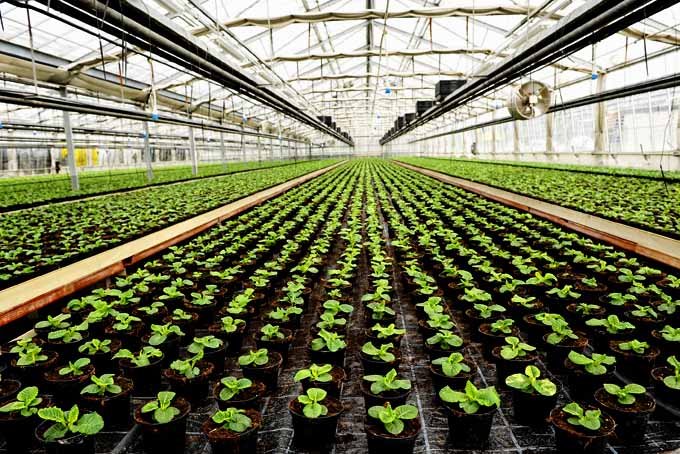
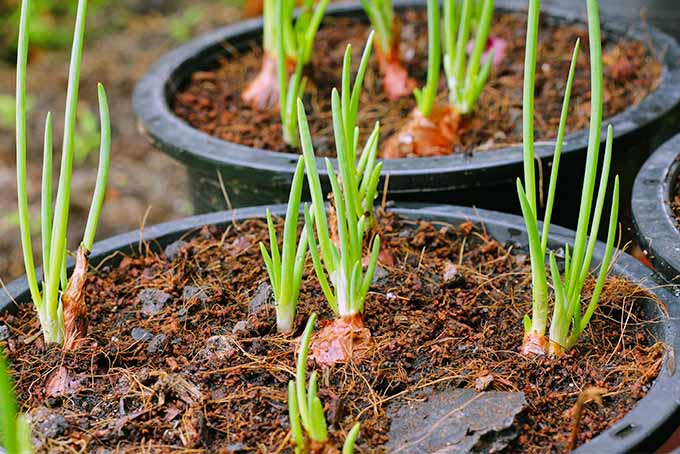
If you are like me and you have a winter that freezes the ground and produces frigid temperatures, you might start your onions inside from seed. Start your seeds about 8 to 10 weeks before your last frost. If you choose this method, there are a few additional steps you must take to ensure a healthy and high-yielding onion crop. You will need a few extra things like seeding trays, and a good soil mixture. I find it to be a very adaptable growing medium that can handle a variety of plants and vegetable seeds. Extra Strength 72 Cell and Flat Tray by Bootstrap Farmer Regarding seed trays, they are easy to find at your local home center or online. You can buy traditional 6-packs, starting 2-4 seeds in each cell. Or you can buy plug flat trays. You can also use recycled containers from salad mixes or plastic take-home containers from your local deli, planting in rows of 7 to 10 seeds each. The choice is yours. Fill your chosen trays with moistened soil, tamping down the soil just a bit. Seed 2-4 seeds in each cell. Water and set aside in a warm, well-ventilated location. I have a greenhouse attached to the south side of my house, which enables me to have beautiful morning and afternoon light that keeps the soil warm and the seeds happy. If you’re interested in building your own greenhouse, check out these DIY project ideas from some of our favorite bloggers. If you don’t have space for a greenhouse, consider buying plastic dome lids like the one pictured above to place over your trays, or using a seedling warming mat to help with propagation. Water whenever you notice that the soil looks dry. When you notice germination, you need to be sure that your onions get enough light from that point on. Ideally, onions would like to have 12 hours of light and 12 hours of darkness per day. During the winter when the sun isn’t particularly strong here in New England, I use fluorescent lights to keep my seedlings happy and healthy. Be sure to remove the dome and the warming mat, since your plants are now ready to grow on their own. They produce a cool white spectrum light that is more conducive to the vegetative state of the plant, rather than a warmer yellow light reserved for flowering. Once germinated, onions tend to grow quickly beneath lights. They will emerge from the soil and grow tall very fast, so it is important to monitor them. When you notice that the onion seedlings are about 5 inches tall, take a sharp, clean pair of scissors and cut the tops off, leaving about 2 inches of the plant. Cutting the tops will make your seedlings stronger and thicker, which will be beneficial when you are transplanting them into your garden. Also note that you can use these trimmings in salads, soups, or other dishes. They are delicious!
Hardening Off the Seedlings
Between propagation and transplanting lies hardening off. It is imperative to make sure that your seedlings will be strong enough to withstand lower temperatures, wind, and less frequent watering. Now is the time to move your trays outdoors for periods of time, exposing them to the elements.
Put your plants outside in a protected spot during periods of more pleasant weather if possible, starting with a few hours during a sunny day and extending to an entire day. Do this for about a week, just before you are ready to transplant.
PART II: Planting Without Danger of Frost
If you do have mild seasons that allow for direct seeding without the threat of frozen ground or torrential rains and cold temperatures, then you don’t have to worry about starting onions indoors. Skip the seeds and consider planting onion sets instead. Stargazer Perennials Mixed Onion Sets Onion sets are smaller onion bulbs that were planted very thickly and never thinned out while they grew, to produce smaller, more hearty onion bulbs. Harvested at the end of the summer and dried for approximately four weeks or more, these bulbs are stored until needed for the next growing season, when they will be ready for you to plant in your garden.
If you are going to be planting at all, figure out what hardiness zone you live in and plant accordingly. Based on your location, hardiness zones indicate when you can confidently begin to plant outdoors so that the plants will be able to withstand the minimum average temperature. Knowing your hardiness zone is extremely beneficial for a gardener because it takes a lot of the guesswork out of the equation. Take the time to acquaint yourself with this USDA plant hardiness zone map to avoid making any mistakes in timing.
PART III: Planting Directly into the Soil or Transplanting from Indoors
Whether you are direct seeding onion sets or transplanting your seedlings, planting onions outside is a relatively simple process.
Transplant outdoors about 2-4 weeks after your last frost date. You will need a few tools, such as:
Spade or shovel Stakes or long sturdy sticks Twine or thin rope Onion sets or seedlings
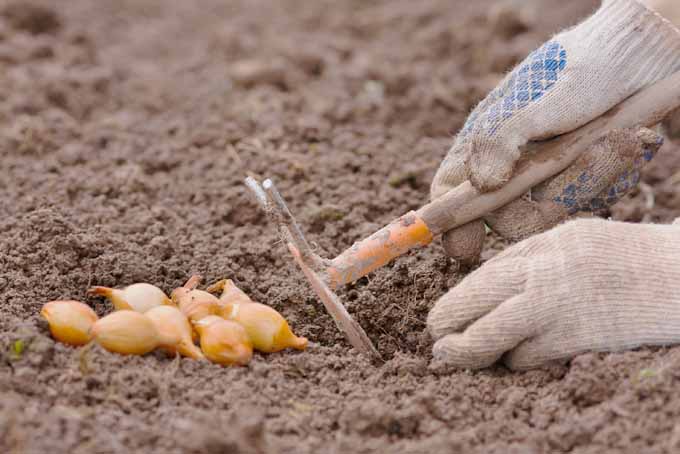
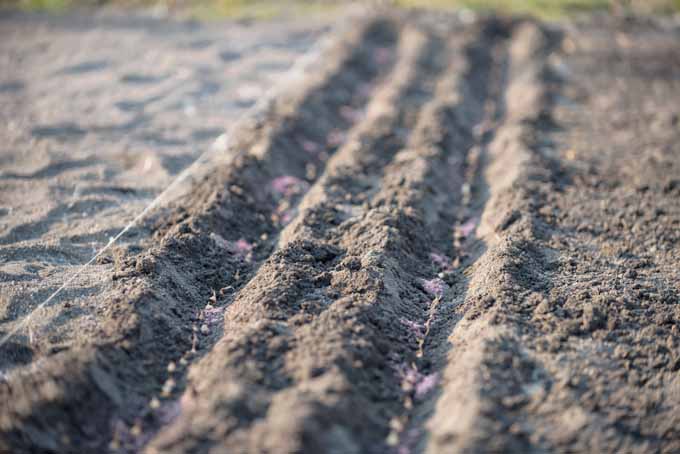
Though it’s not required, I prefer planting in rows. Decide how many rows you need to accommodate the number of onions you want to plant. You’ll want to allow for about 4-6 inches between seedlings, and 12-18 inches between rows. Put a stake in the ground at either end of where you plan to place each row. Attach a piece of twine to a stick on one end, stretch it to the stick at the other end of the row, and anchor it. The string and the stakes make it easy to dig a nice straight row, just by using the twine as a guideline.
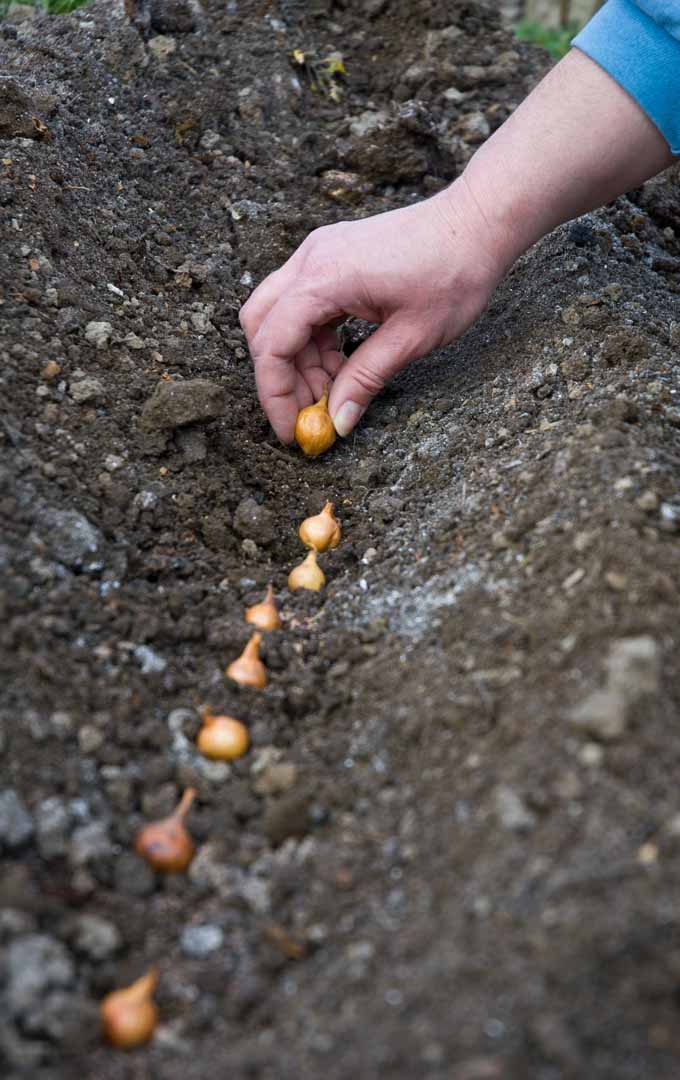
Using a shovel or any other tool that will dig into the dirt, make your rows about 1-2 inches deep. Sometimes I just bend down and drag my hand along the dirt just below each line of string, using my fingers to make a row. Sometimes I use the tip of a long-handled shovel or a spade. See what works best for you. Sow directly into the soil, planting each onion set about 1 inch deep and 4 to 6 inches away from the next onion in the row. And be sure to leave 12 to 18 inches of space between each row to ensure a proper growing environment. If you are transplanting your onion seedlings, you can plant 2-3 seedlings in a clump together, or you can choose to separate them and plant each one individually.
Some gardeners like to keep a few together, as they feel that it helps with growth. Others prefer to keep each one on its own. That’s your choice. Do what feels right, and keep notes on your successes and failures from year to year. I group my seedlings together in groups of 2 or 3 and have great results.
Once you’ve planted all of the onions, cover up the rows with soil and tamp down lightly. Don’t push too hard. Everything that you plant in the garden needs some breathing room, even seeds. It’s a good idea to put the planting date on your tags as well, so that you have an idea of how long germination actually takes.
In addition to this, I keep a gardening journal from year to year, where I write down all of my planting dates. This is a great resource to have at the beginning of each growing season.
Part IV: Growing and Maintenance
Watering
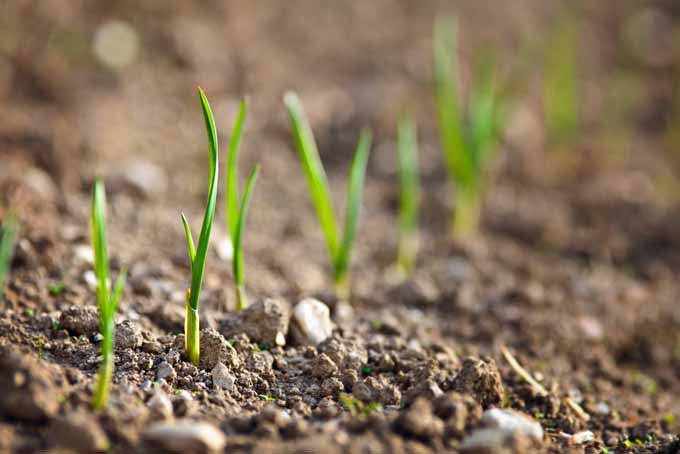
Once planted, water your onions. You don’t need to soak them. You just want to make sure that the soil is dark and moist. Water daily after you’ve planted until you see germination. After that, you can change your watering schedule to once or twice a week, depending upon how hot and sunny it is where you live. If it is very dry, you’ll need to continue watering every day.
Just Add Mulch
Once they’re tall enough, you can place a thick layer of mulch around the plants to help retain moisture, and also to reduce the amount of weeding you will need to do. I use straw because it locks moisture in and is seasoned enough so that I don’t have to worry about any insects that might be living in the medium, as you might find in hay grass. The last thing you want at this stage is to have to deal with unwanted insect visitors!
Keep in mind that onions need much more time to grow than some other crops, so you will be watering and weeding them quite a bit. Anything you can do to save time and be more efficient in your garden is a good thing.
Fertilize
Onions crave nitrogen, so fertilizing every two weeks with a high nitrogen fertilizer until the bulbs begin to form is vital. Dr. Earth 9000 Nitro Big Fertilizer Fertilization is a critical part of the process. Without enough nitrogen, your onions will not grow properly. I mix my liquid fertilizer with water in a watering can and water each row by hand. It’s a rather meditative process, and I love doing it!
Continue to fertilize every two weeks until a few weeks before harvest. Onions appreciate the nitrogen throughout their entire growing cycle.
How Long Until Harvest?
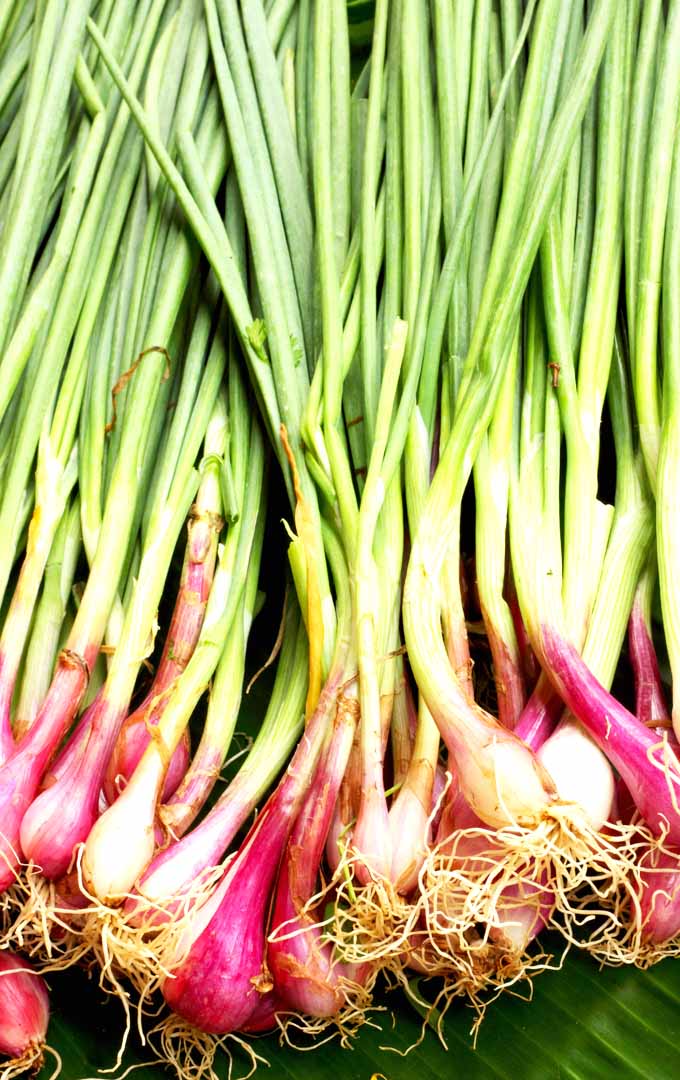
Onions take about 3 to 4 months from planting to harvest. If you want spring onions, otherwise known as green onions, harvest them about 3 to 4 weeks after you’ve planted your sets. Otherwise, be patient, water, fertilize, and weed. Before you know it, nice and plump onions will peek the crowns of their heads out of the soil to show you their progress.
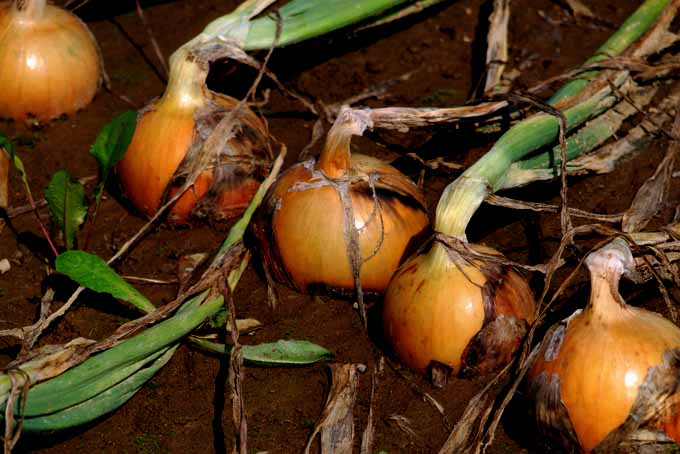
Monitor them carefully, noticing when the long green tops begin to flop over and lay down, changing color from green to brown, indicating that it is harvest time. The beautiful thing about onions is that once you plant them in the ground and they establish themselves, which can take about two weeks or so, you can pick fresh ones from that point on. These spring onions have a lighter and sweeter flavor that’s wonderful in many recipes.
Otherwise, wait until you see large crowns popping out of the ground and you notice that the green onion tops are flopping over and beginning to brown. That is a sign that they are ready to be picked.
Part V: Harvest and Storage
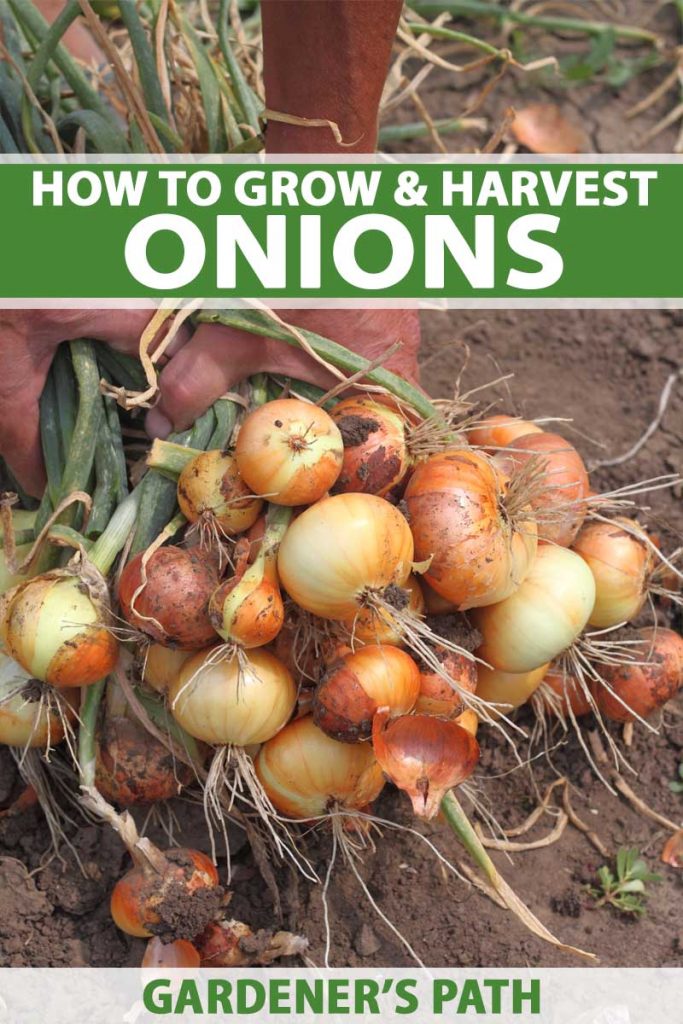
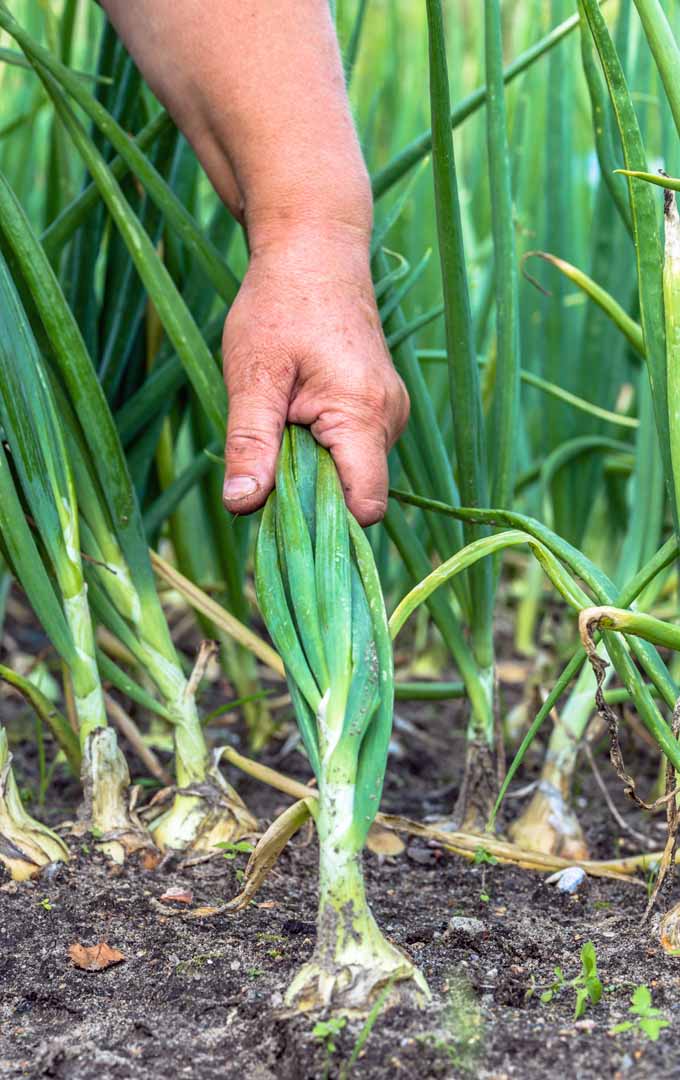
Remove onions with your hands by pulling the long green and brown tops in an upward motion, from the ground to the sky.
At this point, you should not need any hand tools to help you with this process, as the onions are already halfway out of the soil and ready for removal. Every once in a while, you might need a small hand spade to help. I like to keep one on hand, just in case. Lay out to dry, keeping the long green tops attached.
Drying and Curing
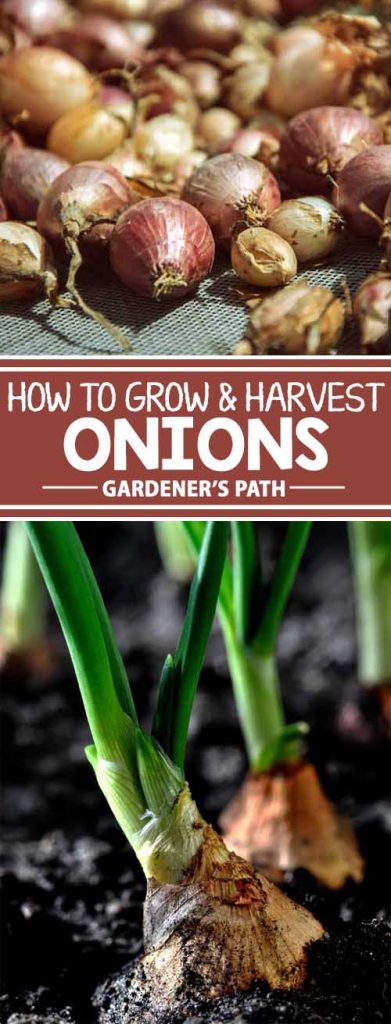
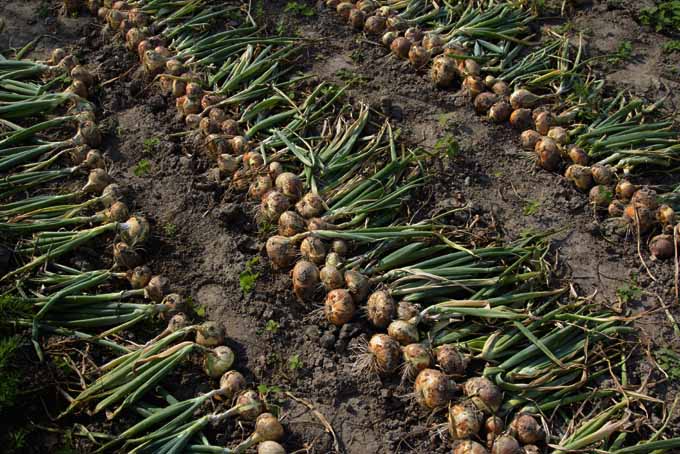
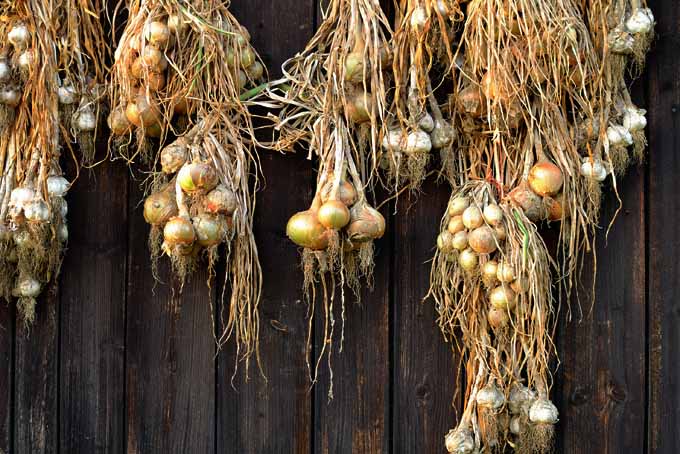
When the weather is dry and sunny, many farmers and backyard gardeners will pull up their onions and leave them on top of the soil in rows for up to a week, allowing the sun and air to dry them naturally.
If you do not have such fantastic conditions, harvest your onions and bring them into a well-ventilated area like a barn or some kind of open room. Spread the onions out on a flat surface, like the floor or mesh drying racks, so that they can dry. Either way, after a week or so, the onions will need additional time to continue drying. This process is called “curing,” and it is a critical step in the storage process.
If they are not properly cured, onions will not have a storage life at all, because the remaining moisture will cause them to rot. After I bring my onions in from the garden, I like to lay a large canvas tarp on the floor of my garage and spread all of my onions out to cure. The canvas breathes and allows air to flow through, which is necessary for drying. Some gardeners and farmers like to lay them on a barn floor or the floor of a garage or shed. You can also dry your onions on a drying rack, which allows sufficient airflow all around the onions so that they can dry properly. This works well for a smaller harvest.
Many of my friends make their own drying racks and reuse them every year for many different crops throughout the season. They are great space savers and work very well.
Time to Store Your Harvest
You’ll know they are ready when you cut off a top and notice that there isn’t anything oozing from the cut. If they aren’t dry enough, a milky white substance will seep out, telling you that the onions need more time and must continue to be cured. It is important that your onions be dry. Otherwise, the moisture inside will quickly rot your crop.
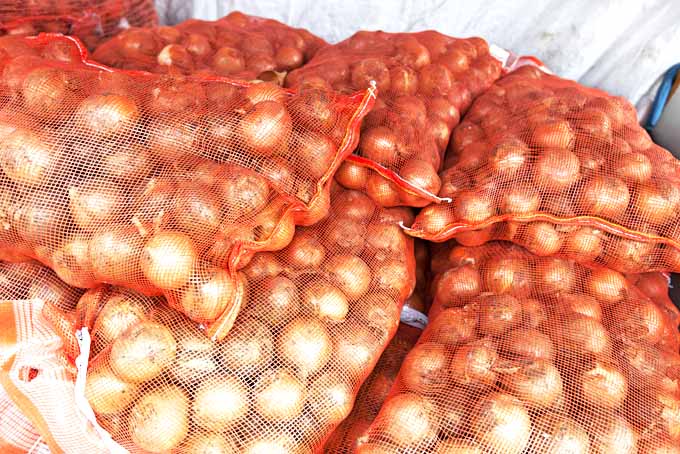
Once properly cured, you can begin the process of cutting off the tops, trimming the roots, and bagging your onions for storage. When cured and stored properly, some storage onions – such as Patterson or Red Wing – have a storage life of 6 months or more! Get more tips on storing your onions here.
Dishing the Dirt
Gardening is cathartic and peaceful. A garden does not discriminate, nor does it turn its back on you. It soothes even the most savage of us on our worst days. I go to the garden daily, often multiple times. It is my mediation and my therapy. I spend time walking down the rows, noticing the subtle differences of the plants. Sometimes I take a glass of water and a book and sit in the garden for hours at a time, reading. Often, when friends come over, the first place they want to visit is the garden. Honestly, there is nothing quite like it. Be thoughtful, plan ahead, and take your time. Be patient and vigilant.
Follow the basic guidelines outlined in this article, and you will have a beautiful crop of onions growing in your garden that you can enjoy, both fresh and for months to come. Do you have any gardening secrets for growing onions? Any tips or ideas to offer? Add your comments below. We’d love to hear from you! And for more oniony tip and advice, check out some of these guides:
How to Grow and Harvest Bunching Onions How to Overwinter Onions Planted in the Fall How to Plant and Grow Egyptian Walking Onions
Greenhouse photos by Leslie M.G., © Ask the Experts, LLC. ALL RIGHTS RESERVED. See our TOS for more details. Product images via Stargazer Perennials, EarlyGrow, Bootstrap Farmer. Uncredited photos: Shutterstock.