Junipers grow in a massive range of environmental conditions, and they’ve been cultivated by numerous cultures throughout history as medicine, food, and for their ornamental value. Perhaps another reason that they’re so ubiquitous in gardens is that they’re so darn easy to care for when planted in the right spot. We link to vendors to help you find relevant products. If you buy from one of our links, we may earn a commission. If you’re ready to add this classic shrub to your space, or if you just want to know how to better care for the one you already have, this article will cover all of the basics that you should know, including: There’s a lot to love about these plants, so let’s get going!
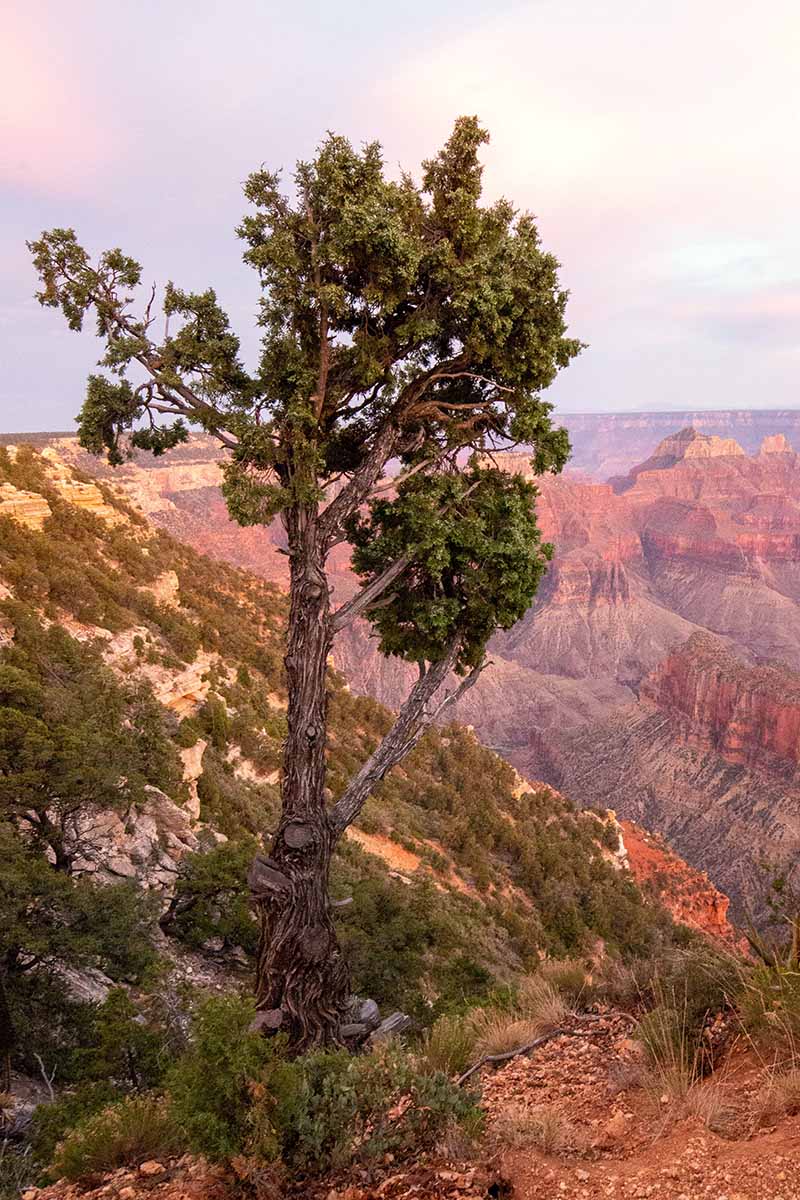
Cultivation and History
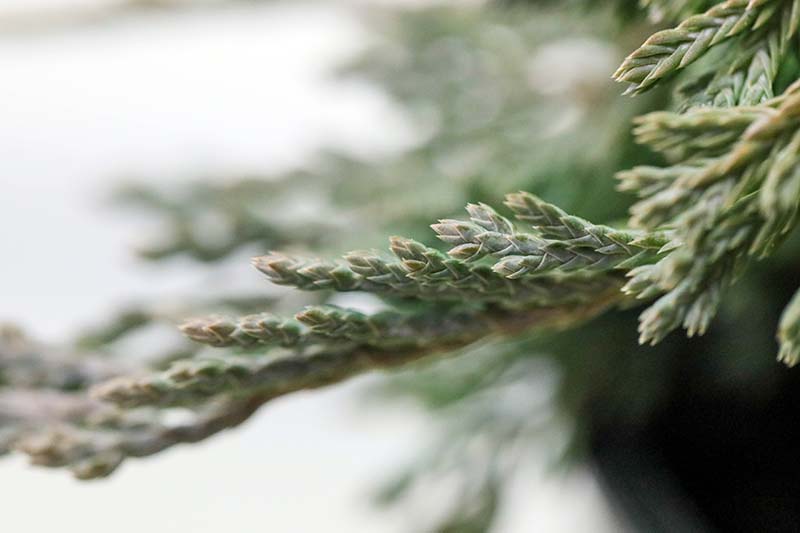
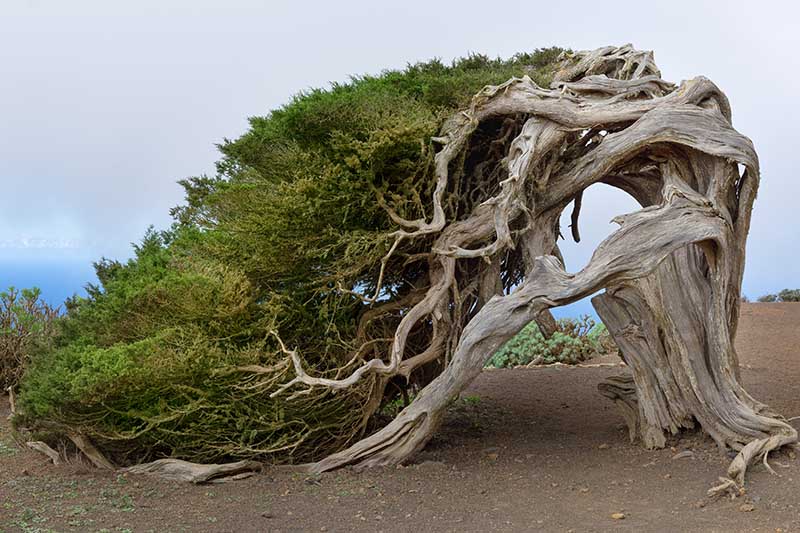
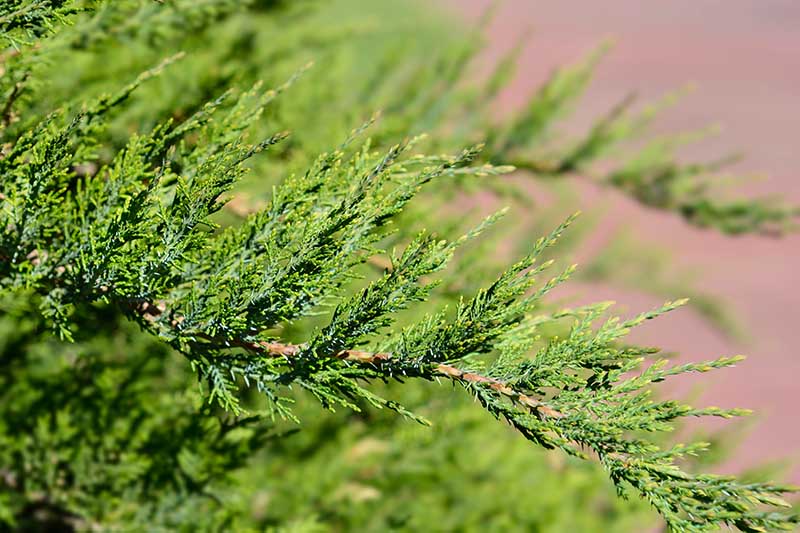
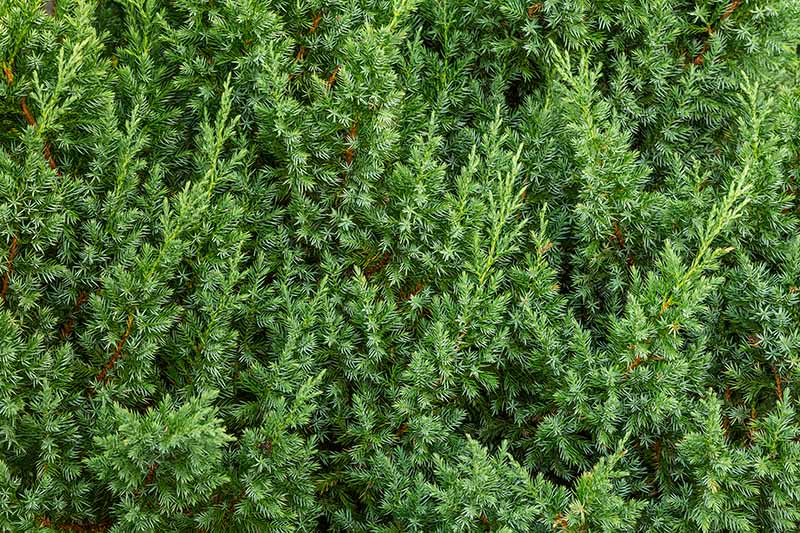
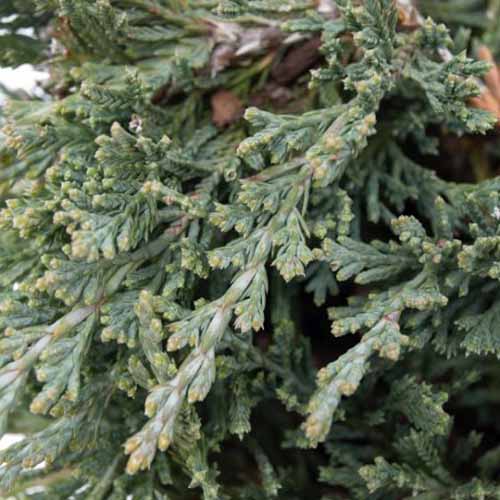
The juniper genus (Juniperus) is part of the conifer family (Cupressaceae), which includes fir, spruce, and pine trees. Like the rest of the family, these species are evergreen with scale or needle-like leaves. While most people recognize that familiar needle shape common on many conifers, scale leaves are the broader, fuller leaves that you see on cedar trees. Scale leaves have small overlapping structures that resemble scales. Junipers are native to a surprising range of different environments, from low elevations to extremely high ones, and from arid deserts to alpine tundras and temperate rainforests. They’re found in regions across the northern hemisphere in Europe, North America, Central America, Asia, Africa, and parts of the Caribbean, such as Bermuda. They grow so extensively that the common juniper (J. communis) is the most widespread of all conifers and one of the most widely distributed plants in the world. One of the reasons for their prolific natures is that these shrubs can handle conditions that many other plants can’t tolerate, including drought and freezing temps, as well as poor, acidic, sandy, or calcareous soils. They’re considered a “pioneer species,” which means they are the first to colonize barren environments. There is even a subspecies (J. communis ssp. alpina) that can survive above the treeline, which is the elevation limit of where most trees can grow. This ability to survive in harsh conditions is why you’ll often see the iconic tree growing on craggy rock faces and in barren deserts. They’re such survivors that in some areas of the western US, there are concerns that junipers are spreading into environments where they didn’t previously thrive, and pushing out native flora. This shift is likely due to modern fire suppression efforts. They aren’t indestructible, though. In the United Kingdom, juniper populations have been declining, thanks in part to wild rabbits nibbling on them. As I mentioned, there are two types of juniper leaves: needle-like and scale-like. Needle-leaf junipers have groupings of three needles joined at the base. Scale-like leaves look somewhat like those on cedar trees (and the two plants are often confused).
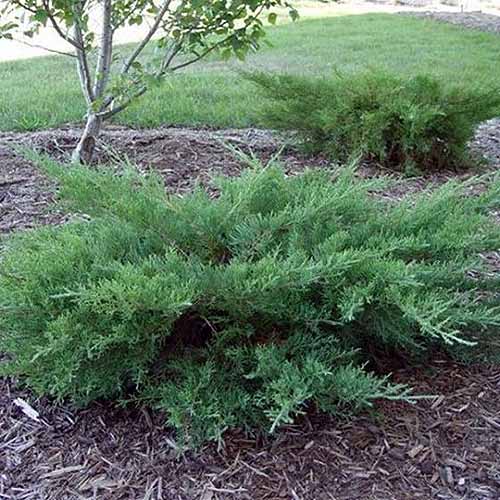
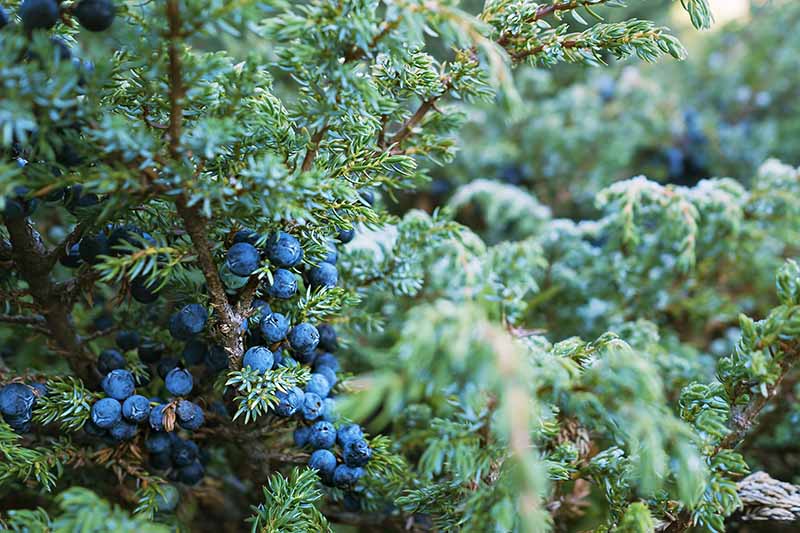
Most species have both types of leaves, forming needles that turn into scales as the tree matures. Some self-fertile varieties are available, but most junipers are dioecious, which means plants are either male or female. Males develop cones during the spring, summer, and fall. The next year, those cones pollinate the female flowers that form in the spring. The flowers turn into cones with small bluish-black berries that are ripe during autumn and winter. Each berry holds one, two, or three seeds. Those berries contain terpenes, tannins, sugar, tar, and resin, which give them a distinct flavor (hello, gin!), as well as medicinal properties. Junipers can live a good, long time. The oldest juniper tree in the world grows in Tuolumne County, California, in the Stanislaus National Forest. It’s an astonishing 3,000 years old (though some experts think it could be as old as 6,000 years)! An alligator juniper (J. deppeana) specimen in Arizona is thought to be hundreds or possibly thousands of years old and is one of the largest known trees in the US. When it comes to cultivated plants, there are over 170 different species and varieties of junipers that you can find for sale at nurseries, and you’ll find plants suitable for USDA Hardiness Zones 2-9. The plants can grow as spreading ground covers, small or large shrubs, or as trees.
Propagation
The most reliable ways to obtain junipers for your garden are by taking a cutting, air layering, or by purchasing a plant from a nursery. It’s technically possible to grow juniper from seed, but it’s not recommended.
Planting by seed requires up to four years before you’ll have a shrub you can transplant, and the process isn’t easy. Germination is unreliable, and the seeds require a lengthy stratification period. Keep in mind that if you want to harvest the berries, you’ll need to propagate or purchase a self-fertile type, or both a male and a female plant.
From Cuttings
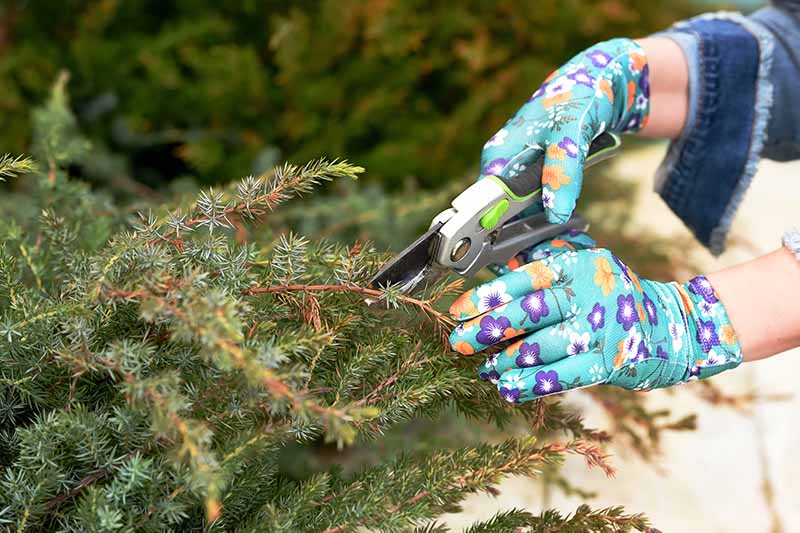
Cuttings are the most reliable, not to mention fast, way of reproducing your shrubs. In early to mid-spring, take a six- to eight-inch cutting from a hardwood branch that is at least a fourth of an inch in diameter (wear gloves!).
After collecting your cuttings, snip the bottom of each at a 45-degree angle and remove the leaves from the bottom half. Combine one part sand with three parts seed starting soil. Then, combine that with an equal amount of perlite or vermiculite and mix well. Fill a four-inch pot with this mixture.
Bonide Bontone II If you’re looking to pick some up for your gardening kit, head to Arbico Organics. Make a hole in the soil using a pencil or chopstick and insert the cutting so that at least two inches are buried. Place in a spot with bright, indirect sunlight and keep the soil moist (but not wet). After three months or so, roots should begin to form. Give the cutting a gentle tug to see if it resists. If it does, the roots are growing in the soil. At that point, harden rooted cuttings off for four weeks. That means bringing the plant outdoors in a shaded, protected area for 30 minutes on the first day, then add about 30 minutes of outdoor exposure each day to follow until the plant can sit outside all day. Bring cuttings in each night, and don’t put them outside on days when there are harsh winds or extreme temperatures. You want to acclimate them to the outdoors gradually. In three or four weeks, you can leave the cuttings outdoors full time. When the winter rolls around, store the potted cuttings outdoors under protection like insulating foam or a thick layer of pine boughs. Remove the cover in the early spring. Plants should be about a foot tall before you plant them in their permanent home, which should be in the late spring if everything goes according to plan. If not, keep the cuttings alive in their pots by watering as needed. Allow them to continue to grow, and then plant them out in the fall.
Via Air Layering
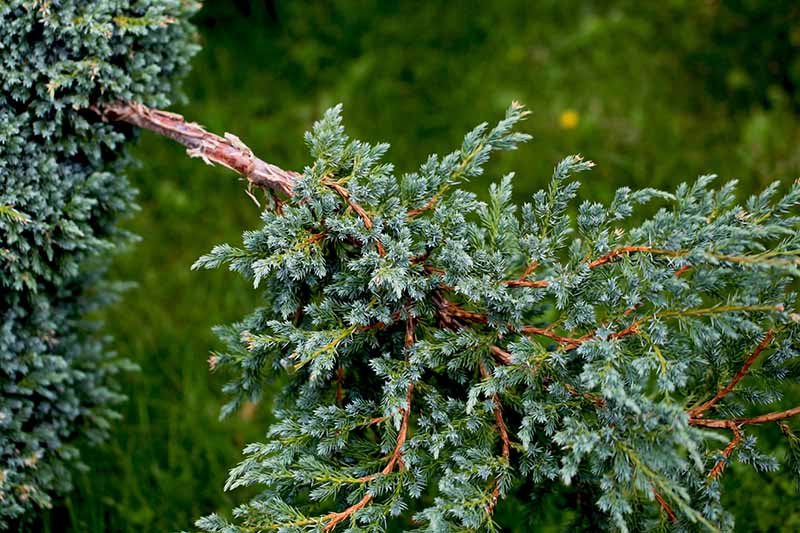
Air layering is a technique that involves exposing the interior of the wood on a branch or stem so that the plant sends out roots. You can then remove the newly rooted section from the parent plant. This is a common technique used by gardeners who are training junipers as bonsai, but it works well for propagating plants from mature outdoor shrubs as well. You can just let your juniper grow as usual without any special care beyond checking to make sure the new section has moisture. You don’t have to tend to a separate cutting or seedling, and before you know it, you have a new plant! In the spring, when air temperatures are above 45°F, locate a branch or stem that is at least a quarter inch in diameter, a foot long, and woody. Clip away any foliage from the middle four inches.
Using a clean, sharp knife, cut two parallel vertical rings around the branch about an inch apart. Then, use the knife to strip away the bark between the two cuts. The goal is to just expose the lighter interior wood, which means you’ll need to cut through the bark and green cambium layer. Then, wrap moistened sphagnum moss around the cut. The moss should extend about an inch above and below the cut. Cover the sphagnum moss in clear plastic and secure it at the top and bottom with zip ties, twist ties, or string. Keep an eye on the moss and occasionally check to make sure that it is still moist. If it dries out, pour in a little water or spray the moss with a spray bottle and reseal. Within a few months, you should see lots of roots growing in the moss. At that point, you can cut the branch or stem just below the plastic bag. Remove the plastic and moss, and plant as you would a transplant.
From Saplings/Transplanting
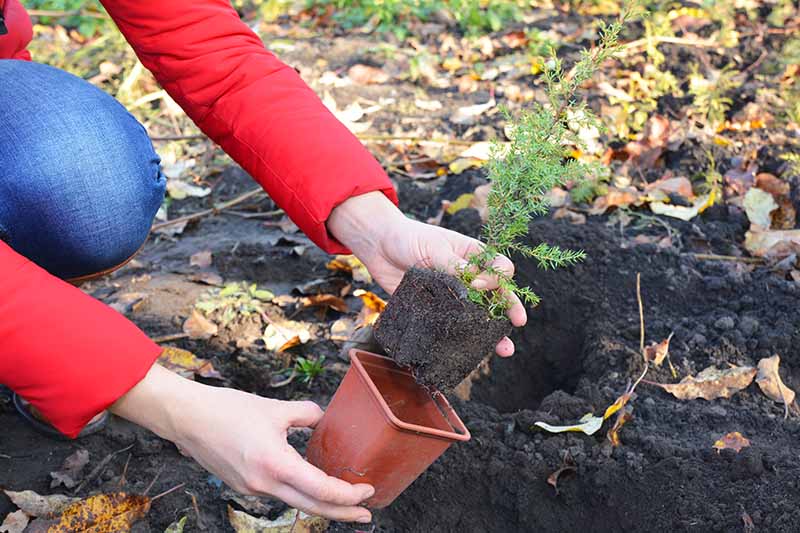
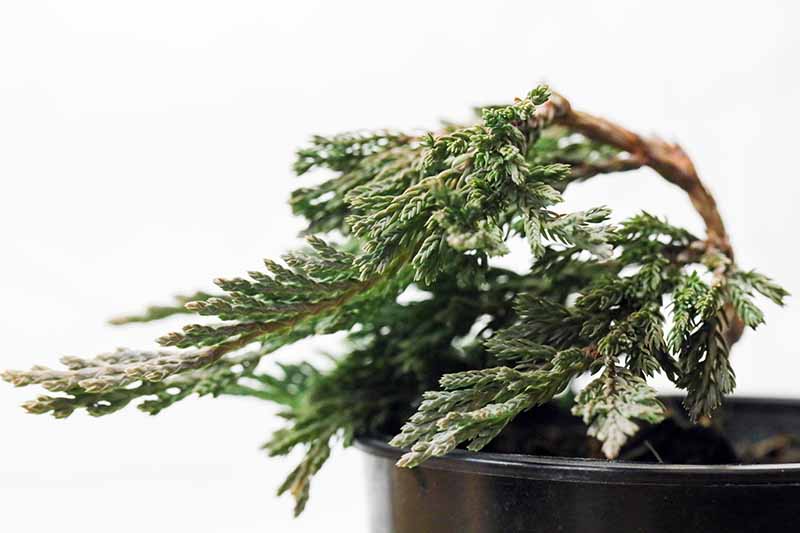
If you purchase a plant from a nursery, the first step is to give it a once-over to make sure it looks healthy.
Yellow or brown foliage is a sign that something might be wrong. Look for a plant that is green (or silver, golden, or blue, as the case may be) and give a branch a tug. It should spring right back into place. Examine it for any bugs or evidence of their presence, such as fine webbing, which might indicate spider mites. Planting should be done in the spring after the ground is workable, or in the fall. I know I said that this plant could grow in some pretty harsh conditions, but you want to give yours the best start in life, right? To do that, you may need to amend the native soil before planting. If you have clay, work in some aged manure, shredded cedar or hardwood bark, or rotted compost. Don’t use sand because it won’t help to improve drainage, despite what some guides recommend. To improve sandy soil, work in manure, compost, or topsoil. And for compacted soil, add rotted compost or mulch and work it in by hand (don’t use a rototiller). You should also test your native soil to see if it is deficient in any of the main nutrients: nitrogen, phosphorus, or potassium (NPK). A soil test will also tell you what pH level you have. It’s best to aim for a pH of 6.0-7.0, though junipers can tolerate a wider range than that if they need to. If the pH is off or the soil is deficient in any of the main nutrients, resolve these issues before you start planting. To plant, dig a hole twice as wide and the same depth as the container your juniper is growing in. Remove your new plant from its container by squeezing the sides to loosen the soil, and then gently pull the plant out and loosen the roots. Place it in the ground and fill in around it with the soil you removed from the hole. Give the plant a good soaking to settle the soil.
How to Grow
Junipers can handle a wide range of soils, which makes them ideal if you have a less than perfect spot in your yard. Amending the earth is a great way to get them off to the best possible start, as described above. But sand, dry clay, and salty soils won’t phase most of these plants, depending on the variety. The situations they can’t handle? Full shade and poorly draining soil. You should also follow the grower’s recommendations for spacing (or recommendations for your selected cultivar) since plants placed too close together are more susceptible to disease. When you plant, be sure to consider the location thoughtfully. Junipers are notorious for getting much larger than people expect. Don’t put a young petite juniper next to your home and expect it to stay that tiny. Unless it is a dwarf cultivar known to stay small, you’ll find your shrub outgrowing its spot before you know it, and you’ll be forced to dig it out.
When it comes to watering, less is more. These plants are extremely drought tolerant. Robert Jackson, a professor of biology at Duke University, says “junipers are the most drought-resistant group that has ever been studied,” according to an article summarized in Science Daily. They send down lengthy taproots that can reach up to 25 feet into the soil to access water. It’s hardly an exaggeration to say that over-watering is one of the only ways to kill a juniper. That and digging it out of the ground and burning it, and even then… Okay, I’m kidding, but you’ll want to let the top three inches of soil dry out completely before you add more water. In most areas, they won’t require supplemental watering at all after they become established. Just keep an eye on them during particularly dry and hot stretches. If a juniper isn’t getting enough water, the plant can limit the amount of water a branch receives, effectively self-pruning it away to ensure that the rest of the tree survives. If that starts to happen, and you confirm that it doesn’t have a disease or pest problem, you may need to provide additional water.
In Containers
Junipers are ideal if you want an ornamental container plant, and they stay smaller for longer periods if their roots are restricted. Not only can you grow them as a traditional large container specimen or a topiary, but they are one of the easiest plants to grow as a bonsai tree. That’s because they are tolerant of cramped roots, poor soil, and drought. Anyone who has grown a bonsai tree knows it’s really easy to under-fertilize, let your plant dry out, or let the roots get too compacted – any one of which can spell disaster. But your juniper bonsai will just keep chugging along even if you neglect it. Want proof? I took one of my juniper bonsais with me when I moved years ago from Salt Lake City to Denver. But I forgot the plant in the backseat of my car during all the activity. It didn’t receive any water for over a week as it sat in a car that heated above 100°F inside each day. When I finally noticed the empty spot on my bonsai shelf, I ran outside, expecting to find my poor plant prostrate and lifeless. Nope. I gave it a drink of water, and it carried on as if nothing had happened. It even sent out new growth in the spring like normal, as if I hadn’t done my best to murder it. It’s still alive and doing well 20 years later (no thanks to me)! If you decide to grow a juniper bonsai, you can keep the plant indoors or out, but if you grow it indoors, it needs plenty of direct sunlight, at least six hours a day. As a standard plant in containers, you won’t need to worry about watering or repotting as often as you would with many other shrubs, such as roses or elderberries. Once the top three inches of the soil in the container have dried out, add more water if mother nature doesn’t take care of it for you. When it comes to repotting, if you see roots sticking out of drainage holes or if the soil has become extremely hard and compact, it’s time to give your juniper a new home. If it stops sending out new growth in the spring or the root ball starts to rise out of the soil slightly, these are also signs that it’s probably time to repot. When you repot, gently brush away as much of the soil as possible from the roots before planting in fresh potting soil. Once your shrubs become established after a few years, you don’t need to fertilize at all unless your soil is exceptionally deficient in one of these main nutrients, or if your plant is stressed.
Soil Mender 109 Potting Mix Any all-purpose potting mix will do, but I particularly like Soil Mender 109 Potting Mix, which is available at Arbico Organics if you want to give it a try.
Fertilizing
After six months of being in the ground, feed your young shrub every six months with a tree and shrub fertilizer to give your plant a boost – any product with an NPK ratio of around 16-4-8 works well.
Vigoro Fertilizer Vigoro makes a fertilizer targeted at evergreens that takes the guesswork out of choosing the right ratio. You can purchase some at Home Depot. Doing an annual soil test will help you determine if you have any nutrient issues that need to be addressed. Exceptionally short needles coupled with a muted color can indicate a lack of nutrients. But if your plant looks unhealthy, don’t just assume it’s a nutrient issue. More often than not, the problem is overwatering. If your plant is damaged by insects or disease, resolve that issue first, and then apply fertilizer. Rather than fertilizing container plants (with the exception of bonsai, which can use a yearly application of a slow-release bonsai fertilizer), it’s best to repot them with fresh potting soil every few years.
Growing Tips
These shrubs must have well-draining soil. Water only after the top three inches of soil have dried out. Fertilize only as needed after testing your soil.
Pruning and Maintenance
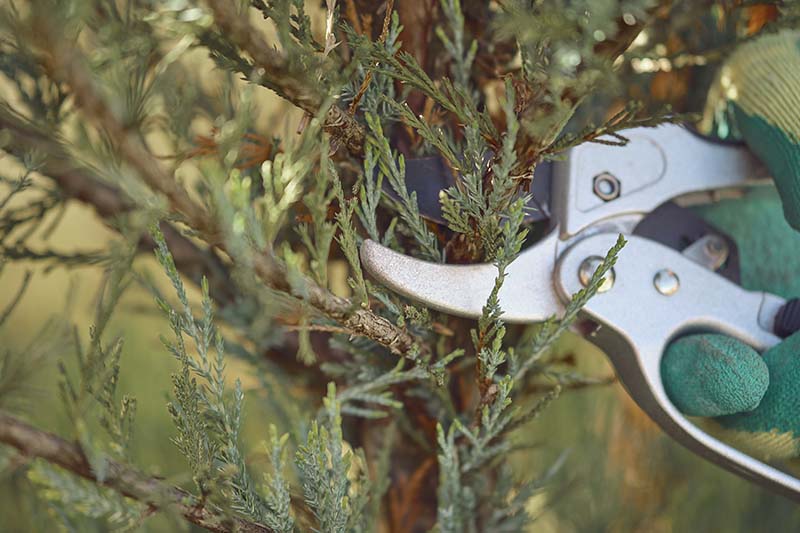
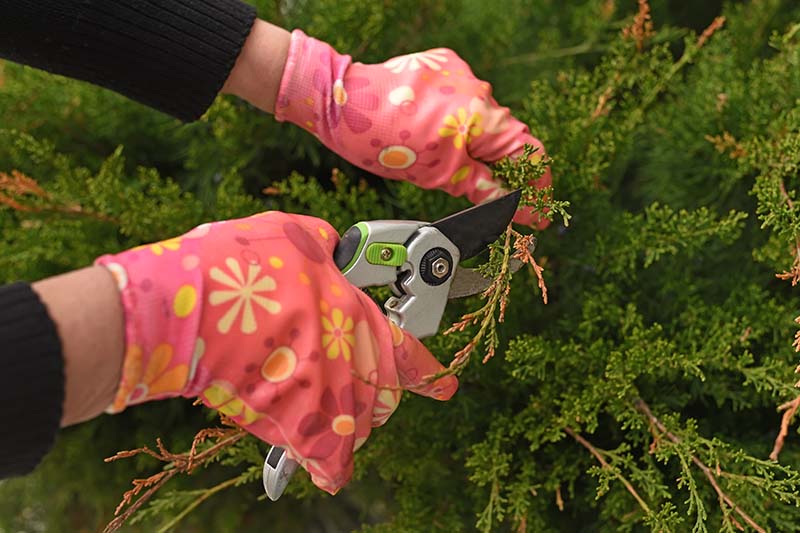
Junipers can be pruned any time when the wood isn’t frozen, but late winter or early spring before new growth begins is ideal. Keep in mind that you don’t need to prune your shrubs at all unless you want to remove unsightly wood or diseased branches, you want to limit their size, or you want to encourage a specific shape.
Most junipers grow quite slowly, so you won’t need to be out there with your pruners every year, wrestling things back into shape. Ground cover type shrubs don’t need to be pruned at all unless you want to lightly trim the edges to keep them in shape. Never trim more than a fourth of the plant at a time. Avoid pruning the central leader (the main trunk) on plants with an upright growth habit. To begin, cut back any unwanted stems to the ground or main trunk using a pair of pruners or a saw. Next, it’s time to perform any heading cuts that you want to make. This encourages branching and bushier growth. To do this, cut just above a bud (that’s the spot where a leaf grows out of the wood) on young, soft growth. New branches will emerge from where you cut. Finally, you can make some thinning cuts. This involves completely removing any branches back to the base in order to thin out bushy growth. Remove any dead or bare branches.
Thinning is a simple way to maintain a natural look while still keeping your plant tidy. Heading is typically used to create a more cultivated look. Whether you choose to have a free-form shrub or a precisely trimmed topiary is simply a matter of preference. Don’t prune back older needle-less wood unless you intend to remove the branch altogether. New growth won’t form, and you’ll be left with an unattractive, bare stump of wood. If your shrub starts to outgrow the spot you planted it in, and there isn’t enough young wood to trim back, it’s probably time to pull the plant and start fresh.
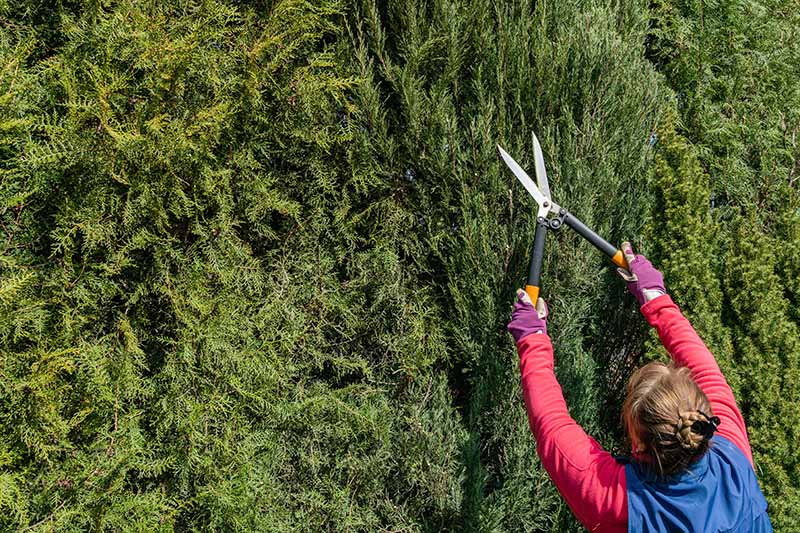
Unless you are training a topiary shape, don’t shear your junipers. When you do this, it creates a dense outer layer of growth and the interior can’t access the light it needs. The needles may start to drop and the plant will become more susceptible to winter dieback and disease. You can learn more about how to prune junipers in our guide.
Species and Cultivars to Select
There are dozens of species and cultivars out there, from low-growing ground covers to trees that reach 20 feet tall or more.
Managing Pests and Disease
Junipers are sturdy, and they don’t often fall victim to diseases or pests. They’re also resistant to many of the herbivores that plague other plants. The most common species that you’ll find in stores are:
Chinese (J. chinensis) Common (J. communis) Creeping (J. horizontalis) Drooping (J. flaccida) Eastern red cedar (J. virginiana) One seed (J. monosperma) Rocky Mountain (J. scopulorum) Savin (J. sabina), Shore (J. conferta) Western (J. occidentalis)
Here are some of the more stand-out options out there that might make a nice pick to add to your garden.
Bar Harbor
J. horizontalis ‘Bar Harbor’ is a low-growing plant that only reaches about two feet tall and eight feet wide.
‘Bar Harbor’ When mature, the foliage is scale-like with a silvery cast in the spring and summer before shifting to a subtle purple shade. It can handle more moisture than some other types. Nature Hills Nursery carries this pretty specimen, which can grow in Zones 3-9.
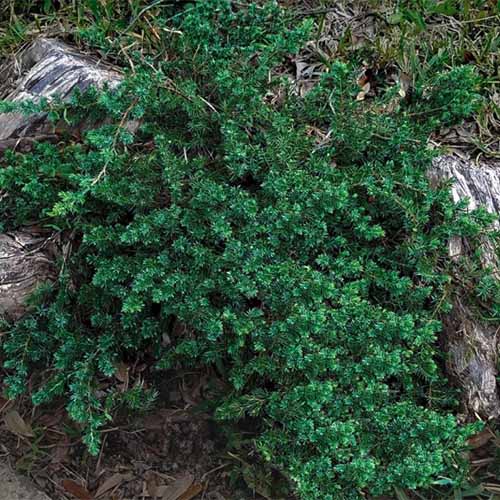
Blue Pacific
As you might have guessed from the name, the foliage on this juniper appears to have a blue hue to it. Use it for erosion control, in areas with sandy, poor soil, or in a spot that gets a lot of reflected heat off of windows or metal siding.
‘Blue Pacific’ Perfect for Zones 6-9, this low-growing plant stays under a foot tall and spreads out six or seven feet. J. conferta ‘Blue Pacific’ is available to ship to your home from Home Depot.
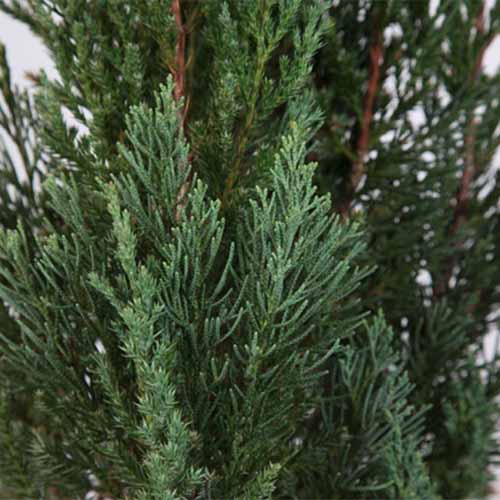
Blue Point
J. chinensis ‘Blue Point’ has a pyramid shape and a silvery-blue cast to the foliage. This is a medium-sized shrub, reaching up to 10 feet tall and up to six feet wide at the widest point.
‘Blue Point’ Use it as a focal point in the garden or for a living screen in Zones 3-9. Sound right for your spot? Head to Home Depot to pick up one of your own.
Gold Cone
J. communis ‘Gold Cone’ has – you guessed it – a golden hue to the foliage and it grows in a columnar shape. In the winter, the foliage turns more of a blue-green. This plant grows three to five feet tall and one to two feet wide when mature, which makes it ideal for smaller spots that need a little height. It’s cold hardy down to Zone 2 and grows best in locations up to Zone 6.
Grey Owl
J. virginiana ‘Grey Owl’ grows in Zones 4-9 and reaches three feet tall and six feet wide when mature, with a lovely vase shape.
‘Grey Owl’ The needles appear blue from afar with their silver tinted green coloring. Nature Hills Nursery carries several sizes of this pretty plant.
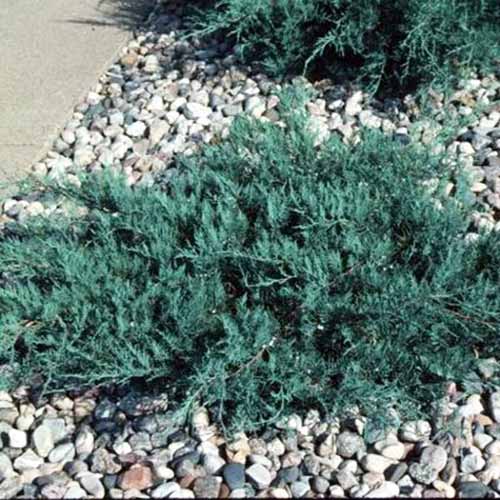
Hughes
J. horizontalis ‘Hughes’ is one tough cookie. It can handle salt, pollution, rocky or sandy soil, heat, frost, and snow in Zones 3-8. It also resists pests and disease. It stays compact at 15 to 18 inches tall and spreads up to eight feet wide, which makes it ideal as a ground cover or trailing over a rock wall.
‘Hughes’ It has silvery-blue foliage that looks slightly purple. Nab one for your yard at Nature Hills Nursery.
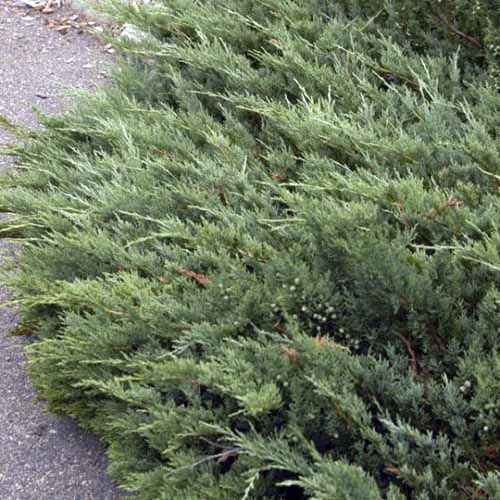
Kallay’s Compact
This shrub grows to about two or three feet tall and spreads out four to six feet. The needles are soft and bright green with a subtle silvery cast when planted in full sun. It works well for erosion control, as a ground cover, or to replace a water-hungry lawn in Zones 4-8. This is a hybrid known as Juniperus x pfitzeriana, which is a cross between J. chinensis and J. sabina.
‘Kallay’s Compact’ If you’re ready to plant one of these in your yard, head to Nature Hills Nursery and pick one up.
Youngstown
J. horizontalis ‘Plumo’ grows in a wide range of environmental conditions in Zones 3-9. This is another low-grower, staying under a foot in height and spreading out about eight feet once mature. The scale-like silvery-green needles turn slightly purple or bronze in the winter. That said, you might bump up against some issues now and then. Here’s what to watch for:
Herbivores
I know, you’re probably thinking that you’ve heard junipers aren’t appealing to herbivores such as rabbits and deer. There are plenty of articles on the internet touting these hardy plants as deer and rabbit proof, and it’s true that they’re not often the first choice that these animals have in mind when they’re looking for a meal. I hate to be the one to bring you bad news, but animals will take a bite out of many juniper shrubs, especially if other food is scarce. Damage can range from no big deal to devastating, depending on the species, cultivar, and the age of the plant. For instance, Rutgers University’s New Jersey Agricultural Experiment Station worked with Rutgers Master Gardeners and other nursery and landscape professionals in the region to conduct a study of deer-resistant plants. They determined that J. conferta is “occasionally severely damaged” by deer, while J. scopulorum ‘Moonglow’ is rarely damaged at all. A tiny sapling is extremely vulnerable, while an established shrub usually won’t be bothered much at all.
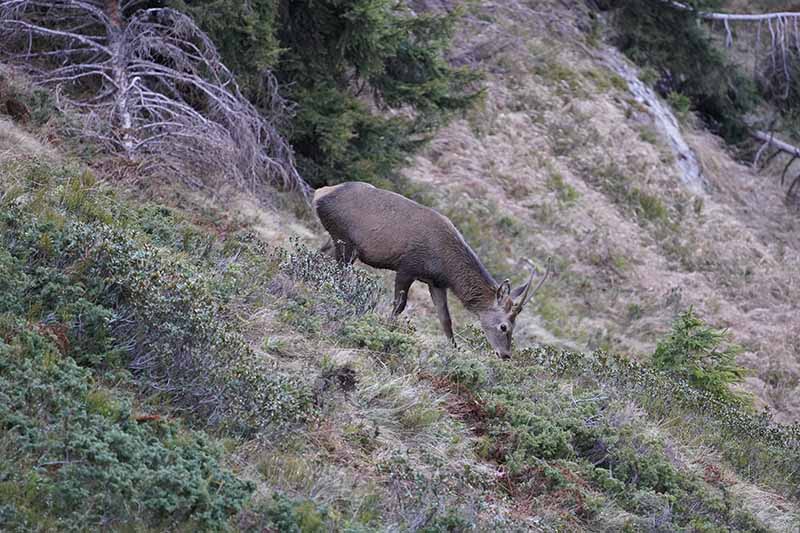
Deer
In the Rocky Mountains, juniper makes up about 66 percent of the mule deer browse in the winter, and don’t think they stick to only the wild plants out there.
When I was living in Utah, deer (and rabbits) would regularly devour my juniper saplings, and one harsh winter, the deer ate all the foliage on my older Rocky Mountain junipers (J. scopulorum) from about six feet down. A few of them were so damaged that they eventually died. To protect saplings, completely enclose them in a wire mesh such as chicken wire. You can make a little dome by bending and shaping the wire. For older plants, fencing (especially in the winter) works best. We also have an entire guide to helping you keep deer out of your garden, if you want to really get serious about protecting your plants from marauding ungulates.
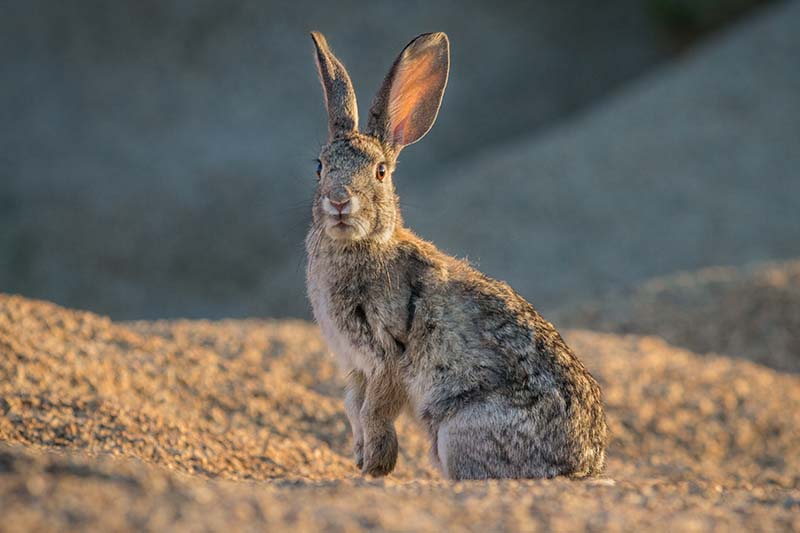
Rabbits
Rabbits will nibble on young plants and new growth, and they go for the tender cambium (the part between the wood and the bark of the trunk) on older shrubs.
Protect young trees with fencing made out of chicken wire or hardware cloth. Fences need to be about three feet tall to prevent climbing or hopping over, and buried by about three inches into the ground to prevent digging under. Check out our guide for additional tips on keeping these admittedly adorable pests out of your garden.
Insects
There are a few common pests that attack junipers. Pests are more likely to have an impact on stressed trees, so do your best to keep your plant healthy with good watering and feeding practices.
Aphids
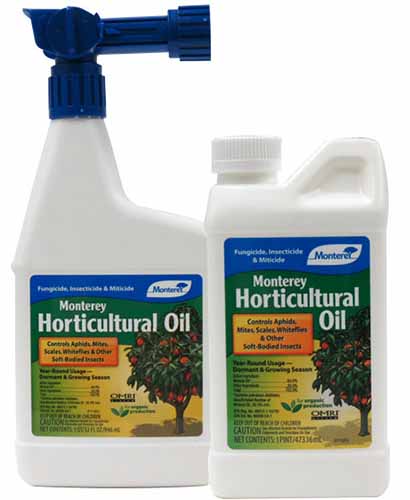
Aphids are impossible to avoid, and at some point, every gardener will come in contact with them. Junipers may be attacked by several types of aphids from different genera, but there is one group of species known as the giant conifer aphids (Cinara spp.) that are often found feeding on these shrubs in particular. Most aphids are about two to four millimeters in length, but giant conifer aphids grow up to six millimeters (yep, that’s why we call them “giant” aphids). Aphids won’t kill an established juniper, but they can make the foliage turn yellow or brown. A secondary issue is that they leave behind a sticky substance called honeydew that attracts sooty mold. Need more info? Our guide to dealing with aphids has lots more tips.
Monterey Horticultural Spray You can also apply horticultural oil spray, like this one from Monterey, which you can pick up at Arbico Organics.
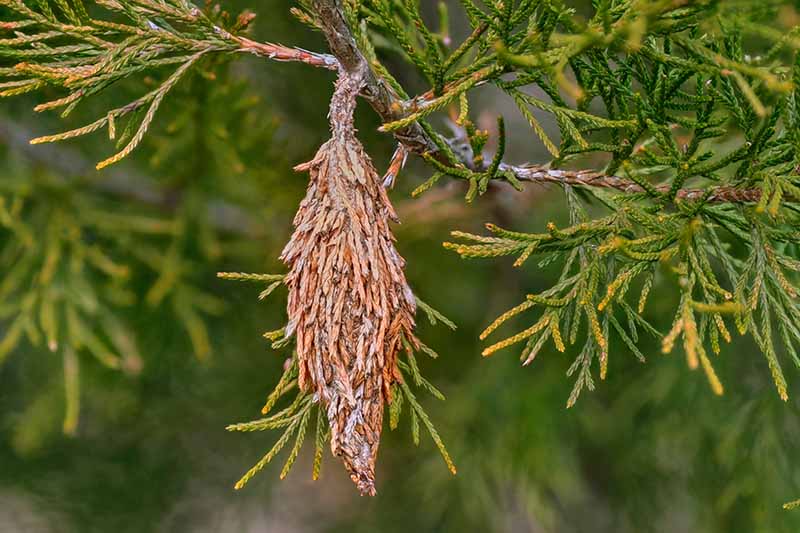
Bagworms
Want to know how bagworms (Thyridopteryx ephemeraeformis) got their name? The caterpillars create large bags during the fall that look a lot like conifer cones. These bags are filled with hundreds of eggs.
When the larvae hatch in the spring, they crawl out and feed on the foliage. While an established plant can probably survive an infestation, a stressed or young shrub can be completely defoliated and killed, especially if it’s attacked year after year. You’ll likely need to reapply multiple times throughout the growing season. Check the manufacturer’s recommendations for application timing. First, if you spot the bags, remove and dispose of them. A spray containing the beneficial bacteria Bacillus thuringiensis is also effective if applied in the spring when the larvae are emerging.
Monterey Bt Spray Monterey makes a liquid spray targeted at caterpillars like bagworms, and Arbico Organics carries this effective product.
Juniper Scale
Juniper scale insects (Carulaspis juniperi) are two millimeters long, with hard shells. In small numbers, they aren’t too much of a problem, but large infestations can kill plants over time. The first sign is yellowish-brown foliage and an overall appearance of being dry and wilted. Later, branches die off, followed by the entire plant dying. These insects suck the juice out of needles, leaving behind sticky honeydew. Prune away infested branches. Make sure your plant is getting enough water and fertilizer, if necessary, since a healthy plant is better able to withstand this pest. You can also use horticultural oils to suffocate the insects. Alternately, insecticidal soap will kill them off.
Bonide Super Soap Try Bonide’s Super Soap, which is available at Arbico Organics.
Juniper Webworms
These plants are sometimes attacked by the juniper webworm, Dichomeris marginella. The adults are small brown moths that don’t particularly stand out. The caterpillars are what to watch for. These three-quarter-inch-long worms are white, light brown, or grayish brown and have red stripes along their bodies. The worms feed on foliage, causing it to turn brown and dry, and create masses of webs using silk and dead leaves, where they retreat when they aren’t eating. A large infestation can completely cover a shrub in webbing. On top of looking untidy, the damage can weaken and stunt plants. If you see the nests, sweep them out of the foliage and dispose of them in a sealed bag. Handpick any caterpillars you see and drown them in soapy water or dispose of them in a sealed bag in the trash.
Spider Mites
Spider mites are a common garden pest, and spruce spider mites (Oligonychus ununguis) in particular enjoy a nibble on plants in the Cupressaceae family. These tiny arachnids are too small to see, unless you get in really close. But if you notice fine webbing on your plant and tiny yellow spots on the needles, you likely have an infestation. In large enough numbers, this pest can cause needles to drop, and after a few years of feeding, they can even kill off a plant.
Unlike other mites, spruce mites prefer cool weather, so watch for them in the spring and fall. As with aphids, a strong spray of water can knock this pest loose, though it will likely take multiple treatments.
Disease
I know we spent a lot of time talking about how junipers are survivors, but that doesn’t mean they can’t fall ill now and then.
Bonide Mite-X Arbico Organics carries this potent spray. Just be judicious in using it, as it can kill off beneficial bugs as well. Keep an eye out for the following:
Cedar Apple Rust
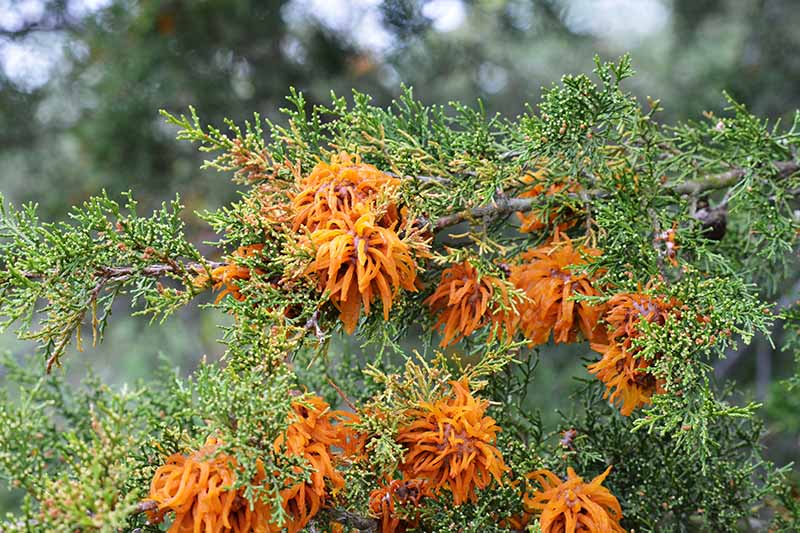
Gymnosporangium clavariiforme and G. cornutum cause cedar apple rust in juniper shrubs, particularly J. virginiana. In the summer, watch for large two-inch galls forming near the tips of the branches. In the following spring, these galls produce long, jelly-like growths known as teliohorns that are filled with spores just waiting to blow away to infect other trees.
Junipers that are infected have stunted growth, may become weak, and can eventually die. Apples, crabapples, hawthorns, and quince trees serve as alternate hosts for this disease, and when the spores leave the juniper, they go in search of these other trees to complete their life cycle. That’s why you should avoid planting apple trees, crabapples, hawthorns, or quince, and junipers near each other whenever possible. Prune away any galls that you spot. They look like small walnuts or wrinkly bulbs at the ends of branches. J. chinensis ‘Femina,’ ‘Keteleeri,’ Mint Julep,’ and ‘Pfitzeriana’ are resistant, as are J. communis varieties ‘Aureospicata,’ ‘Suecica,’ ‘Broadmoor,’ and ‘Skandia.’ J. horizontalis plants are resistant as well.
Juniper Twig Blight
Juniper twig blight, also known as tip blight, is caused by Phomopsis juniperovora or Kabatina juniperi fungi. Depending on the pathogen, these types of blight may exhibit different symptoms. Kabatina blight is a sneaky disease because you won’t see any symptoms in the first year when the plant is initially infected. The next year, as the weather warms up, you’ll see shoots start to turn brown. By the time winter arrives, the brown shoots will die off. If you look closely, you might see tiny, pinhead-sized black fungal spores at the base of the dead shoots. These fungi need water to survive, so if you’re irrigating your shrubs, be sure to do so at the soil level and not on the foliage. Also, thin your plants to improve their ability to dry after rain or watering. Prune away any impacted branches and destroy or dispose of them in a sealed bag. Don’t prune during wet weather. Mites can cause damage in the wood, which allows twig blight to infect plants, so be sure to keep mite infestations in check. The fungi overwinters on plant material, so clean up debris in the fall and prune away diseased branches before winter sets in. Phomopsis blight is a little easier to spot early on because it infects and causes dieback of new shoot tips in the spring. Otherwise, it appears and is managed the same way as Kabatina blight. While you can find cultivars that are resistant to one or the other type of fungi, there are only a few that resist both. These are Golden Pfitzer junipers (J. chinensis ‘Pfitzeriana Aurea’) and the Sargent J. chinensis var. sargentii ‘Glauca.’
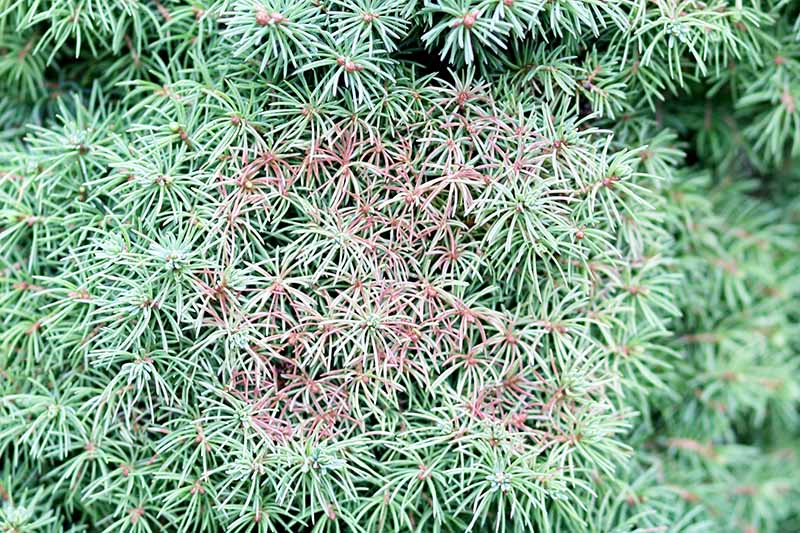
Needle Cast Fungus
Needle cast is a disease that causes the previous year’s needle growth to turn reddish brown and fall off the shrub. This typically happens in late winter. The infected needles on the ground release spores that will go on to reinfect the tree the next year. Beyond the browning needles, you’ll know your plant has this disease if the branches closer to the ground are impacted more than those higher up the tree. If a tree is repeatedly infected year after year, the lower branches may die. If you examine the needles closely, you’ll notice very small (1/32 inch) black fruiting bodies. Lophodermium juniperinum fungi causes this disease. To avoid it, good air circulation is key, since the fungus needs water to thrive. Keep plants well-spaced and pruned, and water at the soil level. Clean up all fallen needles as soon as they drop and dispose of them.
Root Rot
It’s not the first time I’ve mentioned it, but here’s the number one reason why you should never overwater your juniper, or plant it soil with poor drainage: Junipers with wet feet are prone to root rot. This disease is caused by several water molds (technically called oomycetes), including those from the Pythium genus, as well as Phytophthora cinnamomi and P. austrocedrae. These water molds attack the roots, which begin to rot away. The disease also moves up to the parts of the plant above ground, where you’ll see cankers or splitting bark that may ooze a dark liquid. Lower branches may die back. If you notice this disease moving in, stop watering if you can. Let the soil get nice and dry. Badly impacted plants with a majority of the branches that are dead or dying should be pulled. To prevent root rot, amend your soil if you have heavy clay, or consider planting in a raised bed. Avoid susceptible cultivars like J. horizontalis ‘Andorra,’ Sargent (J. chinensis var. sargentii), and Shore junipers (J. conferta). Don’t give your plant additional water until the soil is dried out at least three inches down, and always err on the side of too dry rather than too wet.
Best Uses
Juniper isn’t just a pretty garden specimen. It’s actually “one of the most useful multi-purpose shrub species worldwide,” according to authors C. M Enescu, T. Houston Durrant, G. Caudullo, and D. de Rigo in the European Atlas of Forest Tree Species.
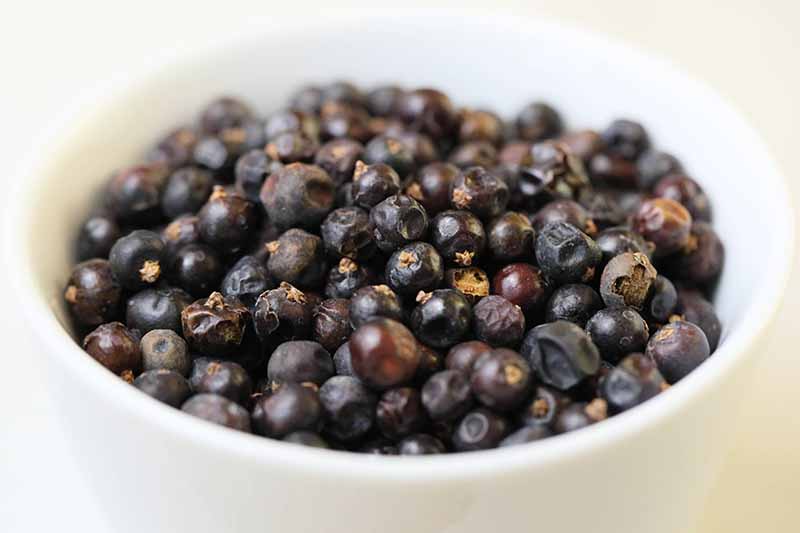
The plant has been utilized medicinally for thousands of years by cultures across the globe to treat things such as gastrointestinal issues, asthma, arthritis, and skin diseases, and it has been used as an anti-inflammatory. For instance, Navajo people used (and continue to use) extracts to control blood glucose levels, while Romanians created and continue to use an infusion to treat dermatitis conditions. Currently, researchers are looking into the science behind it all, such as how the berries may help control hypoglycemia and if the essential oil can be used as an antimicrobial and antioxidant agent. Some research shows the wood can even be used for artificial bone implants. Humans (and animals) also consume the berries, perhaps most famously in good old gin. Speaking of, want to make your own compound gin at home? Steep one ounce of juniper berries in two cups of vodka for two days. Strain out the berries, and enjoy! If you want to make the flavor a bit more complex, you can add whole dried cardamom, allspice, bay leaves, grapefruit peels, coriander seeds, or peppercorns after the juniper berries have steeped for a day. You can use berries that you’ve purchased or foraged, but just remember that some varieties contain high levels of thujone and other essential oils that can make you quite sick if you consume enough. Juniper berries of any kind should never be consumed in large quantities. Avoid any berries from Saving (J. sabina) and Cade junpier (J. oxycedrus), and Mountain cedar (J. ashei), among others. When in doubt, check with an expert. If you’re confident that you’ve foraged or harvested the berries safely, try playing around to see what flavor profile you like best (and feel free to send me some, I’m happy to offer my taste-testing services). The fresh or dried berries are an essential part of Nordic cooking, as well. I can’t imagine my bedstemor’s gravlax without them. If you plan to collect the berries, wait until late fall and handpick them or shake them off the shrub onto a tarp. The fruits should be dark blue and slightly soft. Berries covered in a powdery substance or that are light blue or hard are immature. And remember, be sure to positively identify your plant before you dig in. Those of the common juniper (J. communis) are always a safe bet. If you want to support wildlife in your area, these shrubs are a good option. For instance, in the Rocky Mountains, they provide food and cover for songbirds, juncos, sparrows, pheasants, grouse, and hawks. In the Pacific Northwest, coyotes, rabbits, and other small mammals also eat the berries and live in the trees. Rabbits, mice, voles, and woodrats use the plants as forage and cover. If you don’t want to eat your plants or use them as medicine, that’s cool, too! There are species and cultivars that make perfect ground covers and can help prevent erosion in dry areas or replace water-hungry lawns. They’re ideal in xeriscaping.
Taller shrubs are beautiful as specimens or in groupings in your landscaping. If you want a stand-out option, train them into topiary. They can also be used as windbreaks or to create living fences. They are also ideal for bonsai, particularly for beginners, since they’re forgiving. As if this list isn’t long enough already, I find the wood of a dead juniper to be particularly attractive, especially in xeriscaping. Head out into public lands and gather the deadwood to use in your garden. Just be sure to check with your local authorities first to determine what you can and can’t take. Ancient Egyptians grew them as medicine, and Japanese gardeners have been using them as specimens in tsukiyama (artificial hill gardens) and chaniwa (tea ceremony gardens) for centuries. Once you learn to appreciate these elegant plants, you can understand why. They provide year-round color, architectural shape, and distinct texture, on top of their medicinal and culinary functions. Combined with their ability to tolerate harsh growing conditions, it’s no wonder they’ve found a home in so many places. Are you growing juniper? Let us know in the comments section below – and feel free to share a picture! If this guide helped you feel as though you’re ready to tackle juniper gardening in your space, check out some of these other helpful next:
Blue Star Juniper: How to Grow These Hardy Garden Staples Tips for Growing Spartan Juniper 13 of the Best Evergreen Shrubs for Your Garden