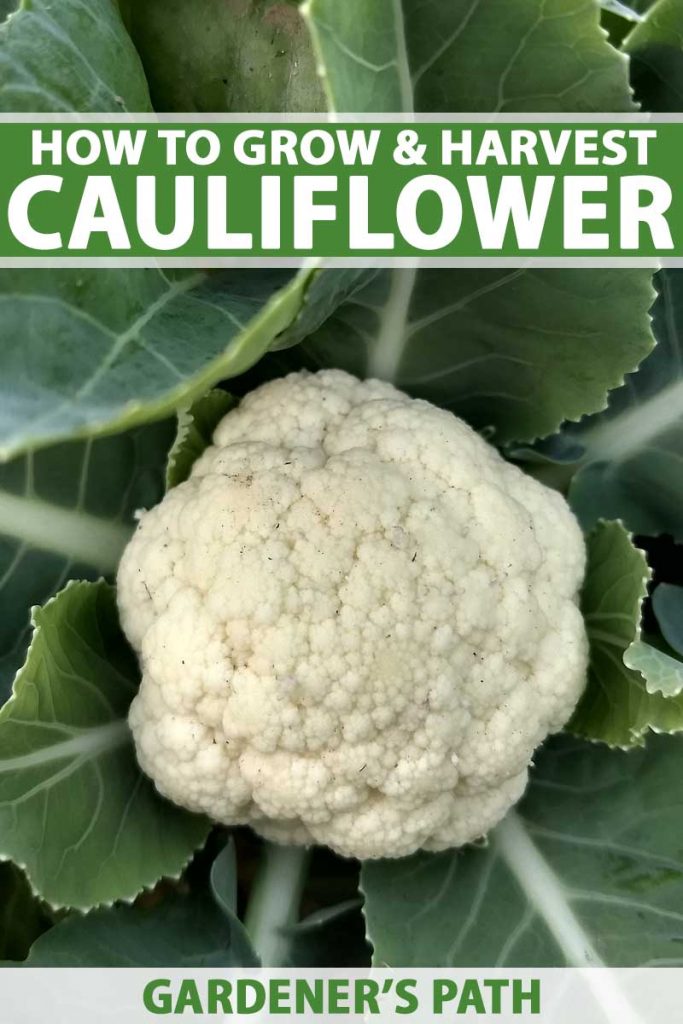
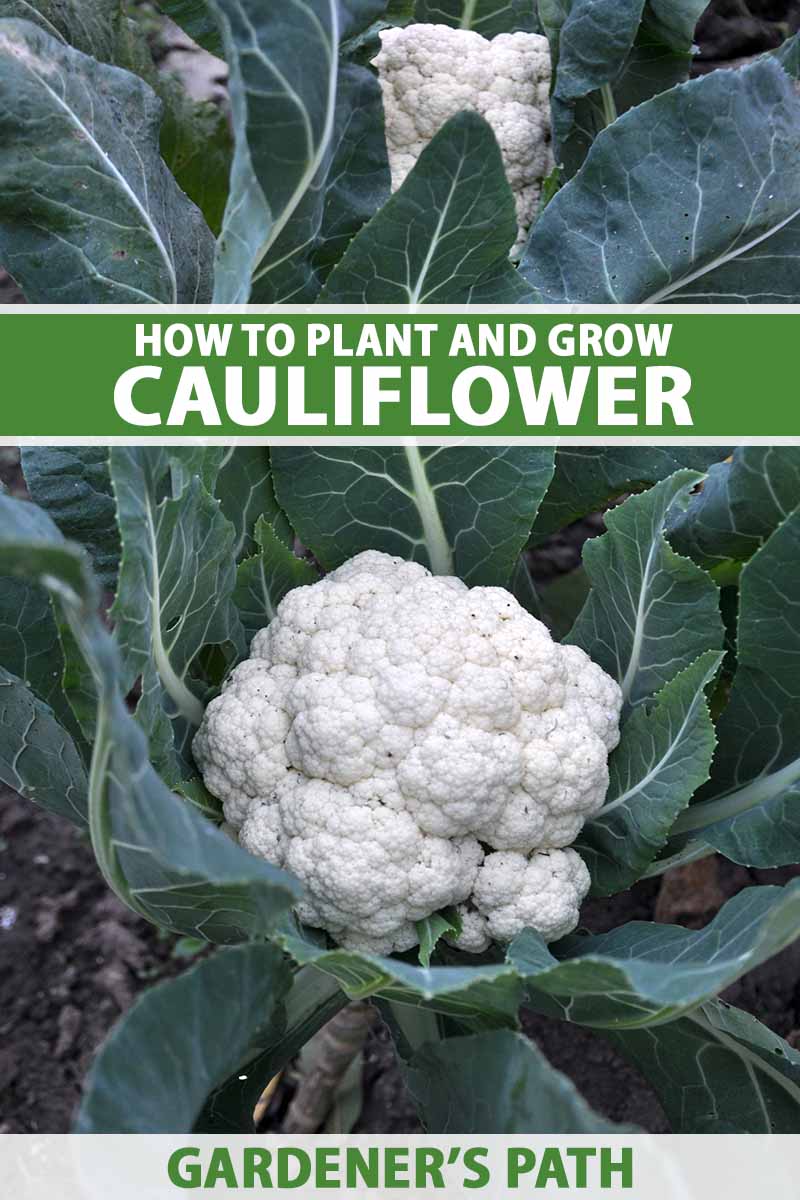
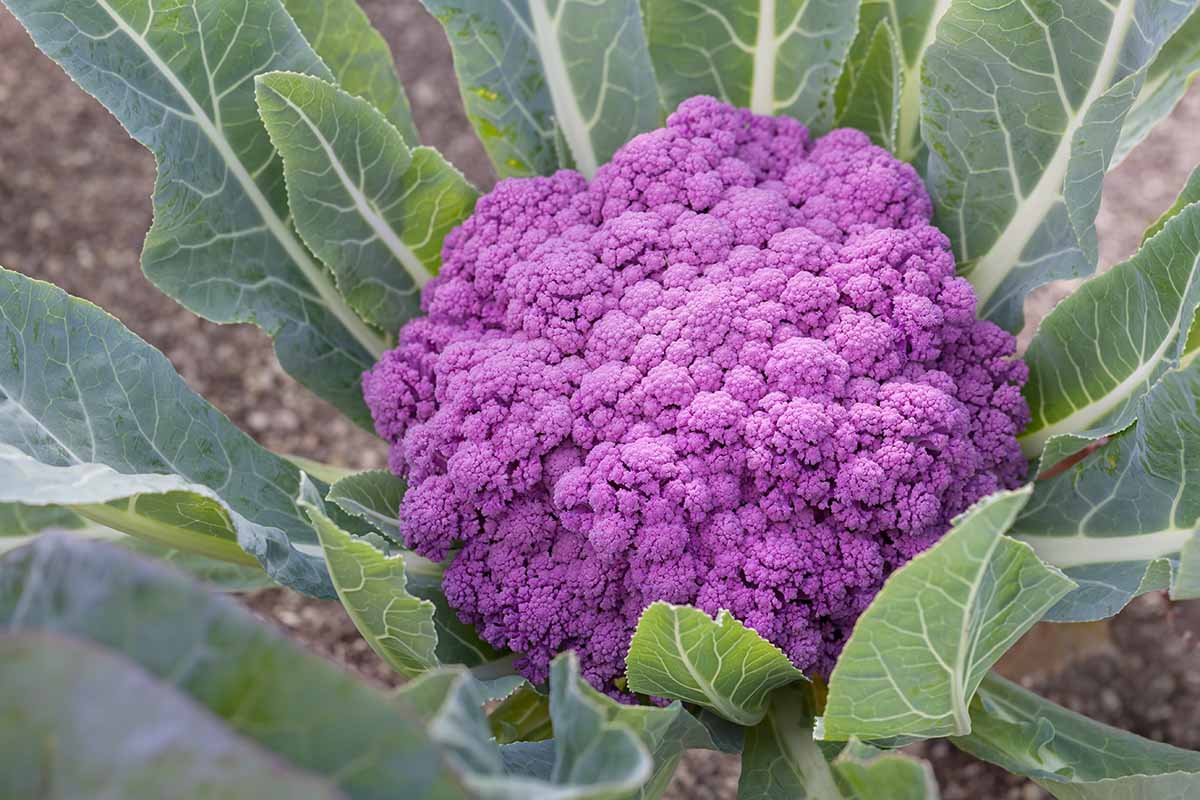
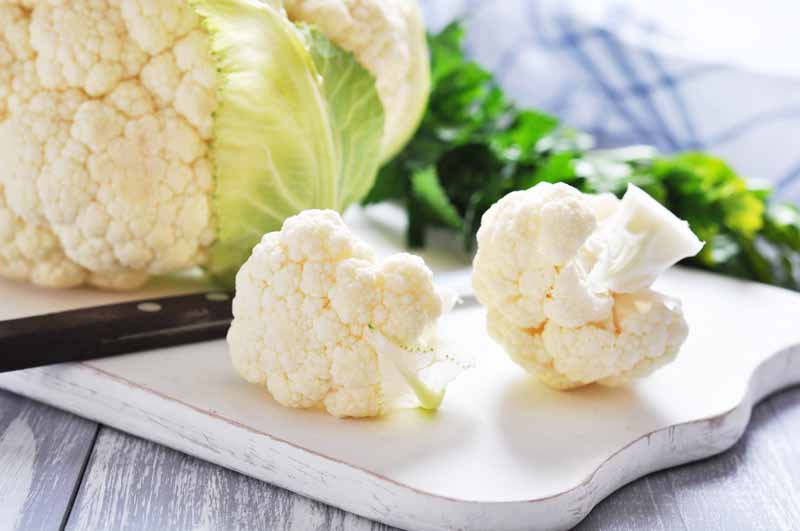
It is a cool-weather crop often referred to as a “brassica” or “cole crop,” with edible heads, leaves, and stems. Cauliflower resembles broccoli in its form, but it is actually quite different. Unlike broccoli, which has a domed head of tightly packed edible flower buds, a cauliflower head consists of dense, curd-like plant tissue with a soft texture and mildly sweet, nutty flavor. We link to vendors to help you find relevant products. If you buy from one of our links, we may earn a commission. The green type is actually a “broccoflower,” or hybrid of cauliflower and broccoli that most resembles cauliflower with its fleshy head. Note that there is another vegetable commonly referred to as a broccoflower that is not botanically a type of cauliflower. It is Romanesco broccoli, and has pointed lime green whorls of tightly packed flower buds. You may have heard that cauliflower is difficult to grow, but that’s only because it has specific requirements that need to be met in order to produce robust and delicious heads. In this article, we discuss all you need to know to grow cauliflower in the home garden. Here’s what’s in store: Let’s get growing!
Cultivation and History
B. oleracea var. botrytis is a half-hardy biennial that is usually grown as an annual in USDA Hardiness Zones 2 to 11. How confusing is that? Half-hardy means it’s able to withstand some frost. The leaves may “burn,” but a maturing head may continue to grow. However, if a cold spell comes suddenly, the temperature fluctuation may cause a plant to bolt, finishing its life cycle prematurely, and likely producing an inedible crop. A biennial is a plant that takes two growing seasons to complete its life cycle. Cauliflower produces an edible head in the first year. If we harvest the head, the plant is finished growing. This is how most of us cultivate it – as an annual. However, in regions without freezing winters, if we don’t harvest the head, plants continue to grow and will flower and set seed in the second year. This is characteristic of a biennial. Seed savers in warm regions can let some of their best heads run to seed to collect it for future crops. When growing this brassica, expect the number of days to maturity to vary from approximately 50 to 100. Pay close attention to seed packets when making your selections, and choose a length of time that suits your average climate. In warm climates, plant in the fall for an early spring crop. In colder zones, you have the option of planting indoors in early spring, or outdoors in late summer, to avoid peak heat and cold. Growing cauliflower reminds me of “Goldilocks and the Three Bears” and their bowls of porridge. This veggie doesn’t like air that’s too hot or too cold, preferring instead temperatures that are consistently “just right.” If you’re in a zone where you have two to three months of temps that average in the 60s, you’re in prime brassica-growing territory. The rest of us must work a bit harder. Here in southeastern Pennsylvania, we sometimes have crazy days in April when the temperature suddenly soars to 90°F. This may cause plants to ”button,” producing multiple tiny heads, or “bolt,” forming curds that spread and go to seed. It’s much better to plant in late summer for a fall crop in locations like mine. From a historical standpoint, cauliflower is an ancient vegetable that originated in the Eastern Mediterranean, likely on the island of Cyprus. By the Middle Ages, it was already under cultivation in Italy, and from there, made its way across Europe and around the world to India. There are four main groups of cauliflower: Italian, Northern European, Northwest European, and Asian. The Italian varieties are believed to be old ancestral descendants. The rest are the progeny of cultivars developed in the 18th and 19th centuries. Today’s colorful cultivated varieties are marvels of the 20th century. Who knows what the future holds!
Propagation
There are two ways to start plants: from seed, or from nursery seedlings that are transplanted to the garden.
From Seed
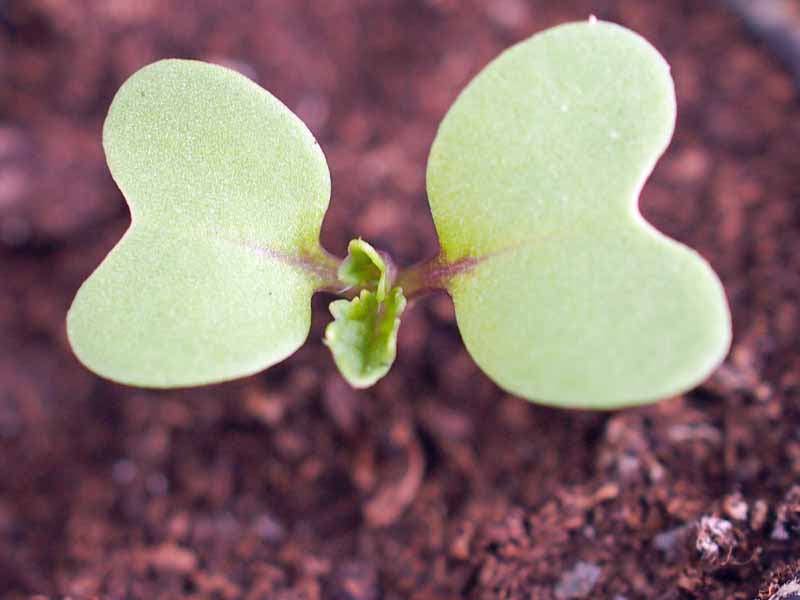
For an early summer harvest, Rodale’s Ultimate Encyclopedia of Organic Gardening recommends starting seeds indoors in peat pots about four to six weeks before the last expected frost date. Sow seeds half an inch deep in biodegradable pots. This way, you can transplant entire pots instead of unearthed seedlings, and avoid root damage. Be sure to use sanitary tools and supplies to avoid exposing your germinating seeds to disease. You can place the pots on a 70°F warming tray and set it near the sunniest window in your home. Keep the soil moist, but not soggy. Be sure to remove the warming tray as soon as the seeds germinate, so they don’t overheat. When the seedlings have sprouted not only cotyledons, or “seed leaves,” but several sets of true leaves as well, begin to harden them off. This simply means setting the pots outside for a few hours each day, increasing gradually to all day, before transplanting them into the garden. And as we’ve said, in cool climates, you may also sow seeds in late summer for a fall harvest. Place them directly in the ground two to three months before the average first frost date. Choose a planting location with full sun to partial shade. Full sun is recommended on many seed packets, however, a partially shaded placement offers protection in the event of a sudden spike in temperature. You may want to have a soil sample tested to determine its acidity and nutrient content. Soil with a nearly neutral to slightly acidic pH of 6.0 to 7.0, is best. Transplant during a cool time of the day, morning or evening. Some folks like to put a collar around each seedling to deter cutworms. You can read our guide for more information on this pest. Add a one-inch layer of mulch to aid in moisture retention, keep weeds down, and keep the ground cool.
From Seedlings/Transplanting
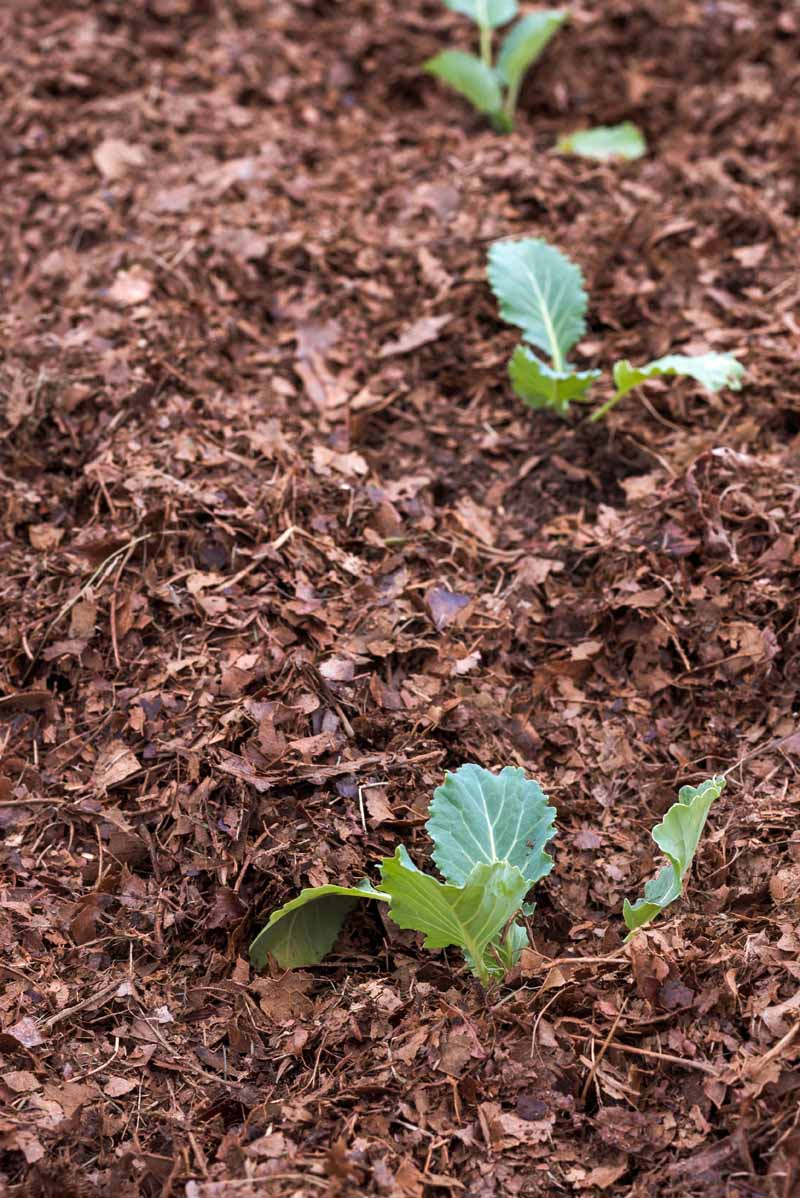
Transplant nursery seedlings to the garden the same day you buy them, or as soon as possible. Gently unpot the seedlings and set them into the garden slightly lower than the soil surface. Cover the potting medium with soil, tamp it down, and water well. Mulch as recommended above.
How to Grow
B. oleracea var. botrytis does best in good-quality soil that drains well. You may wish to conduct a soil test prior to planting. Per the results of your test, you may work amendments such as organically-rich compost, bone meal, or lime into it as recommended by the testing laboratory. Work your planting soil to a depth of about eight inches. Plant entire biodegradable pots 12 to 20 inches apart, depending upon the variety you are growing. For nursery pots, carefully ease the contents out, loosen any visibly tangled roots, and place in the hole at the same depth as they were in their pots. Some seed packets recommend closer plantings, but this doesn’t allow for maximum air circulation. Mature plants generally reach a height and girth of about two feet in either direction, and overcrowding increases vulnerability to pests and disease.
Fertilizing
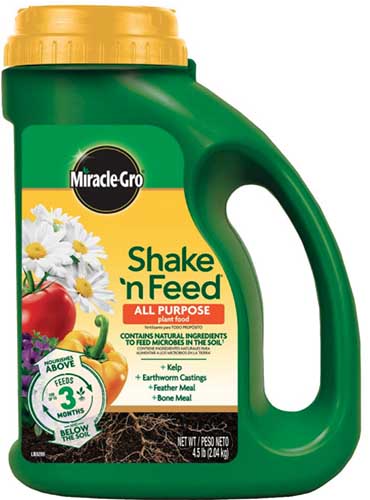
Theories differ on fertilizer applications. Carla Emery, in her comprehensive Encyclopedia of Country Living, warns against commercial fertilizers that may burn tender roots. The folks at the Missouri Botanical Garden recommend high-nitrogen varieties. Side dressing is simply applying it around the perimeter of plants, just outside the edge of the largest leaves, to avoid direct contact with the foliage. It’s available from Home Depot in a variety of container sizes. Apply it at transplant time, and it works throughout the growing season. Miracle-Gro Shake ‘N Feed All Purpose Plant Food If you choose to fertilize and don’t use a slow-release product, apply it at transplant time, and then as a side dressing per package instructions during the growing season.
Watering
Cauliflower requires even moisture, so don’t let it dry out. To increase moisture retention, make a narrow moat around each plant by mounding soil up in a ridge around it. Mix some mulch into this soil ridge to further aid in moisture retention, protect delicate roots, keep the ground cool, and inhibit weed growth. The less you need to weed, the better, as the roots are shallow and fragile. Water deeply once a week in the absence of rain, using a gentle spray nozzle aimed at the soil over the roots. Do this in the morning or evening, when temperatures are at their coolest. Rainfall plus supplemental irrigation via watering by hand should amount to between one and two inches total per week. If you’re not sure how much precipitation you’re getting, try using a rain gauge.
Temperature Management
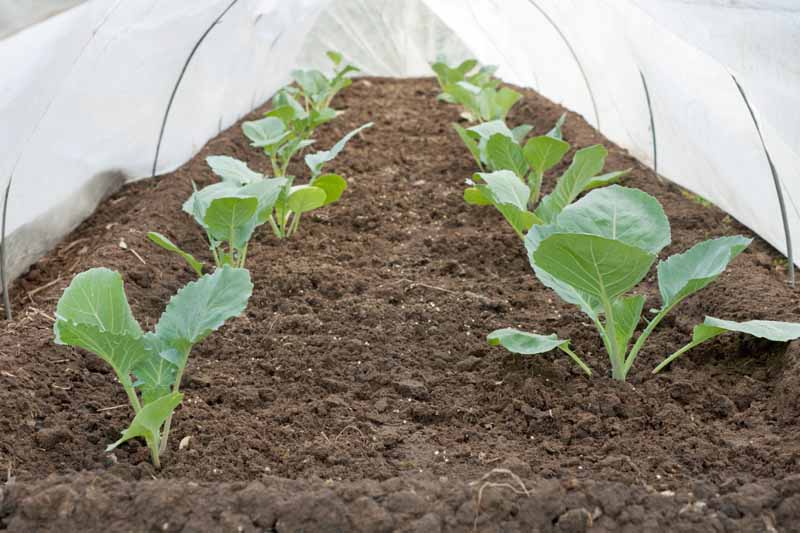
In early spring, most of your garden is likely to be in full sun, however, as the season comes into full bloom, trees begin to leaf out and cast some shade. Consider this as you choose a planting site. If partial shade is unavailable, be prepared with a supply of lightweight floating row covers that you can quickly set up in the event of a sudden surge in temperature. Place them as high as possible and leave the ends of the rows open to ensure adequate air circulation. For fall crops, the converse is true. Cold snaps are not uncommon, so keep row covers of a heavier material on hand. Place them a little lower, and close off the ends, to create a snug environment. Be sure to open the ends or remove them entirely when temperatures rise. In addition to providing some temperature control, row covers help to deter unwanted pests as well.
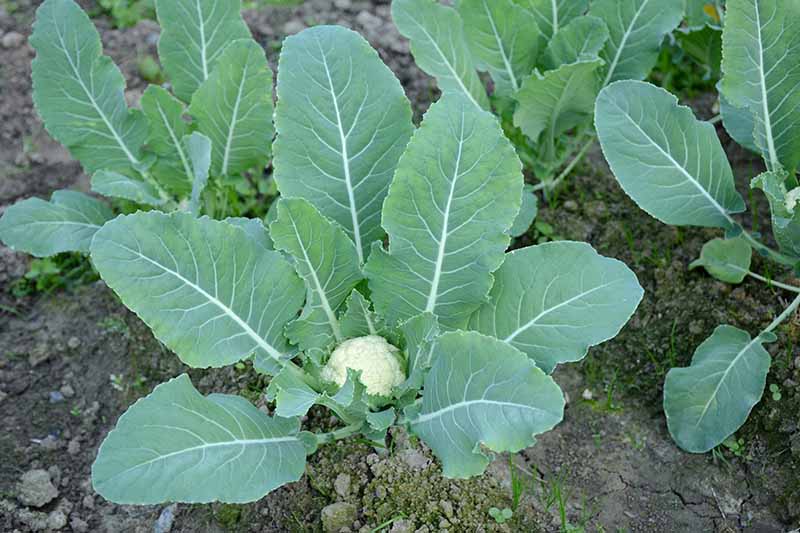
Blanching
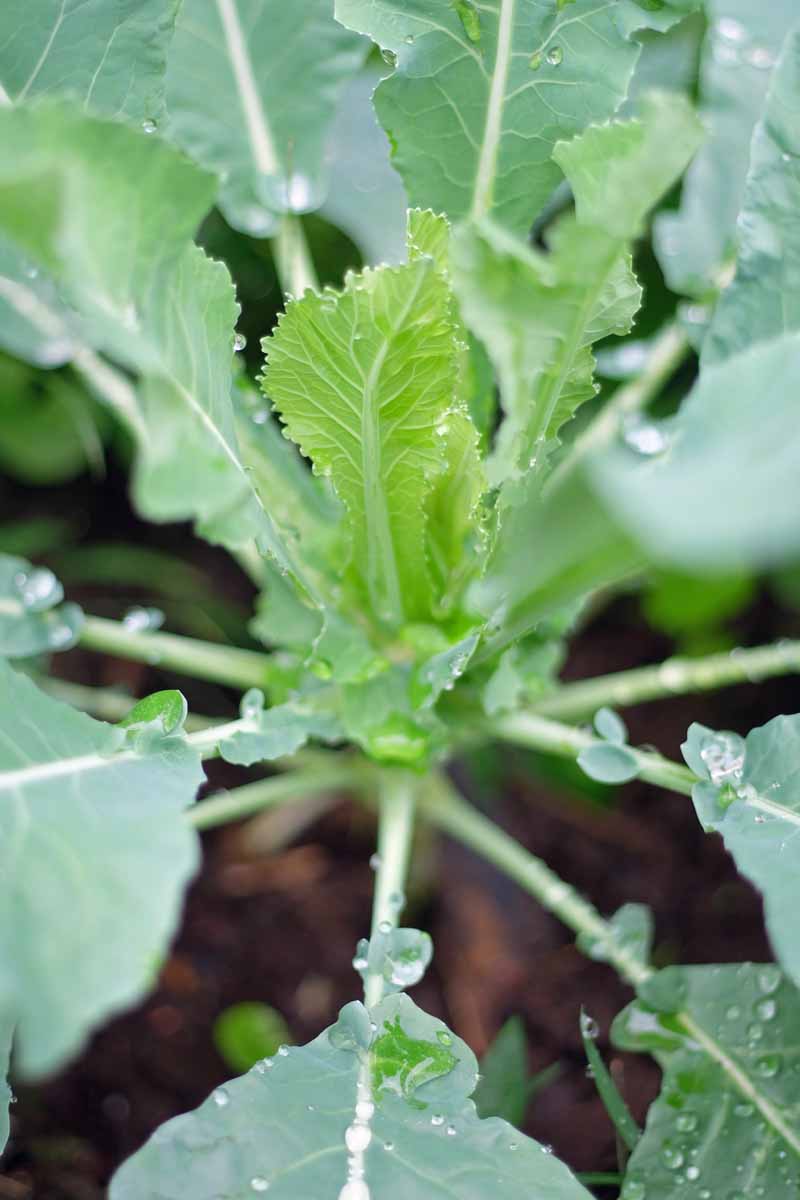
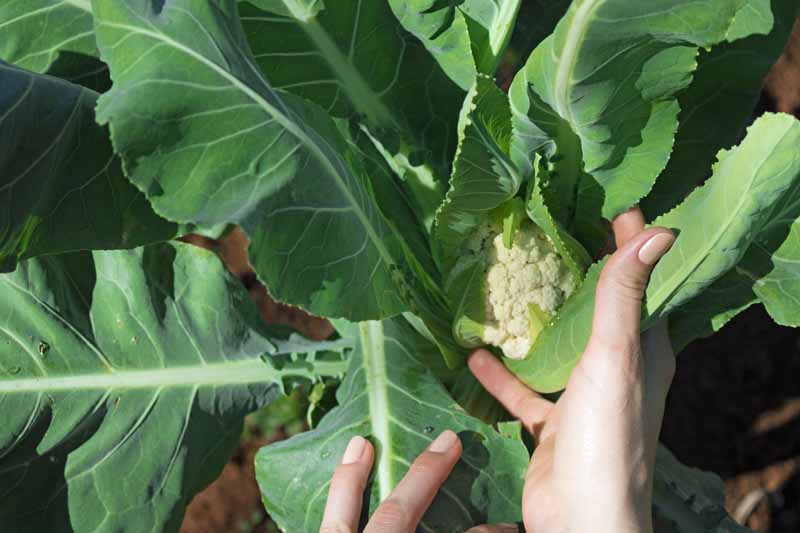
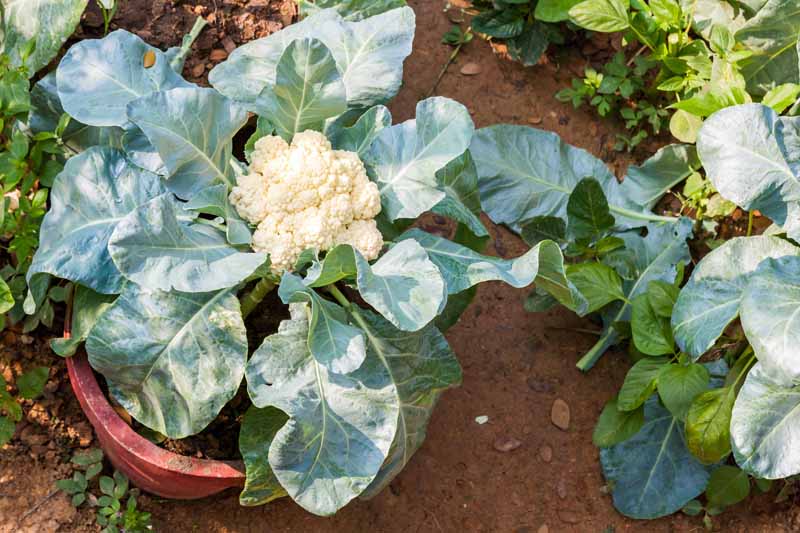
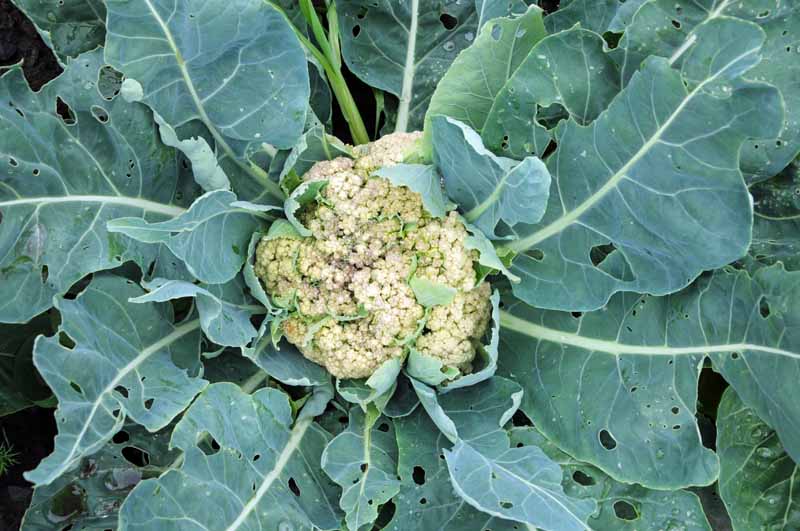
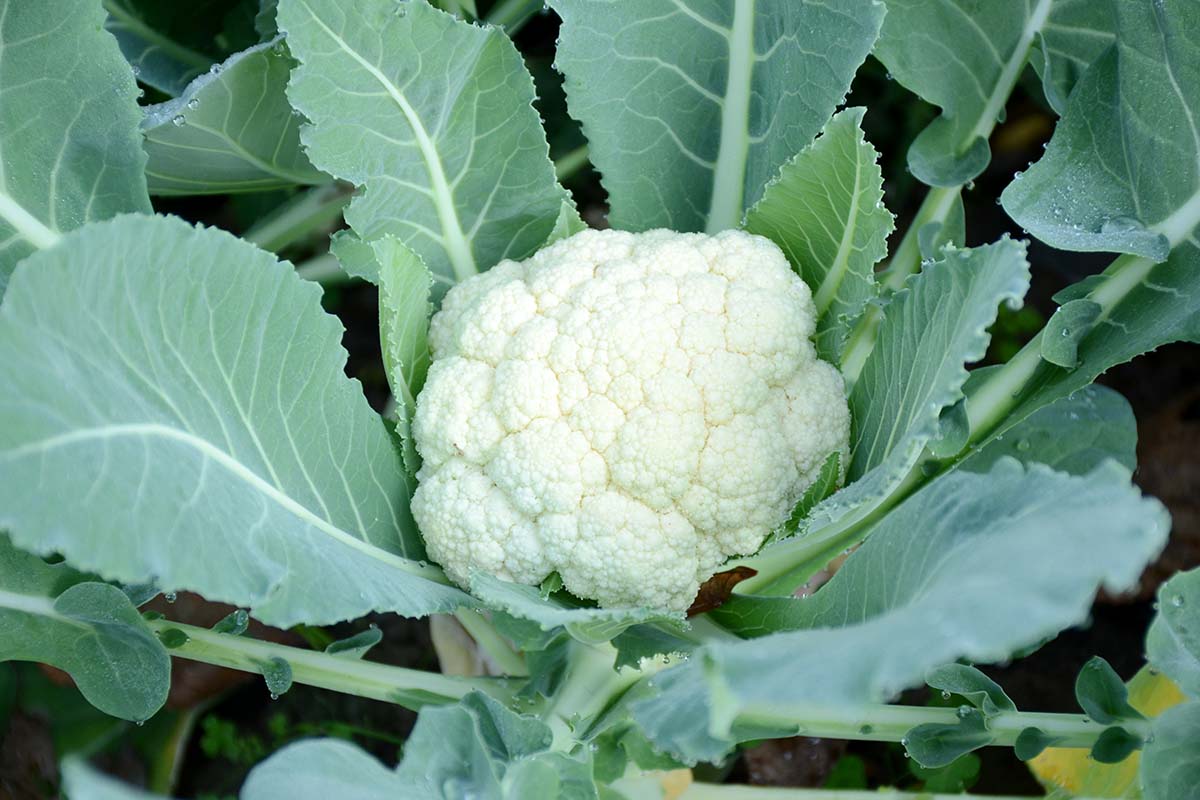
As your crop grows, the leaves will become voluminous, and in the center of each plant, you’ll see a head of curds beginning to form. If you are growing a white variety, when it’s a few inches across, it may be time to “blanch.” This is a simple task that involves binding the leaves up and over the developing head to keep the color pristine and the flavor at its peak. Some cultivars are self-blanching, with leaves that curl naturally up and over the flower heads. Others must be manipulated manually. To blanch a head, simply gather the leaves in your hands as if you were making a bouquet, and bind them together above the head. Use rubber bands or twine, and be sure to leave room for air circulation. The idea isn’t to snug them up, but to shade them from the sun. Peek in and check on them every couple of days. It may be another week or more before heads reach the diameter specified on seed packets, at which time you may unbind the leaves and prepare to harvest. Read more about blanching cauliflower heads in our guide.
Companion Planting
Cauliflower is a plant that emits allelochemicals that may have a detrimental effect on neighboring plants, and on the landscape site itself. This characteristic, plus its need for abundant nutrients and water, make cauliflower a poor companion for plants like other brassicas, corn, cucumbers, peppers, squash, strawberries, and tomatoes, which may be adversely affected by the allelochemicals, and would compete for food and water. Ideal companions include those that are suitable for growing alongside broccoli: beets, celery, chamomile, culinary sage, dill, garlic, hyssop, fennel, marigolds, nasturtiums, onions, oregano, potatoes, rosemary, thyme, and yarrow. Just don’t plant your broccoli and cauliflower together, or they’ll battle it out for the nutrients and moisture in the soil. See our guide to cauliflower companion plants for more information.
Container Growing
In addition to growing in the garden, the shallow roots of B. oleracea var. botrytis make it a good container crop. Just remember that these plants must have consistently moist soil. This poses an additional challenge, as a container will typically dry out faster than ground soil. Choose a pot that can accommodate your selected cultivar’s mature dimensions, with a depth of at least eight inches. Be sure that it has one or more drainage holes. Read more about how to grow cauliflower in containers in our guide.
Growing Tips
Choose cultivars that are suited to your growing season, and plant so that heads mature during cool periods.Fertilize to keep this heavy-feeding brassica well nourished.Maintain even moisture throughout the growing season.Provide protection from weather extremes, especially during heading.Blanch white varieties to keep them from scorching, or sow self-blanching types.
Managing Pests and Disease
As with all cabbage relatives, B. oleracea var. botrytis is prone to pests and disease, posing additional challenges to successful growing. Here are two to consider:
Flame Star
‘Flame Star’ is an exceptionally heat tolerant orange variety that grows in full sun. Its generous seven-inch heads have an especially nutty, almost buttery flavor. ‘Flame Star’ Plants mature to a height of 12 to 14 inches, with a spread of 12 to 18 inches. They are harvest-ready in 55 to 60 days. Find ‘Flame Star’ available from Burpee. Choose from 50-seed packets or six-plant bundles.
Snowball Self-Blanching
‘Snowball’ is a classic white cultivar that grows best in cool weather with full sun. It has foliage that curls around its ample six- to eight-inch heads, self-blanching them. As this type prefers cool weather, it is recommended that seeds be started indoors, so maturity takes place when the weather is as cool as possible. ‘Snowball Self-Blanching’ Plants achieve mature dimensions of 24 to 30 inches tall and 12 inches wide. They are ready for harvest in 65 to 75 days. Find ‘Snowball Self-Blanching’ now from Burpee in packets of 100 seeds. You can find more selections for your veggie patch in our guide to cauliflower varieties. If you notice discoloration, wilting, or holes in the foliage; damage to the stems or roots; or insect infestation or eggs, take immediate action. Some disease-carrying pests may reduce leaves to skeletons before burrowing into the heads, while others attack at the root level. Here are some pests you may encounter:
AphidsCabbage LoopersCabbage MothsCabbage Root MaggotsCabbage White CaterpillarsCabbage WhitefliesCross-Striped Cabbage WormFlea BeetlesSlugs and Snails
There are preventative measures you can take to make your garden less attractive to these pests, including avoiding over- and underwatering, and keeping the area free of weeds and debris. In addition, there are both chemical and biological treatments to consider. One biological solution involves planting umbel flowers, like yarrow, with flattened flower heads full of tiny blossoms that attract the parasitoid wasp. This tiny pest is a predatory powerhouse that lays its eggs in soft-bodied cauliflower pests, causing their death in the process. See our guide to cauliflower pests for more details. Diseases to be on the lookout for include:
Alternaria Leaf SpotBacterial Soft RotBlacklegBlack RotCauliflower Mosaic VirusClub RootDamping OffDowny MildewPowdery MildewRing SpotSclerotinia Stem RotWhite Rust
Many of these conditions can be addressed with preventative measures, as well as biological and chemical treatments. Consult our guide to cauliflower diseases for more information.
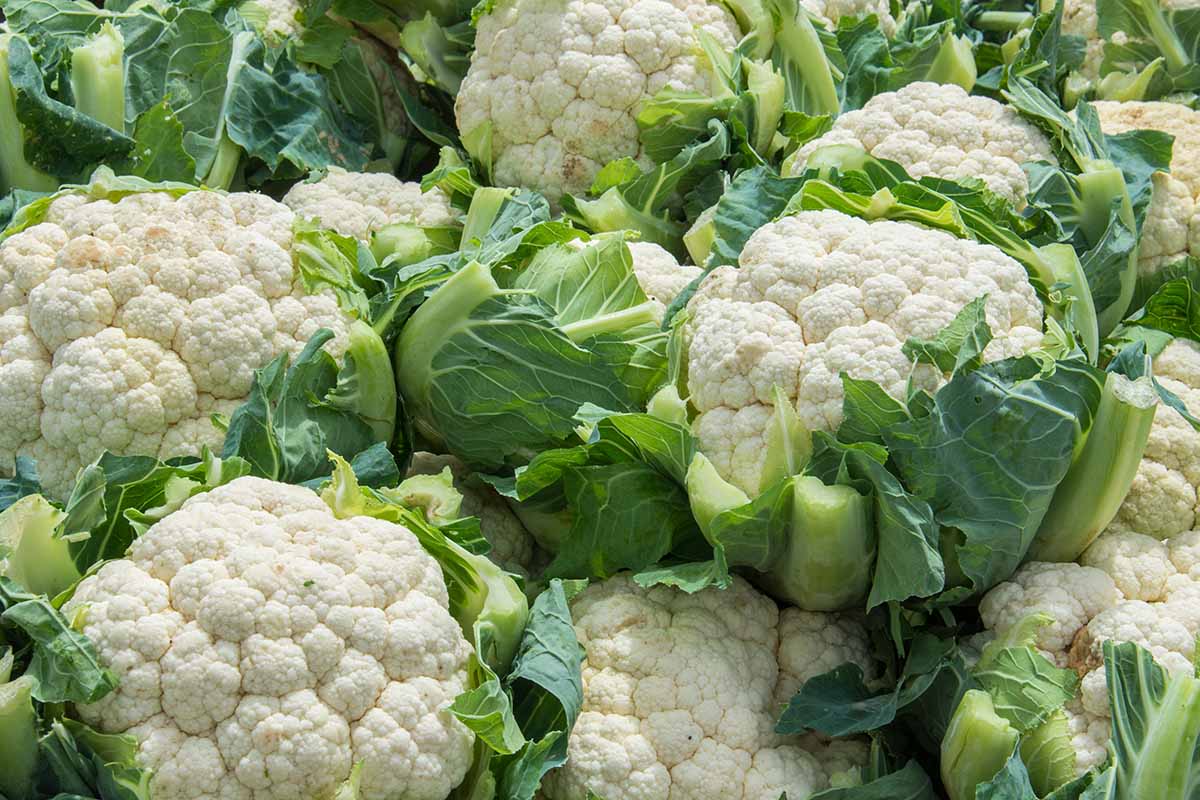
Harvesting
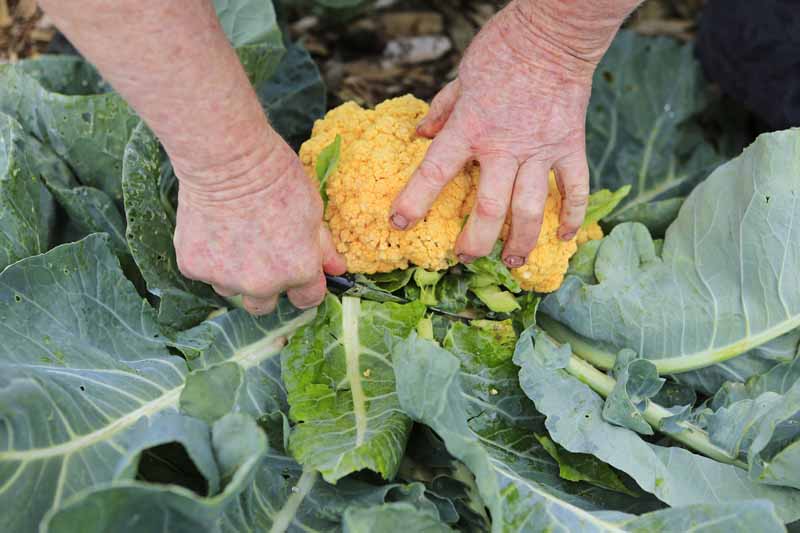
Use seed packet information as your guide to the approximate number of days to maturity and expected head size. When these benchmarks have been reached, and you have a large head of dense, curd-like flesh, it’s time to harvest. To harvest a head, use a clean knife to make a clean cut across the stem a few inches below the head. Some folks like to leave a good length of stem and some leaves attached, as they are good to eat. Others leave most of the stem and all the leaves behind with the hope that side shoots may sprout. While this is likely with broccoli, cauliflower is usually a one-and-done plant. Read more about harvesting cauliflower in our guide.
Storage
It’s best to eat a homegrown vegetable the day it’s picked. However, you can harvest your cauliflower and wrap it, unwashed, in damp paper towels, and then store it in the low-humidity crisper bin of your fridge. It should stay fresh for up to one week. Alternatively, you can freeze your crop. Here’s how:
Recipes and Cooking Ideas
Cauliflower is a mild and versatile cruciferous vegetable that is packed full of nutrition and can be prepared in many ways. Here are three recipes for you to try: Tangy, creamy, and bursting with lemon zest, you’re sure to enjoy mozzarella-smothered creamy riced cauliflower stuffed peppers. Get the recipe now from our sister site, Foodal. Crisp baked easy vegan cauliflower Buffalo wings with lime make a zesty barbecue appetizer with their extra-spicy cayenne sauce. Find the recipe on Foodal. And grain-free Indian spiced cauliflower fried rice with cashews and coconut is a multi-layered sweet and savory combination infused with warming, anti-inflammatory turmeric, ginger, and garam masala. You can find this recipe on Foodal as well. When selecting seeds, gauge the length of time your climate stays “just right” for plants to mature. And while it may be tempting to choose one of today’s fast-maturing cultivars for spring planting and a summer harvest, some folks swear that a fall crop of a tried and true slow-growing variety is the only way to go when it comes to conducive temperatures and outstanding flavor. Protect your crops from the start with quality seed and sanitary practices. Sow in soil that’s not too acidic, ensure adequate drainage and air circulation, and consider using row covers for an added layer of protection from pests and disease. Make room for a few cauliflower plants in the vegetable garden this year. You know how to meet the challenges and are ready for success. Have you grown cauliflower? Feel free to share your experience with our readers in the comments section below. Want more information on growing cauliflower? Be sure to check out all of our guides including:
Why Is My Cauliflower Turning Purple?9 Cauliflower Head Disorders and How to Avoid ThemWhy Is My Cauliflower Fuzzy? Troubleshooting Tips for Ricing in CurdsHow to Grow and Care for Romanesco Broccoli