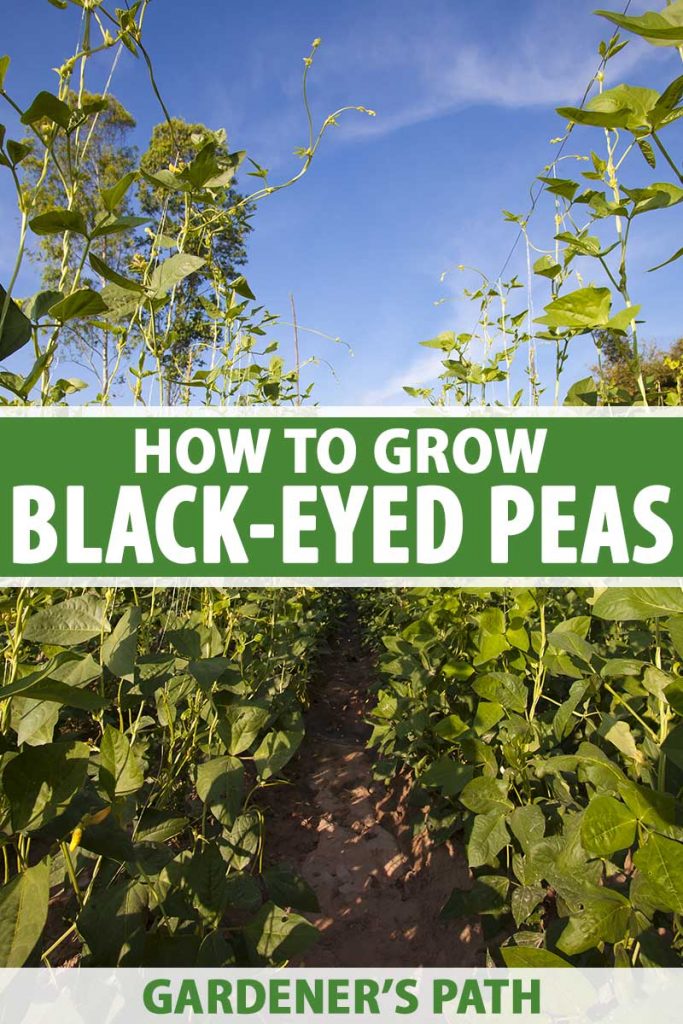
These Southern US favorites are a New Year’s Day good luck tradition. But if you grow them in your vegetable garden, they’re also good: for the soil, for areas that get hot as Hades, and for drought resistance. From personal experience, I’d also add, “good for gardeners who like low-maintenance vegetables.” We link to vendors to help you find relevant products. If you buy from one of our links, we may earn a commission. The main obstacle to growing a healthy crop of these legumes is having enough time for them to produce a harvest before the first frost. They’ll die on the spot when a hard freeze strikes. But up to that point, they’re workhorse producers of edible leaves, snaps, shellies, and finally, dry black-eyed peas you can save and store dried or cooked and frozen. Sold on the idea of a New Year’s tradition that starts in your garden? Let’s get growing. Here’s what’s to come in this article:
What Are Black-Eyed Peas?
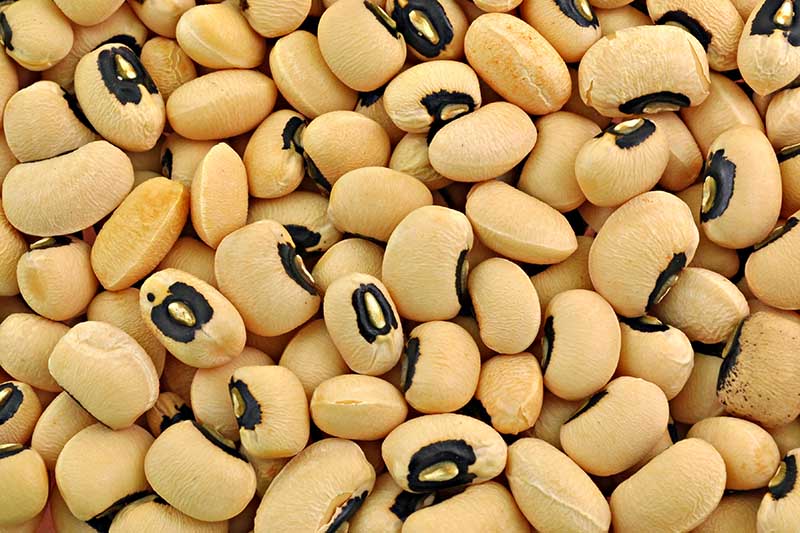
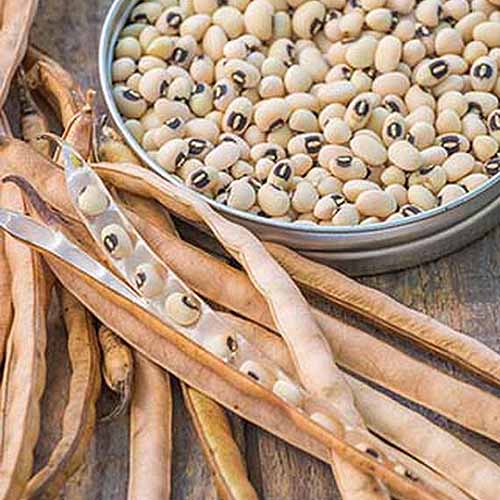
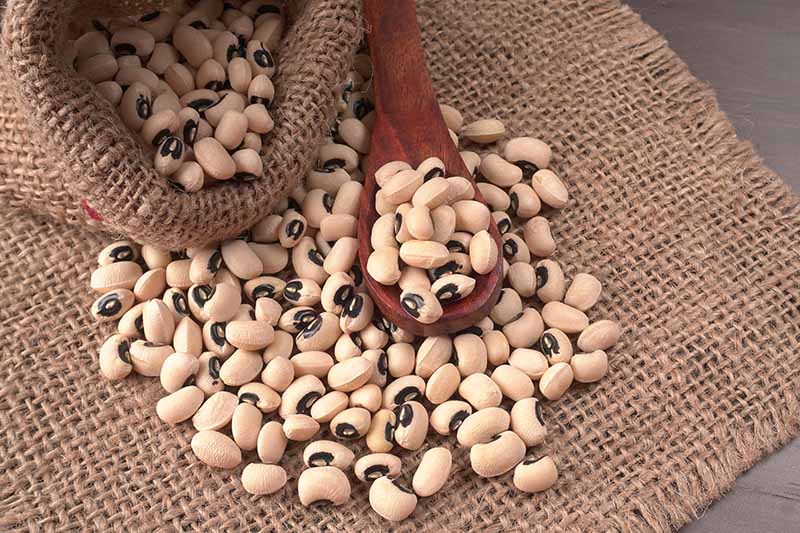
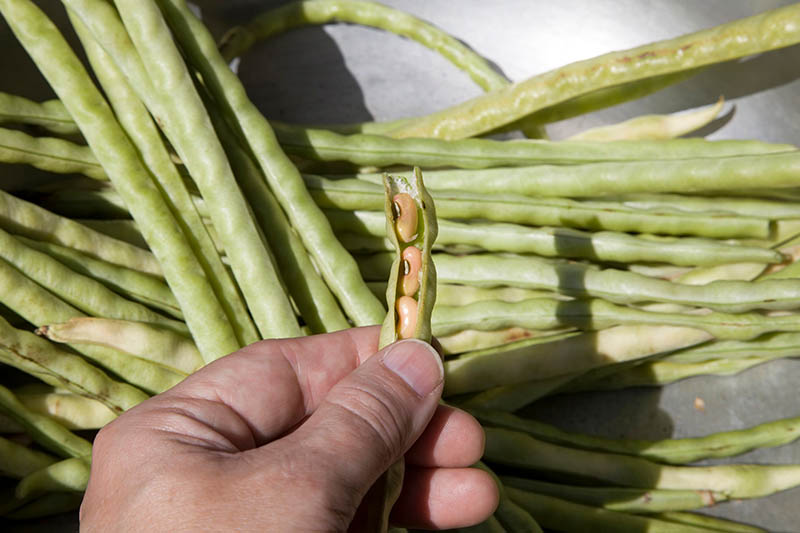
When is a pea not a pea? When it’s black-eyed. Don’t let the name fool you. These legumes that sport a black “eye” at the spot where the seed attaches to the inner pod are beans.
They are members of the Fabaceae family, which includes peas and green beans. Tan with a black speck, the small, kidney-shaped beans are one of a number of species in the Vigna genus. They’re the best known variety of a larger species, V. unguiculata, commonly known as “cowpeas.” Just a few of the many others names you might hear used interchangeably for black-eyed peas include Southern, crowder, and field peas. As a herbaceous annual originating in Africa, these legumes have many of the cultural requirements of other types of beans. They thrive in heat and humidity and can tolerate both drought and poor soil. Dried black-eyed peas are a staple ingredient for soul food and comforting “cheap eats” soups and stews. They have a mealy texture and a rich, mineral flavor that has caught on with farm-to-table chefs in recent years. You’ll find them as an ingredient in summer menus in everything from updated succotash to hummus, marinated bean salads, and nouveau Southern fritters. While they are versatile, they’re never bland. The taste is earthy and savory, while the bean broth they produce is rich and pairs very well with smokey meats or smoked spices. One thing I really like about these plants is that they produce something edible throughout the season. You can eat the young leaves or immature pods steamed, and then enjoy the mature seeds as fresh shelled beans.
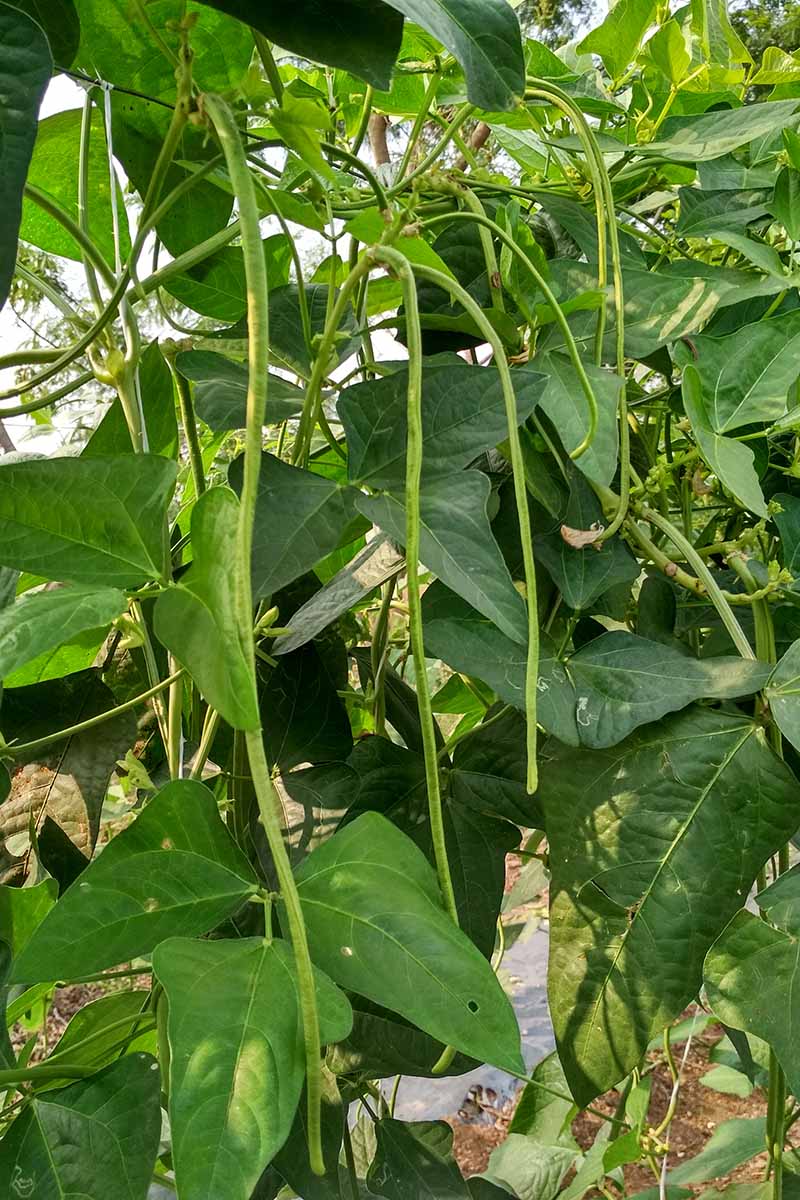
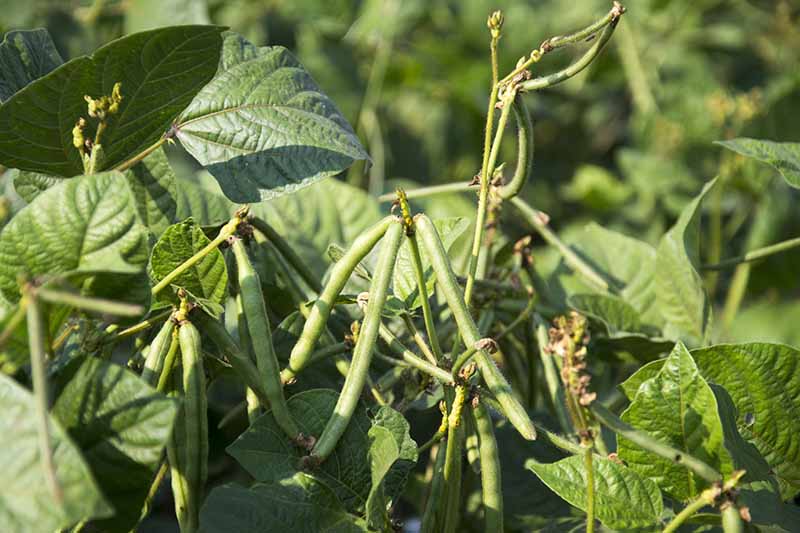
Still later in the season, you can harvest seeds from the dried pods to save to eat in the winter or grow next summer. Like many other beans, some black-eyed pea cultivars are creeping vines, with a growth habit much like their pole bean relatives. There are also more compact, bush varieties of this Southern good-luck bean plant. Cultivars may be determinate or indeterminate. Determinate varieties will produce the crop all at the same time, while indeterminate types will produce beans throughout the season. If you’re intent on harvesting a crop to dry and store to cook for luck next New Year’s Day, the determinant plants will be your top choice. While these tan and black dried beans are synonymous with the US South, they will prosper in USDA Hardiness Zones 5-11. Like many legumes, these plants improve tired or poor soil by fixing soil-bound nitrogen with the nodes on their roots. While many larger farms use black-eyed pea plants solely for a cover crop or soil builder, us home gardeners can reap the soil benefits and still harvest the seeds and pods, too. Dried black-eyed peas are a soulful, satisfying staple ingredient for many delicious dishes. And they’re also good for you. High in dietary fiber and protein, rich in polyphenols and micronutrients such as folate and iron, they pack quite the nutritional punch.
Cultivation and History
Black-eyed peas and their cowpea relatives are native to West Africa. Even today, about two-thirds of the world’s cowpea crop is grown and eaten in Africa.
According to an article by Franck Kuwonu, published by the United Nations, these life-sustaining legumes go by the name “miracle peas” in sub-Saharan Africa because they’re so nutritious and can perform in the type growing conditions that would thwart most other edible plants. The popular New Year’s Eve dish exists as a result of the shameful legacy of slavery. The beans were shipped over to what became the United States as provisions on slave ships, according to National Geographic coverage of the opening of the National Museum of African American Culture in Washington, DC. These cowpeas continued to be grown in the American South long after slavery finally came to an end, and are still popular in the region today. In the American North, the superior nutrition that they offered and the plants’ ability to thrive in poor growing conditions made them a natural crop choice to feed cattle and milk cows, hence the name “cowpea.” As for how the “miracle pea” became a prerequisite for good luck on New Year’s Day? The New Encyclopedia of Southern Culture The New Year’s dish is often combined with some sort of green vegetable, usually collards, to represent green paper bills.
How to Sow
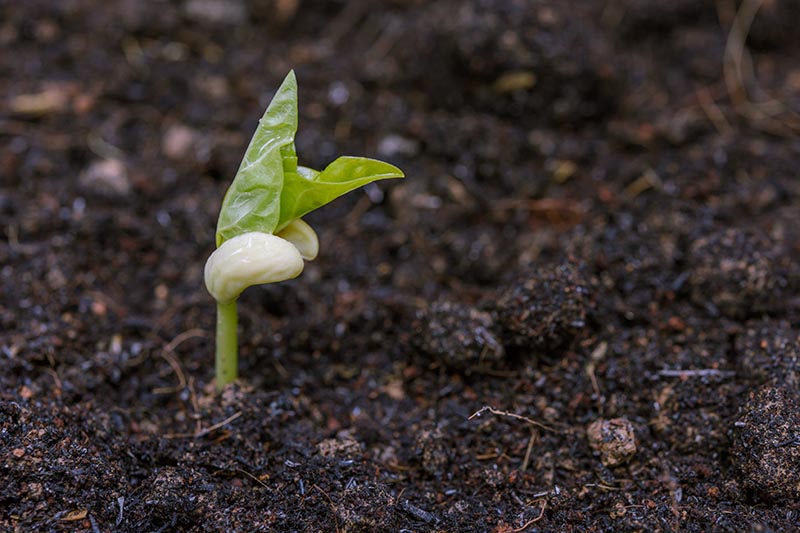
Black-eyed peas are one of the summer vegetables you’ll want to direct sow. They do not transplant well, so it’s best to plant the seeds right in the garden. Wait until the soil has warmed to at least 65°F in the spring. If you try to speed things up by planting too early in cold soil, the seed will likely rot in the ground. Sow seeds four to six inches apart in rows two and a half to three feet apart. Plant them about an inch and a half deep.
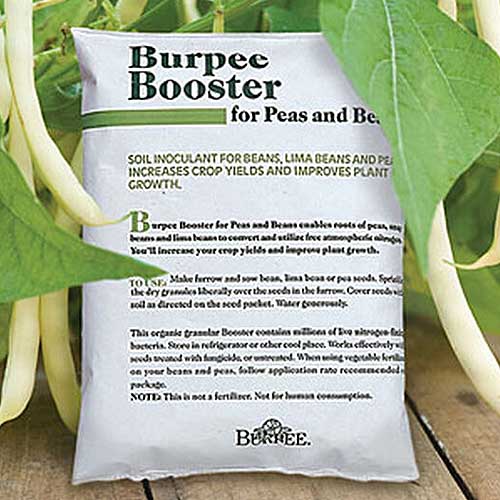
Black-eyed peas, like all legumes, have a beneficial symbiotic relationship with certain types of bacteria (species in the Rhizobium and Bradyrhizobium genera) that produce food for the plants. In a process that takes place amidst the legume plants’ special root tissues, known as nodes, the bacteria extract nitrogen from the air and turn it into ammonia that feeds the plants. The legumes give those microbes what they need by providing them with life-sustaining carbon and other nutrients. This benefits the plants while they’re producing, and also strengthens the garden soil. Legumes “fix” this nitrogen into the soil, where it remains at season’s end when you pull the plants. The helpful bacteria stick around for next year’s crop, too! Here’s the thing, though. You might not have this bacteria in your soil, so it can be a good idea to treat your black-eyed pea seeds with an inoculant that contains the beneficial bacteria strains. Your local farm supply store may be able to sell you a small amount of inoculant targeted specifically for legumes. Typically, you’d coat your seeds with this type of inoculant by sprinkling them with a little water or milk and then rolling them in the powder or sprinkling it on top. Just make sure you only apply those types of inoculant shortly before you plant. The microbes in the inoculant don’t live long in sunlight.
How to Grow
Black-eyed peas grow best in well-drained loamy to sandy soils with a pH between 5.5 and 6.5. They require a full sun location and shelter from strong winds.
Burpee Pea and Bean Booster Burpee Pea and Bean Booster is a nitrogen-fixing inoculant that is ideal for black-eyed peas and you can find it at Burpee. You can learn more about how to use soil inoculants in our guide. They are light feeders and don’t need much fertilizer. If you use a soil inoculant at planting time, you won’t need any fertilizer at all.
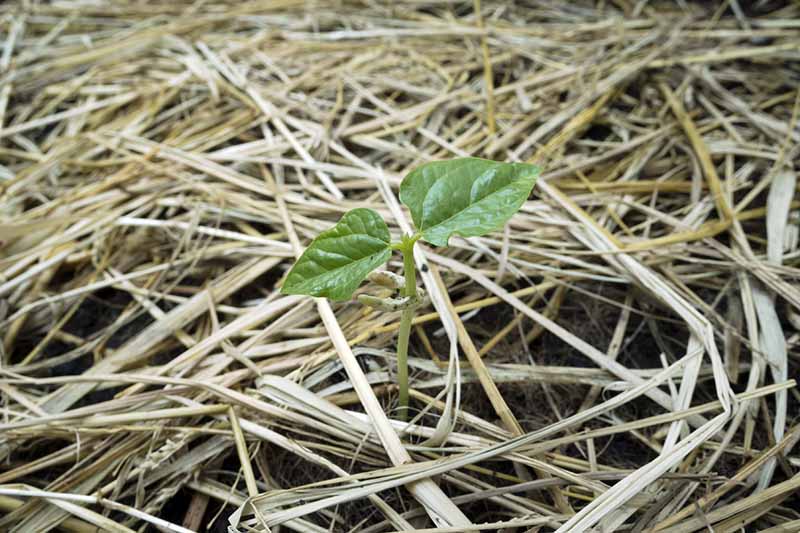
Black-eyed peas tolerate heat and dry weather well. Unless you go for a month or more without rain, they won’t require much supplemental water. What they really can’t abide is wet feet, so well-draining soil is essential. When you irrigate, make sure you water the plants at the base, not from overhead, to prevent a build up of moisture that can lead to powdery mildew. Keep the planting area free from weeds, and maintain adequate spacing to allow for good airflow between plants to reduce the risk of fungal infection. You can apply a layer of mulch around young plants to inhibit the growth of weeds.
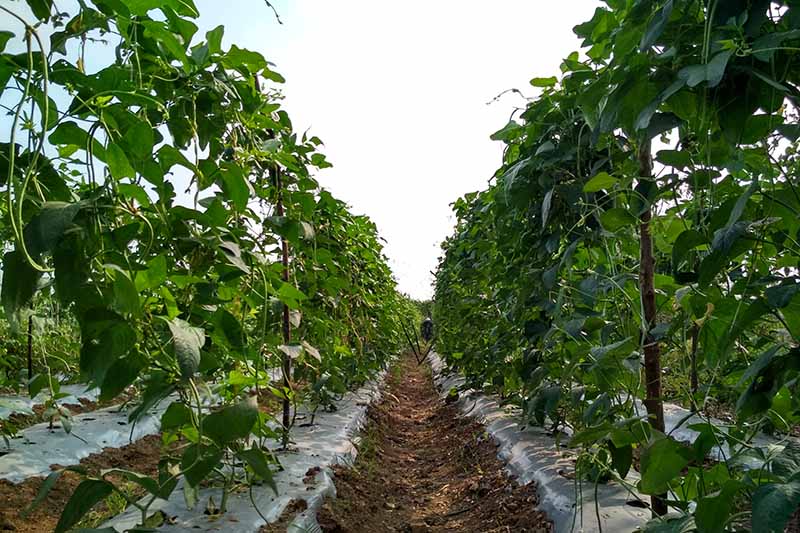
Determinate varieties will grow into a knee-high bush. But if you’ve selected a vining type, you’ll also need to provide stakes or a trellis for the plants so they can grow vertically instead of sprawling all over the ground. Make sure to insert the stakes about four inches from the spot where you plant the seeds, and do it when you sow. Otherwise, you risk disturbing the roots later in the season. Or you plant your seeds in soil that’s a similar distance from the trellis or fence that will be supporting the vines. When the plants are about five inches tall, use your hands to gently train them on to the supports if they haven’t already entwined.
Growing Tips
Plant in a full sun location, with protection from high winds. Make sure the soil is well-draining as plants can’t tolerate wet feet. Provide support in the form of stakes or trellis for vining types.
Cultivars to Select
Managing Pests and Disease
Black-eyed peas are also known as cowpeas, and that name is appropriate – they taste great to cows, deer, and other grazing animals. It produces six- to eight-inch pods, grows 16 to 18 inches tall and spreads about 10 inches at maturity.
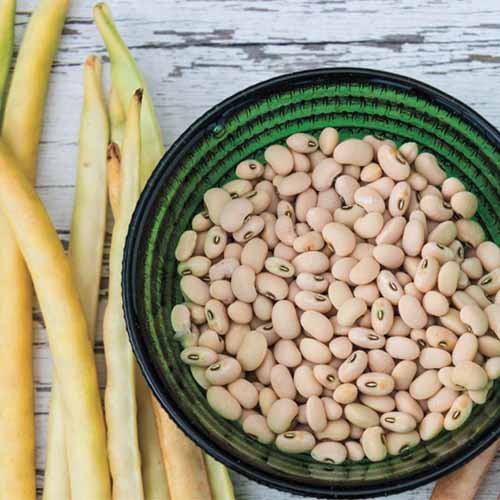
‘California Black Eye’ You can find packets of 200 seeds available from Burpee. Another bush variety, ‘Cream Pea Elite,’ produces beans that are a bit lighter than ‘California Black Eye,’ and in pods known for being easy to shell.
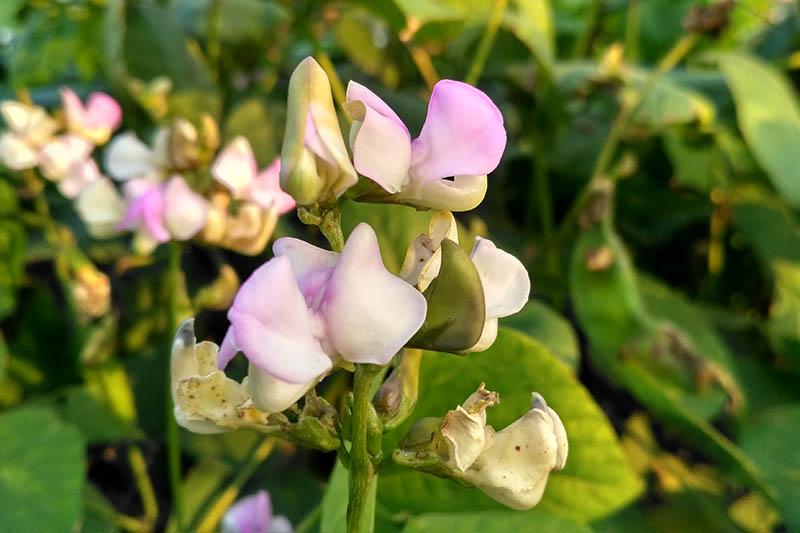
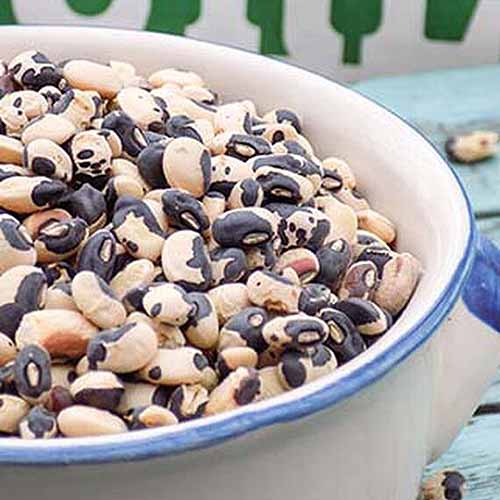
‘Cream Pea Elite’ This cultivar has also been bred to be resistant to Fusarium wilt. You can find quarter-pound packets of seeds available from Gurney’s via Home Depot. For a splashier looking black-eyed pea cultivar, I’m trying ‘Phenomenal’ this year. It produces tiny purple-pink flowers, followed by yellow pods with a dozen beans apiece.
‘Phenomenal’ They are heavy producers but also space hogs, with a mature height of two feet and a spread of two to three feet. The draw for me is the pattern on those beans: a black and brown mottling that looks sort of like the coat of a Calico cat. You can find packets of 200 seeds available from Burpee. To find a vining black-eyed pea cultivar, you may need to reach out to seed savers or possibly farm stores. They all tend to go by the name black-eyed pea, with no specific cultivar name. Look for descriptive words like “vining,” “sprawling,” or “needs staking” when you shop. A couple of hungry deer will eat a patch of peas to the ground overnight. Build a good fence or cover your pea plants with netting to keep the deer away.
Insects
Black-eyed peas are also subject to damage from leaf-eating insects, but the only specialized pests that prey on them are the cowpea curculio, Chalcodermus aeneus. In southeastern states east from Virginia to Florida, and west to Texas and Oklahoma, you may need to beware of this tiny dark weevil. The adults feed on pods and can lay eggs inside the pods, which hatch and tear up the seeds inside. They do not typically do any damage in northern areas. For home gardeners, it can be a viable solution to spray your plants with insecticides containing bifenthrin, carbaryl, or malathion when the peas are flowering or the pods are filling out. But larger operations literally have to surrender to these insects and stop growing cowpeas if they gain a stronghold in the crop or by overwintering in the soil. Other insect pests largely leave adult black-eyed peas alone. They are more of a concern in young plants where the damage can stunt their growth.
Aphids
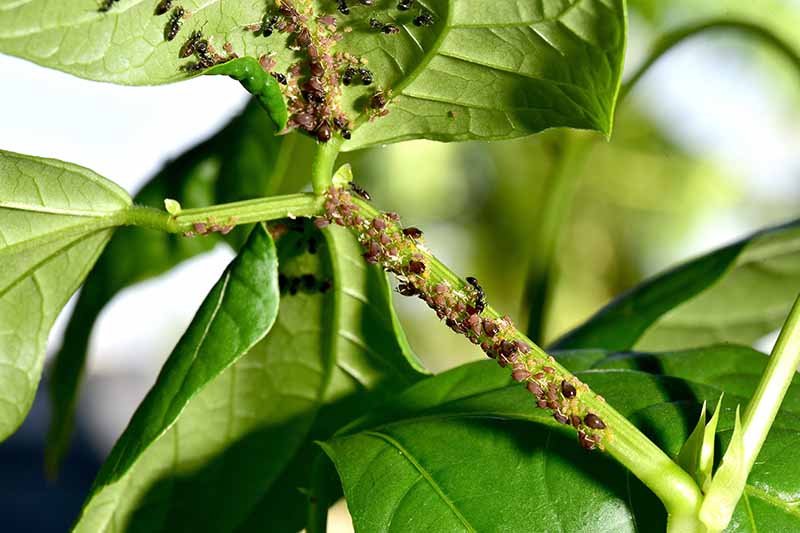
Aphids are small, soft-bodied insects that suck the sap out of plants, weakening them. They leave a sticky, yellowish residue on the leaves and stems, called honeydew that can lead to sooty mold.
These pests can also spread bean mosaic virus to your black-eyed pea plants. They can be controlled by an application of neem oil, soapy water, or even knocked off the plants with a blast of water from the hose. Read more about aphid control here.
Bean Beetles
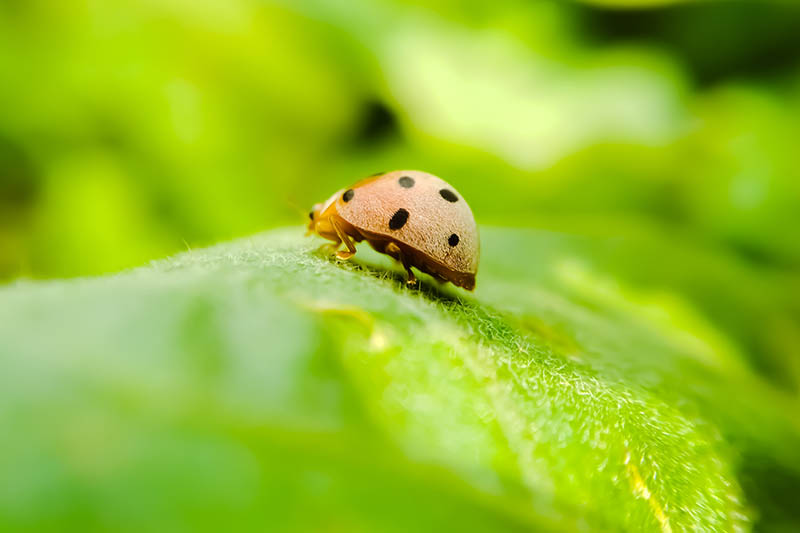
Bean beetles, Callosobruchus maculatus, are black and yellow or black and orange beetles that look a little like ladybugs. The larvae will feed on the roots, but seldom do much damage.
The adults feed on the undersides of the leaves of black-eyed pea plants, creating tiny holes. They’ll also eat the pods. They can be controlled by applying diatomaceous earth, neem oil, or insecticidal soap.
Leafhoppers
Leafhoppers, tiny insects in the Cicadellidae family, are another sap-sucking pest. Leafhopper damage gives leaves a mottled white pattern on the foliage. They mostly make the plants look unattractive, and will take away the option of eating the greens. But they don’t typically damage the pod or affect the bean harvest. Use floating row covers to keep them from accessing your plants, or apply insecticidal soap sprays to kill these pests. Also make sure to dispose of any plants that have leafhopper damage at the end of the season, so the pests don’t have a chance to overwinter in the debris.
Root-Knot Nematodes
These tiny soil-borne pests attack many garden crops. They cause pea plants to be stunted and the foliage turns yellowish. The roots of infected plants will have unsightly galls on them as well. You can’t save infected plants. Pull ‘em up and get rid of them, roots and all, bypassing the compost pile. If you have root-knot nematode problems, limit the damage by rotating black-eyed peas with crops that aren’t susceptible to nematodes. Extreme infestations can be controlled with soil solarization in the warmest growing areas. This involves covering the soil with clear plastic sheeting during the heat of summer. The high heat will kill nematodes, but keep in mind that it also kills beneficial soil organisms like beneficial nematodes and the Rhizobium bacteria that help beans develop root nodules. Happily, there is an effective countermeasure: Replace the beneficial organisms by amending the soil with organic matter after the solarization process is complete.
Disease
Black-eyed pea plants are relatively disease free, if their basic cultural needs are met.
Bean Mosaic Virus
Bean mosaic virus is often spread by aphids. Infected plants will show puckered leaves with curled edges and a mosaic of light and dark patches on the surface of the foliage. Plants infected with bean mosaic virus are unlikely to bear many seed pods, and the condition can’t be treated. Pull them up and dispose of all plant material in the trash, do not place it on your compost pile.
Fusarium Wilt
Fusarium wilt, a fungal infection caused by Fusarium spp. fungi, lives in the soil for many years. Infected leaves turn yellow and wilt. Eventually, the whole plant will die. There is no cure for this disease, you need to remove infected plants and dispose of them. Some varieties, such as ‘Cream Pea Elite,’ are resistant to Fusarium wilt.
Powdery Mildew
Powdery mildew is caused by hundreds of different species of fungi and presents as white or grayish patches of “powder” on the surface of the leaves. This condition usually appears in warm, humid conditions, and spreads readily when plants are crowded, and lacking adequate airflow. You can learn more about how to treat powdery mildew in this guide.
Harvesting
If you’ve been buying other people’s black-eyed peas all this time, you’re probably most familiar with the dry bean. Do you have a treat in store if you grow your own! You can eat parts of these plants at every stage after the first two sets of true leaves appear.
First up are the greens. Usually the plants will have enough tender, edible leaves so you can harvest maybe one third of them approximately 21 days after the seeds sprout. Don’t pick more than one third of the foliage at a time or the plant won’t be able to keep growing, flowering, and eventually producing pods and beans. And keep in mind that the more mature leaves are edible, but they tend to be fairly tough, so pick the young leaves instead. To cook these black-eyed pea greens, either steam them or add them to stir fry. If they’re tender and agreeable to your taste buds, you can also experiment with adding them to salads.
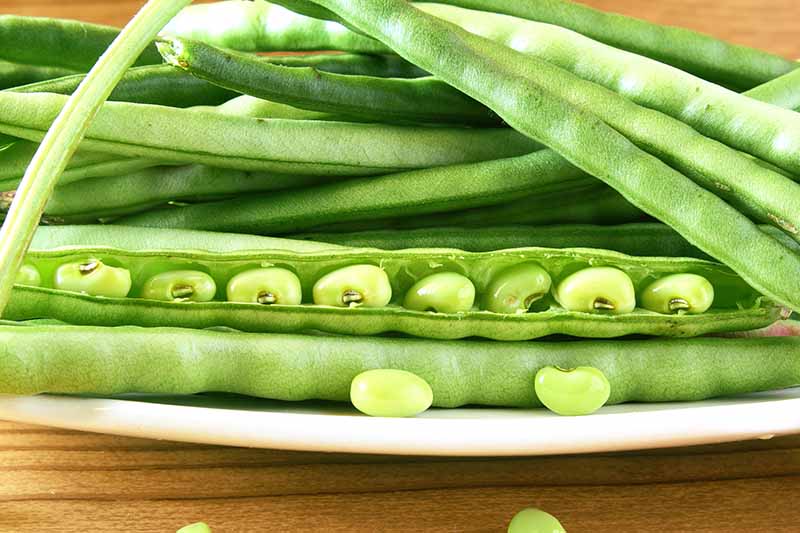
You can also harvest the young, tender pods before they’re bulging with seeds, and while they’re still green. They’ll probably need steaming, but they’re an enjoyable early harvest. Just don’t expect the young pods to be sweet or taste like typical green beans. Even in the early harvest days, they’ve got a distinctive earthy flavor. The extra-indulgent way to consume black-eyed peas is at the “shellie” stage. Watch for the pods to look lumpy as they fill with seeds, making sure to pick at least a few before they start to dry. Shell the beans by slitting the pods open with clean fingers, and then pushing the beans out with your thumb into a clean bowl or container. It’s optional to sit on a porch while you shell, catching up on conversation or listening to the radio, ideally oldies or a baseball game – but it can really add to the authenticity of the experience. When you shell these fresh pods, the peas inside will still be green or tan with the distinctive black eye. Don’t fret when they don’t look the same as the dried versions you buy in the grocery store.
At the end of your growing journey, you can harvest dried beans to save, either to plant next season or to cook in the cold months. This could be anywhere from 80 to 100 days after sowing your seeds. The seeds are typically suitably dry for storage about two to three weeks after you notice the pods filling out. When they are ready, the skins of the pods will turn tan and feel like parchment, and should separate from the beans quite easily. After shelling, you’ll need to spread the shelled peas in a single layer on brown or parchment paper, and place them in a cool, dry location, like a shelf in a shed or even the kitchen. Be sure it’s somewhere inaccessible to critters and toddlers, since hard bean seeds are a choking hazard. Let the peas dry completely, which takes another three or four days, and then they’ll be ready for storage. Before we get into the details of preserving the dry beans, a note of caution: From personal experience, I can tell you that you’ll want to keep a close eye on your plants towards the end of the growing season. They’re such a carefree crop you may have forgotten all about them, but the local mice and squirrels might beat you to your harvest if you don’t look lively.
Preserving
Shelled, dried black-eyed peas can be stored in an airtight container in a cool, dry place for years. If you’re planning to plant them, though, you can only count on them to be viable for a year after harvest. The young leaves should be tucked in the fridge in a plastic bag, or wrapped in a slightly damp dish towel. Even then, you’ll need to use them within three days.
You can store the fresh pods in the fridge for up to two weeks before either steaming the young ones whole or shelling the more mature ones and cooking the beans. Fresh shelled cowpeas can stay in the fridge for just a day or two before they’re unfit to cook with. If you’ve previously only cooked cowpeas that came in a bag from the store, note that shellies don’t last for months and years like their dry counterparts. After 36 to 48 hours, they may start spoiling or forming mildew, and that would be such a waste! Fresh beans can also be sealed in bags and frozen. You’ll need to blanch them first, by boiling them in enough water to cover for two minutes, then plunging them into very cold or ice water. Next, drain them and spoon them into freezer-safe containers or freezer bags, in the proportions you’re most likely to use in cooking. Cool them to room temperature before popping them in the freezer. They’ll stay good frozen for at least six months, which is perfect timing for using them to cook traditional New Year’s Day good-luck dishes. The nifty thing is, you won’t need to thaw the black-eyed peas before adding them to stews and other hot dishes. With food safety in mind, cooked fresh black-eyed peas need to go in the fridge within two hours, and you should then use them within four to five days.
Recipes and Cooking Ideas
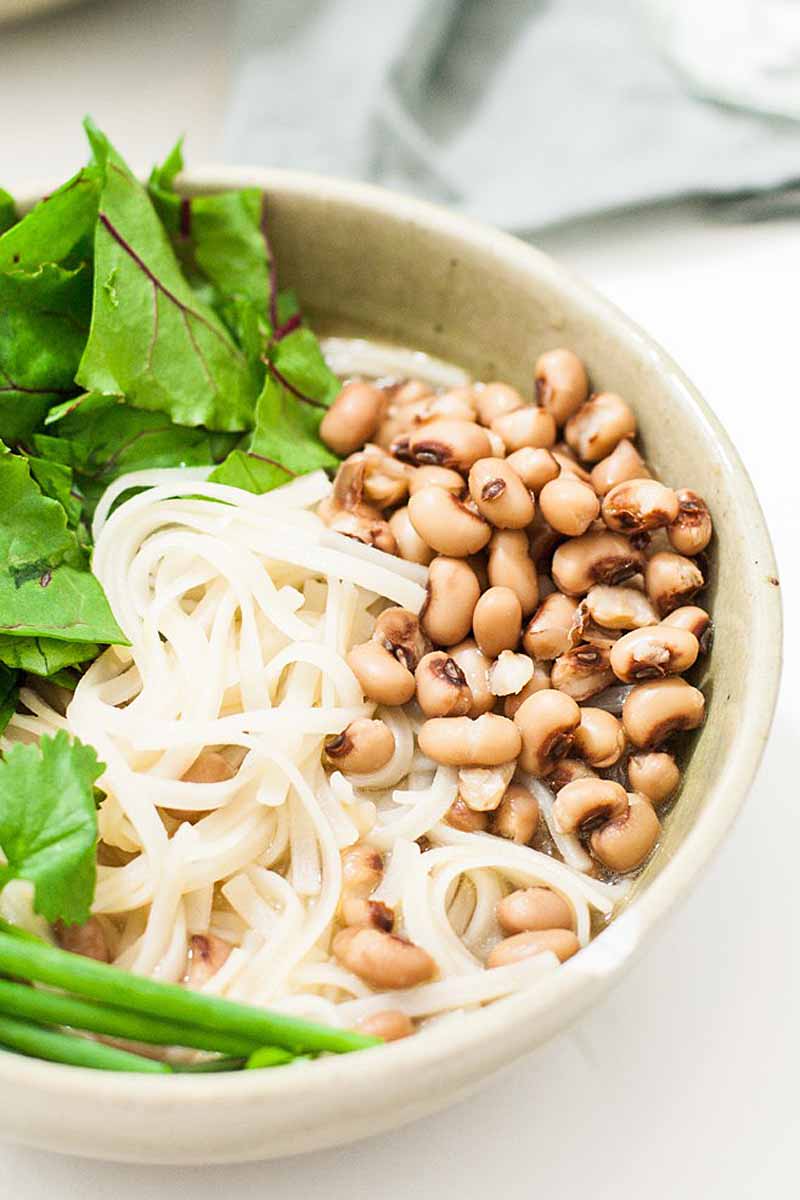
Traditional recipes for black-eyed peas call for four ounces of diced ham or bacon per pound of beans, boiled in water or chicken stock. Use a quart of water for fresh ones, or two quarts for dried. Cooked from fresh, they will be done in less than 20 minutes; dried beans need to cook for at least an hour. I like to prepare mine by sauteing a clove of garlic, a pinch of cayenne, and some onion in a bit of olive oil and then stirring that into the cooked and drained peas. Yum! If you want to try something a little different, check out this ramen-style black-eyed pea noodle bowl on our sister site, Foodal. The shelled beans are tasty cooked in salted water. Bring them to the boil and then turn them down to simmer for about 15 minutes. I’ve also enjoyed the cooked “shellies” in a sort of cold bean salad, dressed lightly with a mix of olive oil and lemon juice, seasoned with salt and pepper, and adorned with chopped tomato and red onion. In short, no need to wait for New Year’s to luck out!
For a great summer gardening experience that will stock your pantry for the winter, add some black-eyed peas to your garden next year. If you’re already an old hand with cowpea cultivation, how about sharing your secrets to success in the comments section below? And for more information about growing beans in your garden, check out these guides next:
How to Grow Bush Beans 35 of the Best Bush Bean Varieties How to Grow Lima and Butter Beans
© Ask the Experts, LLC. ALL RIGHTS RESERVED. See our TOS for more details. Product photos via Burpee, Gurney’s, and University of North Carolina Press. Uncredited photos: Shutterstock. Revised and expanded from an original article by Aaron Cummins. With additional writing and editing by Allison Sidhu and Clare Groom.