These tender perennials are easy to cultivate, and they put on a fantastic display of glorious blooms from early summer until they are felled by a hard frost. And after cold weather settles in, it’s time to dig up and remove the tubers for winter storage, to plant out again in spring. We link to vendors to help you find relevant products. If you buy from one of our links, we may earn a commission. Keep reading here to learn all about how to store dahlias.
A Dahlia Primer
Native to Mexico and Central America, the Dahlia genus boasts over 40 species available for the home gardener.
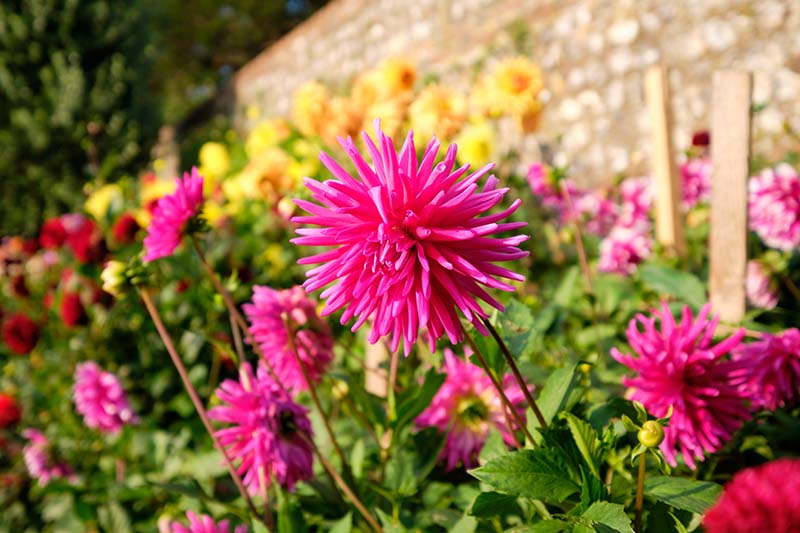
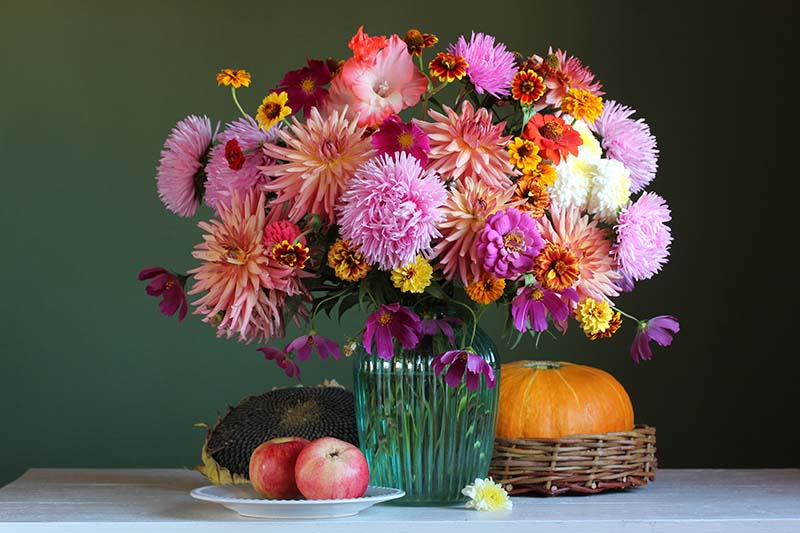
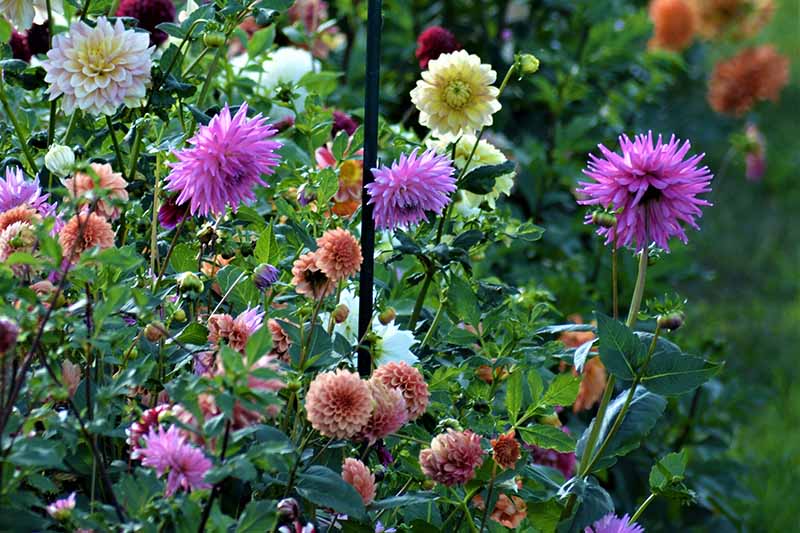
Members of the Asteraceae family, like asters and sunflowers, these highly ornamental plants put on a long-lasting display of stunning flowers from early summer until frosty temperatures set in. They make lovely, vibrant cut flowers and with the right care, will last a long time in a vase.
As tender perennials, they’re hardy only in USDA Hardiness Zones 8-11. In Zones 7 and below, they must be treated as annuals. That is, the tubers need to be dug up in autumn, stored for winter, then divided and/or replanted the following spring for another round of stunning summer flowers. In regions with mild winters, they can stay in the ground. But they do have an intense dislike of wet feet, and even those that are growing in warmer areas – particularly those with wet winters – benefit from an annual lift and division. If they are left in the ground over winter, the tubers multiply and grow into large clumps. But this is at the cost of flower production – the larger the clump grows, the fewer flowers appear. Some years back I left my tubers in-ground for two winters, thinking this was going to be a time saver. But I dug them up in the third year because the previously abundant flower count was growing scarce – and as dahlias are all about the flowers, I now lift, store, and divide them every year! Container-grown plants can be overwintered in their pots if they are settled into a frost-free location with a thick layer of straw mulch to cover the crown. However, for best flower production, these too should be lifted and divided on a regular basis. An annual treatment is preferable, but every second year works as well.
When the Time Is Right
A sunny day in early fall may seem perfect for activities like digging up bulbs, but you’ll want to be patient and leave your dahlias in place for a bit longer. These plants start tuber production in spring, but they don’t reach maturity until late in the season. The longer they can remain in ground the more robust they’ll be and the more energy they will have stored for next season. And this is an important asset to help them survive winter storage in the best possible health. So even though the flowers and foliage may completely die back, leaving the tubers in place through a light frost or two is beneficial. However, they do need to be dug up before the first hard frost or freezing temperatures set in.
To Cut the Stems, or Not?
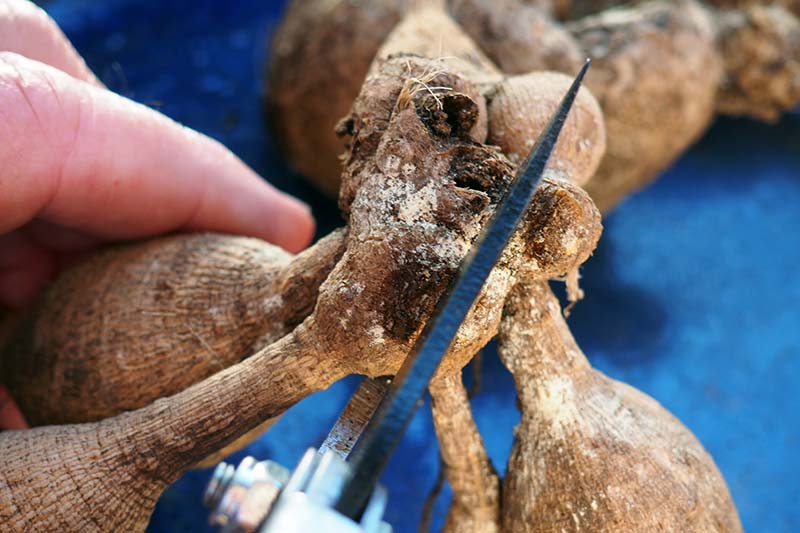
Cutting dahlia stems to about twelve inches a week or so before lifting helps the growth eyes to emerge on the crown. This makes it easier to divide the clumps for propagation and storage. The “eyes” are where next year’s growth will sprout from. But because the stems are hollow, water can enter the cut ends of the stems and accumulate at the crown, leading to rot. This can be problematic during autumn rains, so if you choose to cut the stems early, you’ll need to cover the cut ends. To do this, use a small square of tin foil or plastic secured with a twist tie to prevent water from reaching the crown until the tubers can be lifted. Alternatively, you can wait until you are ready to lift them, but this may make the growth eyes more difficult to identify. When you cut them down, be sure to tag the base of each stem with the variety name as once they’re cut and lifted, it’s very hard to distinguish one variety from another.
Tuber Tutorial
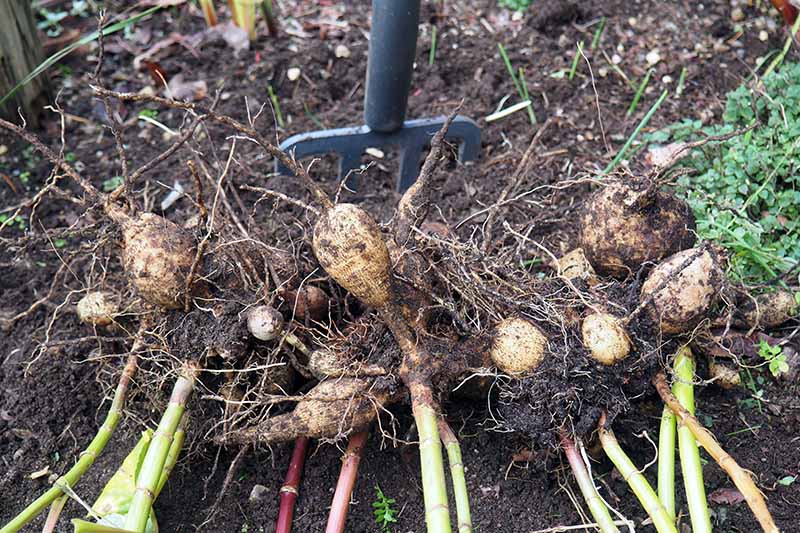
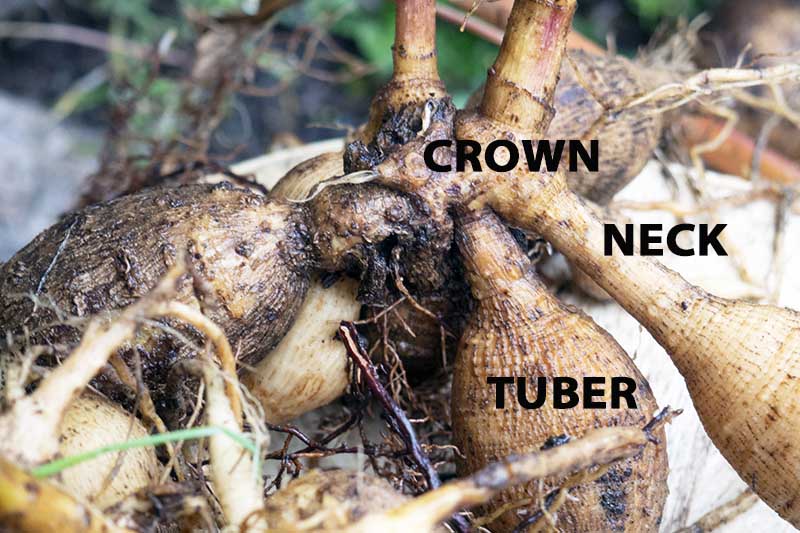
A dahlia tuber is the below-ground portion of the plant. It’s a starchy storage organ that holds the food, nutrients, and water needed for growth as the plant establishes feeder roots. They come in a variety of shapes. Some look distinctly yam-like, others can be long and thin, plump and rounded, or elongated teardrops, depending on the variety. For the purposes of storage and division, there are three tuber sections to be aware of: The crown is only the only part of the plant that develops growth eyes. But for successful propagation, all three sections are required to remain intact. For this reason, don’t try to propagate new plants using tubers that have grown from other tubers – without a piece of crown, new plants won’t develop. Also, should you inadvertently break off actively growing eyes, it’s not a problem. New ones will push up from the crown at the same location.
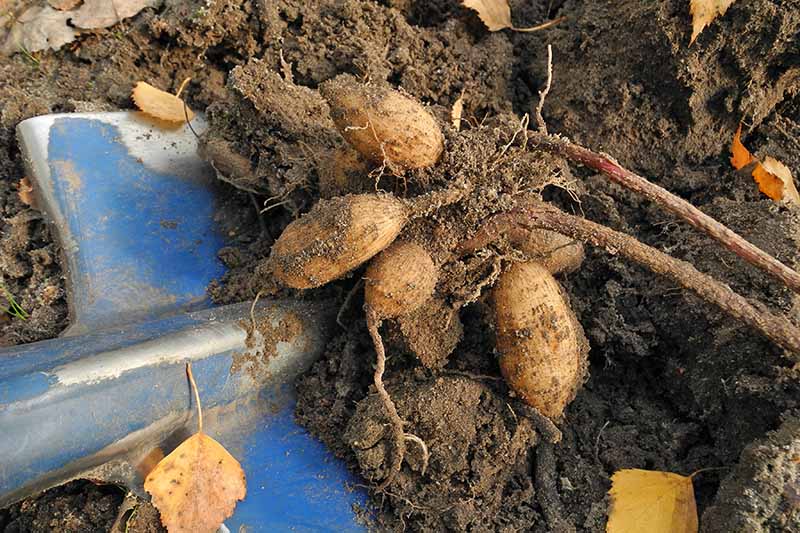
Dig and Lift
When first lifted, dahlia tubers can have fragile necks. If possible, dig them out in the morning and allow them to sit on the ground for a few hours before cleaning and dividing – the necks will be less brittle and easier to handle.
To remove a clump of tubers, cut down stems to approximately 12 inches from the ground, if you haven’t done this in advance. Mark a radius of approximately 12 inches around the clump and use a garden shovel or fork to dig down six to eight inches to loosen the soil. When the soil is loose, insert your fork under the clump and lift it carefully. Grasp the flower stems to help you lift it if needed. Gently knock off any large lumps of soil from the clump and rinse with a garden hose to remove any remaining dirt. With a sharp, clean knife, cut away any pieces that are damaged, discolored, soft, or rotting. Invert the clump and set it upside down in a dry location for a few days. This allows any stem water to drain away and helps to remove excess moisture from the tubers. This time spent drying, or curing, is important to prevent contamination from bacteria, fungus, mildew, and winter rot which can damage or destroy your tubers. After the skin starts to wrinkle slightly, the tubers are dry enough for storage.
Winter Storage
Storing tubers is straightforward and a wide variety of containers can be used including cardboard or wooden boxes, paper bags, or styrofoam ice chests. Your dahlia tubers should not be stored in plastic bins, containers, or bags as these tend to trap too much moisture which can easily lead to mildew and rot. They will require a dry to lightly moist packing medium. Coconut coir, peat moss, perlite, sand, sawdust, or vermiculite all work well for packing tubers. For storage, line the box bottom with several layers of newsprint then add a generous layer of your chosen packing medium – two to three inches deep. With clean, sharp garden shears, remove any long feeder roots growing from the tuber and any remaining pieces of stem. Close the box and store it in a cool, dark location such as a basement, cellar, garage, or shed. To ensure viability, temperatures need to remain above freezing and below 50°F, with an ideal temperature range of 40-45°F.
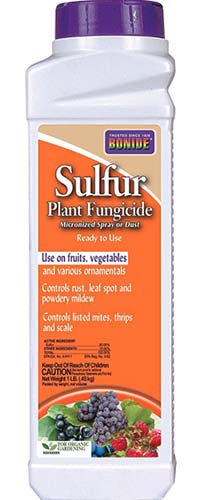
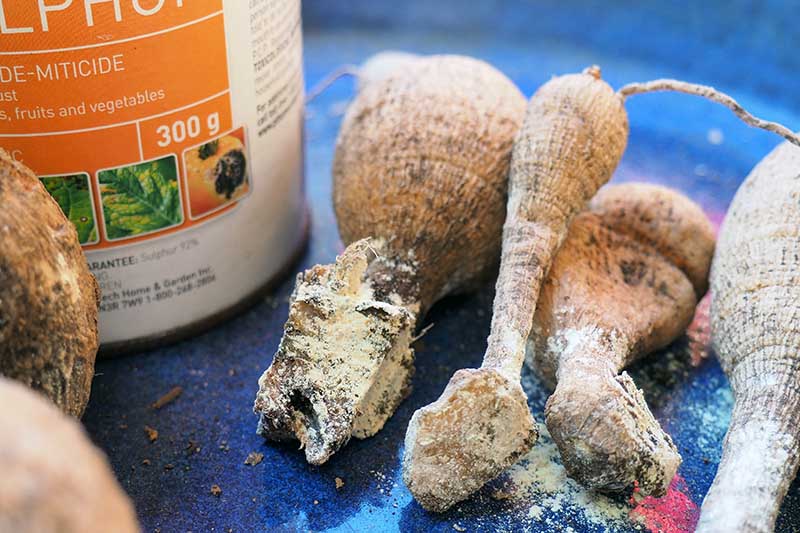
Bonide Sulfur Plant Fungicide Garden sulphur can be purchased online at Arbico Organics. Place clumps of tubers inside the box on top of the packing medium ensuring that they’re not touching. Add more packing material on top until they are completely covered. Every month, inspect the tubers carefully and discard any that show signs of softness or rot. In late winter or early spring, move your containers to a warm (60-70°F), dark location. Every week, sprinkle a tablespoon of water on top of the packing medium until you are ready to plant them out. The warmth and added moisture help the growth eyes to develop, which makes division easier.
Divide and Plant
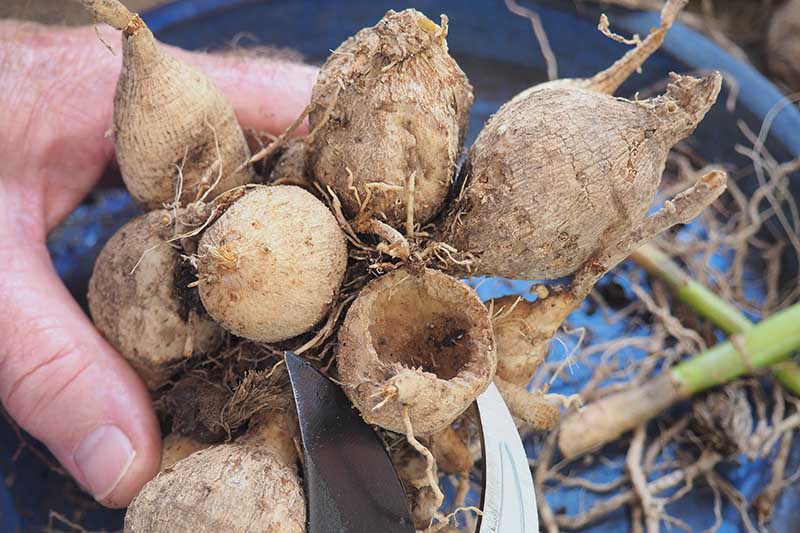
After all risk of frost has passed, when you are ready to plant, remove the clumps from storage and gently shake off the storage medium. Inspect the clump and discard any tubers that are moldy, soft, or rotten as well as those with broken or damaged necks. A broken neck prevents the flow of energy from the tuber to the crown that is required for healthy eye development. Cut a slice off the end of each tuber you want to replant. With the end removed, a quick check will determine if the interior is healthy. Any showing signs of rot need to be discarded. Cut away any remaining pieces of stem as close to the crown as possible. If the growth eyes aren’t visible, you can still successfully divide the clump for propagation. However, for new plants to develop successfully, it’s imperative that each division contains a section of crown along with a healthy neck and tuber. Aim to retain a piece of crown about the size of a marble on each division. Using a clean, sharp knife or garden shears, carefully cut the crown in half. Take care not to damage the necks, but don’t worry about the “mother” tuber as it will be discarded. The “mother” is the original tuber the plant and root system grew from, and it is usually larger and slightly darker than the others. Continue to split the crown ensuring each division has a crown section, a strong neck, and healthy tuber attached. To prevent the spread of fungal and bacterial disease, always sterilize your cutting tools after dividing each clump. The easiest way to do this is to dip your knife or shears in a solution of one-part household bleach mixed with 10 parts of water. After dividing the crowns, treat all cut surfaces with a fungicide such as garden sulphur then allow the divisions to dry for 24 to 36 hours before planting. For more details on this process, be sure to check out our guide, “How and When to Divide Dahlias.”
Just keep the tubers cool, dark, and dry over winter then divide and replant again in spring. It’s easy, and you’ll love their reliable late season color as the rest of the garden starts to fade. Do you folks propagate your own dahlias? Share your techniques and tips in the comments section below. And for more tips on dahlia care, check out these guides next:
How to Prevent Dahlias from Falling Over: Support Options for Your Plants How to Identify and Control Dahlia Pests 19 of the Best Flowering Companion Plants for Dahlias
Photos by Lorna Kring © Ask the Experts, LLC. ALL RIGHTS RESERVED. See our TOS for more details. Product photo via Arbico Organics. Uncredited photos: Shutterstock.