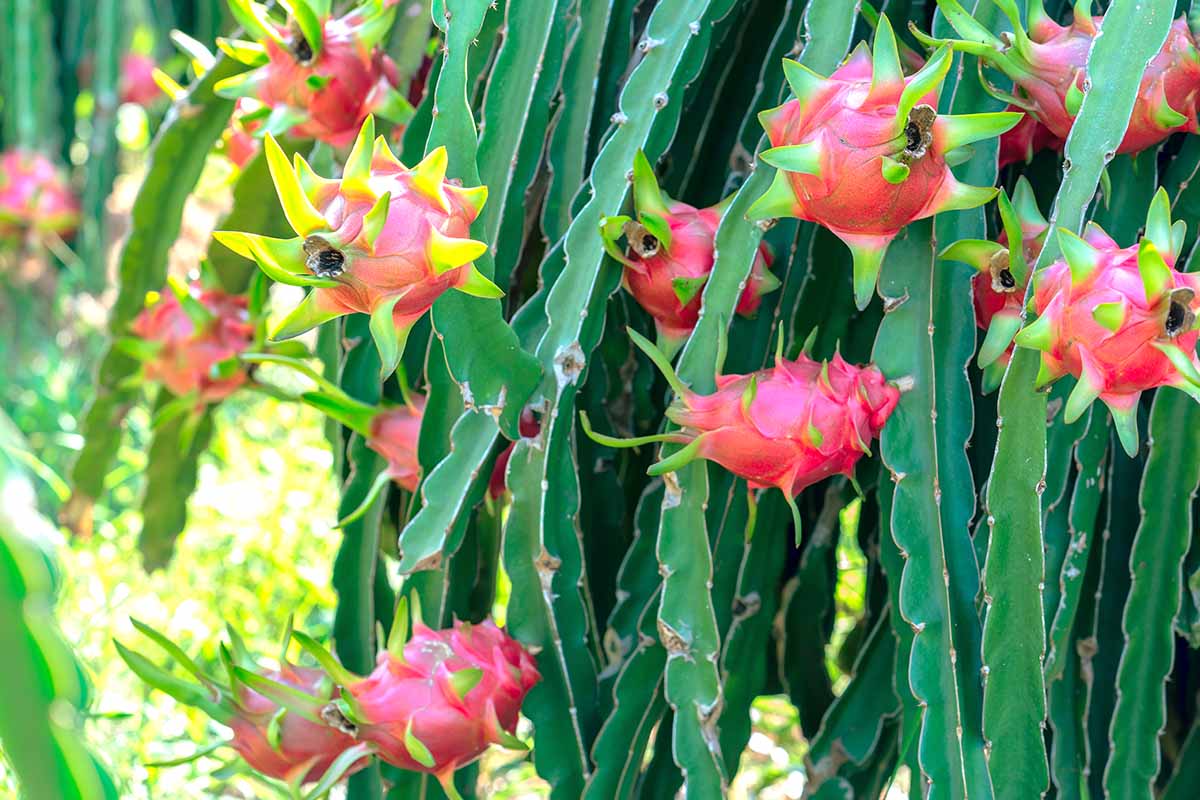
We link to vendors to help you find relevant products. If you buy from one of our links, we may earn a commission. In this article, you’ll discover how professional pitaya growers cultivate these fruits, so you can apply their well-honed techniques to your at-home efforts. We’ll dig into the details of everything you need to know for both indoor and outdoor dragon fruit growing – as well as everything else you’ll need in terms of watering, soil type, harvesting, and much more. While producing pitayas is in no way a low-maintenance affair, the payoff will certainly be worth it. Ready for a sneak peek at what we’ll cover?
What Is Dragon Fruit?
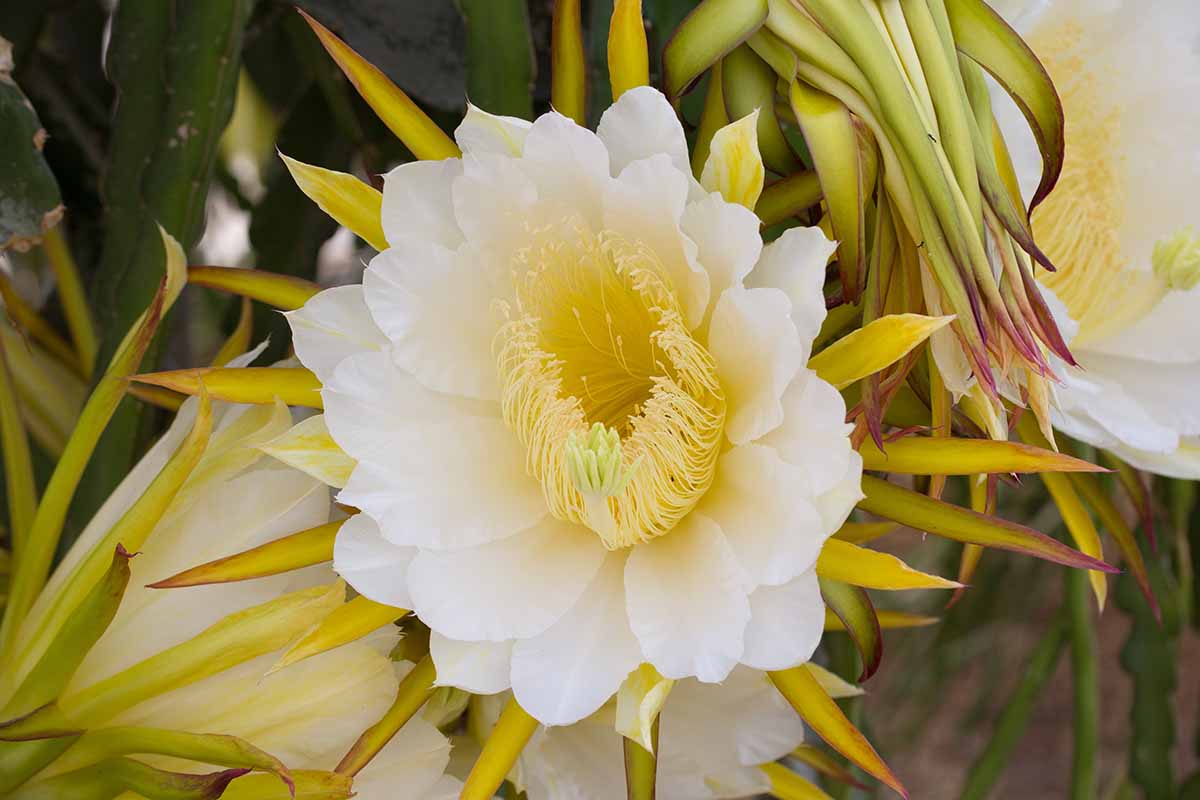
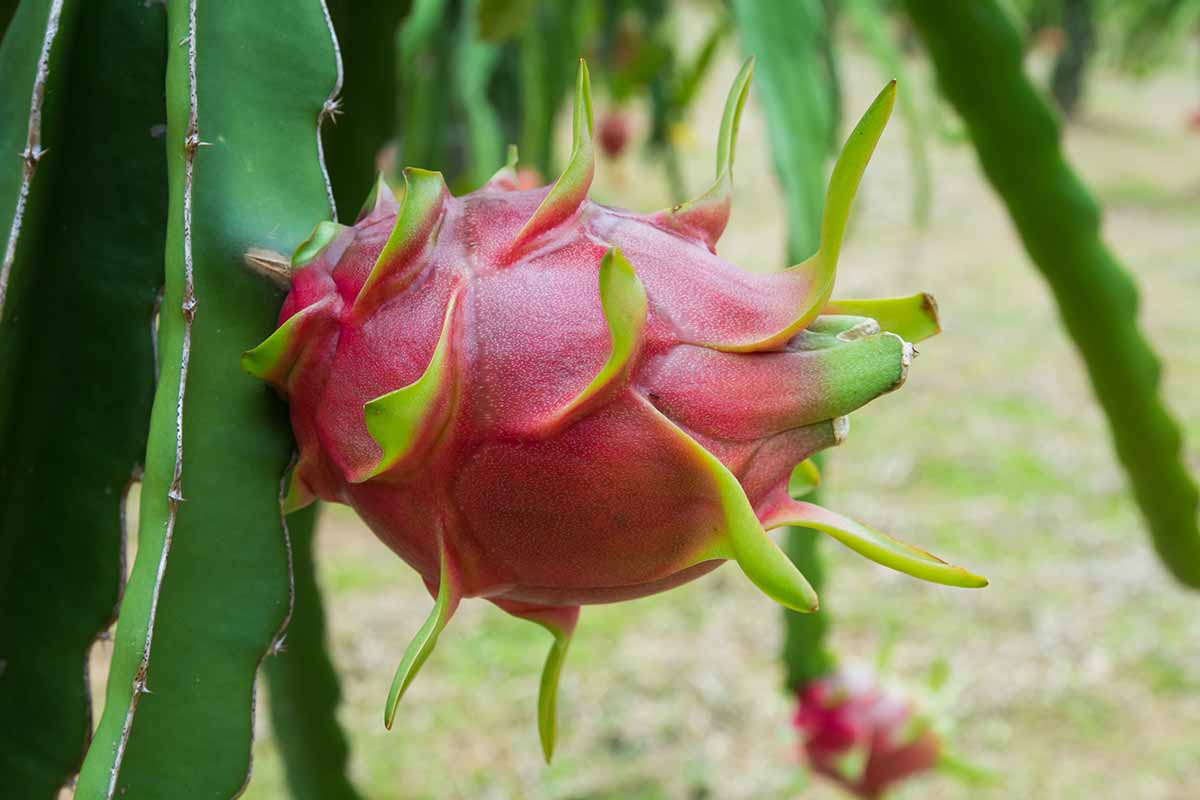
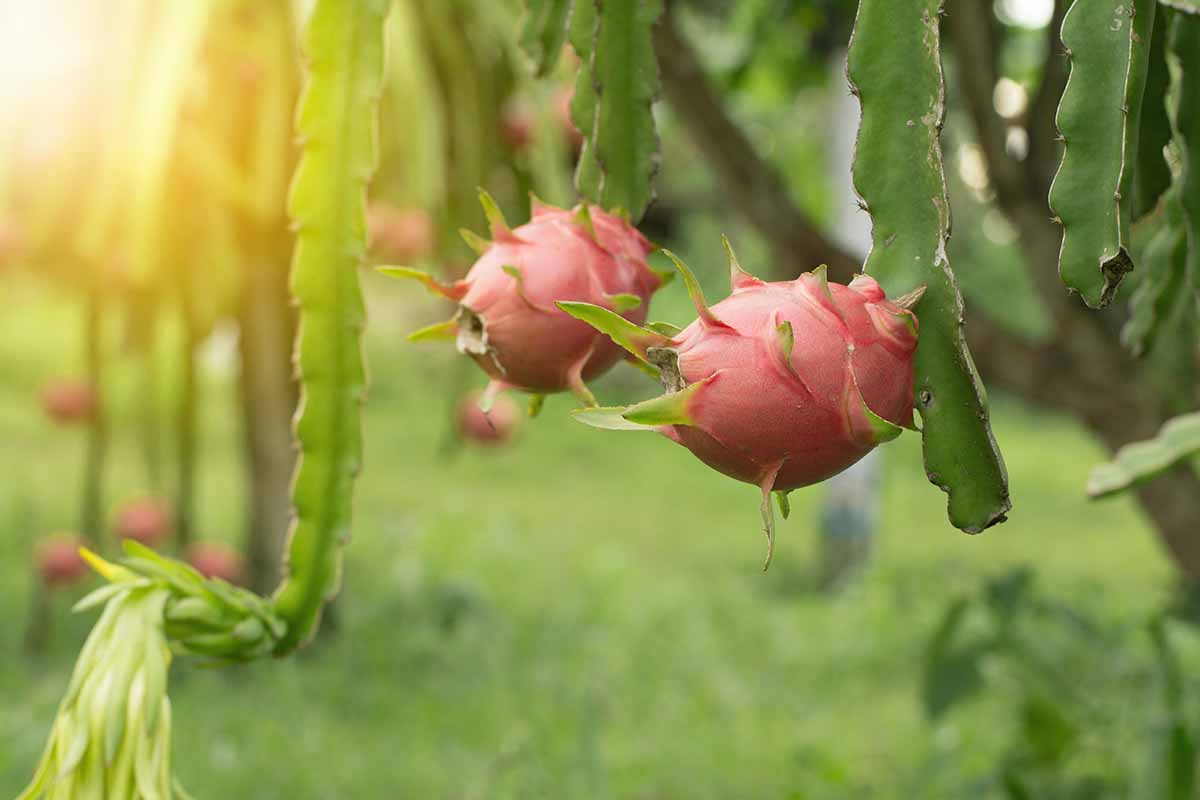
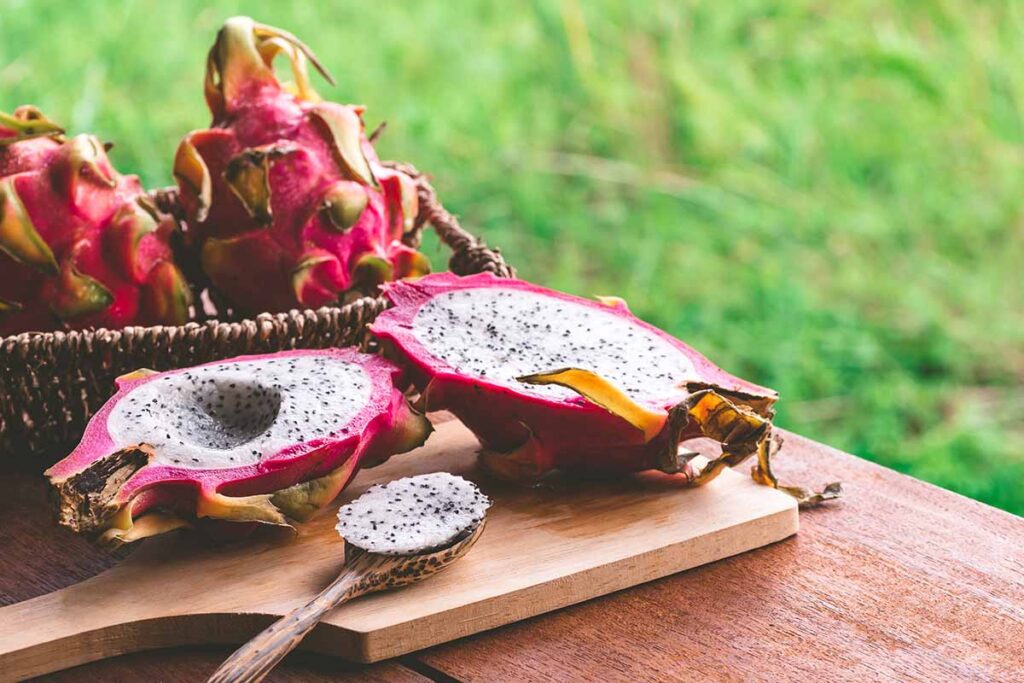
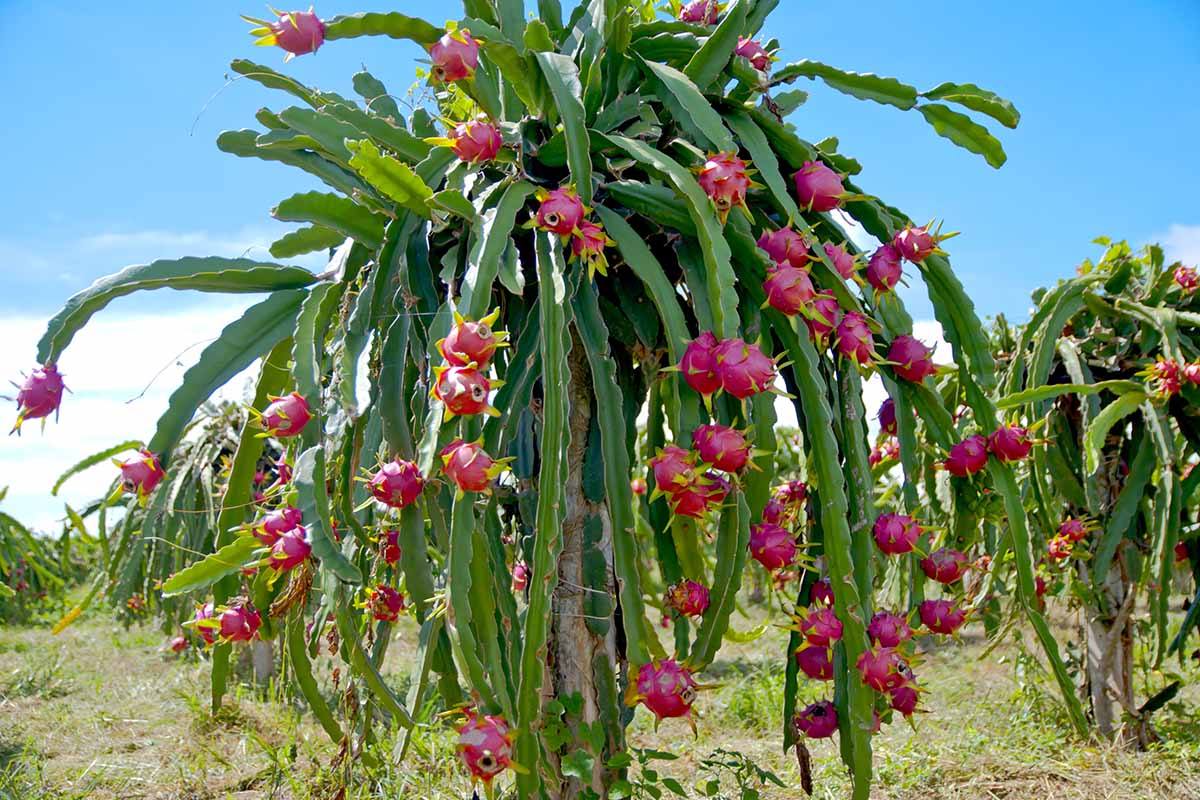
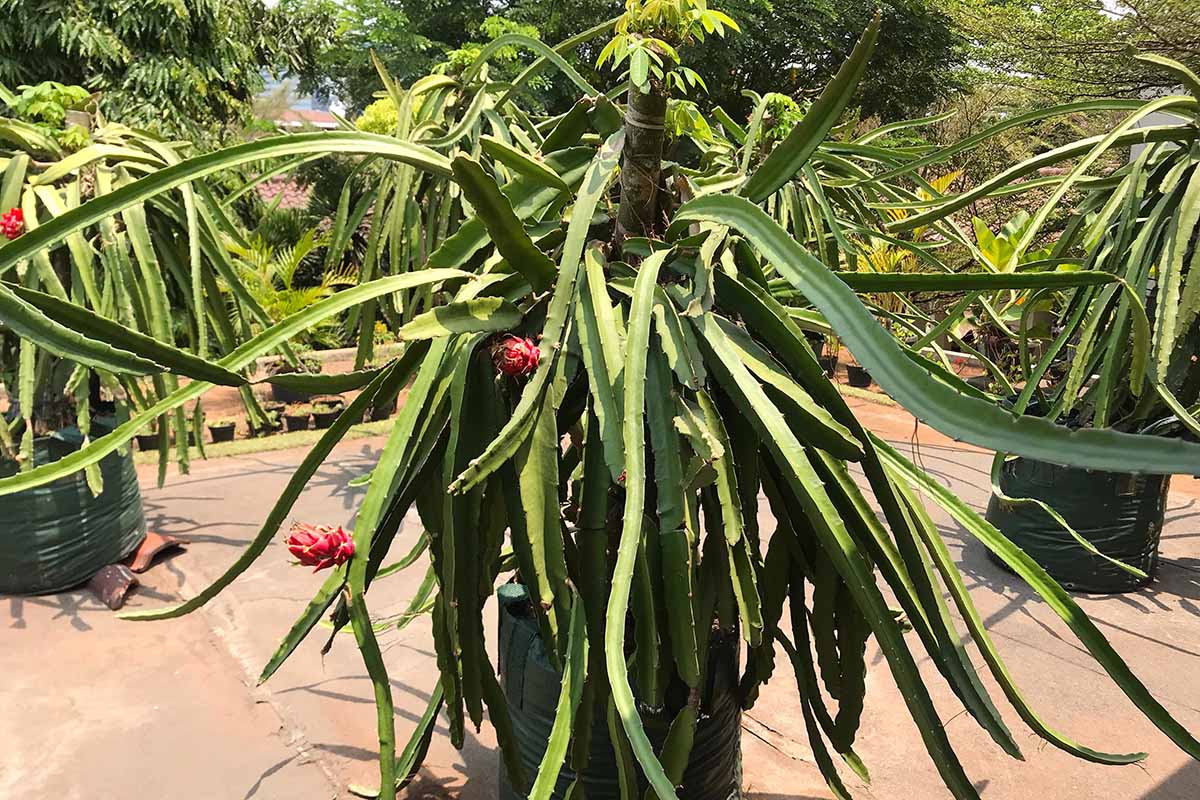
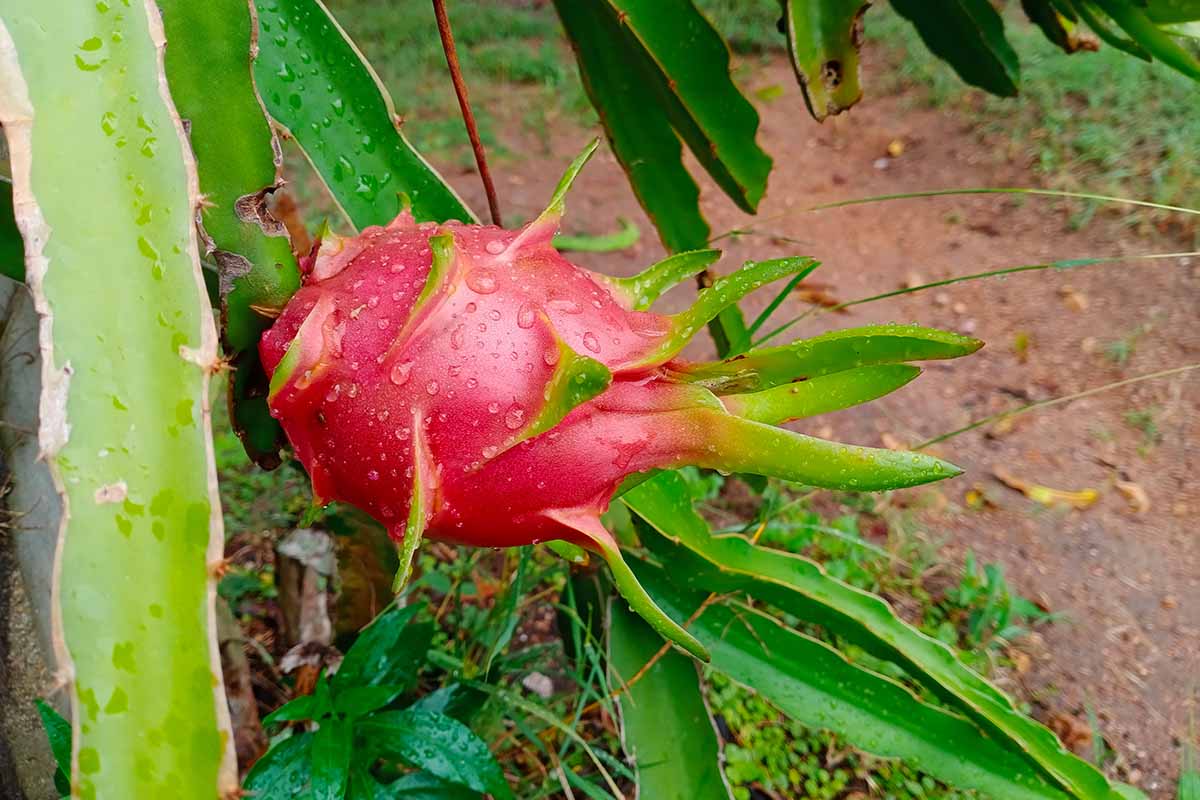
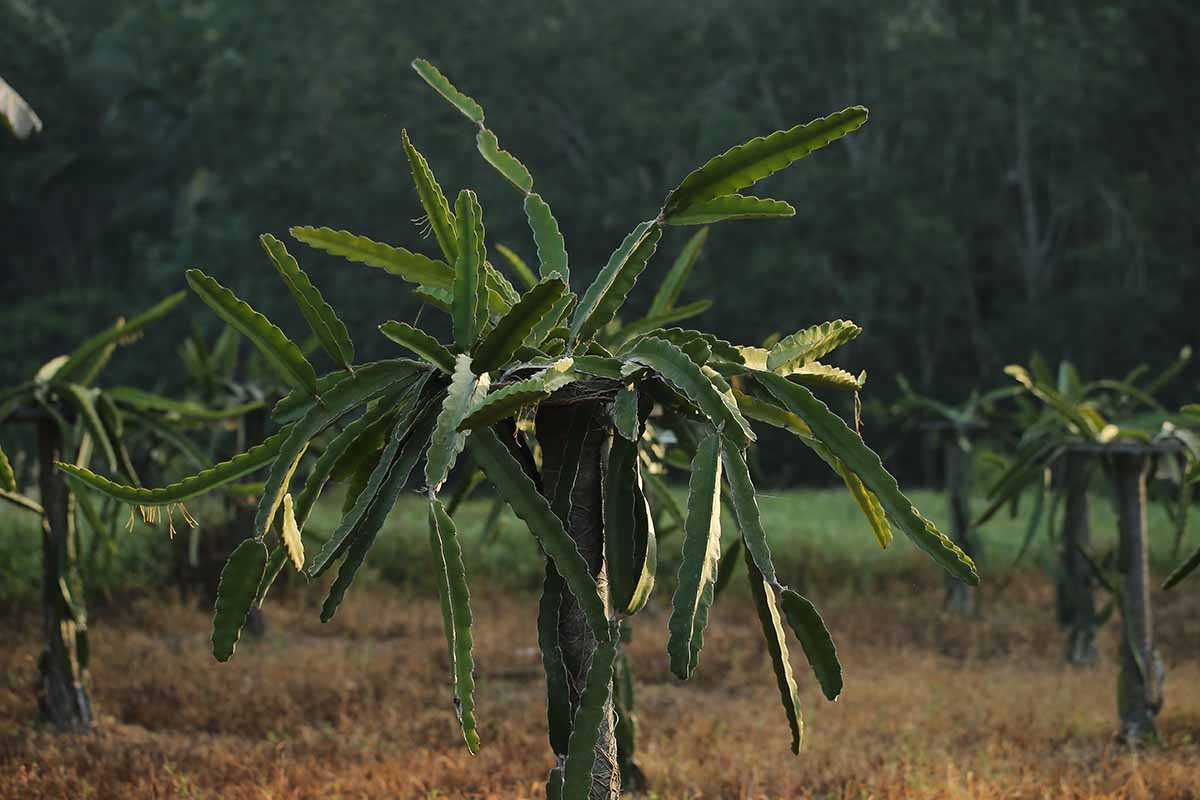
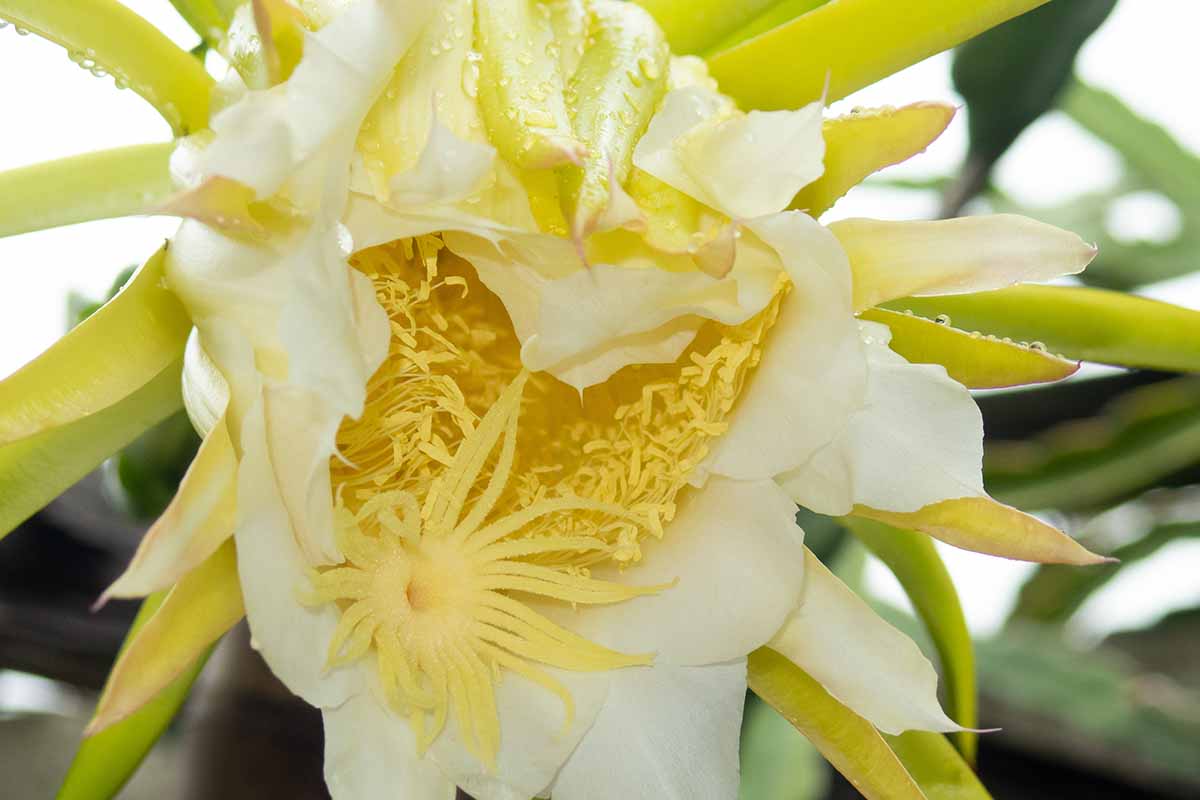
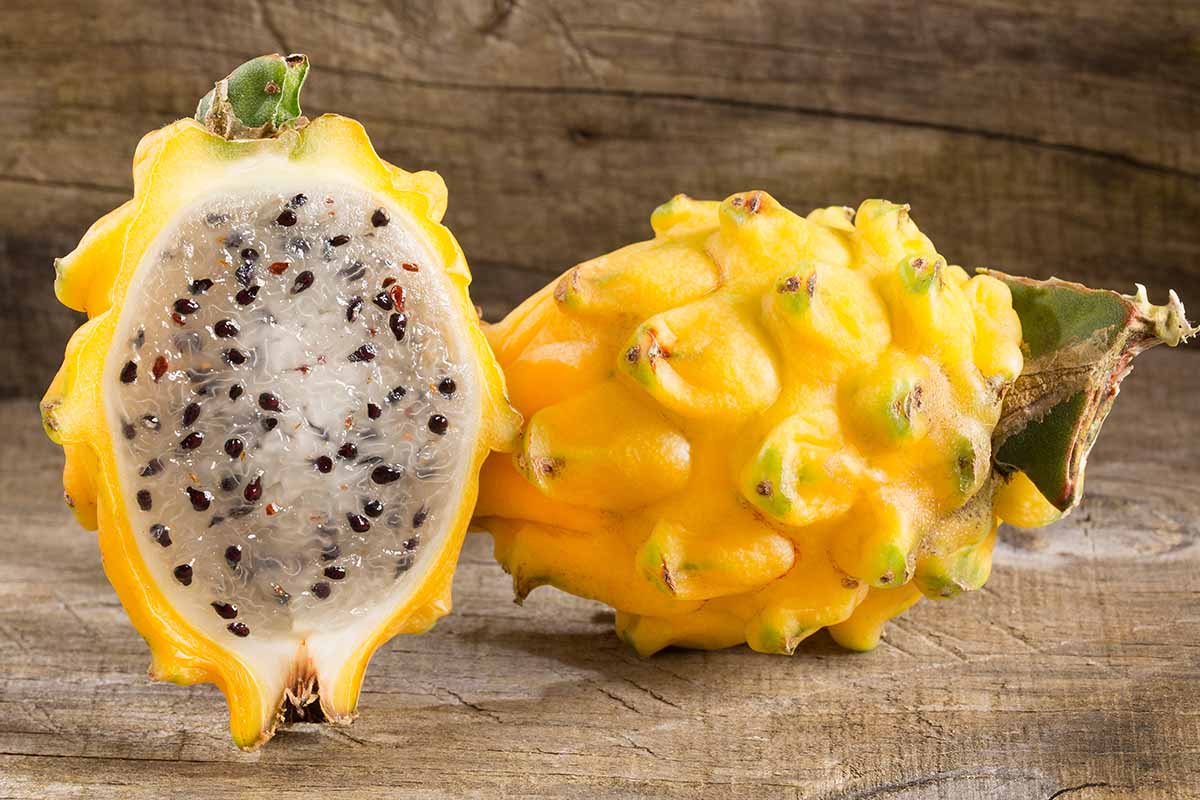
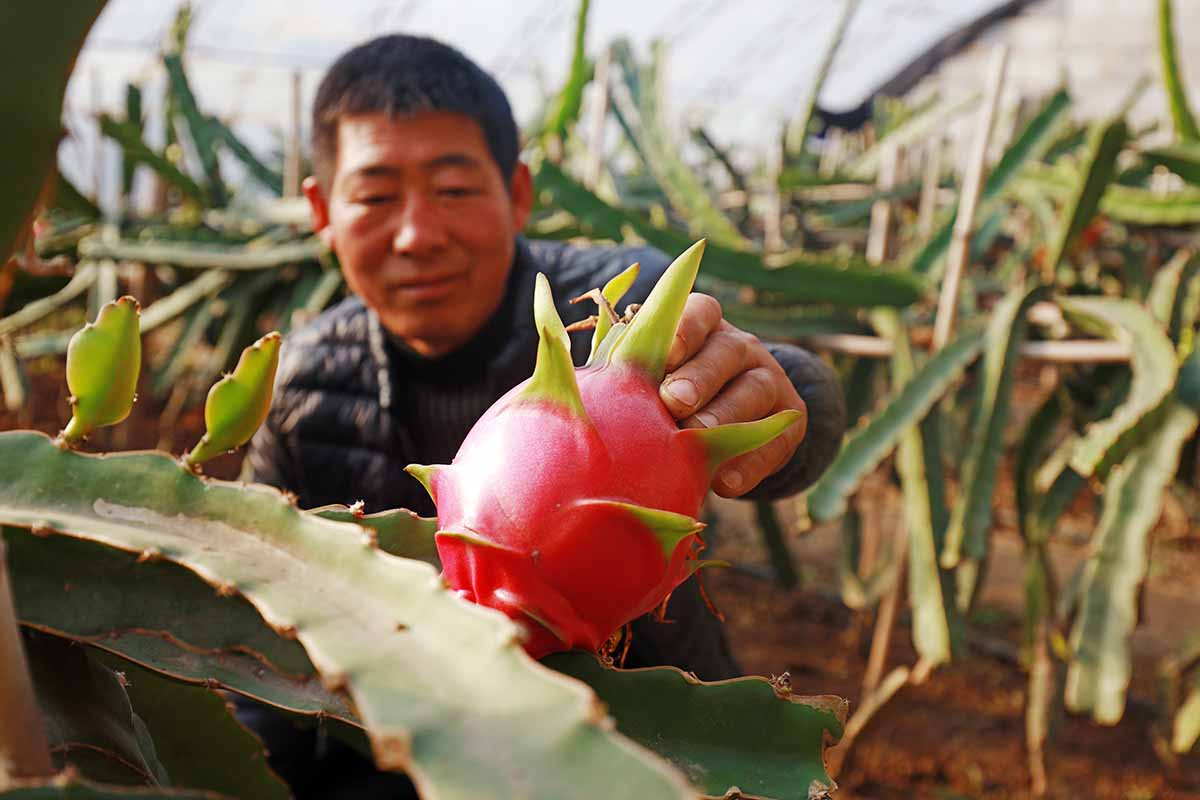
Dragon fruit, or pitaya, are names given to the large, edible fruits of several types of tropical cacti, as well as the names given to the plants themselves. These cacti have a climbing and vining growth habit, and can reach impressive heights as they clamber up trees, growing 30 feet tall or more, and attaching themselves with aerial roots. In addition to climbing, dragon fruit plants have a sprawling and branching growth habit. These vining plants are leafless, but stems have ridges, usually three, and in cross-section look somewhat like the letter “y.” Pitaya stems are also segmented, like those of Christmas cacti, and most have spines along their ridges. These stems tend to have wavy margins that are punctuated by aureoles, where spines, new branches, or flowers can grow. The flowers of pitayas are impressive – both quite large and quite showy – but they are short lived, lasting only one night. Dragon fruit blooms are usually white, and are pollinated at night by moths and bats, though bees will also visit them in the early morning. While there are some self-fertile types of pitayas, many require cross-pollination in order to produce fruit. And when a flower is successfully pollinated, an edible fruit is produced. That’s why you’re here, right? Pitaya fruit tends to be large, yet it is botanically considered to be a berry (yes, a berry!). Its skin ripens from green to colorful shades of yellow, pink, or red, depending on the species or cultivar. The fruits of some dragon fruits are spiny, while most others are covered with protruding, scale-like bracts. Pitaya flesh can be white, red, pink, or purple, and is studded with small black seeds. The pulp can be mildly sweet to very sweet, with a soft or firm texture, and some cultivars have a sprightly acidity as well. There’s also another type of cactus that produces a fruit commonly called “pitaya.” Those cacti, from the genus Stenocereus, are not vining cacti like the subject of our article, but are upright, columnar growers that are more adapted to arid locations. Their fruits are rounder than those of dragon fruit and have more of a sour flavor – Stenocereus cacti fruits are sometimes called “pitaya agria,” meaning “sour pitaya.” This article will focus on growing the vining type of pitaya cactus rather than the columnar type.
Cultivation and History
Dragon fruit is borne on the vines of several different species, which are native to the Caribbean, Central America, and South America. These species are members of the cactus family or Cactaceae. While many pitaya species were formerly classified as members of the Hylocereus genus, all of the members of that genus have been reclassified as members of the Selenicereus genus. The Selenicereus genus includes plants such as fern leaf cactus and fishbone cactus, which also produce edible, pitaya-like fruits. This genus is classified within the Hylocereeae tribe, whose other members include both Christmas cacti, and epiphyllums. The genus name Selenicereus was given in reference to the species’ night-blooming flowers, inspired by the goddess Selene, the personification of the moon in Greek mythology. These plants have several different common names, which may vary depending on location. Local equivalents for the English term “dragon fruit” are commonly used for this fruit in Southeast Asia, while it is known as “pitahaya” in Mexico, and “pitaya” in Central and South America. The fruits of these plants are also known by the mouth-watering moniker “strawberry pear.” And these cacti are sometimes called “queen of the night” and “night-blooming cereus,” though that name can also refer to a type of epiphyllum as well as to a type of columnar cactus in the Stenocereus genus. Pitayas were first cultivated in the Americas in pre-Columbian times. Much later in the history of these plants, the French imported them to Southeast Asia at the beginning of the 19th century, giving the dragon fruit its introduction to Asia. Today the pitahaya continues to be cultivated commercially in its native range as well as throughout Asia, but it is also cultivated in other tropical and subtropical regions, such as Israel and northern Australia. And in the US, this crop is now being produced commercially in California, Florida, and Hawaii. Although grown primarily as a food crop, pitayas are also used in making food colorings and natural dyes. Dragon fruit can be grown outdoors year-round in USDA Hardiness Zones 10 to 11. In cooler zones, the plants need to be overwintered in a greenhouse or an indoor location with plenty of sun or supplemental grow lights.
Propagation
Pitayas can be propagated from seeds or from cuttings, as well as through grafting, though we’ll focus only on the first two options for the purposes of this article. Before you start with either method, it’s good to know what each will bring you in terms of wait time and fruit production. It can take two years or less to get a harvest of strawberry pears from rooted cuttings, while propagated seeds can take up to seven years to bear fruit. Also, new plants grown from seed will not necessarily produce fruit identical to that of the parent plant, while pitaya cuttings will, since they are clones. Here’s what each method entails:
From Seed
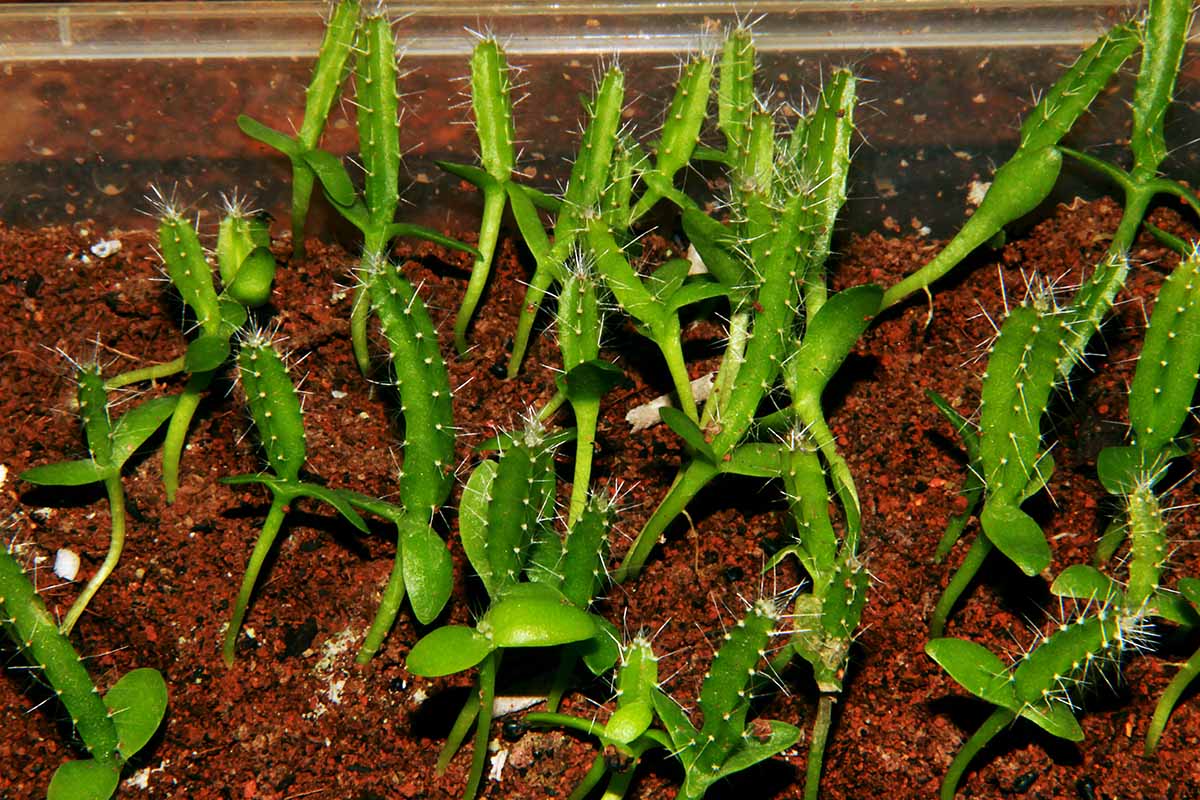
Place the pulp in a bowl, and mix it with some water so the pulp starts to disintegrate. Pour off some of the pulpy water, then pour the remainder (including the seeds) into a sieve. Here’s what you’ll need: pitaya seeds or a ripe dragon fruit, seed starting growing medium, a nursery pot or tray, a small bowl, a misting bottle, and a humidity dome or resealable plastic bag that will fit over your nursery pot. Pack of 100 Red Fleshed Pitaya Seeds To get the seeds out of a ripe dragon fruit, scoop some of the fruit out from the rind. These seeds have a fairly high germination rate, so a heaping spoonful of flesh will be enough. Now you should have mostly seeds in the sieve – if there’s a little pitaya pulp mixed in still, it’s not a problem. Your seeds are ready to plant. Prepare your tray or nursery pot by filling it with a suitable growing medium, leaving about half an inch to an inch of space between the top of the soil and the rim of the pot. Place the pitaya seeds on the potting soil – planting them fairly densely is fine. Then cover with a thin layer of soil about an eighth of an inch deep. Next, use the mister to water the seeds in, then cover the nursery pot with the bag or place the humidity dome on the tray. Keep the sown pitaya seeds in indirect, bright light at 65 to 70°F, and keep the medium moist but not soggy as they germinate, which can take two to three weeks. For faster germination, you can try placing your pot or tray on a heat mat, which can reduce germination time down to a few days.
From Cuttings
There’s a reason that pitaya plants are primarily grown from cuttings – this is the fastest way to get a new plant to produce fruit. Gardeners can produce a harvest from cuttings in six months to two years, depending on the growing conditions. What you’ll need for this project: dragon fruit cuttings, cactus and succulent growing medium, and one four-inch nursery pot per cutting. You can reuse old nursery pots for this project, but make sure you sterilize them first to avoid introducing pathogens. Cuttings should be about 10 to 18 inches long and stiff, not flexible. To get these, you’ll want to take cuttings from mature pitaya stems rather than brand new branches. For best results, take an entire stem segment. If you are taking the pitaya cuttings yourself, make sure to use sterilized pruners. Also, if taking more than one cutting from a stem, make sure to mark the cutting so you know which end is up and which is down. Let the pitaya cuttings callus over for one to two weeks in a location away from direct sunlight before planting them. Once the pitaya cuttings are callused, fill the four-inch pots with potting soil, leaving about an inch of room at the top. Insert a cutting into the middle of each pot, sinking the cutting a few inches deep. Be sure to plant the cuttings right side up! Place the pots in indirect bright light indoors or part shade outdoors and keep the soil moist but not soggy, watering about once a week or as needed. Potted cuttings can be gradually acclimated to more direct sunlight if you propagate a cultivar that is tolerant of full sun. Wait until the root system is well developed before transplanting, which can take four to six months. Once a pitaya cutting has filled its pot with roots, you can either repot it into a gallon-size plastic container temporarily, or transplant it into its permanent growing location, whether in a raised bed, a large pot, or directly in the ground.
From Transplants
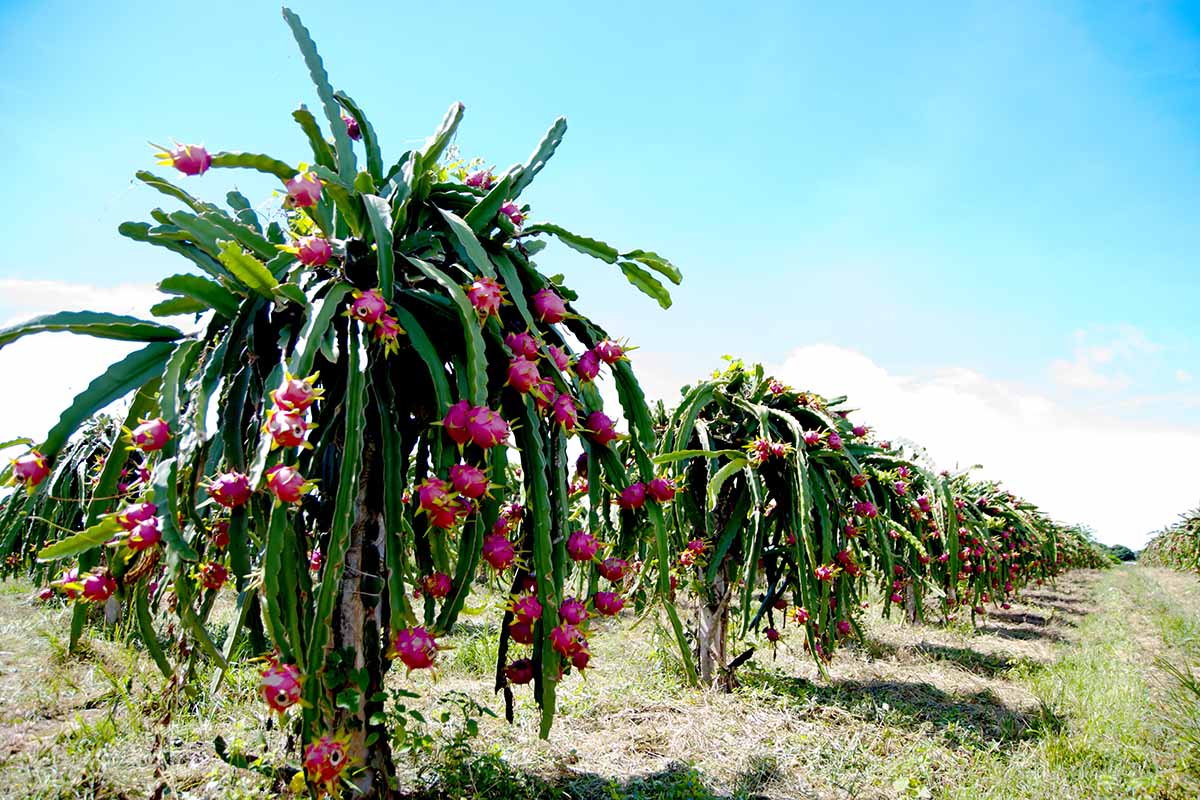
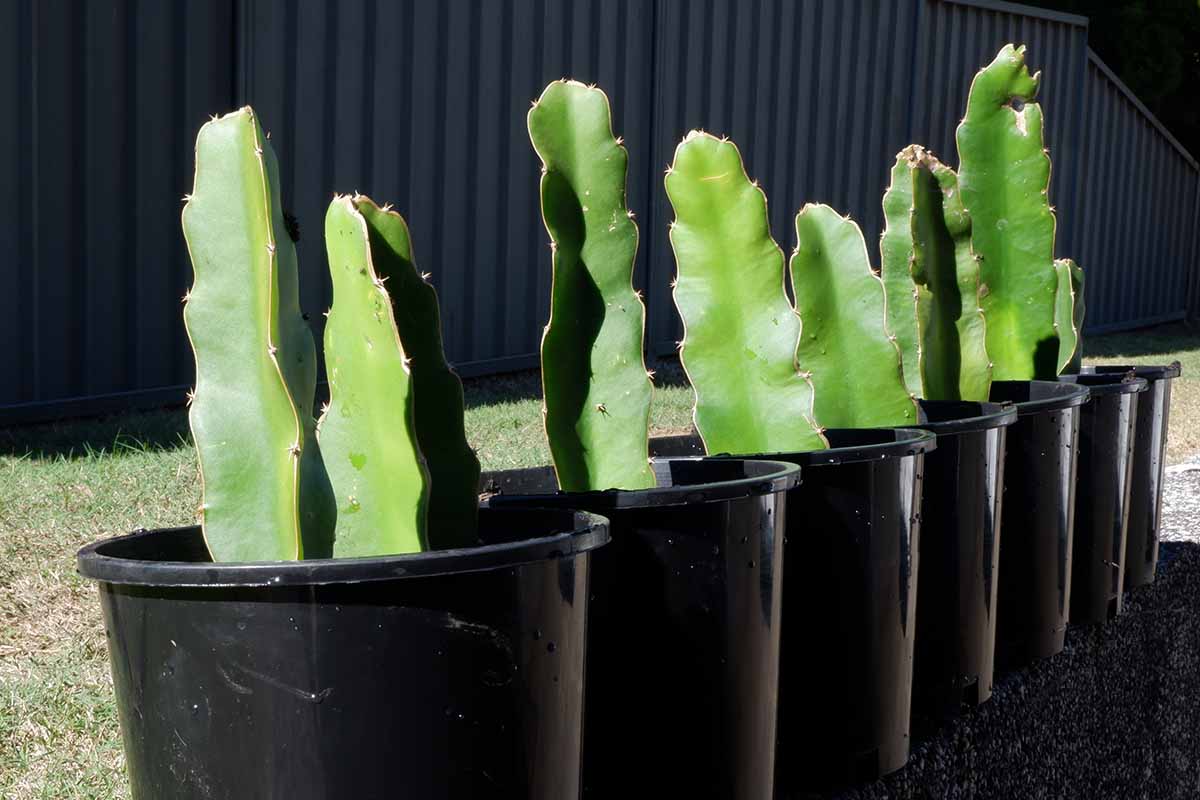
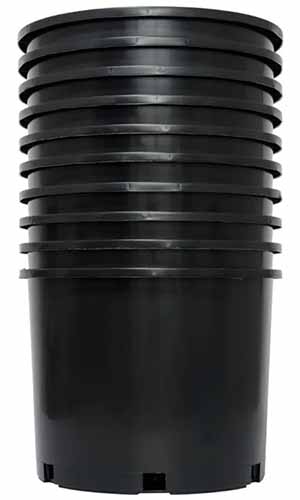
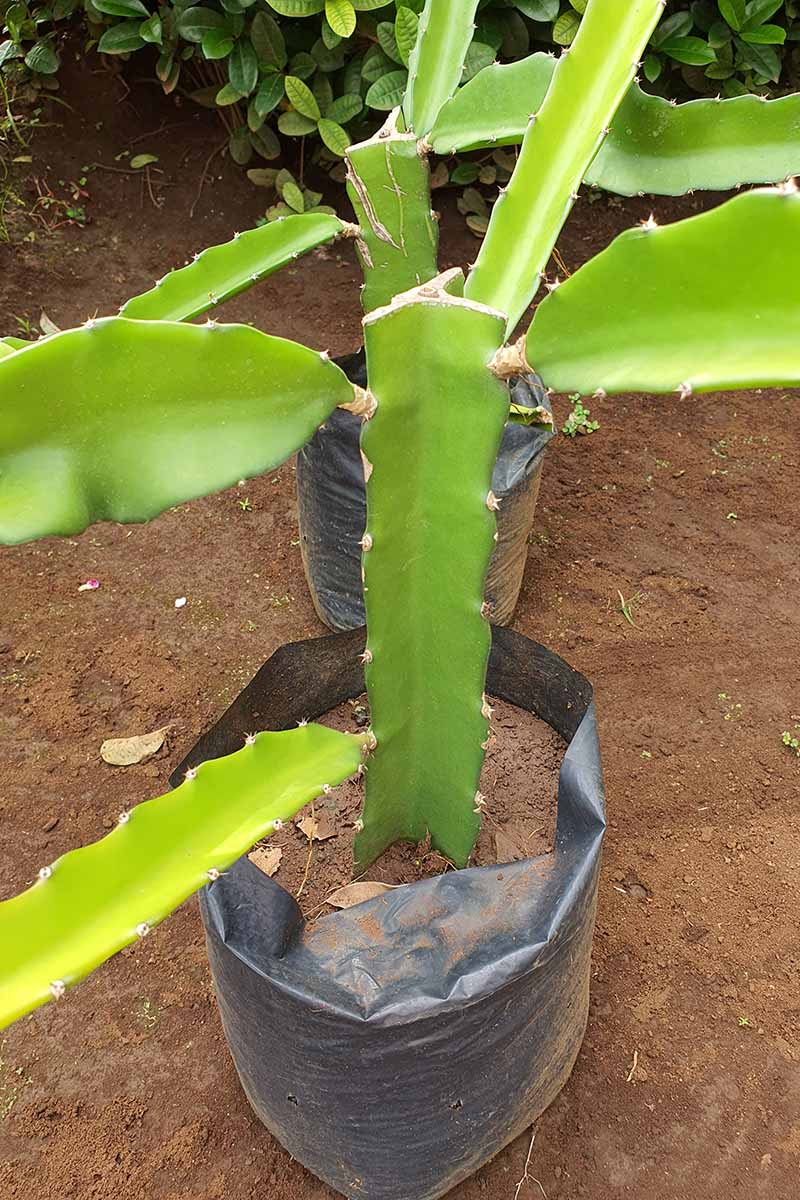
Taking cues from the pros, one of the most common methods used for growing pitayas outdoors is to transplant four rooted cuttings or seedlings into a 25-gallon pot, with one plant placed along each of the four sides of a four-by-four-inch post. For gardeners growing pitayas directly in the ground, make sure the soil is very well draining or plants can rot. Four pitaya plants per large nursery pot is an efficient setup. Set of 5 25-Gallon Nursery Pots A twenty- or twenty-five-gallon nursery pot is the size you’ll need. You might like this set of five 25-gallon black plastic nursery pots available via Wayfair. But there are also other options. You may opt to cultivate your pitayas in a DIY raised bed, for example. On the other hand, if you live in a USDA Hardiness Zone or equivalent that is cooler than Zone 10, you will need to transplant into a pot that can be moved indoors or to a heated greenhouse for the winter, so you may prefer to plant your pitayas into smaller, more manageable containers. In this case, one cutting per five-gallon planter is a good option – you can always repot later if needed. Ready to get started? First, position your post, stake, or trellis. Next, position the dragon fruit cutting or seedling so the top of its root ball is at the level of the soil surface, and the stem is ready to grow up alongside its support system. If transplanting into a pot, backfill with growing medium, keeping a couple of inches of space between the top of the soil and the rim of the pot to allow room for watering. Secure the pitaya cuttings to their stakes or trellises with twine, and water the transplants in. Specimens grown outdoors on heavy-duty posts should be allowed nine to 15 feet of space between posts. Keep in mind that if you are growing a self-sterile variety, you will need a second variety too for cross-pollination. You’ll learn more about this in the section on hand pollination below, so keep reading.
How to Grow
Growing pitayas requires not just providing plants with the right amount of light and water, but also entails offering support, and most often, a raised bed or container of some sort to ensure adequate drainage.
Staking and Trellising
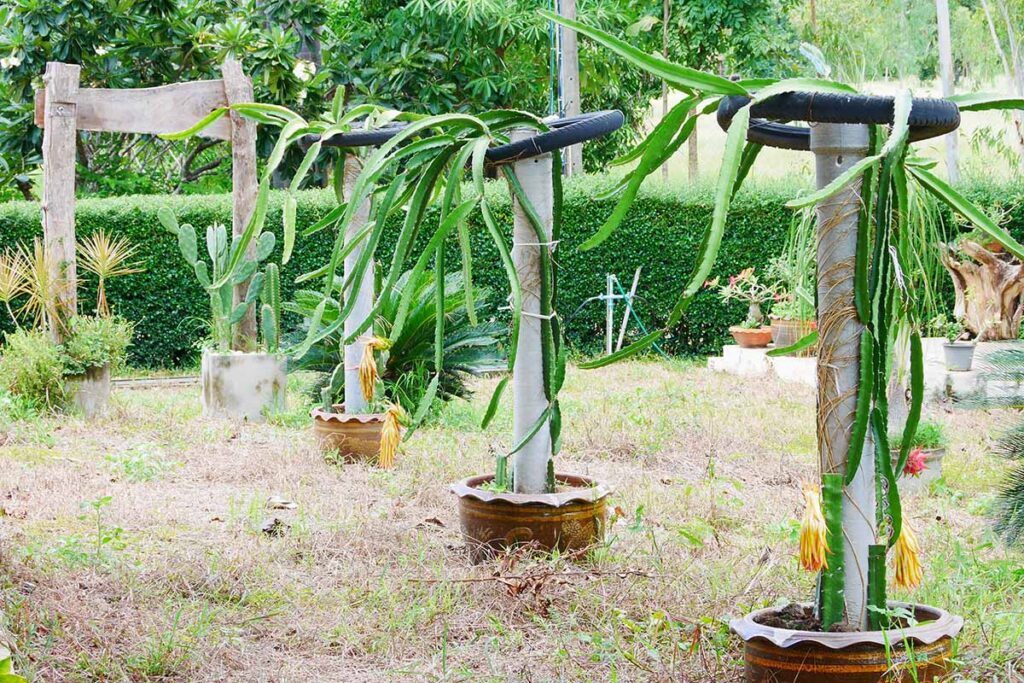
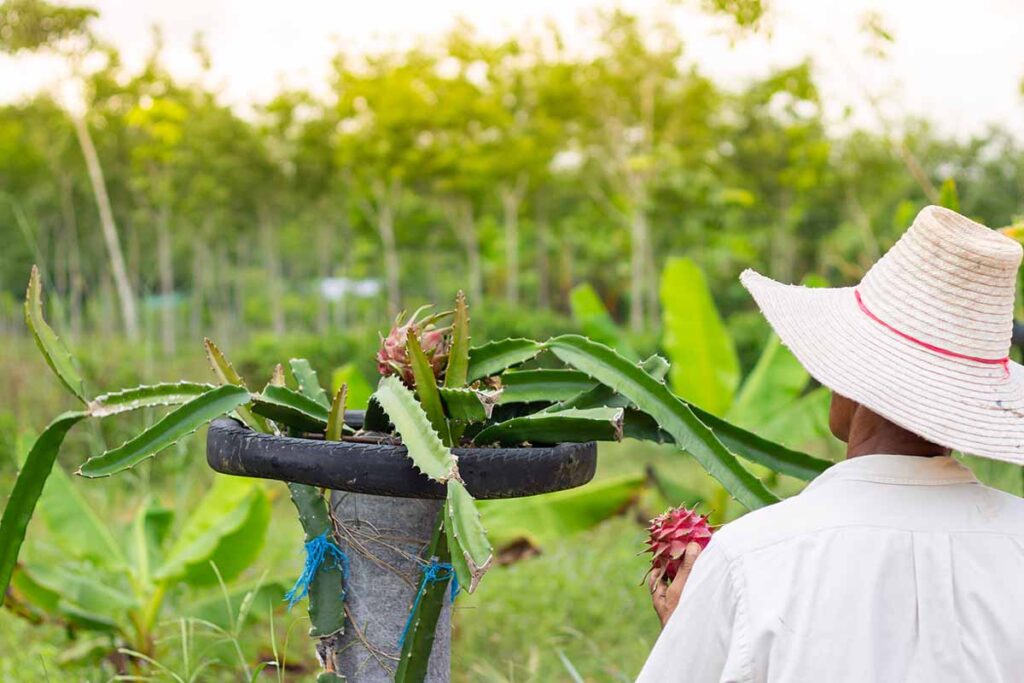
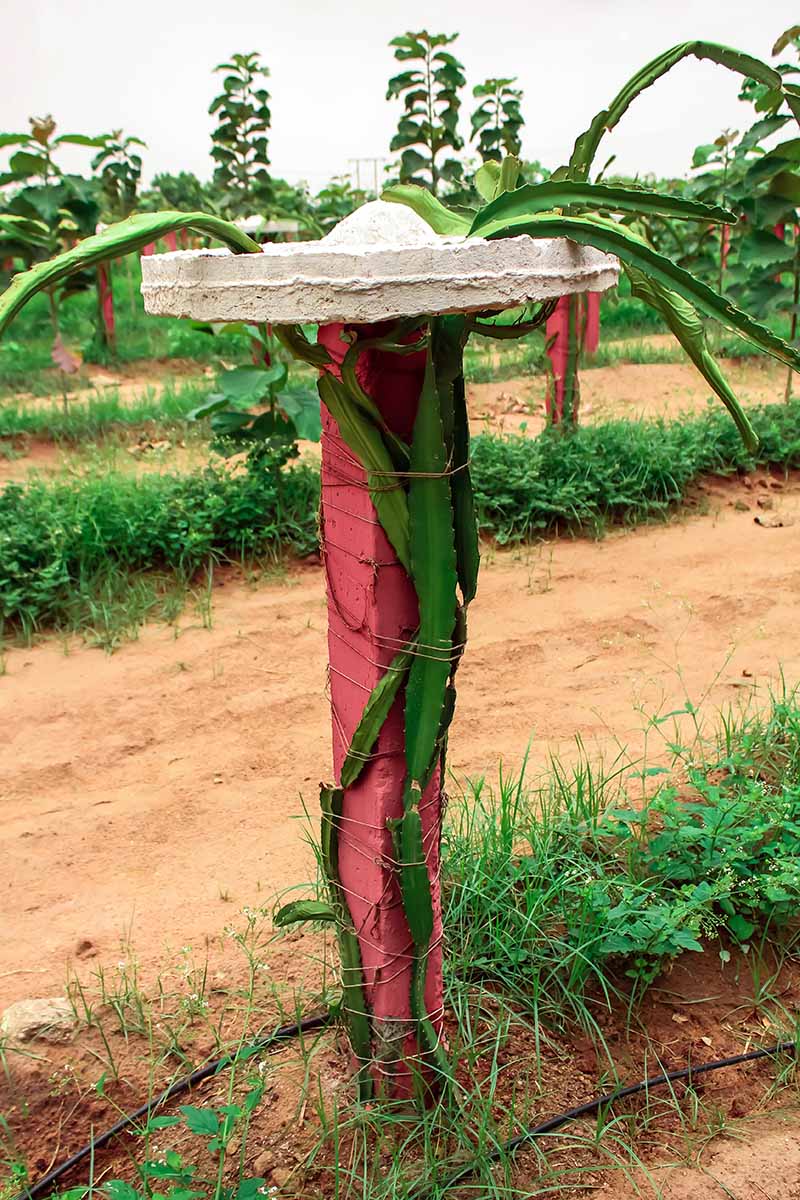
Let’s start with support considerations, which are quite literally foundational when growing pitayas. I’ll preface this by saying that creating a trellis or stake for pitayas can be labor intensive, but since these plants can live for 30 to 50 years with proper care, it’s worth taking time at the outset to create a suitable support system for your cacti. These plants are climbers, and they do indeed need something to climb! If you are growing them for fruit and not just as a whimsical act of pure fun, then you’re going to need a very sturdy trellis system since they produce masses of heavy foliage and heavy dragon fruit. However, there are many different setups you can choose from when growing pitayas and you can adapt your plant’s support system to your growing conditions. Explaining exactly how to construct such a support system is beyond the scope of this article, but I will provide some basic ideas to help get you started. If you’re growing outdoors all year long, you’re going to want some heavy-duty support to maximize your dragon fruit growing potential. Professional pitaya growers often use a four-by-four wood post or a cement post reinforced with rebar, sunk into the ground. Plastic drainage pipes are often used to create a mold for making cement posts. Often a raised bed or container of some sort is used in conjunction with this type of stake to ensure good drainage. For gardeners emulating the pros when growing tree-like cacti, canopies must be able to support the weight of the masses of foliage and heavy dragon fruit, which can become a load of several hundred pounds. One trellising system recommended for smaller-scale pitaya growers comes via Spicy Exotics, a nursery specializing in dragon fruit, which is based in the sultry climes of Louisiana. 20” Resin Wine Barrel Planter These pros recommend creating a trellis by placing a tomato cage in a large resin pot, such as this 20-inch resin wine barrel style planter, available via The Home Depot. Make sure you choose a planter with drainage holes in the bottom, or drill your own. 54” Galvanized Steel Tomato Cage As for tomato cages, choose one that is sturdy and four to five feet tall, such as this 54-inch galvanized steel tomato cage, also available for purchase at The Home Depot. According to this plan, you’ll need to drill four holes in the sides of the pot about an inch above the base. Next, place the legs of the tomato cage in the pot, insert them through the holes by a few inches, then bend the legs up, anchoring the cage to the pot. In addition to climbing support, the pitaya plants will also need canopy support. To accomplish this, two sections of rebar are often secured at the top of the post with a square of heavy-duty wire mesh placed across it. However, since wire will cut into the succulent stems of these cacti, a cushion of some sort is added on top of the mesh to prevent damage to the pitaya’s stems, such as a split tire or garden hose, or some other type of tubing. Gardeners in tropical or subtropical locations can even let this plant do what it does naturally – let it climb up a tree. So that strawberry pears are still within reach, make sure to choose a tree that is small but sturdy, or be prepared to prune the pitaya to size. Not all professional pitaya growers use heavy-duty, tree-like posts, though. Some of the pros use shorter, more horizontal trellising systems made from bamboo. There are many different ways to support pitaya plants and you can certainly adapt your growing system to your space and climate limitations. Pitayas may be trained to grow over a rock wall, to climb on the T-bar of a clothesline, or they can even be grown in large hanging baskets if you’re willing to keep up with pruning to maintain the specimen and keep it on the small side. If you’re especially motivated to grow dragon fruit, think creatively and I bet you’ll find a plant support system that will work well for you.
Light
Pitayas can grow in full sun to part sun, with some cultivars being more tolerant of direct sun and others less so. If you are gardening in a hot climate with temperatures that regularly exceed this plant’s preferred maximum temperature of 80°F, you may need to situate your plant in part shade – but double-check your cultivar’s sun tolerance to be sure. When offering part shade, aim for full sun in the early part of the day and some shade in the later part of the day, when conditions are hottest. For those hoping to produce a dragon fruit harvest indoors, provide as much direct sunlight as possible, and supplement with grow lights if needed. You’ll learn more about using grow lights in our article. Even for pitaya cultivars that tolerate full sun, always acclimate new plants to full sun gradually. Too much sun can lead to scalding, which can cause stems to rot, and eventually die.
Soil
So, water regularly during the active growth period for best results when the growing medium is dry to the touch. Also, the soil should be slightly acidic, with a pH between 6.0 and 7.0. Using a pre-mixed potting medium for cacti and succulents that contains some compost is a good choice. Tank’s Pro Cactus and Succulent Mix
Water
Pitayas are cacti, but as we’ve already learned, they’re not the type of cacti that live in arid deserts. These succulents do best in soil that is moist – but not soggy. To give you an idea of how much water they need, many sources will tell you that they require 25 to 50 inches of water a year. Pitayas are drought tolerant and more water efficient than many other fruit crops grown in similar climates, but dragon fruit quality will decrease if plants are allowed to dry out too much between watering. During periods of little or no rain, pitayas may need to be watered twice a week. When dragon fruit plants are not actively growing in winter, reduce watering to account for shorter day length and reduced moisture needs. And too much water during fruiting can cause strawberry pears to split, so take care not to overwater.
Temperature
Pitaya plants will grow best in temperatures between 65 and 80°F, but mature plants can tolerate temperatures of 100°F or more if provided with some shade. On the colder end of the spectrum, they can bounce back from a light freeze, but can be damaged by cold weather that dips below 32° F. And while freezing weather can harm plants, too much exposure to cool weather can prevent flower production.
Growing Tips
Choose a cultivar adapted to your sun conditions and provide part shade in hotter conditions.Make sure soil is well draining and rich in organic matter.Keep soil moist but not soggy.
Pruning and Maintenance
I’m not going to mislead you – pitayas require a significant amount of maintenance, at least at the beginning. But the pounds and pounds of strawberry pears you grow will be well worth your efforts. If all these steps seem like a lot to keep organized, I recommend creating reminders for each task in a calendar or garden planner.
Pruning
Do you own a good pair of garden pruners? I hope so because pruning is going to be a frequent task when growing pitayas. There are five different reasons you will need to prune this cactus and I’m going to walk you through each of them.
1. Encouraging Vertical Growth
The first type of pruning you’ll do is when you are encouraging vertical growth on your potted dragon fruit cuttings or hand raised seedlings. As the pitaya grows up its support, it will produce branches. You’ll want to discourage this until the plant reaches the top of its post or trellis by pruning off any side branches that appear. Once the plant reaches the top of its trellis or stake, you’ll want to switch gears and allow branching at the top of the plant. Pitaya stems will hang over the edges of the canopy support, trailing down, where they will produce their fruit.
2. Promote Flowering and Fruiting
The next type of pruning you’ll need to know about is making cuts to promote flowering and fruit production, sometimes called “tipping” This type of pruning should be carried out in late winter on plants that have already developed a canopy of growth. Usually, plants are at least two years old by this point. Cut back the tips of some of the stems hanging down from the canopy by two or three inches. This will put stress on the plants, encouraging those stems to flower. You can do this to several stems per plant, but don’t tip stems that already have flower buds on them.
3. Cleanup
As specimens mature and produce masses of foliage, you’ll also want to prune for sanitation. In this case you are essentially thinning some of the masses of growth from the plant. A tip for this type of pruning is to prune so that the center of the plant is visible from all directions.
4. Propagating New Plants
You may also want to take cuttings of your plant to propagate new specimens! However, make sure to let these mature before you cut them – they should be fairly stiff compared to younger growth.
5. Health
Finally, if any branches look diseased, sunburned, or rotten, trim these off with pruners. And whatever your purpose when pruning, make sure your tools are sharp and sterilized.
Training
But there’s an even more pressing concern with weeding: Some weeds can harbor pathogens that may cause diseases in pitayas. While the main stem of your plant first starts growing vertically along its support, it will need a bit of assistance to keep it latched on before it develops aerial roots of its own. Many gardeners use plastic ties for this purpose, but I prefer a biodegradable option such as sisal twine – the plant will produce aerial roots after all, so it just needs some temporary help. Sisal Binder Twine You can purchase a 2,500-foot roll of single-ply sisal twine from Lehman’s. Sometimes burlap is also added around the support post to help the aerial roots latch on. Burlap fabric can be wrapped around a stake and attached with twine. 2-Pack of Burlap Fabric 24’ x 3’ You’ll find a two-pack of burlap fabric in 24-by-three-foot rolls available for purchase via The Home Depot.
Weeding
Weeding is an important task to keep on your pitaya maintenance agenda. If you let the weeds get ahead of you, they can compete with your young cacti when they are trying to get established. Is weeding not your favorite task? It’s not mine either. But help is here – we have plenty of tips on how to spend less time weeding and more time gardening in our article.
Mulching
Mulching around pitaya plants is also a good idea. It can help suppress weed growth and prevent water evaporation, meaning less water needs to be dedicated to irrigation. When mulching pitayas, make sure to leave an unmulched circle around the stem, about eight inches wide. This will help prevent overly moist conditions which could lead to rotting. There are many different materials you might consider as a mulch – read our article for ideas about different types of mulch to use in low-maintenance gardening.
Fertilizing
Many professional dragon fruit growers use cow manure as their fertilizer of choice. Francis Zee and colleagues at the College of Tropical Agriculture and Human Resources at the University of Hawaii at Manoa recommend applying nine pounds of composted cow manure per mature plant.
Hand-Pollinating
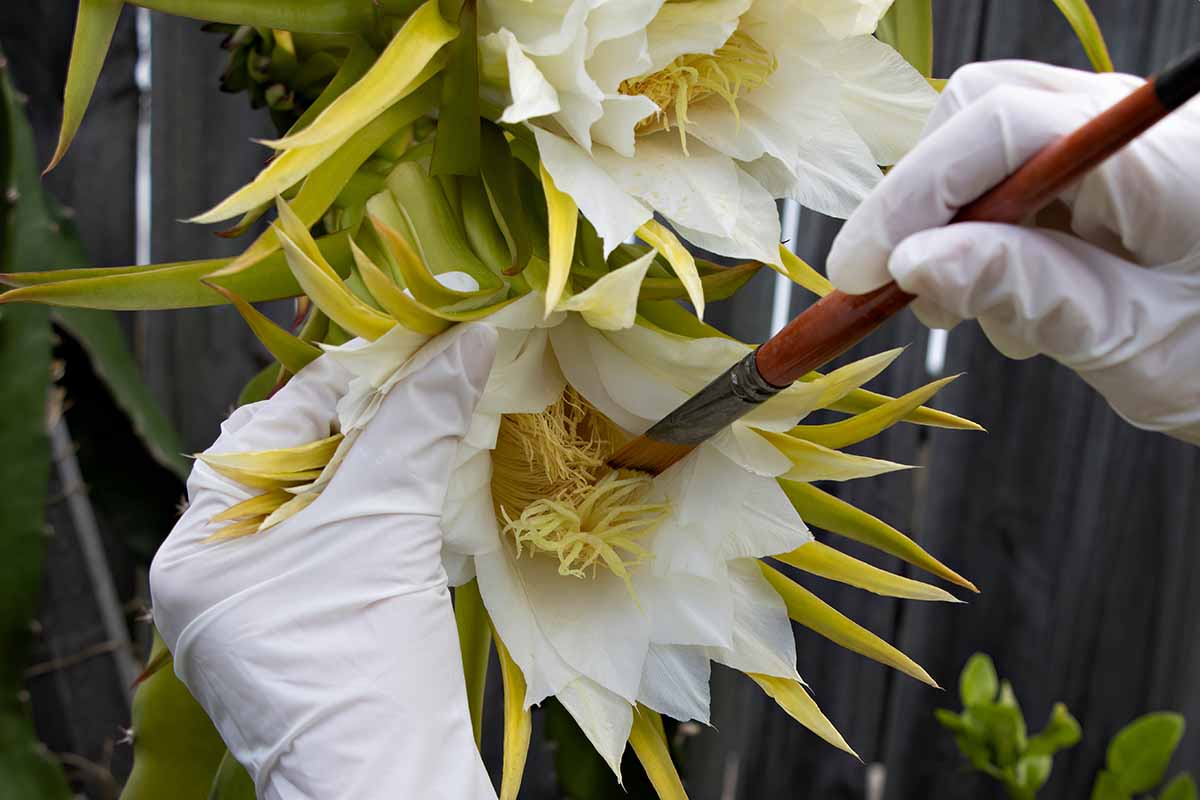
In their native habitats, pitaya-producing species would be pollinated by bats or moths. In addition to this, they also recommend a balanced fertilizer, such as Dr. Earth’s Premium Gold All Purpose Fertilizer, applied according to package instructions. Dr. Earth’s Premium Gold All Purpose Fertilizer Both of these should be applied together every four months throughout the growing season starting in April. Grown outside of their native ranges, pollinators may not be present to help plants accomplish this task. While bees and ants sometimes pollinate these plants, hand-pollination can make up for missing pollinators and boost yields. Poor pollination is the primary reason for lack of fruit on pitayas, so hand-pollination will give you better fruit production whether you’re growing a self-sterile cultivar or a self-fertile one. If you have a self-sterile cultivar, you will need to grow a second variety, one with an overlapping bloom time, and provide pollen from that second variety to produce a harvest. Self-sterile plants can only cross-pollinate with pitayas of different varieties – they don’t have to be the same species though, and some varieties are considered universal pollinators. It’s a good idea to check the compatibility of selected cultivars before you purchase them. On the other hand, if you have a self-fertile cultivar, you can hand-pollinate with pollen from the same plant or even the same flower. Self-fertile plants can be pollinated with pollen from the same flower, a different flower on the same plant, or a flower on a different plant. Before undertaking this task, let’s have a quick review of the flower parts involved – you’ll need to be able to recognize the bloom’s anthers (the male parts) and stigma (the female part), both of which are found within each flower’s petals. The anthers are numerous and wispy, and these are the parts that have pollen on them. The stigma is situated below the anthers. It tends to protrude beyond them, and looks (to me, at least) similar to a sea anemone. Here’s what you’ll need for hand pollinating: a small, flat paint brush with bristles about one to two inches wide, and a small container or jar for pollen collection. If you have a self-sterile pitaya variety, you may need to collect pollen when a flower opens, store it, and then wait until a flower from another variety opens if the two aren’t blooming simultaneously – so choosing two cultivars with overlapping bloom times is important. You can store collected pollen in the fridge for a day – but after 24 hours, pollination success rates will start to decline. If possible, perform hand-pollination within two hours after the bloom opens, which will be after night falls. To collect pollen, dab the brush against the anthers, then tap it into the container. Some of the pollen may fall out on the flower’s petals – if it does, collect it by brushing it from the petals into the container. After collecting the pollen, use the brush to rub it gently against the stigma of an open flower. If you are pollinating a self-fertile variety, you don’t need to collect the pollen in a container. You can instead just dab the bristles of your brush against the anthers, collecting pollen on them, and then dab the pollen onto the stigma. Fruit set will take place within a few days if your pitaya hand-pollination attempts are successful.
Cultivars to Select
There is an astonishingly vast array of pitaya cultivars available to choose from. Gardeners should choose a variety that matches their growing conditions as well as their flavor preferences. Fruits of ‘Colombiana’ are small to medium-sized, weighing in at eight to 12 ounces, and they are extremely sweet, with a Brix score of about 21. The fruits of this pitaya variety are round, weighing half a pound to a pound each, and containing pulp that is soft and very juicy. With a Brix score of 18.51, the flesh of ‘American Beauty’ is bright pink, and extremely sweet and flavorful. Plants have small spines on dark green stems, producing flowers that are self-fertile. This variety thrives in part sun, being less tolerant of full sun, and fruit is ready for harvest between June and November. ‘American Beauty’ Cuttings
Colombiana
‘Colombiana’ is a cultivar of S. megalanthus that produces yellow fruit. With this selection, not just the plants are spiny, but also the fruit. However, if you have a sweet tooth, you’ll probably be willing to put up with a few spines because this variety is one of the sweetest around. This Colombian cultivar is also known as “yellow dragon” and produces small, spiny, oblong fruits with thick yellow skin. Their flesh is translucent white with a firm texture, and contains large seeds. Plants are olive green, bearing flowers that are fragrant and self-fertile. Harvest takes place during the winter, usually from November through February. This type of pitaya is a bit sensitive – it doesn’t like cold, heat, or full sun, and is prone to rust in areas with a lot of rain. ‘Colombiana’ is best suited for more experienced strawberry pear growers.
Sin Espinas
If you love dragon fruit but don’t like cactus spines, ‘Sin Espinas’ is the cultivar for you. But that’s not all ‘Sin Espinas’ has going for it – this Nicaraguan variety is self-fertile, has gorgeous pink skin, and was one of the top-rated selections for flavor in a blind taste test conducted by the University of California at San Diego Cooperative Extension. The fruit is also a delight to look at, with deep red flesh that is firm and has a tart flavor, and a Brix score of 16.5. These dragon fruits weigh in at about one pound each and are borne on plants that have such tiny spines along their ribs that the variety is considered spineless. This small selection of pitaya cultivars is just barely scraping the surface! Discover more in our article on some of the best varieties of dragon fruit. (coming soon!)
Aphids
Aphids can feed on both the flowers and the fruits of these plants.
Herbivores
While rabbits and deer can also be problematic, birds pose the greatest risk for many pitahaya gardeners, since they will enjoy pecking into dragon fruits as they ripen. 4’ x 8’ Zippered Crop Cage To keep birds from pilfering your crop, use bird netting or consider growing your pitayas inside a crop cage, such as this six-foot-tall, zippered crop cage from Gardener’s Supply. Crop cages will keep most four-legged critters out as well as birds.
Insects
Not all insect visitors to your pitaya plants are cause for alarm, but there are a few pests you’ll want to look out for: Aphids insert their mouth parts into plant tissue to suck out nutrients, leaving behind a sticky trail of honeydew, which can in turn encourage fungal pathogens to proliferate. To keep aphid populations in check, encourage beneficial insects such as parasitic wasps to visit your garden with nearby plantings of some of their favorite food and habitat sources, like dill, cilantro, carrot flowers, and Queen Anne’s lace. Ladybugs and green lacewings will also help keep aphids in check on pitayas. Learn more about controlling and eradicating aphids in our article.
Leaf-Footed Bugs
Related to squash bugs, leaf-footed bugs are easy-to-spot pests thanks to their flipper-like appendages. These true bugs may feed on pitaya stems, flowers, and fruits. They leave puncture wounds on flowers, which cause blooms to abort, and can damage maturing strawberry pears by introducing fungi and bacteria. These bugs are black in color and can be up to an inch long, making them easy to spot. They can be removed when less active in the early morning or late evening by either picking them off by hand, or using a shop vac to vacuum them off of plants. After collecting them, why not feed them to your chickens? Also check stems for eggs, which are brown and usually laid in long rows. These can be removed by hand. Beneficial insects such as tachinid flies and parasitic wasps can help keep populations under control, while keeping weeds down around plants can remove additional food and egg-laying habitats for these pests.
Thrips
Like aphids, thrips also have mouthparts which they use to pierce plant tissue and suck out nutrients. Adults lay eggs on flowers. When the larvae hatch, they will eat the pitaya flowers, ruining their chances of developing fruit. These pests can also feed directly on fruit, causing cosmetic damage. Natural enemies of these pests should be encouraged, and include ladybugs, green lacewings, and minute pirate bugs. Learn more about identifying and controlling thrips in our article.
Disease
Pitayas aren’t particularly prone to diseases, but as always, you’ll want to know what to look for, just in case. Here are some of the most common pitaya diseases:
Bipolaris Fruit Rot
If your cherished crop of dragon fruit is suddenly showing brown to black lesions, Bipolaris fruit rot is a fungal disease that might be to blame. Lesions are circular and start off small and tan colored, becoming larger and growing black as they progress. While it’s primarily the fruits that are affected, younger stems can also show signs of this illness, while larger stems tend to go unaffected. Bipolaris fruit rot can occur in humid conditions during warm and hot weather. This disease is caused by Bipolaris cactivora, a type of fungi. The best treatment for this type of rot is prevention. Plants should be watered in the morning and at the soil level to allow time for foliage to dry during the day. Prune affected plant material, sterilizing pruners between cuts, and dispose of it to avoid spreading this disease.
Cactus Virus X
Cactus virus X is a disease that strikes members of the cactus family, including pitayas. Signs of this disease include stunted plants, a lack of new shoots or flowers, mottled or speckled coloring on the foliage, and twisted stems. However, sometimes specimens are asymptomatic. Unfortunately, there is no known treatment for this virus so prevention is imperative. Sterilize tools and wash your hands between handling different cactus specimens. If reusing pots, be sure to thoroughly wash and sterilize them first. Gardeners who own only one cactus sometimes choose to let their plant live with this disease if symptoms are mild. However, to avoid infection of other members of the cactus family, infected specimens should be disposed of.
Root Rot
Too much water and insufficient drainage can lead to root rot, a situation where the plant’s roots start to rot away, impairing their ability to transport water. Pitaya plants can’t tolerate soggy feet, which is why elevated plantings in raised beds or containers, proper drainage, and regular irrigation are important. You can learn more about managing root rot in fruit, nut, and landscape trees in our article.
Harvesting
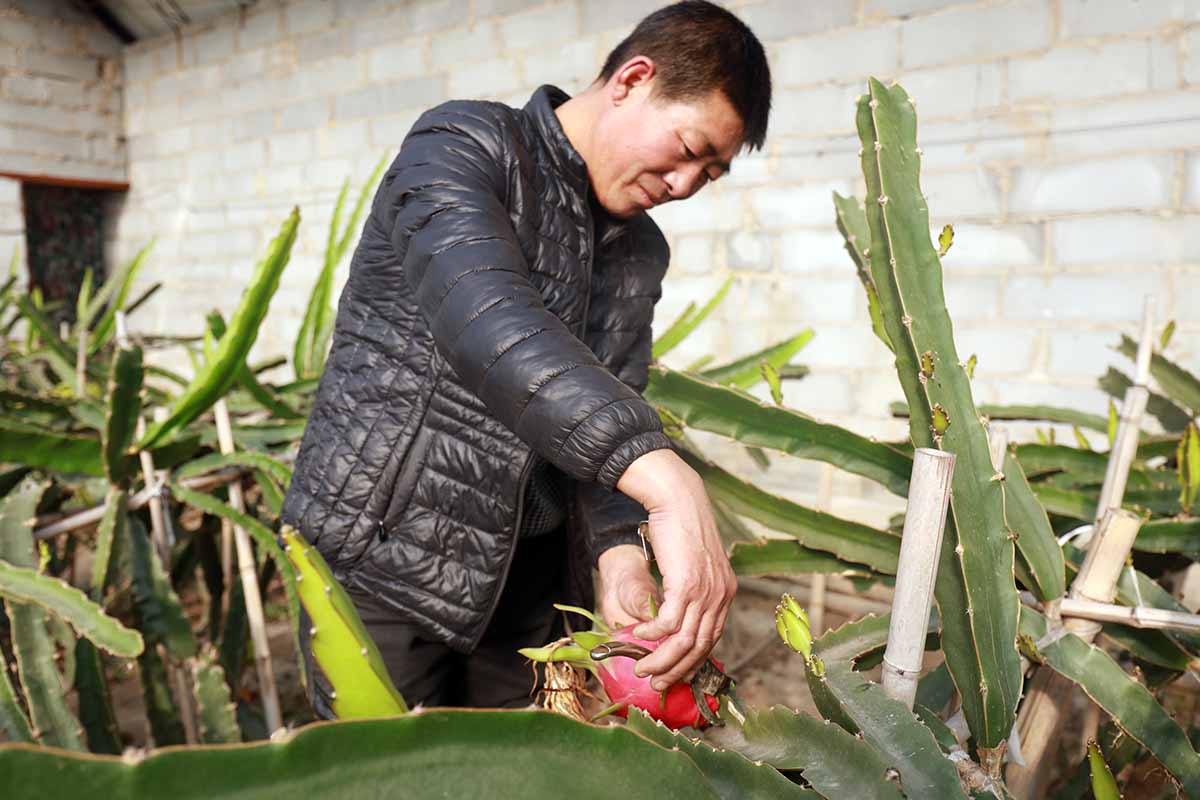
Using the best techniques for harvesting dragon fruit can mean the difference between a harvest packed with flavor, and one that is bland. After your plants flower and are pollinated, within a few days you will notice fruits setting. You can count forward 30 to 50 days from fruit set for an estimated date range when the strawberry pears will be ready to harvest. Unlike bananas and apricots, pitayas don’t continue to ripen once picked, so don’t get too eager and pick when the fruits are still mostly green. In general, dragon fruit is ready to pick when the skin has colored up, but most of each bract is still green. Nicaraguan and pink-fleshed varieties are more acidic than other types and can be allowed to ripen a bit more, when just the tips of the bracts are green. Yellow-skinned types with spines are harvested when the skin has turned completely yellow. If you’re growing a variety that has spiny fruits, spines can be brushed off with a clean dustpan brush prior to harvesting. Sometimes a faded bloom is still attached to the fruit when it’s ready to pick – you can just pull it off and put it in the compost. Young plants will only produce a few fruits, but their productivity will increase as they mature. Expect 20 to 60 pounds of fruit per mature plant.
Preserving
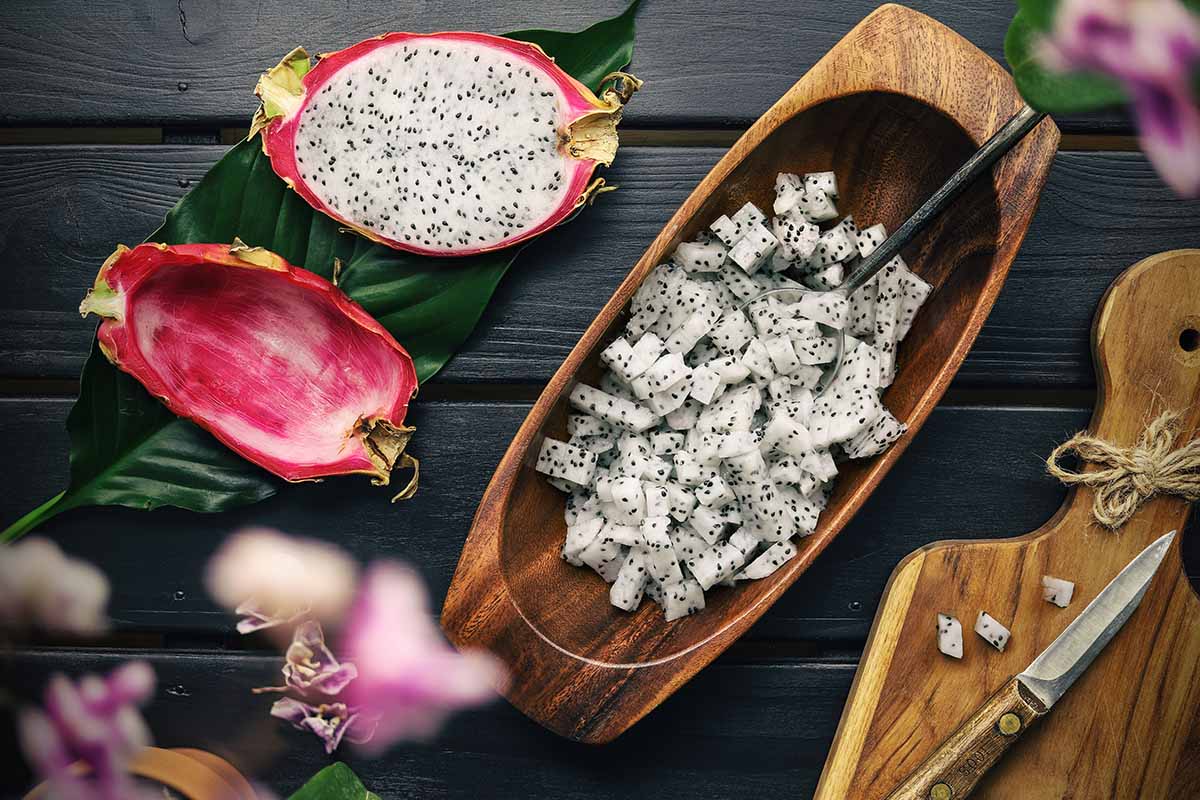
Dragon fruit are tastiest when eaten soon after harvesting. However, if you find yourself with more than you can eat at once, you may want to know how best to keep and preserve them. Pitayas can be stored on the kitchen counter for two to three days, and some folks find they take on a sweeter flavor after a few days spent on the counter. But dragon fruit will keep longer in the fridge. They can be stored in ventilated plastic bags in the refrigerator for up to two weeks. Once pitayas have been cut up, they will keep in the fridge for a couple of days in a sealed container. For longer-term storage, these tropical treats can be frozen. To freeze, remove the flesh from the peel, and cut it into small cubes. Place the cubes on a baking sheet and freeze them for at least four hours or overnight. Once the cubes are frozen, place them in a plastic bag or airtight freezer container. These cubes can be used in smoothies, puddings, or baked goods, and will keep in the freezer for up to 12 months. Sliced dragon fruit can also be dehydrated into thin chips. Need some tips on how to get started with dehydrating? Read our ultimate guide to dehydrating your garden’s bounty at our sister site, Foodal.
Recipes and Cooking Ideas
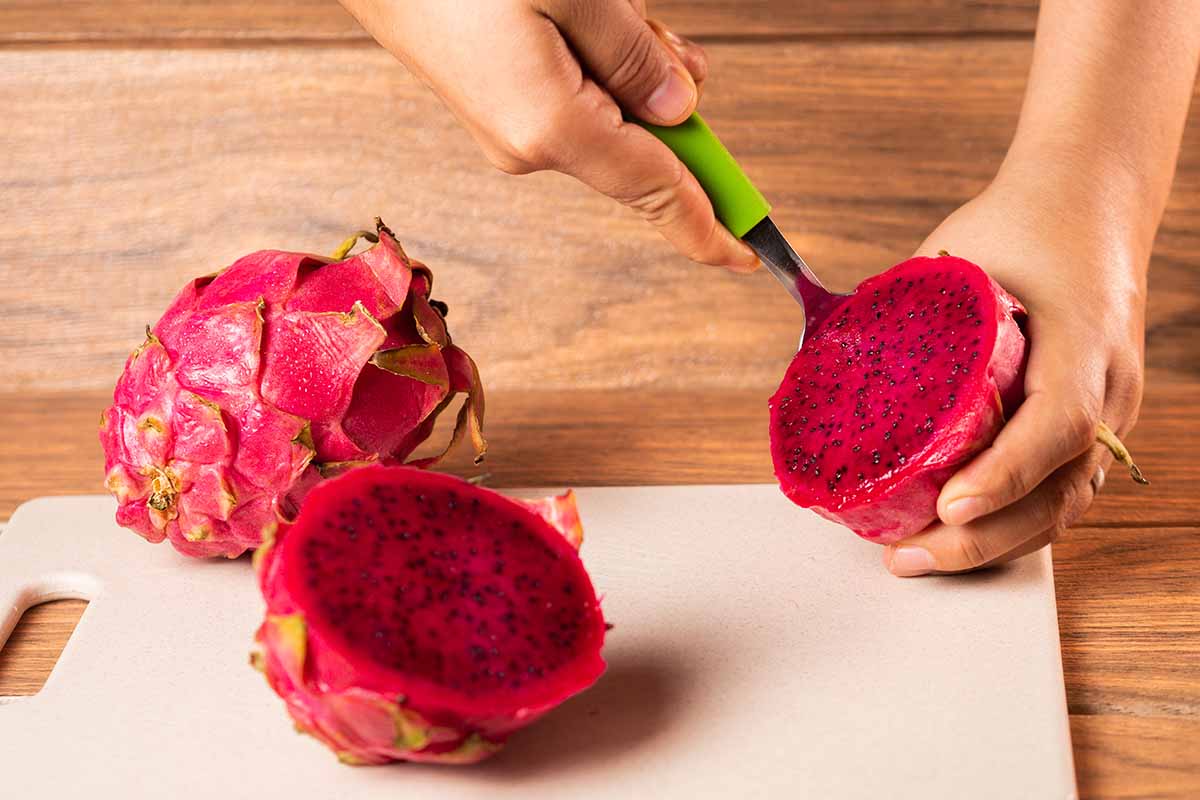
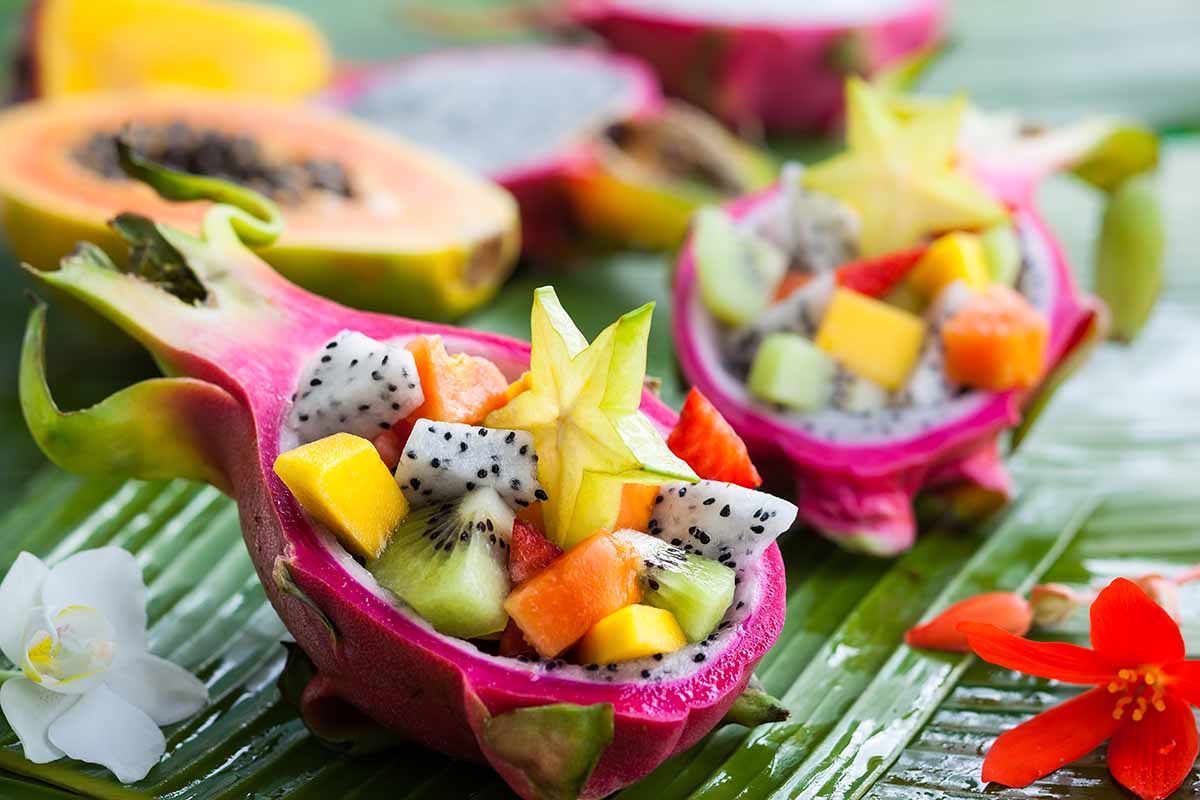
The flesh of a ripe dragon fruit can be enjoyed raw, scooped out of its peel with a spoon – and when enjoyed this way, some find it tastes best chilled. Raw strawberry pears taste especially nice with a little lime juice squirted on top. Looking for more ideas on how to use dragon fruit? Pitaya lends itself naturally to dishes on the sweet side, such as smoothies, puddings, popsicles, and sorbets, but it can also be transformed into jam. You can learn more about making jams and jellies at our sister site, Foodal. For another fresh use, strawberry pear flesh can be added to fruit salads, and the peel can be used as a decorative serving vessel. For those who want to experiment with something more on the savory side, pitahaya can be added to fresh salsa, guacamole, seafood dishes, curries, or salads. Now you’ll just have to decide what to do with all those gorgeous strawberry pears! Are you planning to cultivate a small grove of these jungle cacti? Or are you going to grow a single indoor specimen as a fruit-producing houseplant? Or – be honest – are you just here for the fun, at-home project of growing these tiny cacti from seeds in your windowsill? It’s all good, just let us know in the comments section below, and feel free to drop any questions you might have there as well! Interested in other types of succulents with edible and medicinal properties? We have more guides you’ll enjoy right here:
How to Grow Prickly Pear CactusHow to Grow and Care for Agave in the GardenTips for Growing Aloe Vera Outdoors

