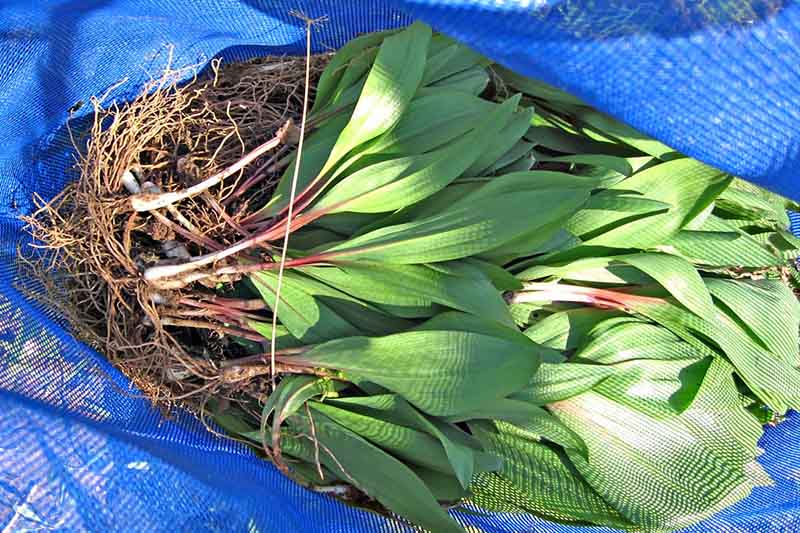
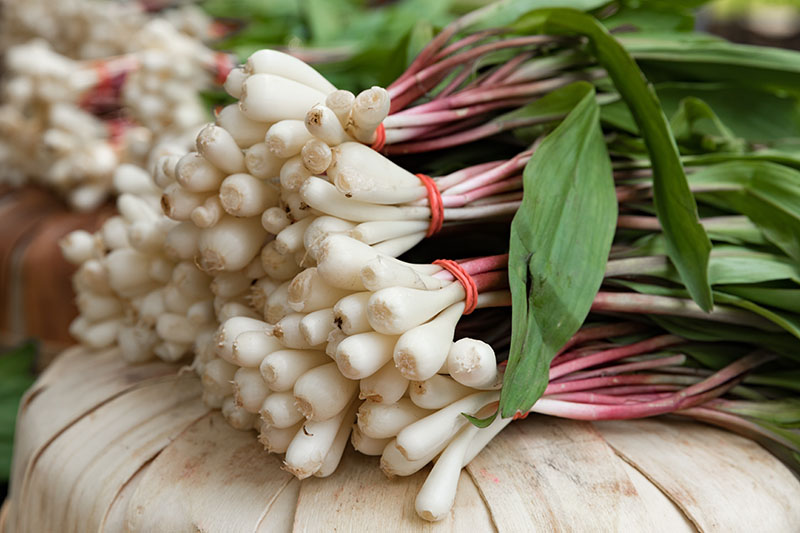
Okay, maybe not everyone sees their property in terms of where they can fit in more edibles, as I do. But if you’re looking for a plant to fill the floor of your food forest, look no further than ramps. Allium tricoccum has gained quite the reputation in recent years. No longer a novelty vegetable, you can find ramps at restaurants and kitchen tables across the country during those few weeks in the spring that they’re available. We link to vendors to help you find relevant products. If you buy from one of our links, we may earn a commission. I’ll level with you: starting these tasty plants isn’t easy unless you have the right conditions – like a loamy forest floor near water. However, that doesn’t mean you can’t use a little elbow grease to create the right environment. The plus side is that once you have this leek-like plant growing, it’s easy to care for. Ready to try your hand at growing this stinky delicacy? Let’s get started.
What Are Ramps?
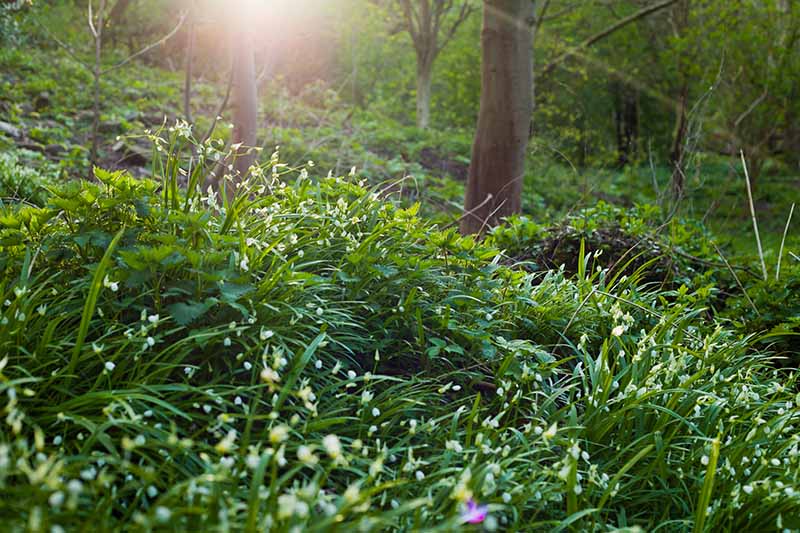
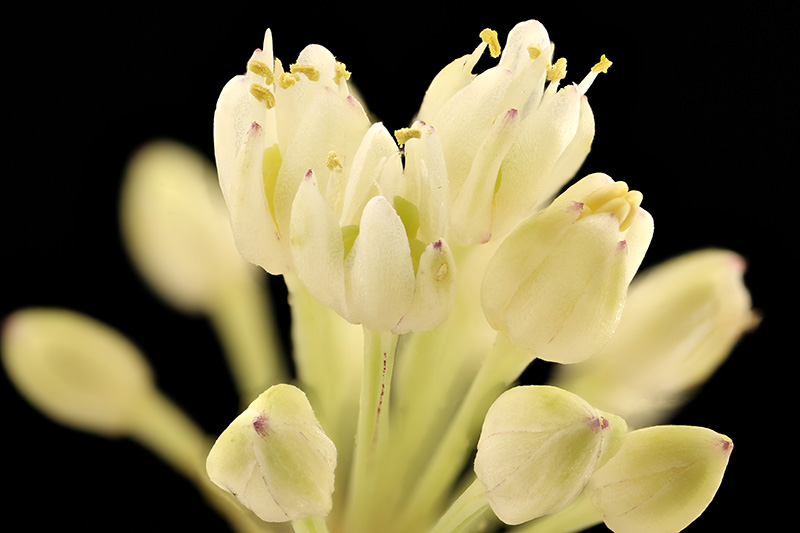
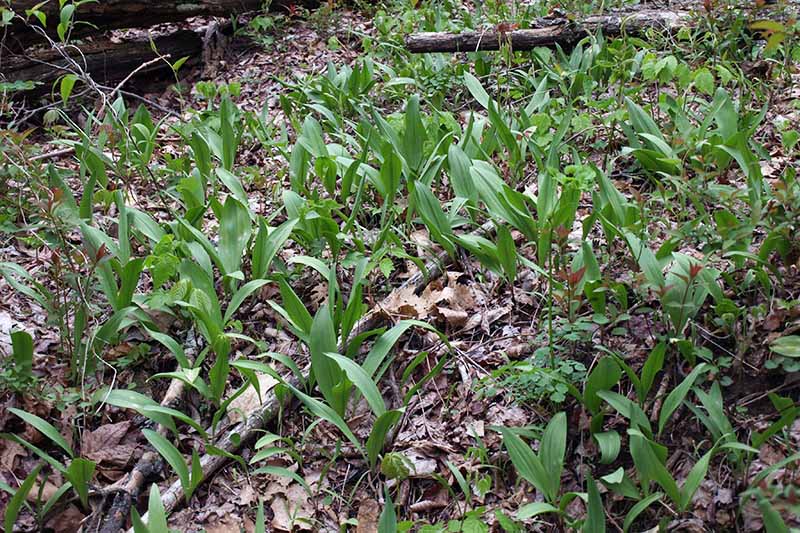
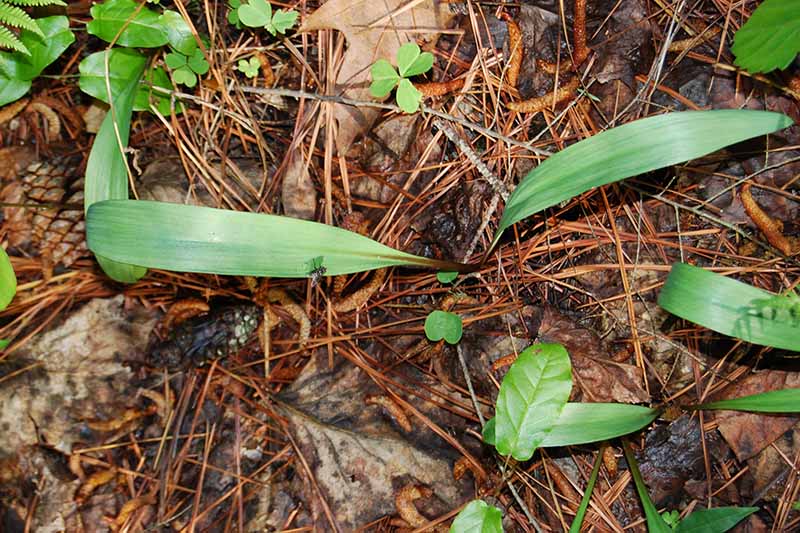
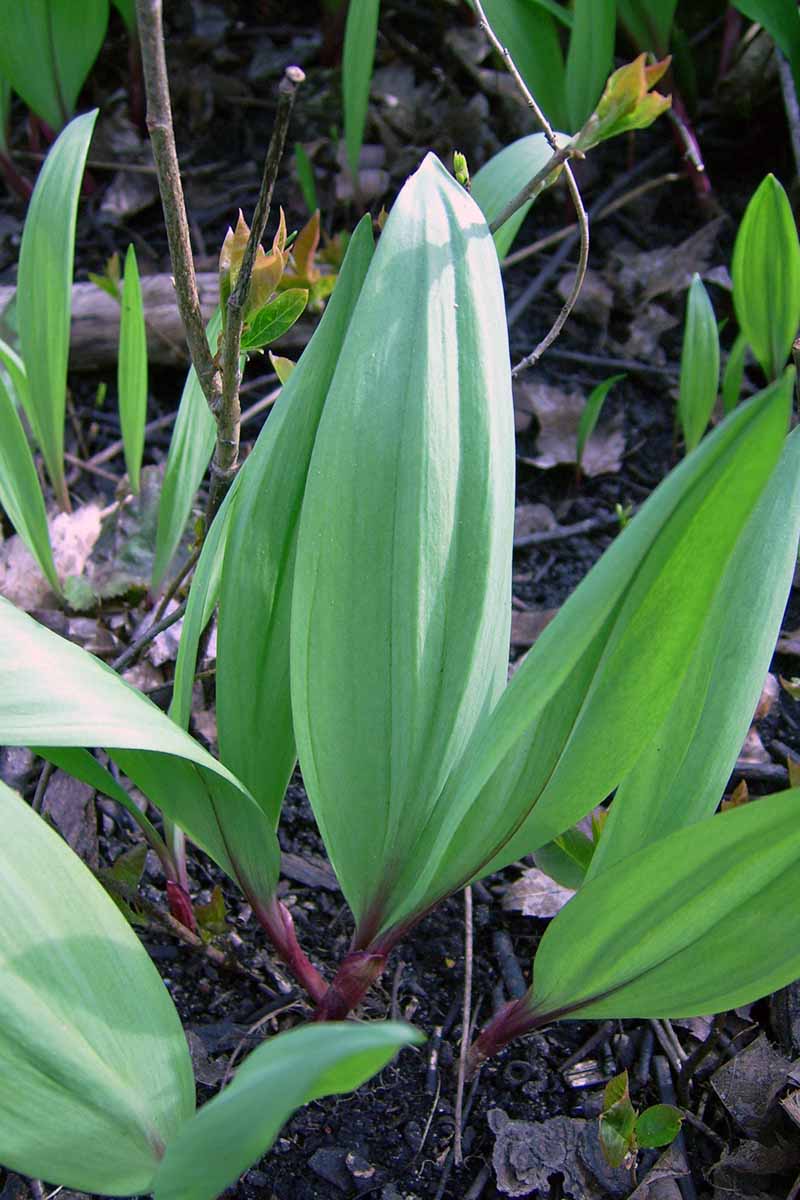
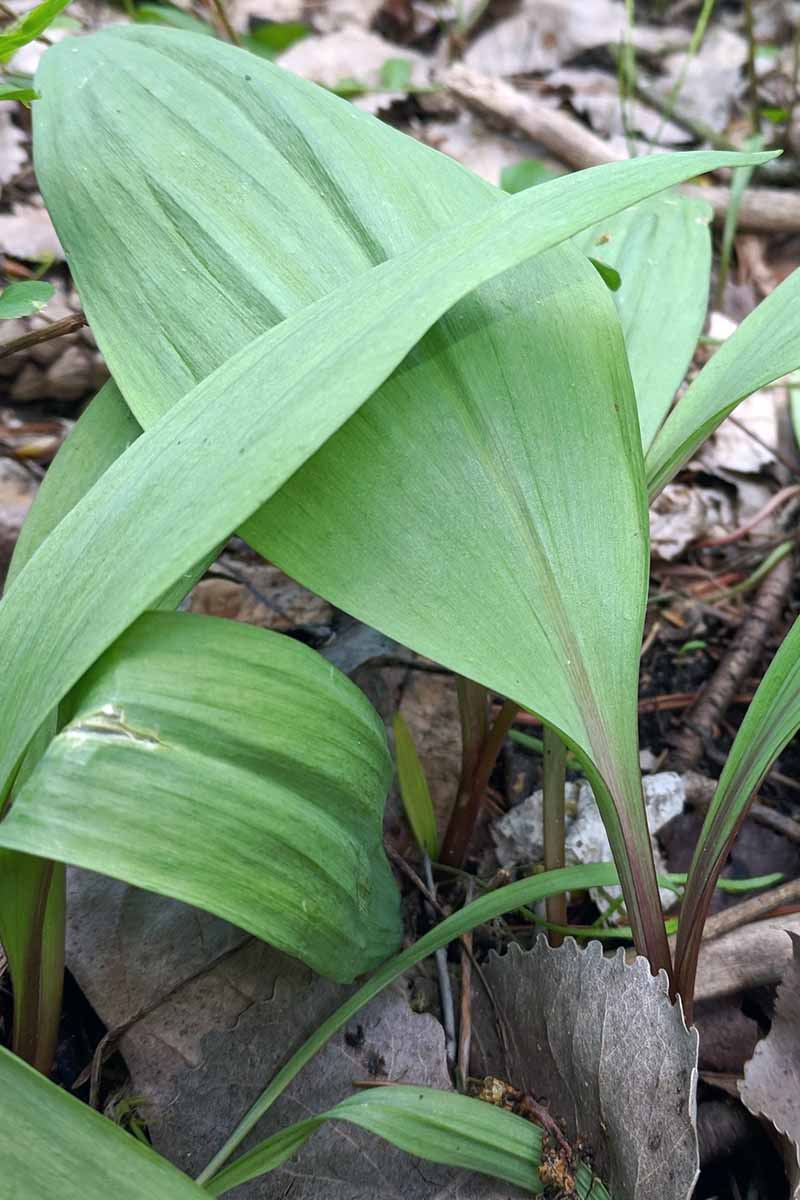
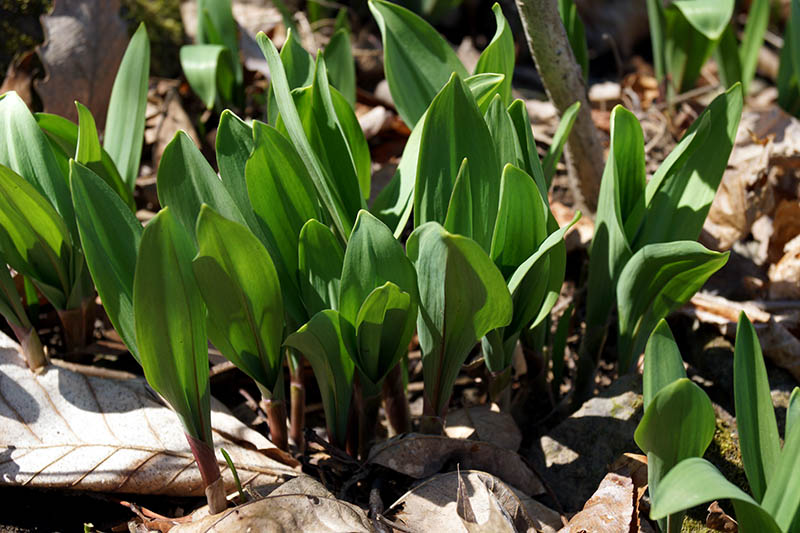
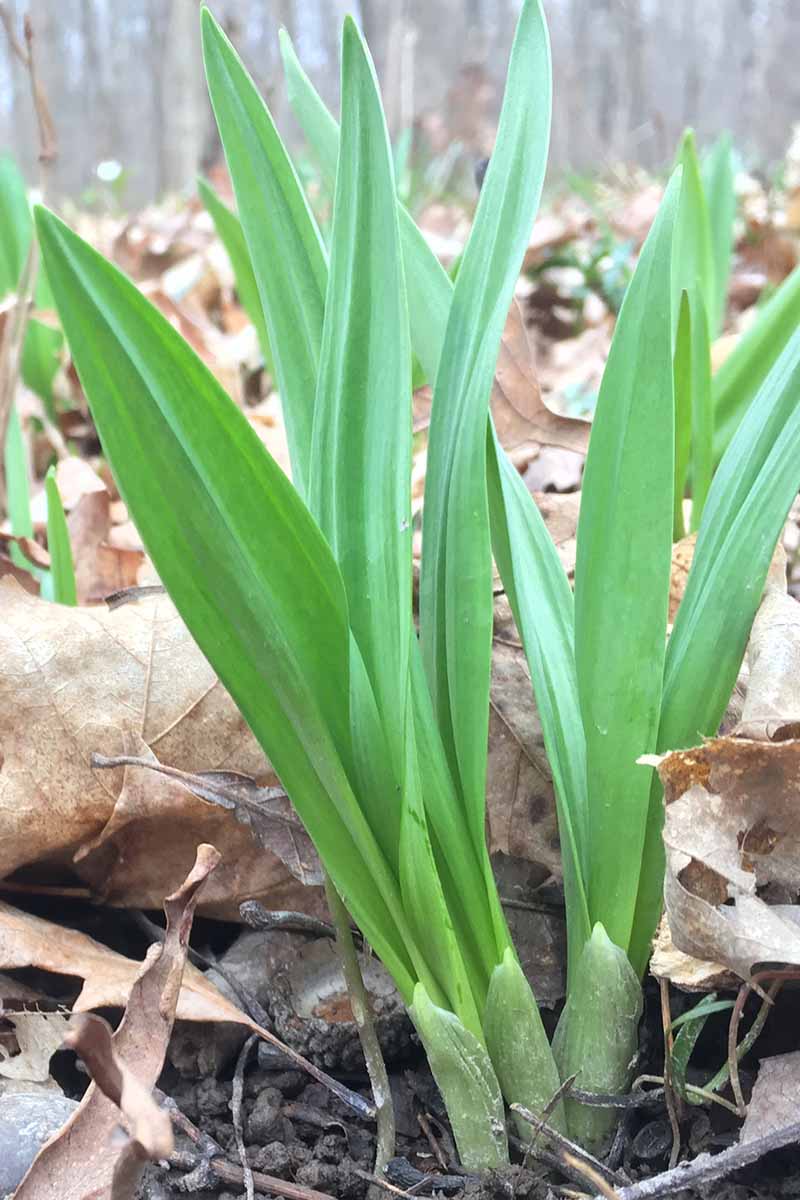
Ramps grow in USDA Hardiness Zones 3-7, from a perennial bulb. The broad, aromatic leaves emerge in pairs in March or April. By May, the leaves die back and are replaced by a flower stalk with papery ivory blossoms that bloom in June.
The blossoms then go to seed, and those fall to the ground to start a new plant. This is one of a group of plants known as “spring ephemerals,” which means they come to life first thing in the spring, and die back just as everything else in the forest is getting going.
Ramps are a part of the same Allium family as onions, leeks, garlic, scallions, chives, and shallots. They look similar to the highly poisonous lily of the valley plant, but the two aren’t related. They’re also related to and look similar to ramsons (Allium ursinum). Ramps and ramsons have similar growing requirements, though ramsons, which are native to Eurasia, are a bit showier and larger.
Cultivation and History
Also known as wild leeks or wild spring onions, these veggies are native to the Appalachian mountain region of North America, where they can be found in the moist, deciduous forests from Canada to Georgia. These early-season greens were once eaten as a tonic, to give people a boost of vitamins and minerals that they had been lacking during the winter months. Native American tribes like the Cherokee, the Ojibwa, and Iroquois tribes used them medicinally and as a food source. Early European settlers in North America cooked with them as a replacement for onions and to fight off winter illness. These days, spring festivals celebrating ramps draw crowds from across the country, and world-famous chefs have been adding them to fine dining menus – when they can get their hands on them. It’s illegal to forage for them in places like Quebec, North Carolina, and Tennessee. That’s because the plants need several years to recover after being harvested, but foragers don’t always know how long a ramp patch has been left to recover between harvests. As a result, the current craze for this pungent vegetable has decimated wild populations.
Propagation
To succeed at growing ramps, you need to provide the kind of conditions they’re used to in the wild. Unlike some plants, which have been cultivated to adapt to the garden, ramps aren’t far from their wild roots. Typically, ramps are propagated from seed. But you can also transplant them, or start new plants from root scraps, in a similar way to how you might go about regrowing green onions from kitchen scraps. When propagated from seed, plants need at least five years to reach harvestable size under ideal conditions. It’s more likely that this may take closer to seven years. If you purchase or obtain plant bulbs, expect to be able to harvest your first crop in three to five years.
From Seed
A. tricoccum seeds require both warm and cold stratification, which means they require a period of warmth before the seed will start to develop, followed by a period of cold, for the shoot to emerge. In the wild, ramp seeds break their dormancy in the fall when conditions are warm and moist, and begin to develop through the cold winter. Seedlings emerge in the spring, when conditions warm up again. In other words, it can take six months for seeds to germinate. And if the initial warm spell isn’t pronounced enough, seedlings may not pop up out of the ground for 18 months after planting. You can plant your seeds outdoors in the fall or spring. Fall-planted seeds tend to do better than spring-planted ones, with a higher germination rate and a higher plant survival rate. To plant in the fall, rake back any leaf matter from the top of the soil and use your rake to loosen the top few inches of dirt. Gently press the seeds into the earth, spacing them 4-6 inches apart. Cover with two inches of moistened hardwood leaf mulch. If you choose to plant in the spring, you’ll need to put the seeds through a period of warm and cold stratification to ensure germination. To do this, fill a bag with moist vermiculite and place the seeds inside. Let them sit at room temperature (60-70°F) for 60 days. Then, seal the bag and place them in the refrigerator for 90 days. Your goal is to sow the seeds outdoors just after the ground thaws, when temperatures are around 45-65°F during the day. Do the required research or consult your gardening journal to determine when average local temperatures have begun to rise in past years, and count backwards to figure out when to begin stratifying your seeds. Prepare your garden bed and press the stratified seeds into the soil 4-6 inches apart. Cover with two inches of moistened hardwood leaf mulch.
Transplants and Division
Most nurseries don’t sell A. tricoccum transplants or bulbs. But you could take a bunch from a neighbor, or another part of your own garden if you’re already growing them. To transplant ramps, carefully harvest a cubic foot of soil at the edge of the ramp plot using a shovel. Plant the entire plug in a separate, prepared area. To divide established plants and give them a little room to breathe, dig up a small clump of ramps and tease apart half of the bulbs. Plant these in a new spot spaced 4-6 inches apart, and return the others back into the ground. If you do manage to find ramp bulbs for sale, plant them in February or March, immediately after purchasing them. If you can’t plant them right away, you can store them in the refrigerator for up to a week.
Regrowing Root Scraps
If you buy ramps to cook with from the grocery store or farmers market and they have plenty of rootlets attached, you can grow new plants. When you prep them for eating, cut off the bottom half inch of the bulb with the roots attached. Soak them in water overnight. Then, plant them outside in a prepared garden bed spaced 4-6 inches apart, with the cut side up.
How to Grow
Ramps aren’t difficult to care for once you’ve got them growing, so there’s no reason to harm native populations to get your ramp fix. You’ll find them growing wild in cool, shady areas. They prefer soil that is moist, well-draining, loamy, and enriched with plenty of organic matter. You’ll need to recreate these conditions at home if you want your ramps to thrive. North-facing slopes on your property are ideal because they generally have a microclimate that is shadier and cooler than other areas. If you’re lucky enough to have a natural forest setting or grove of trees available on your property, take advantage of this. Ramps are a particularly smart option if you want to explore growing a food forest, because they do well under the shade of large trees where other plants won’t grow. If you’re looking for a spot to plant ramps on your property, keep an eye out for mayapples, trout lilies, nettles, ginseng, black cohosh, and trilliums. These plants can indicate the perfect spot for growing ramps because they have similar requirements. One of the nicest things about these plants is that while you have to practice patience, they will grow in areas that might otherwise sit fallow, such as beneath deciduous trees. The best trees to plant ramps under include:
Beech Birch Hemlock Hickory Linden Maple Oak
They do not grow well under conifers. If you don’t have a wooded area available, you can build a shade structure to protect your plants. Placing a shade over a raised bed is preferable, because this will enable you to control the soil, drainage, and cover easily. To create a raised ramp bed, construct a 4-inch-tall frame and line it with weed cloth. Ramps don’t have deep roots, so you don’t need to create a deep bed. Check out our guide to DIY raised beds for more tips to construct your own. They prefer a soil pH somewhere between 5.0 and 6.5. Not sure what type of soil you have? Try a soil test. Ramps growing in the wild favor soil that is high in calcium, so enrich the soil with 400 pounds of gypsum per 1/10-acre bed, or fill your planter with good quality soil that has been amended with calcium. Plants provided with the highest levels of calcium and the lowest soil pH did best in trials at North Carolina State University. Once you’re planted your seeds or bulbs, water them in well. In the wild, A. tricoccum needs about 35 inches of rainfall a year. Not sure how much you get? It might be time to invest in a rain gauge, or make your own. If you don’t receive this amount of precipitation naturally, monitor the moisture level of your soil, and irrigate at the soil level to make up the difference. These plants need partial shade to partial sun to grow best. Don’t assume that because they grow on the forest floor, they don’t need sunlight. Ramps emerge from the soil when the forest canopy isn’t full, so they still get a good amount of sunlight in the wild during their active growing season. Even though they die back early in the season, like other types of bulbs, the plants are developing underground for much of the year. The seeds mature by October and drop to the ground. During the fall and winter, the radicle emerges, which will eventually form the roots of the plant. In spring, the first leaves emerge above ground once temperatures are warm enough. The roots mature in the fall of the second year. So it’s important to plant at the right time and to protect the beds from digging or otherwise being disturbed, even when leafy growth isn’t visible. You also need to keep beds free of weeds that will rob your plants of nutrients and compete for space. Once they’ve matured, you can cultivate about 2,500 ramp plants for every 1,000 square feet of garden space. If you stick to the rule, described in more detail below, of harvesting only about 10 percent of your plants to ensure their longevity, that means you’ll get a harvest of about 250 ramps a year from an established 1,000-square-foot bed. Imagine the satisfied looks on your neighbors’ and local customers’ faces when you bring that haul to the farmers market! Seeds can be collected in the fall and replanted (more on that in the Harvest section below) or you can allow your plants to self-sow freely. If you want more control over the spread of your crop, scapes can be clipped before flowers form, or you can deadhead at the end of the season and collect the seeds before they fall to the soil below.
Growing Tips
Plant in part shade Keep soil moist Keep weeds away Add calcium to the soil
Varieties to Select and Where to Buy
There are two named varieties of this plant that may be found growing in the wild.
Allium tricoccum var. tricoccum
This is the most common type to be found growing wild. It has larger, broader leaves and a larger bulb than A. tricoccum var. burdickii.
Allium tricoccum var. burdickii
This variety is sometimes called Chicago leek or narrowleaf ramp. It has slightly narrower leaves than common ramps, with a smaller bulb. It’s primarily found in Maine, New Hampshire, and Vermont. It’s so uncommon today, in fact, that some experts worry it’s going extinct. You can find ramp seeds online, but use caution. Some seeds sold as A. tricoccum are inauthentic, and there have been reports that the seeds customers receive are actually leeks. Be sure to purchase seeds from authentic, verified sources. Milkweed Medicinals is one of my favorites, and seeds are also often available via Elk Mountain Nursery, and Mountain Gardens Herbs. Local nurseries in states where ramps grow wild will frequently have bulbs available for sale in the late winter.
Managing Pests and Disease
Because cultivating ramps is a relatively new botanical adventure, we’re still learning about what diseases and pests bother these plants when they are cultivated at home.
Septoria Leaf Spot
In the wild, Septoria leaf spot can be a problem. This fungus is most commonly found on tomatoes and eggplant. It causes brown spots to form on leaves, and can cause the leaves to turn brown and wither. Because ramps have such a short growing season, the disease doesn’t usually progress to the point where it will impact your harvest. If you want to treat it, remove any diseased leaves and dispose of them. Don’t compost diseased plant parts. In general, it’s a good idea to control weeds, and mulch around the base of plants. Doing so will help to control this disease as well. Stop any overhead watering if you struggle with this problem, and water at the base of plants instead. You can also use a copper-based fungicide to address leaf spot.
Harvesting
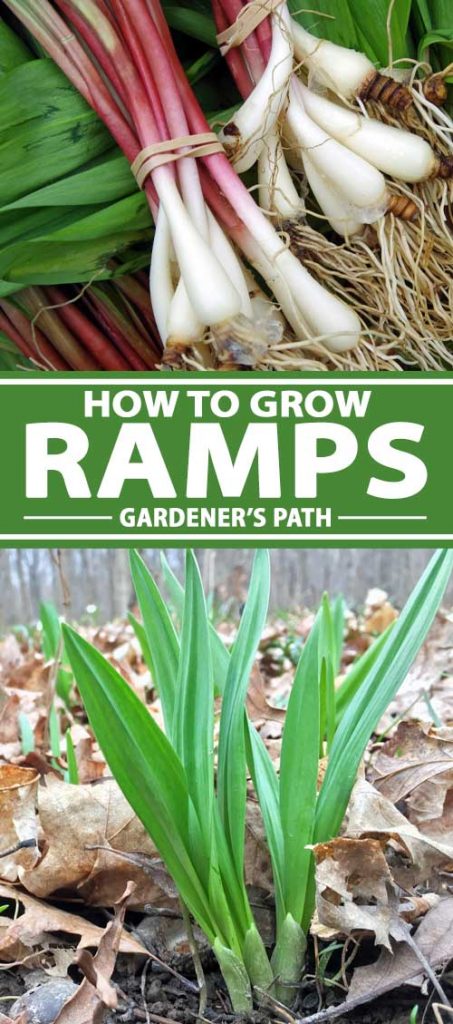
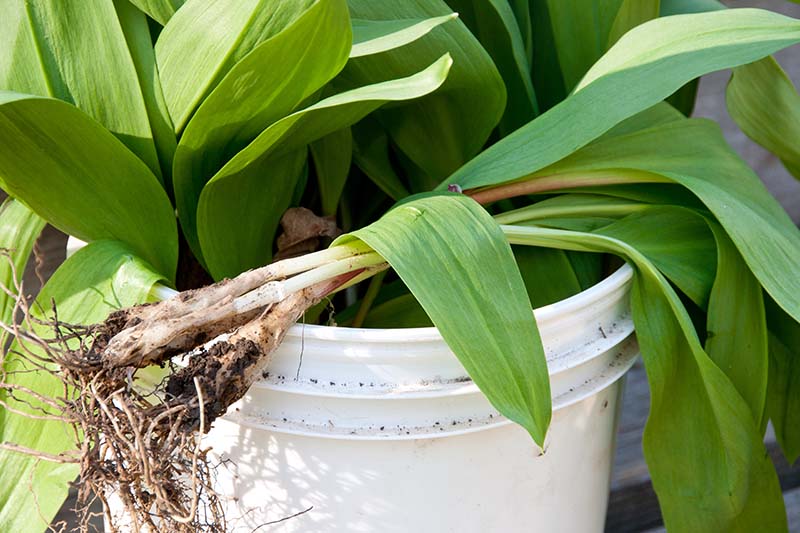
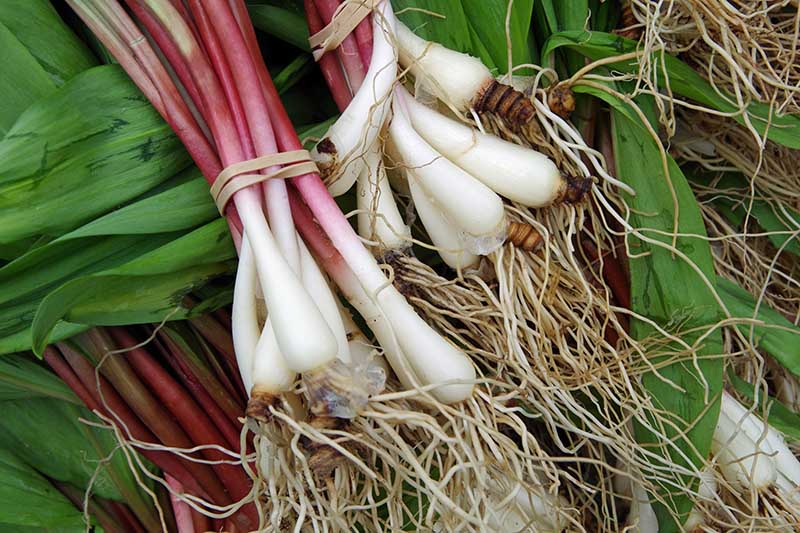
When ramps are fully mature, the leaves can grow to be up to 10 inches tall. The bulbs are small and white, with a purple sheath. They will take several years to become established, and no parts of the plant should ever be picked in the first year of growth. For a strong perennial crop, experts recommend waiting a minimum of three years, or preferably five years if you can wait that long, before you start harvesting.
Harvest your plants just before the leaves begin to turn yellow, and before flower stalks form. This happens sometime in late April or early May, depending on the region. Some experienced gardeners recommend waiting to harvest until your ramps have filled their planting site and you can no longer see bare soil between the bulbs. But this can be difficult to determine, and planting site sizes can vary dramatically. Experienced growers also sometimes recommend picking from the center of the planting site, and leaving the plants around the edges to regrow the next year. This makes the most sense if you have allowed your plants to seed themselves, since the mother plant’s offspring will often surround her. Keep in mind, however, that digging from the center to remove bulbs may also disturb the surrounding plants’ roots. Use a shovel or hori-hori knife to gently loosen the soil and pull up the bulb with the leaves attached. If you’re serious about your ramp endeavor, you might want to invest in a specialty foraging hoe designed for harvesting ramps! But this isn’t necessary. Gently dig up a clump of bulbs and leaves and tease them apart. You don’t want to remove all of the bulbs from an area. Instead, gently harvest about 10 percent of what you’ve pulled, and firm the rest back into the soil to continue growing and spreading. Be careful to keep the roots intact. You only want to harvest about 10-15 percent of your total crop each year, to keep your perennial patch of ramps going, and be sure to only harvest mature plants that have had several years to become established. If you want to collect the seeds to use in other areas of your garden, you can do this in the late summer or early fall. Eventually, ramps begin to put out rhizomes and will propagate that way, so you don’t need to allow the seeds to fall to the ground in order for plants to multiply. Instead, you can harvest all of the seeds from mature plants and plant them somewhere else, or share the seeds with a friend.
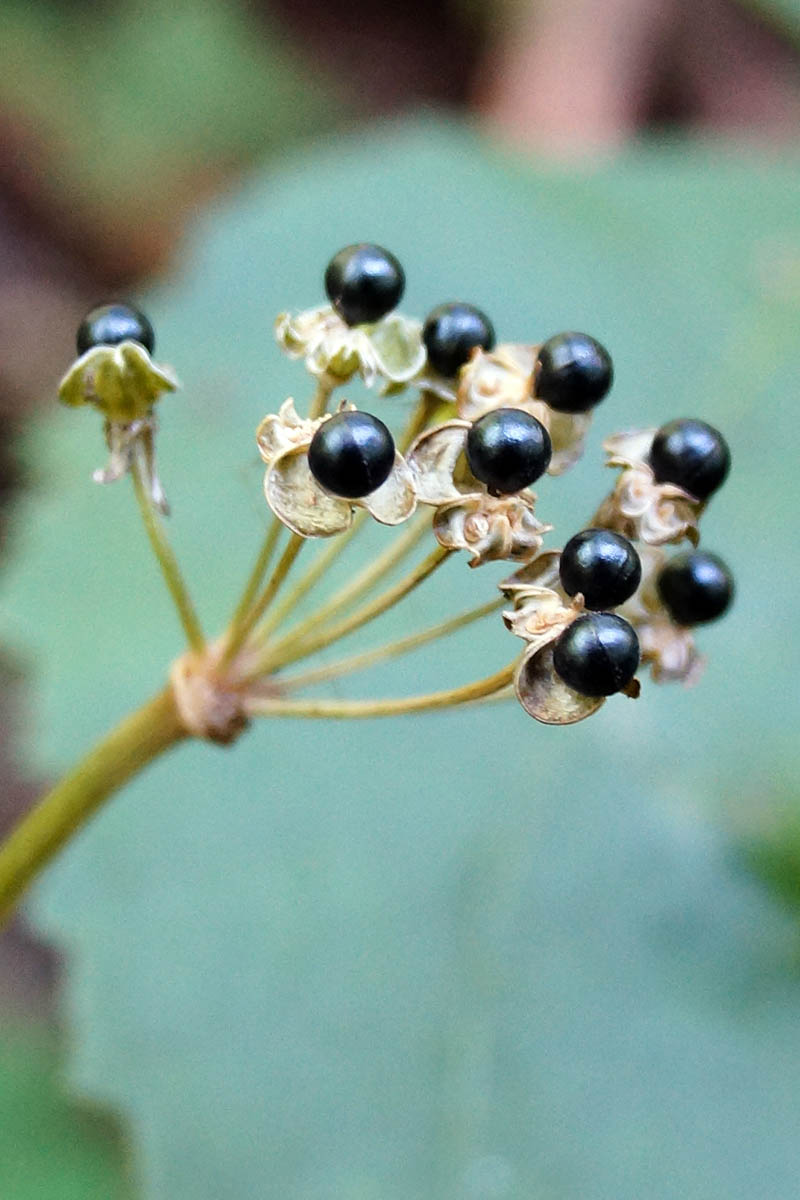
Harvest seeds when the seed head has turned brown and dry. To collect the seeds, snip off the seed head and put it in a sheltered spot to dry. Once they’ve dried out, shake or peel the seeds loose from their casings. You can also just snip off all of the leaves near the base of the plant when they’re about five inches tall, and leave the bulb in the ground to continue to grow and produce more leaves the next year. The leaves taste just like the roots do, sweet and oniony.
Preservation
Once you’ve pulled your harvest, trim away the white rootlets – unless you plan to start a new crop from “kitchen scraps” – and brush away any excess soil. Waiting to wash the bulbs and leaves with water until just before you are ready to use them is recommended, since added moisture can introduce premature rot. Place them in an open container lined with wax paper to preserve bulb moisture, or wrap in a damp cotton cloth and store in the refrigerator. Leaves will last for up to a few days when stored this way, and the bulbs will stay fresh for about a week.
If you have a particularly large harvest, you can also dry the leaves and bulbs, or pickle the bulbs. Dried ramps have a sweet, mellow flavor that lends them particularly well to use as a topping for fish or salads. Pickled ramps taste similar to pickled onions, but with a hint of garlic. To dry ramps, separate the leaves from the bulbs. Slice the bulbs thinly, and dehydrate them at 100°F until they’re crispy and translucent. You can hang the leaves in bunches to dry them. To pickle ramps, remove the leaves, leaving the bulbs and stems intact. Pack a mason jar full of these, along with any seasonings you want to add, such as chili pepper, bay leaves, peppercorns, or fennel seeds. Bring your choice of pickling liquid to a boil on the stove – I like to use a combination of white vinegar, sugar, and salt in a ratio of about 2 parts vinegar to one part sugar by weight, plus 1 tablespoon of salt for every cup of vinegar. Fill the jar, seal it, and allow to cool completely before refrigerating. Your pickles will be ready to enjoy in about a week. Then again, if you can’t eat them all up yourself, you might consider selling them. Fresh ramps can go for $20 a pound, so if you sell at a farmers market, they can be a good moneymaker.
Recipes and Cooking Ideas
Ramps have a garlicky scent and a sweet, onion-like flavor. Basically, they taste like a head of garlic, a scallion, a leek, and an onion all got together and had a delicious baby. You can eat both the greens and the bulbs – they taste the same. One of the simplest ways to prep them is to saute the leaves and sliced bulbs in butter. The leaves only need to be in the pan on low heat for a minute or two, until they wilt. Continue cooking the bulb until it is soft and translucent, like what you would do if you were sweating onions. If you want to get a bit more creative, dip the bulbs in a batter made with two cups of buttermilk, one cup of flour, and one teaspoon each of salt and pepper. Fry in vegetable oil until golden. I love them dipped in olive oil and charred on the grill, served with a squeeze of lemon juice. Or, if you’ve got the baking bug, try whipping up a loaf of pull-apart bread! This recipe, which you can find on our sister site Foodal, technically calls for fresh ramson leaves – but delicious homegrown ramps will do the trick as well.
Quick Reference Growing Guide
Even though they are often compared to their onion and garlic cousins, ramps have a flavor that’s all their own.
It’s no wonder that these ephemeral herbs are so beloved that they inspire spring festivals across the country. Once you get your own crop going, be sure to tell me how you like to cook up your ramps. I’m always looking for new ways to include them in my diet. Drop me a line in the comments. And for more information about growing Alliums in your garden, check out these guides next:
How to Grow and Harvest Bunching Onions How to Plant and Grow Garlic in Your Veggie Patch How to Grow and Care for Bulb Onions
© Ask the Experts, LLC. ALL RIGHTS RESERVED. See our TOS for more details. Uncredited photos: Shutterstock. With additional writing and editing by Clare Groom and Allison Sidhu.

