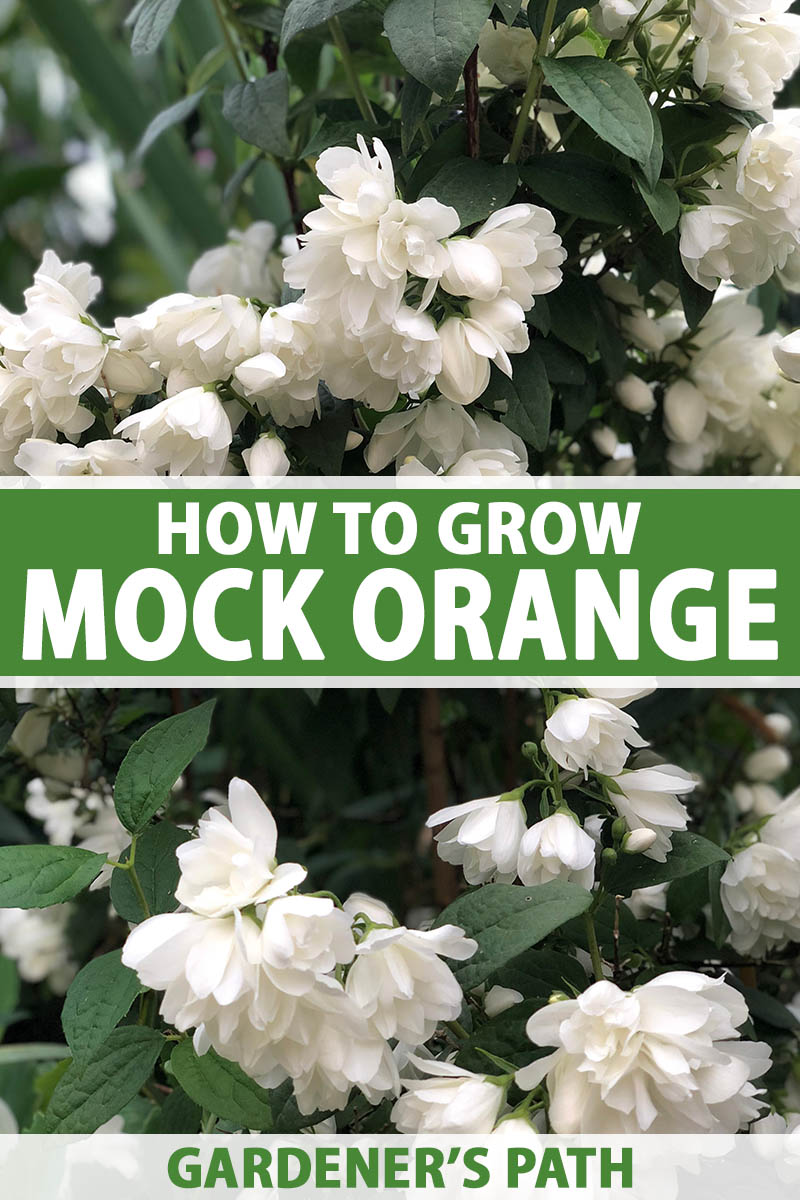
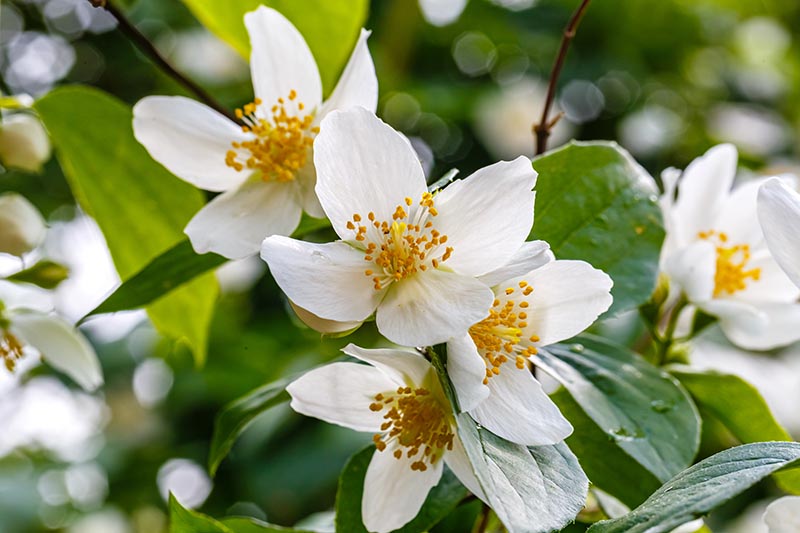
If you’ve ever gotten a whiff of mock orange flowers, you understand what I mean. If not, imagine the scent of orange blossoms, jasmine, pineapple. Sweet, thick, and almost mouthwatering. We link to vendors to help you find relevant products. If you buy from one of our links, we may earn a commission. Below you’ll find everything you need to know to grow and care for your very own bush, a true gift to your nostrils when in bloom. Here’s what I’ll cover:
Cultivation and History
Philadelphus is either named after the Greek word for sibling love, or a King Ptolemy Philadelphus of long ago. Horticulturalists can’t decide, but it’s commonly known as mock orange for its white, citrus-scented blooms that even look somewhat similar to orange flowers. The fruits of mock orange are disappointing compared to its namesake: the small seed pods have no ornamental or culinary value. Referring to plants by the common name “mock orange” can be a little confusing, since members of the Philadelphus genus and Pittosporum tobria, another sweet smelling bloomer claim this name. These are different plants, so be sure to double check the genus before buying a shrub at the nursery! Although she may not look like your typical voluminous hydrangea, Philadelphus is in the Hydrangeaceae family.
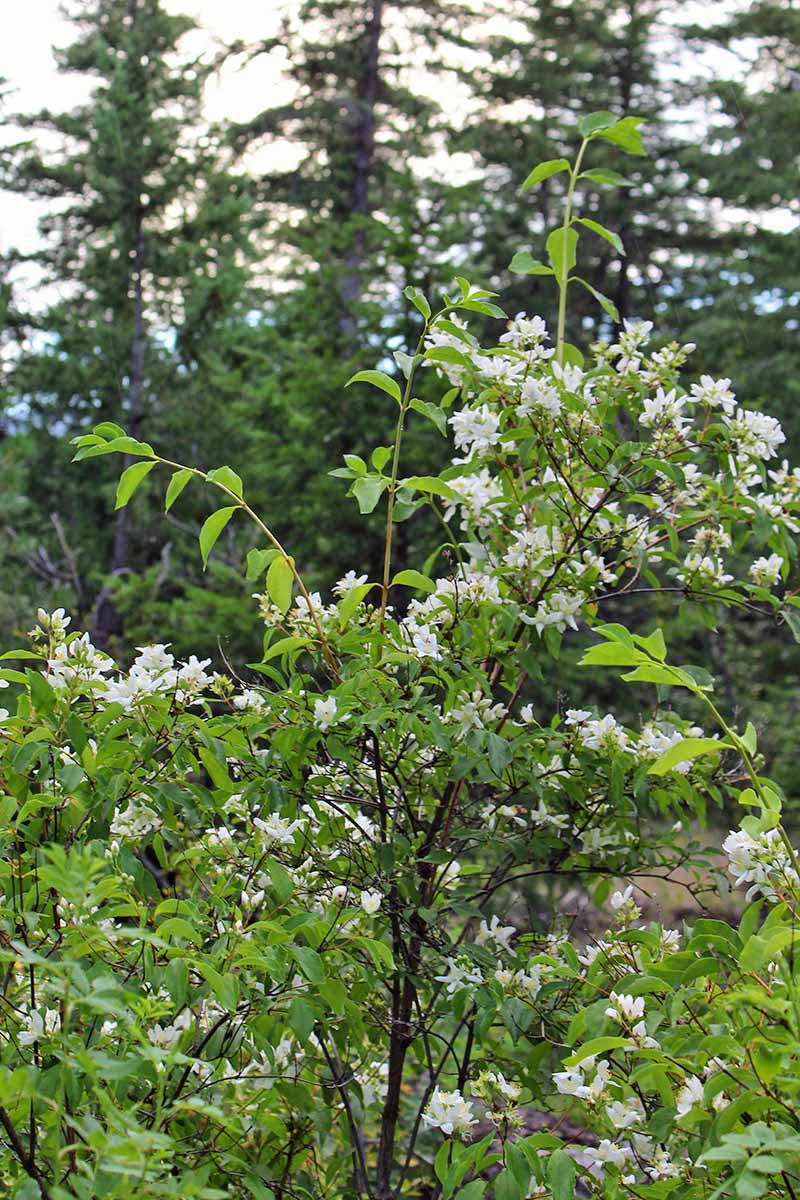
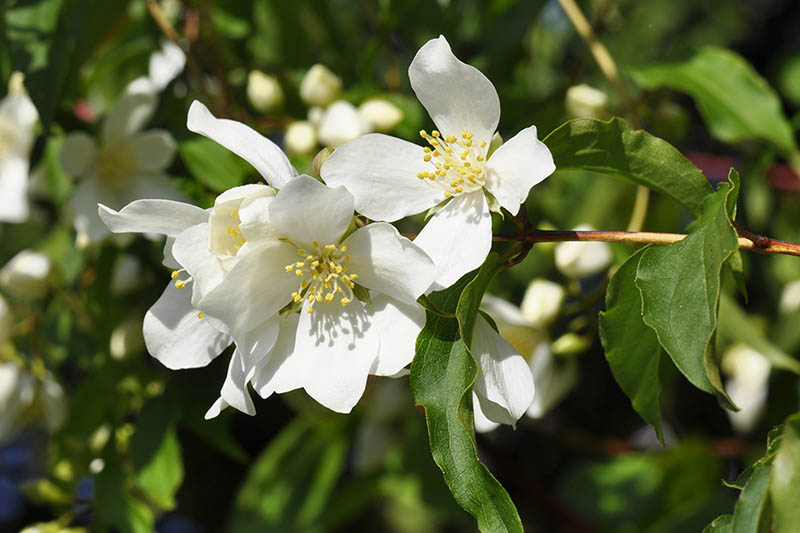
With over 65 different species in the genus, they are native to a variety of locations in northern Asia, Japan, the western United States and Canada, Mexico, and the southern Atlantic coast of the US. Depending on the variety, plants may be hardy in Zones 3 to 8, so be sure to choose a type suited for your location and check plant labels carefully. This may be seen as an old fashioned plant to some, but the volume of bridal-white flowers and heady fragrance it produces has kept it in the good graces of many gardeners for years.
Many of the varieties available to gardeners today belong to just three species: P. coronarius with its white or creamy colored flowers; littleleaf P. microphyllus, a smaller shrub with pineapple-scented white flowers, and a hybrid of these species known as P. x lemoinei which is a compact shrub loaded with white, very fragrant flowers. The exception to the deciduous quality of the mock orange is P. mexicanus, which is only hardy in Zones 8 to 10. It is more of a vining plant than a shrub, and it flowers infrequently through the year instead of once in the spring. This plant has an extensive history. Straight stems of wild mock orange (P. lewisii) were used by Native American tribes, including Saanich, Klamath, Okanagan-Colville, Poliklah, Shuswap, and Montana, to make arrows, hence its other name, Indian arrowwood. In the 1880s, the P. x lemoinei and P. x virginalis hybrids were bred by Victor Lemoine, a French plant breeder who can be thanked for many of the lilac varieties we have today! I imagine mock orange as a grandmother: this shrub is old and much-loved, sweet and adorned in white… I could go on – you’ll find more reasons below!
Propagation
You’ll want to fill a border with these shrubs after experiencing the first flush of blooms of your specimen plant in the spring. Luckily, propagating Philadelphus is a cinch.
From Cuttings
Taking stem cuttings is the easiest way to clone your favorite mock orange bush. The optimal time to take softwood cuttings is after the spring bloom ends and until mid-June. Early morning is the best time to take cuttings because plants are typically well hydrated. Use a sharp knife or pruners to snip four-inch sections with two to three sets of leaves from the stem tips, right below the last leaf node. Leaf nodes are the bulges in the stem that the leaves grow out of. They have unspecialized cells that will pivot into growing roots when they sense the dark and the moist soil. If you are taking many cuttings, place them into a plastic bag or bucket of water as you go so they don’t dry out. I recommend taking more than one cutting, even if you only want to propagate one more plant. Not every cutting will thrive, and if you have several that turn out, you can give them as gifts to your friends! Fill plug trays or four-inch pots with a loose, soilless starting medium and wet thoroughly. Pinch the top set of leaves at the tip to encourage branching and strip the leaves from the bottom inch of the cutting. Remove any spent blooms. Dip the end of the cutting in a powdered rooting hormone, such as Bonide Bontone II Rooting Powder, available at Arbico Organics.
Bonide Bontone II Rooting Powder Poke a hole into the potting medium with the tip of a pencil or chopstick, and pop the cutting two inches deep into the medium, making sure the cutting will stand up on its own. To mimic the humidity and warmth of a greenhouse and its optimal rooting climate, wrap the pots with plastic wrap. Prop the plastic up with toothpicks to keep it off the leaves. Or, I find using a small sandwich bag works well, and it will fit snug over a four-inch pot. Keep the medium moist and the trays or pots out of direct sunlight. I am a notorious root checker, and will occasionally carefully pull the cutting to check for callus formation – and to squeal with delight when I see the first little root tip. It’s better to leave them be than to risk wrecking the tender roots, so instead, wait three or four weeks to check for fresh leaves and signs of new growth. This is a sign of successful rooting! The plastic can come off at this stage and you may let the top of the soil dry out a little between waterings, to about half an inch deep. If you used cells or trays to root your cuttings in, transplant into a one-gallon pot once your little mock orange babies have sprouted several new leaves and are growing well, after about one and a half to two months. When removed from its cell, each plant should have developed a strong root system that is touching the edges and bottom of the cell and hugging its own little ball of soil. If you started the cuttings in small pots instead of trays, you can wait a little longer before transplanting, and allow the plants to grow a bit larger. Once roots have reached the bottom of the pot, which you can see by gently squeezing the pot and removing it, it is time to transplant each into their own one- to two-gallon pots filled with potting soil.
From Seed
Philadelphus flowers produce seed pods that dry up and turn brown in the late summer. Keep in mind the resulting plants may not be identical to the shrub you took the seeds from, particularly in the case of hybrid varieties.
The seeds need to be cold stratified before they will germinate. This can be achieved by collecting the seeds and either sowing them into the ground or a container left outside during the winter, or they may be stored for spring sowing. If you decide to store the seeds over winter, keep them in a cool dry place. Eight weeks before you want to sow, refrigerate the seeds at about 40°F in moist sand or peat moss. Fill a plug tray, or small pot, with a loose sand, peat, and vermiculite or perlite mix to germinate the seeds. Sow two seeds together in each plug or pot and cover the seeds very lightly with the medium. Keep them moist and place the tray or pots in a warm, bright area with indirect sunlight. You can cover these with plastic as well, to keep the environment humid and promote germination. Keep an eye on these little guys! The beauty of using seeds to propagate versus cuttings is you can see the new life in action as the seeds send up little stems and leaves. It takes about two weeks from germination to the time the plants begin to develop true leaves. When the little plants are about an inch high, you can remove the plastic. Keep the medium moist and slowly introduce them to more direct sunlight, and finally fresh air and breezes. Two months after sowing your seeds you should have little Philadelphus plants ready to be transplanted into larger containers. In the fall you can plant your new plants where you want them in your garden.
From Suckers
Mock orange shrubs often put out suckers that you can dig up and plant elsewhere During the fall or winter when the shrub is dormant, use a sharp shovel to make a clean cut to separate it from the parent plant, and dig up the sucker to rehome it elsewhere in your garden.
By Layering
Layering is best done in early spring, when the shrub is putting on new growth. To do this, bend a long, flexible stem towards the ground. About a foot from the tip of the stem, scrape away about two to three inches of the outer bark. Bury six to eight inches of stem, including the scraped section under three to four inches of soil, and weigh it down with a small stone to prevent it from pulling out of the soil. Keep the area moist and after six months to a year you should have a new plant rooted and ready to be dug up and transplanted as you would with a sucker. This technique is often used for propagating boysenberries and other brambles.
Transplanting
If you buy a new plant from the nursery, plan to transplant it into the garden in the fall if possible. You can plant in the spring as well, but keep in mind that transplants will need regular watering as they become established during the warmer months, and may put energy into flowering rather than creating a strong network of roots in the new soil. A soil test can help to determine what type of earth you’re working with, the pH, and any deficiencies it may have before you plant. Dig a hole a bit wider and deeper than the pot size, loosen the soil in the bottom, and fortify it with some light compost. Make sure the plant is well watered before transplanting. Situate the pot in the middle of the hole you’ve dug to make sure it isn’t too deep. The surface of the plant’s soil should be only an inch below the ground level. Remove from the pot by squeezing the edges lightly, grasping the base of the plant, and pulling the pot off gently. If there are a lot of roots tightly woven at the bottom of the root ball, use your fingers to loosen them a little to encourage them to push into their new soil. Place the root ball in the hole, and backfill with soil. Water deeply. They like a layer of mulch as much as the next grandmother with a quilt over her knees, so after planting, cover the soil surface with an inch-thick layer up to double the width of the pot, to keep the roots cool and moist. Keep the mulch an inch or two away from the stems.
How to Grow
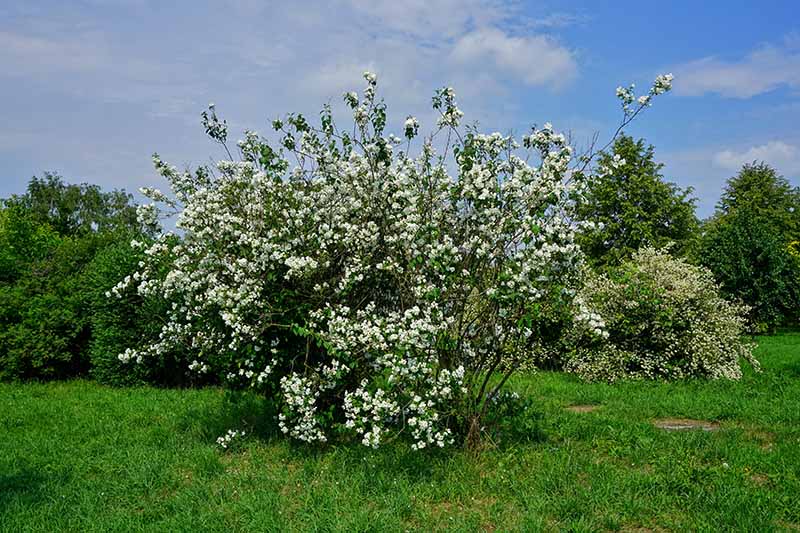
Mock oranges are easy to care for, and they can grow very quickly in the right conditions. Luckily, these fragrant bloomers are like an old grandmother with a large gaggle of noisy grandkids. In other words, the sweet, old fashioned mock orange shrub is tolerant. I’ve seen them growing wild in British Columbia’s interior, where temperatures can dip to -22°F, so they are cold tolerant. And since their native range extends into Mexico, they can tolerate heat as well. They will stand up to a variety of soil types and light conditions, and mature plants are drought tolerant. They’re generally unafflicted by pests or disease as well. They prefer acidic soil with a pH of 4.0 to 7.0, but will tolerate slightly alkaline soils and salt Like many plants, they don’t like wet feet, so it needs to be well-draining. They can grow in sandy loam or clay soils as well.
Mock oranges appreciate full sun to partial shade, and show their love for sunny spots by producing masses of deliciously scented blooms. These plants don’t mind being planted under a thin canopy of evergreens as well, though they will produce fewer flowers if provided with less sun. Mock orange shrubs will do well with regular watering after a spring planting, and until established. Water deeply in the absence of rain every two to four days to start, but allow the soil to dry up to an inch deep between waterings. Plants won’t typically need supplementary water once they are established, as they are quite drought tolerant. But keep an eye on them during dry spells, and water if the leaves start to droop during the day or the soil is dry to three inches deep. In terms of fertilizer, mock orange is not demanding, and will happily grow without it most years. If your shrub shows signs of nutrient deficiency such as discolored or yellow leaves, you may apply fertilizer in the early spring. If you use a granular fertilizer, apply according to the package instructions and water in well to ensure it dissolves.
Down to Earth Rose and Flower Fertilizer If you choose a liquid fertilizer or crystals intended for dilution, water the fertilizer in as you would normally water your shrub.
Growing Tips
Plant in full sun for maximum bloom Prune yearly to maintain shape and airflow Provide supplementary irrigation when the top three inches of soil is dry
Pruning and Maintenance
Because mock orange can be an avid grower, it can use a yearly haircut soon after the blooms are finished. You can prune a little into the summer, but it is not recommended after the middle of July when the combined stress of heat and fresh wounds can be detrimental.
As always, use sharp, clean pruners to keep your shrub looking pretty. Prune stems that have flowered to a third of their length to encourage the bush to start growing flowering stems for next year. You can remove any leggy branches to keep the shape round and in check. Prune about a third of all old woody stems right back to a few inches from the base of the plant as well. This will keep the bush fresh, encourage it to produce more new flowering stems and will improve airflow (hold that thought – we’ll return to this in the section on pests and disease below).
Species and Cultivars to Select
There are a wide variety of cultivars to choose from, from the different Philadelphus species.
Managing Pests and Disease
Fortunately, mock orange is relatively pest and disease free, given the right growing conditions.
P. coronarius
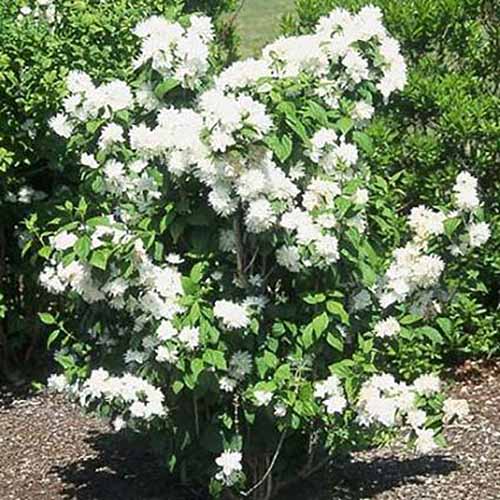
P. coronarius, aka sweet mock orange, is an old favorite and it’s hardy in Zones 4 to 9.
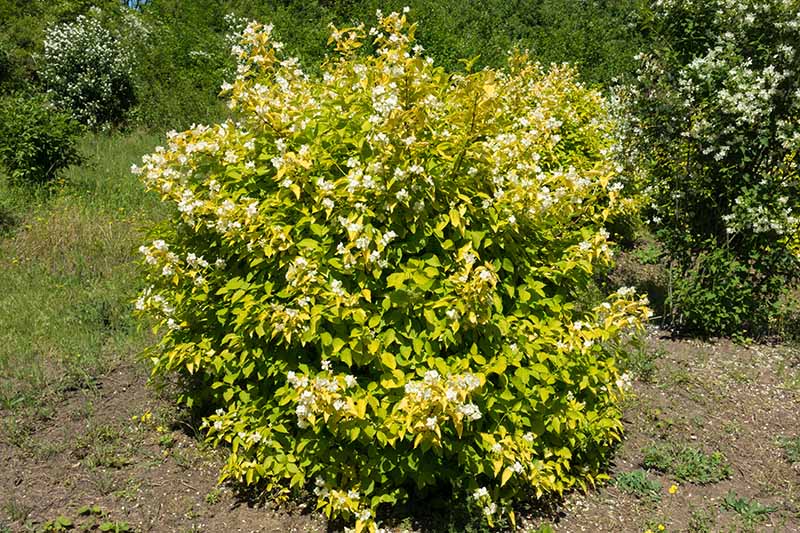
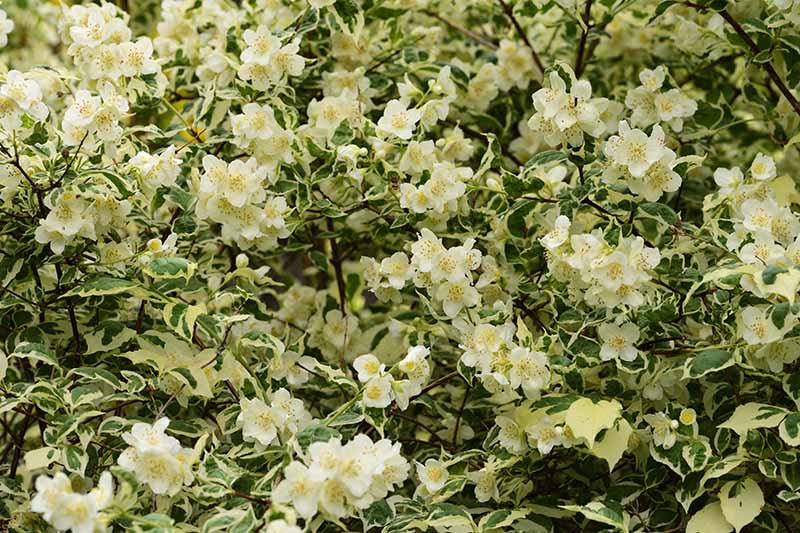
Sweet Mock Orange Sporting white blossoms and a sweet scent, you can find one-foot shrubs available from FastGrowingTrees.com. P. coronarius also has a number of cultivars that boast interesting foliage as well as deliciously scented flowers. ‘Aureus’ is a golden leafed variety, and ‘Variegatus’ has white edged green leaves, giving them ornamental value beyond when they are flowering, unlike other varieties.
P. lemoinei
P. lemoinei is a compact, smaller hybrid variety that boasts an award winning cultivar. ‘Manteau d’Hermine’ branches will droop, heavy and dripping fragrance from a thick layer of double white flowers, with a lengthy flowering period. It won the Award of Garden Merit from the Royal Horticultural Society in 1993, so if you plant this variety in your garden, you’ll have a trophy in your midst! ‘Avalanche’ is another prolific bloomer and is hardy in Zones 5 to 9.
P x virginalis
Commonly known as “virginal mock orange,” P. x virginalis are hybrids, cultivated from P. lemoinei, typically growing from two to 10 feet tall at maturity, depending on the cultivar. They all feature snow white double flowers. ‘Miniature Snowflake’ is a dwarf variety, well suited to cooler regions, as it’s hardy in Zones 4 to 8. With a mature height of just two to three feet tall, this compact type is well suited to smaller yards, or container gardening.
‘Miniature Snowflake’ A profusion of snow white, sweet-scented flowers appear in late spring. You can find ‘Miniature Snowflake’ available at Nature Hills Nursery. ‘Natchez’ is a larger cultivar, topping out at six to eight feet tall, with a spread of five to six feet. It’s suitable for cultivation in Zones 5 to 8, and prefers a full sun location.
‘Natchez’ This fast-growing variety is ideal for planting as an informal hedge or privacy screen, and blooms abundantly in mid to late spring. You can find ‘Natchez’ plants available from Nature Hills Nursery. ‘Snow White Sensation’ is a reblooming type that provides a first flush of flowers in late spring, followed by a second round in midsummer, for a long lasting scent-sensation!
‘Snow White Sensation’ With a mature height of four to five feet tall and a similar spread, ‘Snow White Sensation’ is ideal as a specimen plant, as part of a mixed perennial border, or plant more than one as a fragrant hedge. You can find ‘Snow White Sensation’ plants available at Nature Hills Nursery. But like any living thing, Philadelphus plants can attract some hungry pests.
Herbivores
Wild rabbits can cause quite a bit of damage to the mock orange shrub, using their sharp teeth to prune small stems and graze on the bark. To keep the bush safe from the toothy bunnies, wrap the base of the shrub with hardware cloth in November and keep it in place until April.
Insects
Plants in the Philadelphus genus are tolerant of Japanese beetles, and the few other common pests that may turn up don’t often pose a serious threat to their health and vigorous growth.
Aphids
Most plants look like a good meal to hungry aphids, so don’t be surprised if occasionally you find a large and expanding family of sticky suckers on the leaf undersides. You can learn more about how to manage aphids in this guide.
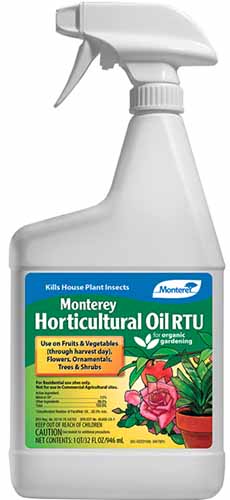
Monterey Horticultural Oil Although horticultural oil is safe for use around humans, some types of birds, and amphibians, it will kill a variety of beneficial insects, so only use it if the aphids are a big problem.
Scale Insects
As is the case for many types of woody shrubs, scale insects may come to visit from time to time – and this can be a nasty surprise. They crawl around slowly over the stems, suck plant juices like aphids, and especially like to settle in the safe armpits (aka crotches or branch angles) of twigs. When they are mature, they develop a hard waxy coating and look like little blisters, or even bark. You may notice a trail of ants tending to the scale insects, so start by trapping the ants with sticky paper wrapped around the branches. If scale is a known problem for your bushes, catch the crawlers in the spring while they are still mobile and more susceptible to a horticultural oil spray than the adults are. Learn more about combating scale infestations here.
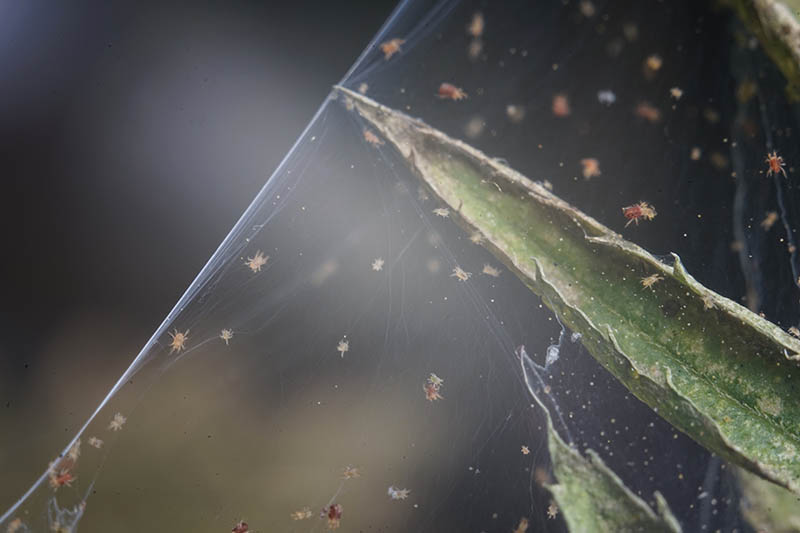
Spider Mites
Spider mites love hot and dry summer weather. Unless you are scouting your plants regularly and looking very closely, you’re not likely to notice them until they’ve sucked light green and yellow speckles into the leaves and strung their fine webbing over the plant.
Simply washing them off with a good stiff spray from the garden hose can do wonders, but if they keep coming back, horticultural oil should do the trick for these mites as well. Read more about controlling spider mites in our guide.
Disease
Disease tends to crop up when cultural or climatic parameters are not ideal. Hint: we will be hating on humid and wet conditions below.
Bacterial Blight
Bacterial blight (Pseudomonas syringae), causes ugly brown lesions on the dark green leaves and can turn your shrub into a mess during cool, wet years. P. lemoinei is resistant to bacterial blight, so if you live in a climate that tends towards the cool and wet during the growing season, it would be smart to choose a variety from that species. Otherwise, cultural control options can be lifesavers, and they won’t cause harm to the environment. When you plant your shrub, keep in mind how wide your selected variety can grow and give it enough space, allowing for good airflow and social distancing, should one shrub become infected in an area where you are growing more than one. Still holding that thought from the pruning section above? Thinning your shrub a little in the spring (with clean pruners) can help to promote good airflow during the season, and allow the leaves to dry out faster after rain. This will reduce the build up of moisture and humidity which can foster the spread of disease. Speaking of pruning, always remove infected leaves or stems right away, so they don’t spread spores to their neighbor leaves.
Canker
Canker, or coral spot, a fungal infection caused by Nectria cinnabarina, shows up as areas of dead tissue that produce a red-colored growth.
Bonide Liquid Copper Fungicide If none of these tips seem to help, you can apply a copper-based fungicide, such as Bonide Liquid Copper Fungicide from Arbico Organics, according to package instructions. It can cause leaf and shoot death past the area of infection as well. And while it isn’t usually a serious issue, it is a good idea to remove infected areas with a pair of clean pruners. Fungi thrive in humid conditions, so improving airflow via pruning is also very effective against this disease!
Powdery Mildew
You guessed it: yet another high-humidity-loving disease. Powdery mildew likes to cloud the prettiest green leaves with its mold, on both upper and lower surfaces. The cultural control strategies here are the same as for bacterial blight, including pruning to improve air circulation, removing dead and dying infected branches, or applying a copper spray. Read more about dealing with powdery mildew in the garden here.
Rust
This (not-so-fun) guy, Gymnosporangium speciosum, causes an interesting type of funny-looking symptoms. If your plants are infected, you will note upper leaf spots that correspond with tentacle-like growth on the undersides. Juniper serves as an alternate host for this fungi, so keeping juniper plants far away from your mock orange plants is a good way to prevent one from infecting the other.
Best Uses
Mock orange is a great border or screen plant, and it looks best when planted in groupings. It doesn’t have much ornamental value after flowering – unless you choose a golden or variegated variety.
Because they boast such sweet smelling blooms, plant them beside your patio, front door, or a walkway so you and your visitors can catch a good whiff of the intoxicating scent every time you pass by. Whether planted as a border or screen, or a singular specimen to envelop your patio with its sweet fragrance, mock orange is an easy to care for shrub.
The perfume this dear grandmother of a plant emits from its white flowers is the bulk of the appeal for generations of gardeners. And let me tell you, the fragrance is worth the bits of pruning needed on occasion. Do you have a mock orange shrub in your garden? Have you ever found them in the wild like I have? Leave me a comment below and let me know! And check out these articles next for more information about growing ornamental shrubs in the garden:
How to Grow Flowering Quince for Early Spring Color 23 of the Best Variegated Shrubs for Your Landscape How to Grow and Care for Forsythia
© Ask the Experts, LLC. ALL RIGHTS RESERVED. See our TOS for more details. Product photos via Arbico Organics, Arbor Day Foundation, and Nature Hills Nursery. Uncredited photos: Shutterstock. With additional writing and editing by Allison Sidhu and Clare Groom.