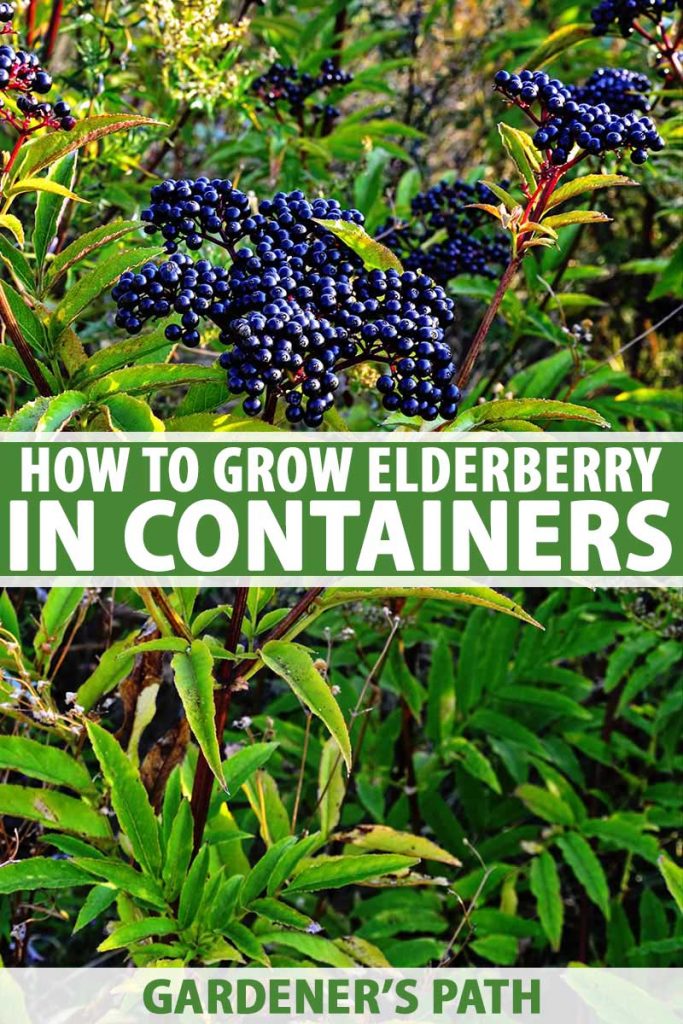
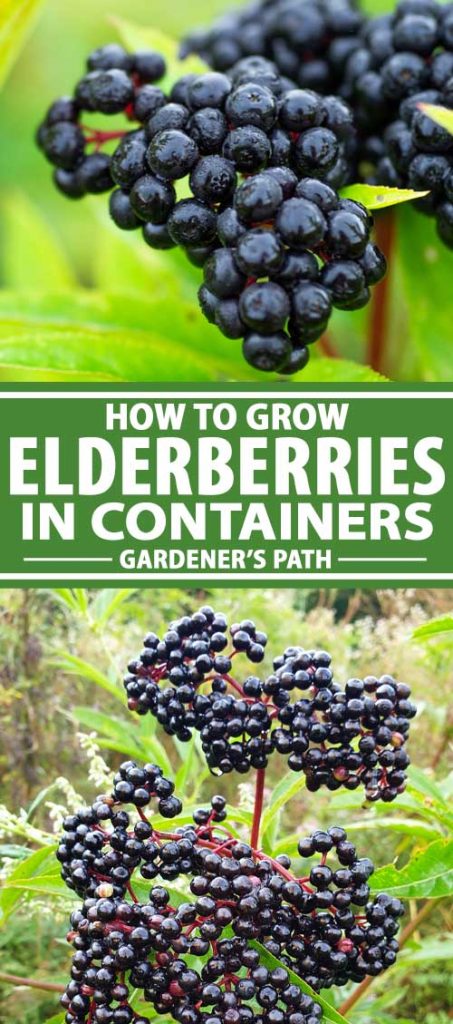
That’s why I love growing currants, gooseberries, and my all-time favorite: elderberries. It isn’t just the fact that they taste delicious, but there’s something so satisfying about growing a plant that popular culture has recently rediscovered, to the point of obsession. But what if you don’t have room in your garden for an elderberry bush? Never fear, these lovely plants lend themselves well to container growing, as long as you keep a few tips in mind. We link to vendors to help you find relevant products. If you buy from one of our links, we may earn a commission. Curious about how to get started growing your elderberry in a container? Let’s dive in!
Why Grow Elderberries in a Container?
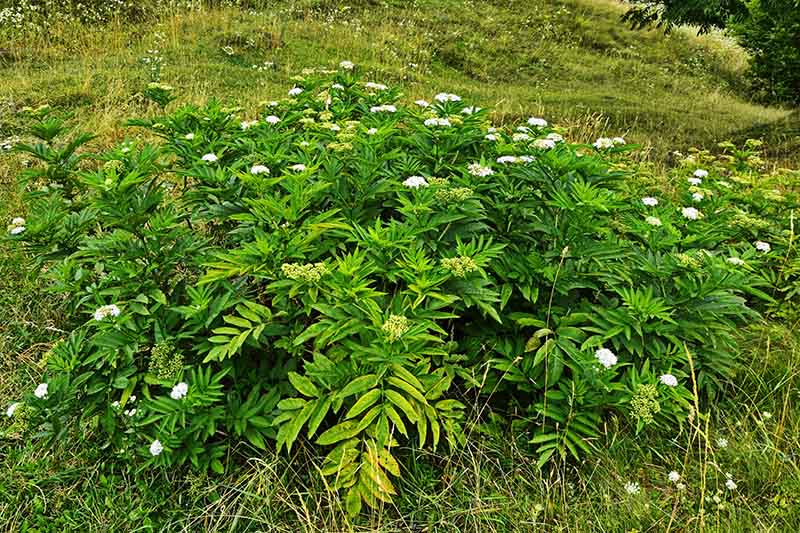
First, let’s consider why you might want to grow elderberries in the first place. These shrubs aren’t as common in home gardens as some of the more popular edible berries, and I think that’s a shame.
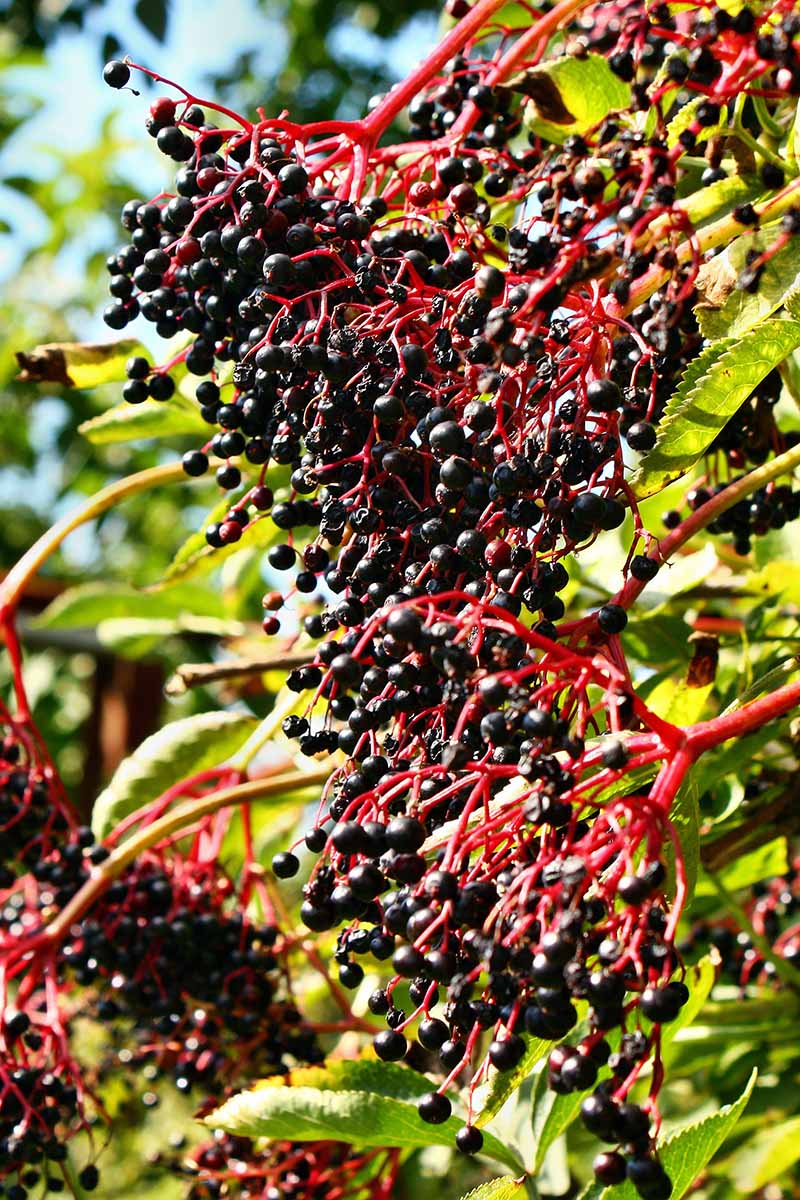
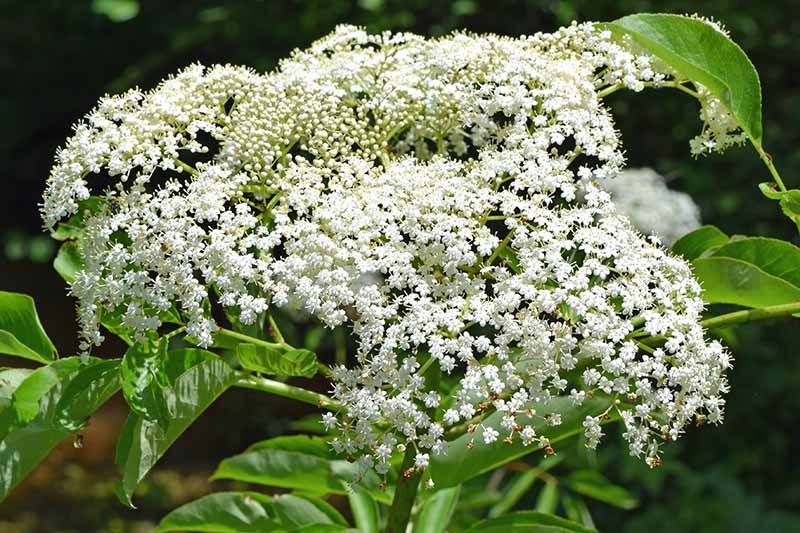
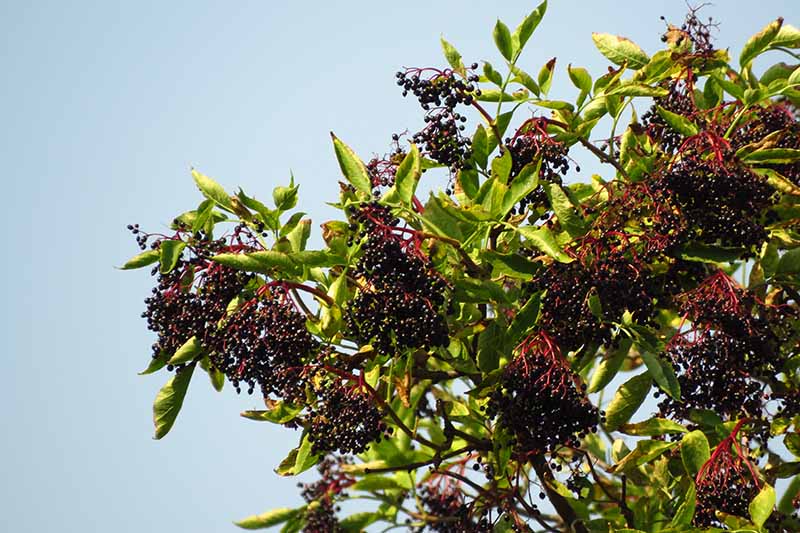
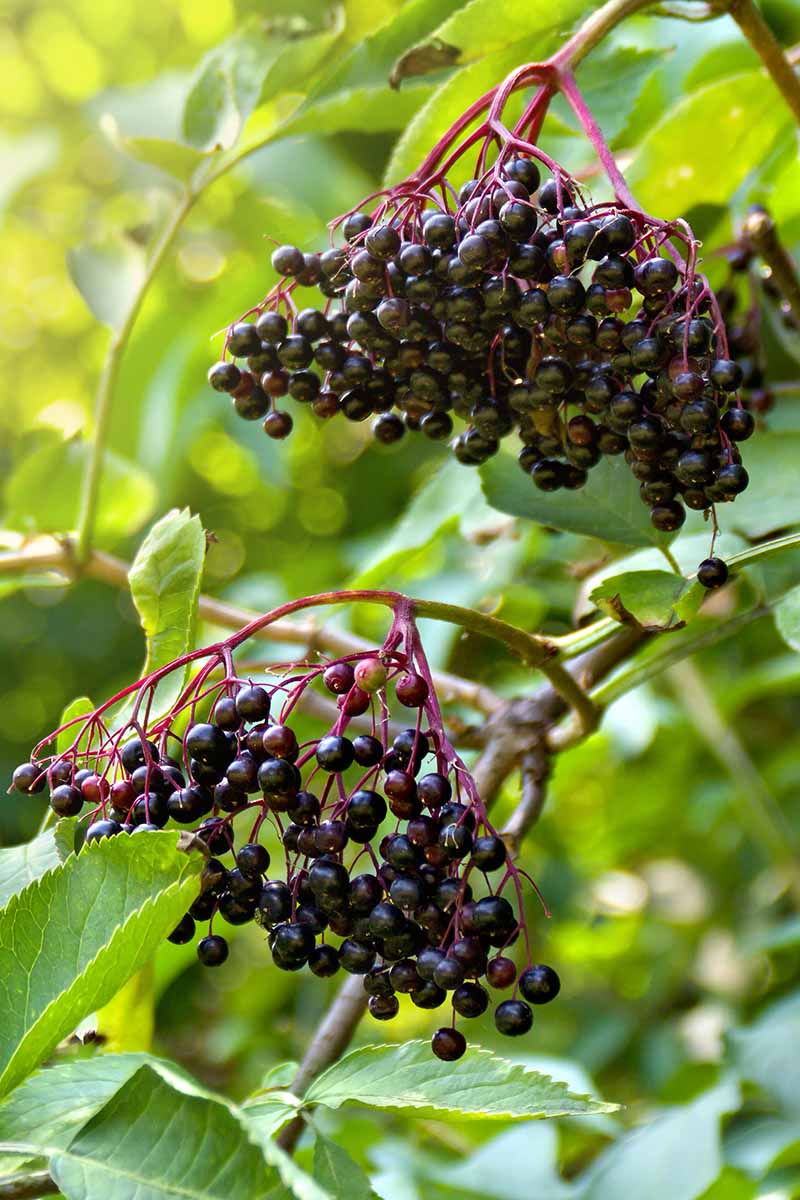
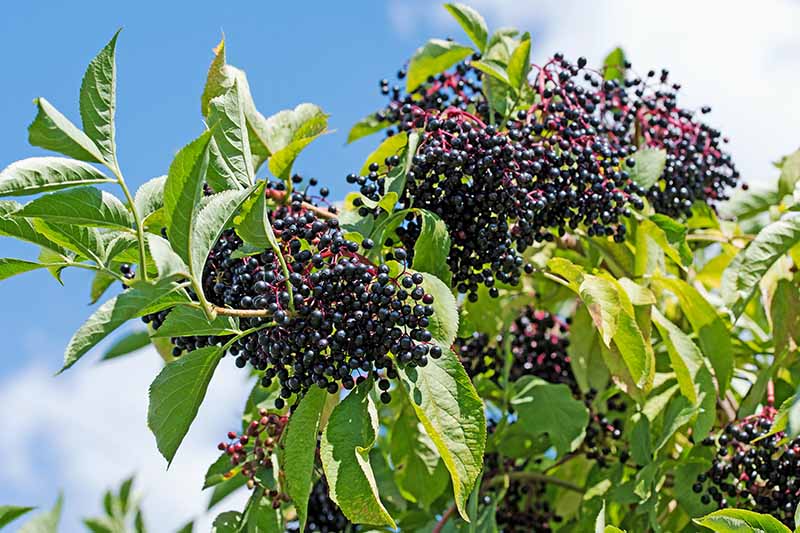
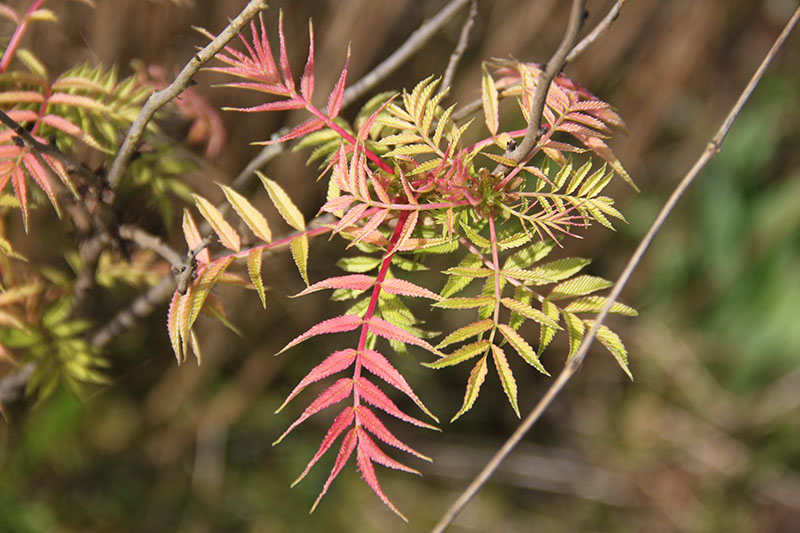
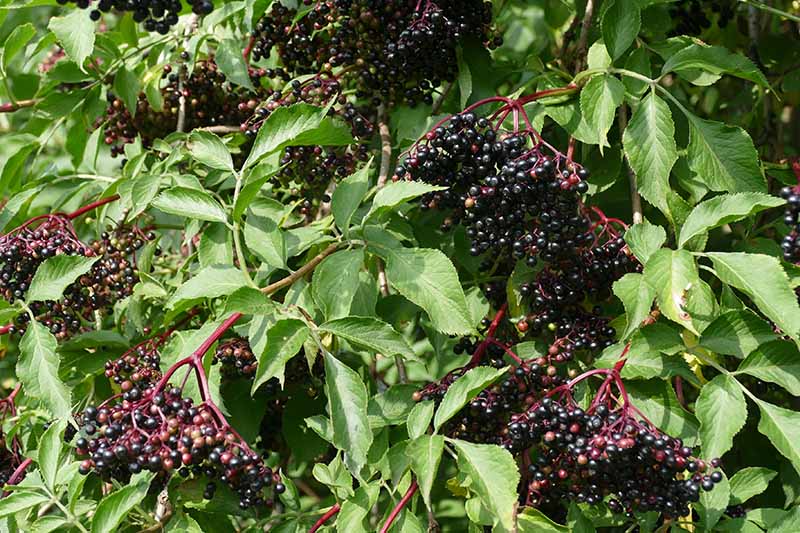
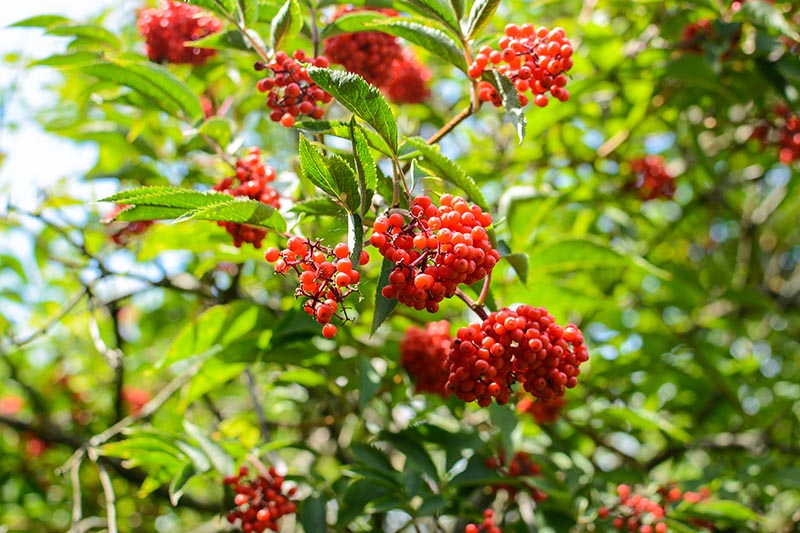
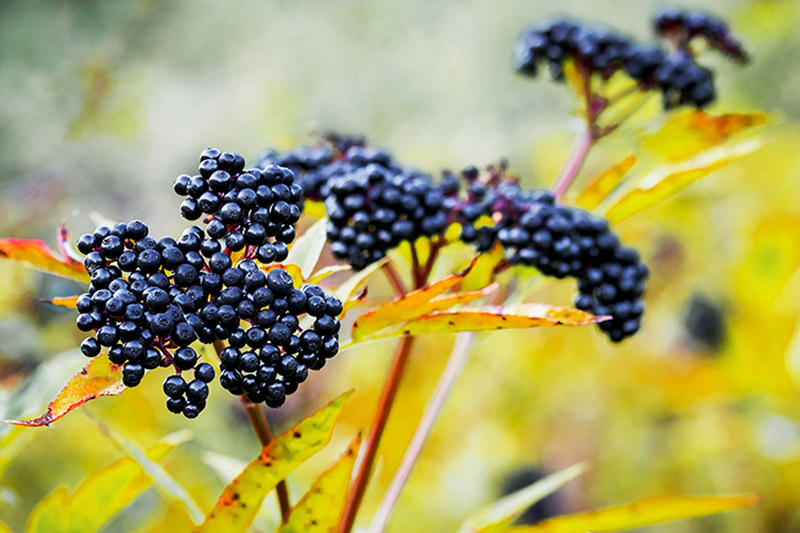
They are the ultimate multipurpose plant, providing multi-season interest in the garden with their feathery foliage, clusters of white or pink flowers, and berries in shades of purple, red, or blue that can often be used medicinally or in the kitchen. Even if you don’t plan to cook the berries or make your own home remedies, elderberry shrubs make a lovely ornamental addition to outdoor spaces, both spacious and more compact. The flowers can be snipped and placed in vases to freshen up your home, and some varieties can be used to flavor cordial, tea, or wine. The berries are delicious when used in baking or made into jam – but should not be eaten raw, as the seeds are toxic and can cause digestive issues. Why grow them in containers? Though elderberries have shallow roots, these shrubs are fast growers that spread via suckers, so planting them in pots is a smart way to keep them in check. But my favorite reason to plant these fruit bushes in a container is because of their flowers.
The blossoms smell heavenly – like a handful of summer. They have a floral, creamy, honey-like scent that can fill an area, and attract a host of beneficial insects to the garden. I like to bring that scent close so I can enjoy it frequently, right on my patio. Elderberry used to be classified as part of the Caprifoliaceae, or honeysuckle family – maybe because the flowers smell so nice. They were reclassified in 1994 as part of the Adoxaceae family, which includes viburnums. Depending on the variety, these plants thrive in USDA Hardiness Zones 3-9. The Mexican or blue elderberry is suitable for growers in Zones 6-10.
Choosing the Right Container
Elderberry plants need a fairly sizable container to thrive. For best results, you need to pick one that is at least 24 inches wide and 20 inches deep. This plant has shallow roots, so it’s more important that your container be wide than deep.
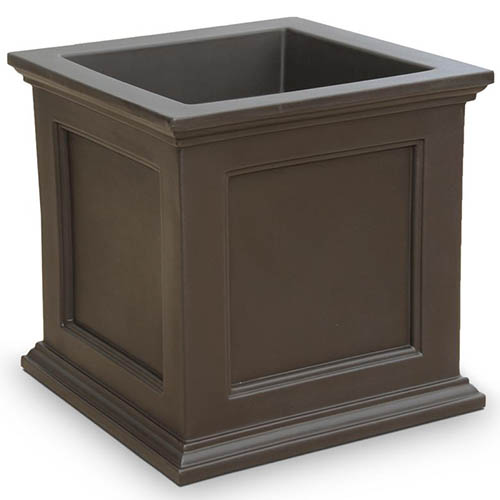
A wide container allows the roots to develop and spread out in order to support and feed the plant. Allowing the roots to spread also provides a more stable base, and will help to prevent the plant from falling over. Most varieties have a free-form, bushy growth habit, and can often grow to be as wide as they are tall. Make sure the pot you choose does not taper towards a narrow base. A heavy-duty, wide base is required as the plant has a tendency to get top-heavy, particularly if it’s not kept well pruned. Coupled with the shallow root system, if the planter is not big enough, your container-grown elderberry can easily tip over – especially in windy locations. Always check the expected mature height and spread of the variety you intend to plant, and choose the size of your container accordingly. That said, bigger is better. A large container with a heavy base will keep your plant stable as it matures. Soil dries out much more quickly in containers, and a large pot can hold more moisture without leaving the roots standing in water, which can cause root rot. This large, square planter would be ideal. It’s 28 inches by 28 inches and is available from Home Depot in black, espresso, and white.
Square 28″ by 28″ Planter in Espresso Large containers are often not recommended for plants with a small root structure, but elderberry likes moist soil with good drainage. This is a plant that likes to spread out and it won’t do well in a small pot. While the roots are shallow, they can spread several feet. Even with a large container, your plant will probably never get as large as it would if it were growing in the ground, and this can also affect your potential harvest. A full-grown, mature plant can yield up to 15 pounds of fruit each season, but you’ll get less than that with a container-grown elderberry shrub. Because the container needs to be so large, I like to place mine on a wheeled base. That way, if sun conditions change or we have a particularly harsh winter, I can move my plant around. Trust me, you don’t want to try lifting a container of this size that’s full of soil.
Preparing Your Container
First things first: If your container doesn’t have several large drainage holes, you’ll need to make some. This plant needs to be planted in well-draining soil, because standing water can lead to root rot. Aim for at least five holes in a 24-inch-wide container. You can drill holes in the base of your container using a household drill, with a drill bit made for handling plastic or stone, depending on the material of your container. Don’t put rocks or other drainage material in the bottom of the container. You want the soil to retain a good amount of water, and the holes you’ve added in the bottom will do the job of draining excess water.
According to Linda Chalker-Scott, Extension Horticulturist and Associate Professor at the Puyallup Research and Research Center at Washington State University, rocks or other coarse material placed in the bottom will actually impede the flow of water through the container, potentially causing the soil to become waterlogged. Fill your chosen container with an organically rich potting soil. Choose a potting mix that has added perlite, vermiculite, sand, or peat moss to help with drainage. Alternatively, you can also combine 70 percent perlite and 30 percent peat moss, and add this mixture to your potting soil. Use a ratio of 1 part perlite and peat moss mixture to 3 parts potting soil. Using soil taken directly from your garden is not recommended, as it can harbor disease and weed seeds. But if you do decide to do so, conduct a soil test and amend with compost or well-rotted manure as needed. Also add the perlite and peat moss mixture mentioned above, or some sand to promote good drainage.
How to Grow
Picking the right location will make all the difference in keeping your container plants happy. The US native species, Sambucus canadensis, thrives in shade or part shade, with about four hours of sun per day being ideal. Most other elderberry species prefer a full to part sun location, and will fruit better in full sun. Aim for six hours or more of direct sunlight per day.
Keep in mind when choosing a spot that ripe elderberries are highly pigmented and can be used to dye cloth, which means they may stain your cement walkways and patio flagstones. You’ll either need to harvest or prune the berries as they ripen, or be diligent about picking them up. Also, be aware that birds might pick up and drop berries in places where you don’t want them. Elderberry containers should be spaced at least three feet apart and away from walls and fences, to promote good airflow and help to prevent disease. Most – but not all – varieties are self-pollinating, but you can plant two together within 50 feet of each other to improve your berry harvest. You also want to place your plants in an area where they are protected from wind to prevent your container from tipping over. This is particularly important if you plant a larger variety that may become top-heavy. Starting elderberries from seed is a time-consuming process, but you can buy seedlings or bare root plants from garden centers and nurseries. You can also transplant suckers from existing plants, or propagate stem cuttings. To transplant nursery seedlings, dig a hole in the soil in your container to the same depth as the pot it is currently in. Water the plant, then place it in the hole, and tamp the soil down gently before watering it in well.
Container Care
Perhaps the biggest challenge in growing elderberries, and particularly those in containers, is that they need a lot of moisture. Soil in containers dries out more quickly than garden soil, so I use drip irrigation to keep my plants happy. You’ll also want to add an inch or two of mulch such as grass clippings, leaves, newspaper, or compost to help retain moisture.
Give plants at least an inch of water each week from the time they start blooming in spring until the berries have finished and have either been harvested from the plant, eaten by wild birds, or fallen to the ground. You can determine how much water your plants are getting by using a rain gauge. If you notice the top inch of soil is dry between waterings, increase the amount or frequency of your irrigation. During the winter months, the plant will be dormant and only occasional watering is needed, to ensure the soil does not dry out completely. When you’re growing in a container, aggressive growers like elderberries will need pruning to keep them in a compact, bushy shape so they won’t get too big for their containers. Pruning is essential, or you’ll end up with an elderberry shrub that doesn’t fruit as vigorously as it used to, and it will rapidly outgrow its container home. This is a job you’ll want to do in late winter or early spring before new growth starts, starting in the third year of growth. Remove any canes that touch the ground and any that are broken or damaged. You should also thin the bush out by removing any canes that cross one another, to improve air circulation. Cut canes at the base near the soil level. Prune out any third-year canes, since they don’t produce as well as younger growth. Second-year canes produce best and production drops off after that. Identification is relatively easy – third-year canes will be larger than the surrounding canes, and will have fewer leaves. Leave at least five canes in place on each bush so the plant can continue growing.
While you don’t need to divide elderberry plants, pluck out any suckers that pop up next to the main plant, or you’ll end up with several plants trying to compete for nutrients and water in one container. From the second year onward, fertilize in early spring with a balanced 10-10-10 (NPK) fertilizer according to packet instructions. Regular fertilization is especially important for plants grown in containers, as the roots are unable to spread beyond the container walls in search of nutrients, and regular watering will flush them from the soil. They’re nitrogen-hungry plants, so plan to supplement the soil after a few years of container growing. If you notice your plants are producing an excess of new leafy growth, reduce the amount of nitrogen you’re giving them by half.
Nitrogen will promote the growth of foliage but not of flowers or berries. You can increase nitrogen by selecting a fertilizer with a higher nitrogen ratio. You can also work composted manure into the soil. If growth appears sluggish and only a few new canes pop up come spring, increase nitrogen by half. Learn more about how to fertilize your elderberry in our guide. In the winter, protect the roots from freezing temperatures by adding a two-inch layer of mulch to the top of the soil, and wrap the container in blankets or burlap. Many types of elderberries grow best in Zones 3-8, all of which experience winter freezing. Since container-grown plant roots are more exposed to the elements, they can use a little extra protection.
Growing Tips
Plant in a container that’s a minimum of 24 inches wide by 20 inches deep Keep soil moist but not waterlogged Provide a full sun to part sun location – except if you grow S. canadensis, which prefers part to full shade Prune each year to keep size in check
Cultivars to Select
There are four species of elderberry that you’ll commonly find in container gardens:
S.nigra (Black) S. racemosa (Red ) S. mexicana or S. nigra var. caerulea (Mexican or blue) S. canadensis (North American native)
Many elderberry varieties are self-fruiting, but will almost always produce higher yields when a cultivar of the same species is planted within 40-50 feet. Others will not set fruit at all without another plant for cross-pollination. This self-fertile species produces large clusters of reddish-purple fruit that ripens in early fall.
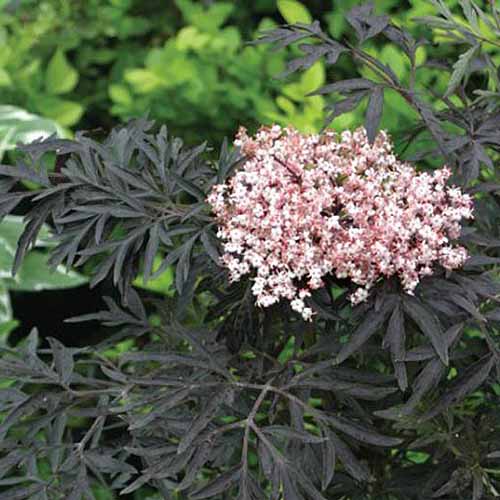
Black Beauty®
First introduced to the US from Europe in 2004 by Proven Winners, ‘Black Beauty®’ is a cultivar of S. nigra.
It has lance-shaped, dark purple leaves and delicate pink blossoms with a sweet, floral-lemony fragrance. Suitable for Zones 4-7, it grows in a compact form, with a mature height of six feet. Prune regularly after the third year to maintain a short, bushy shrub.
‘Black Beauty®’ In the fall, dark berries appear – provided you’ve got another variety, such as ‘Black Lace®’ (described below) nearby. You can find plants in quart-size pots at Nature Hills Nursery.
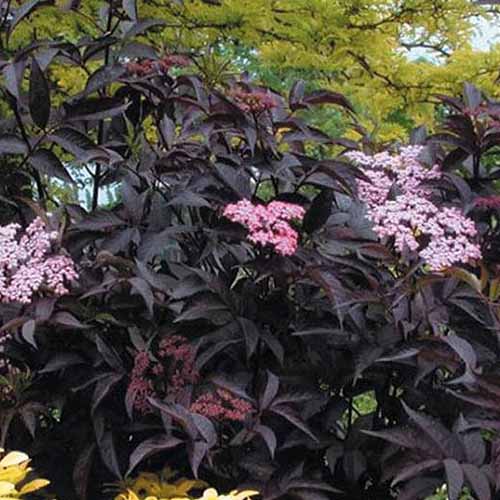
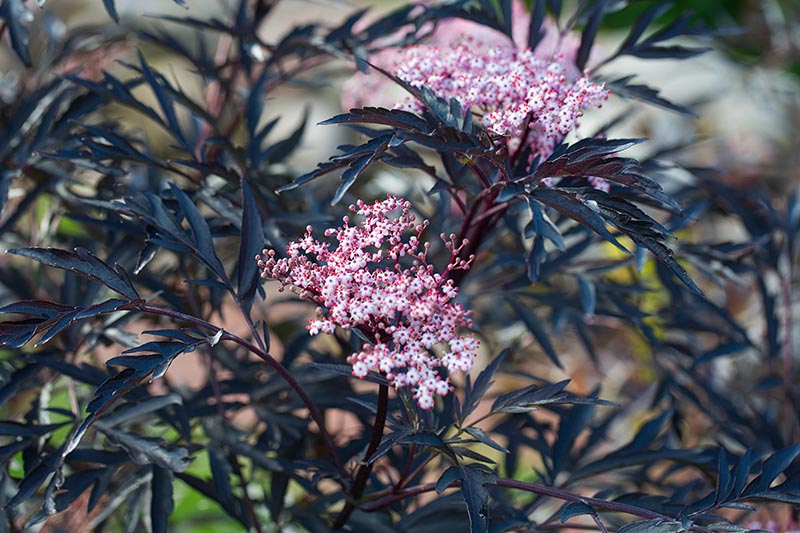
Black Lace®
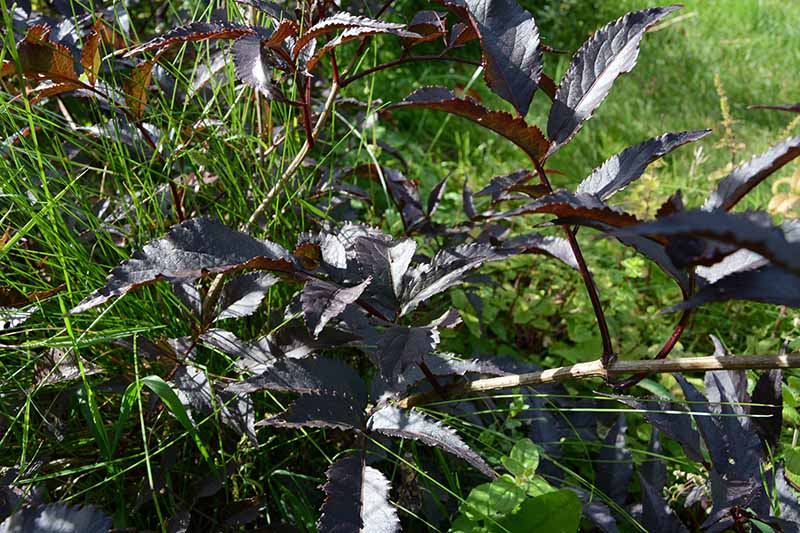
S. nigra ‘Black Lace®’ is a real beauty, with delicate, dark reddish-purple lacy leaves and light pink blooms. This cultivar is suited to gardens in Zones 4-7, and makes a perfect cross-pollinating companion for ‘Black Beauty®.’
S. nigra is often called the European elderberry. This particular cultivar was developed in England in the 1980s, and was introduced to the US market by Proven Winners. If allowed to, it’ll top out at 8 feet tall, but it responds well to pruning if you want to maintain a compact, bushy form. The dark foliage, especially when contrasted with the delicate pink flowers in springtime, makes a bold statement on your patio or as a feature planting.
‘Black Lace®’ Glossy black berries will ripen in the fall, provided there is another variety with a similar bloom time and of the same species located close by for cross-pollination. You can find 18- to 24-month-old plants in 2- to 3-quart containers at Nature Hills Nursery or from Home Depot.
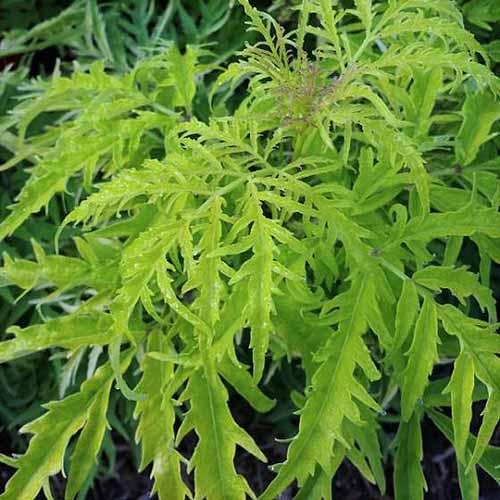
Lemony Lace®
S. racemosa ‘Lemony Lace®’ is a compact, dwarf cultivar that has bright yellow-green lacy foliage, and produces delicate white blooms in springtime.
With its more upright growth habit, ‘Lemony Lace®’ is perfect for smaller spaces, with a mature height of just 3-4 feet tall.
‘Lemony Lace®’ The ornamental red berries are not edible, but will provide a source of autumn sustenance for local songbirds. Suitable for growers in Zones 3-7, you can find 2- to 4-year-old plants available at Nature Hills Nursery or from Home Depot.
Tapiro
Tapiro is the common name of the Mexican species, S. mexicana. It is native to western North America, from Oregon through Mexico. It has green foliage, and delicate yellow or cream-colored flowers give way to clusters of light purple or blue berries in the fall. Once established, it is drought tolerant. This makes it ideal for container growing, since it won’t suffer if you forget to water. It does, however, need protection from freezing temperatures below -5°F. Tapiro grows well in Zones 6-10 and reaches a mature size of only 4 feet tall and 4 feet wide – just right for a container.
Dwarf Elderberry
Dwarf elderberry, S. ebulus, also known as dwarf elder, danewort, dane weed, and dane blood, is native to southern and central Europe and has naturalized in the eastern US.
It grows rapidly to a mature size of 3 feet tall and wide. It is suitable for growers in Zones 4-8, and features pretty white flowers with crimson edges in the spring.
Managing Pests and Disease
Elderberries face a few pests and diseases in the garden, though plants are usually untroubled. The best way to prevent your container-grown plants from contracting disease is to start with healthy transplants. Maintain good airflow by pruning regularly, and provide adequate water and well-draining soil.
Pests
Most pests will give your elderberry plants a wide berth, but keep an eye out for these:
Elder Shoot Borer
The elder shoot borer is the larvae of a red-brown moth, Achatodes zeae, that tunnels into the new shoots, and causes the tips of the canes to wilt. The moth lays its eggs in late summer, and they hatch the following spring. You’ll know you likely have an infestation if just the green shoots on your plant start to wilt. To eradicate this pest, prune back canes until they’re no longer hollow, and burn or dispose of the infected material.
Thrips
Thrips are tiny winged insects that are black or brown with red, black, or white markings. They puncture plants and suck the juice from petals and fruits. This causes stunted growth, reduced harvests, and curling and discolored leaves. Use an insecticidal soap to control thrips. Read more about thrip control here.
Disease
Starting with high-quality potting soil means you will usually be able to avoid the soil-borne diseases that can affect this plant. Problems often arise in plants that are not pruned regularly enough to maintain proper airflow.
Leaf Spot
If you notice black or brown spots on the undersides of leaves, your plant may have leaf spot. It may be caused by a variety of bacteria and fungi, including Colletotrichum spp., Septoria sambucina, and Phyllosticta sambuci. Left unchecked, it can cause leaves to turn yellow and fall off the plant. Fruit can also develop spots and form cracks. While it won’t usually kill your plants, it can weaken them and reduce flowering and fruit production. You can tackle this problem with a sulfur or copper-based fungicide, which will slow the spread, but not cure the disease.
Powdery Mildew
This disease affects a whole range of plants, including elderberries. You’ll notice whitish-gray powdery mold on leaves, buds, and twigs. It can cause stunted growth, and usually appears in moist, humid conditions. It’s important to maintain good air circulation by pruning, avoid watering the foliage, and remove any debris that falls into the container. You can also spray plants with a targeted fungicide. Read more about treating powdery mildew here.
Root Rot
Although they like moist soil, if their roots become waterlogged, elderberries may suffer from root rot. This is particularly true for plants grown in container. That’s why it’s important to provide good drainage, with plenty of drainage holes in your container. Root rot is caused by Phytophthora rubi, a fungus-like organism that thrives in waterlogged soils. Test drainage now and then by watering your container and watching to see if excess water drains out of the bottom. If it doesn’t, the soil may have become compacted. You’ll need to remove the plant and free up the drainage holes. Refill the container with new, well-draining potting soil and replant. Root rot causes leaves to turn yellow or red, and roots may have black or brown lesions. If your plant has root rot, it’s toast. Pull it and start again.
Thread Blight
Thread blight is caused by a fungus, Corticium stevensii. Leaves wilt, curl, and turn brown, particularly on parts of the plant located in full shade. You’ll also see a white fiber that forms near dead portions.
Pots of Berry Bliss
With the delicate beauty of the intensely-scented flowers that look heavenly in bouquets, and the fruit that can be used medicinally or in cooking, elderberries are a delight to have in the garden.
If you don’t have room in your garden beds, don’t despair. These can be grown in a container where you can enjoy all that the plant has to offer on your porch, patio, or even on a sunny balcony. Have you tried growing elderberries in containers? Are you tempted to try? Let us know in the comments below, and feel free to upload a picture or two! For more information about growing and using elderberries, you’ll need these guides next:
Harvesting and Preserving Elderberry: A Fruit for Food and Medicine How to Use Elderflowers for Food and Medicine How to Grow Elderberries
© Ask the Experts, LLC. ALL RIGHTS RESERVED. See our TOS for more details. Product photos via Nature Hills Nursery. Uncredited photos: Shutterstock. With additional writing and editing by Clare Groom and Allison Sidhu. The staff at Gardener’s Path are not medical professionals and this article should not be construed as medical advice intended to assess, diagnose, prescribe, or promise cure. Gardener’s Path and Ask the Experts, LLC assume no liability for the use or misuse of the material presented above. Always consult with a medical professional before changing your diet or using plant-based remedies or supplements for health and wellness.