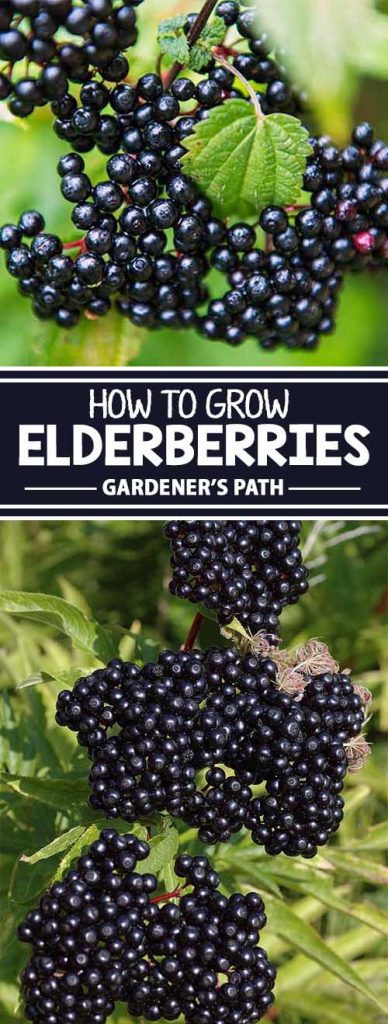
These clusters of tiny fruits soon get eaten up by the birds. But before then, I grab as many as I can for baking, making tinctures, and drying into powders. What are these in-demand beauties? They are a variety of elderberry (Sambucus canadensis), a plant that is native to many areas in the US, and that is becoming increasingly popular as an intentional addition to lawns and gardens. We link to vendors to help you find relevant products. If you buy from one of our links, we may earn a commission.
Getting to Know the Plant
Many types of elderberry are sold to home gardeners today.
To be honest, they so closely resemble one another that I’m not sure that one is superior in choosing which to grow at your home. The names I see most often include:
Adams Johns Kent Lacinaiata (a cutleaf variety) Nova Scotia York
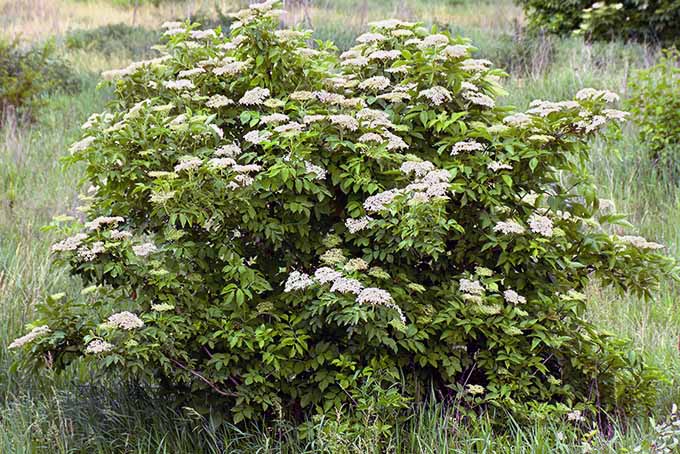
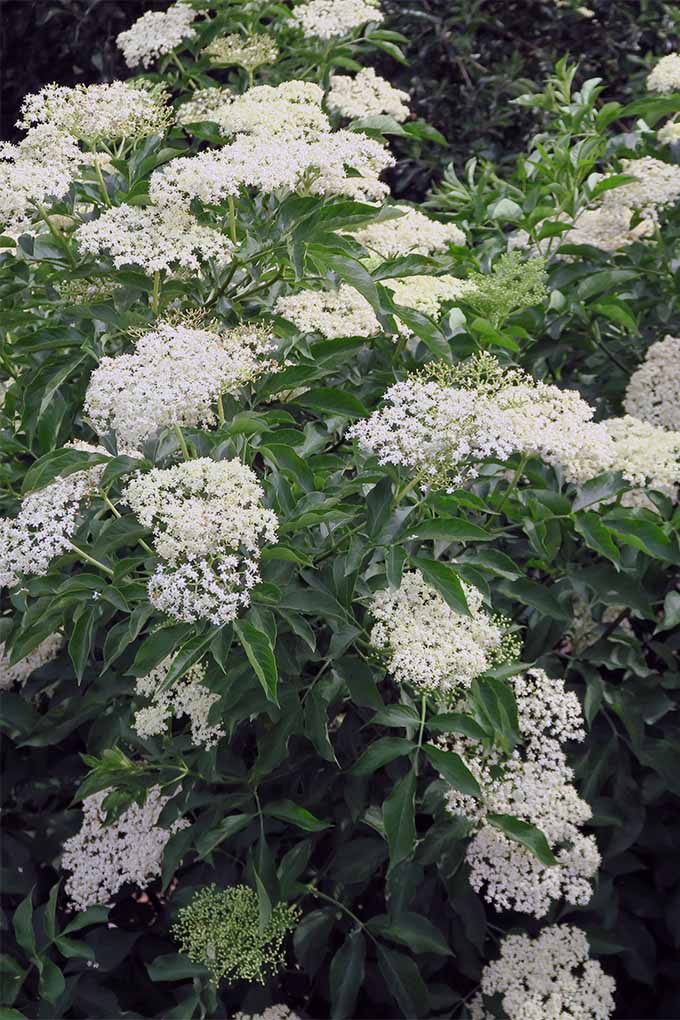
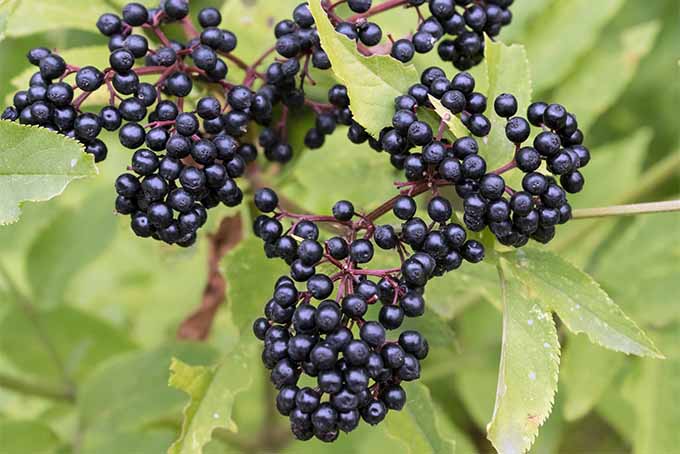
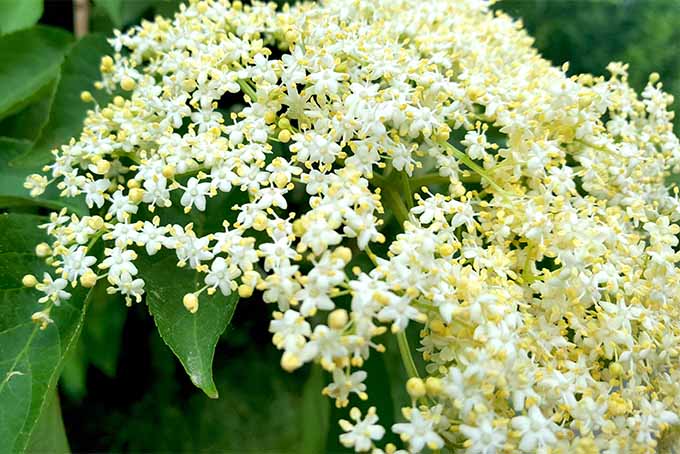
All cultivars can be characterized by their shrub-like plant structure, compound leaves, and big, beautiful clusters of white flowers. The flowers bloom in June. They are not unlike the snowball hydrangeas many gardeners covet, but these have the added benefit of producing amazingly edible fruits! The flowers also be used for culinary and herbal applications.
Choosing a Proper Location
If you’ve already been sold on the benefits of adding this treasure to your yard, it’s important you spend a little time considering the right place to plant. According to Nicole Haxton, educator at the University of Nebraska-Lincoln Extension, elderberries prefer partial shade and would rather be cool and moist than hot and dry. Proper drainage is key to preventing root rot, so avoid any place prone to standing water.
It is recommended that you plant in pairs, no more than 60 feet apart, for the full benefit of cross pollination (more fruit to enjoy!) Allow plenty of space between plants. The more air that can circulate between the shrubs, the better they will fare against diseases of the leaf structure. Since they can grow up to 12 feet tall and six feet across, mature bushes will need lots of room to thrive. Elderberries should be planted in the spring, once the danger of frost has passed. If you are ordering from a reputable plant or seed supplier, they usually mail out plant orders during the appropriate planting time for your growing climate. While you wait, work to find (or create) a soil pH level that your new plant will thrive in. The Cornell University Department of Horticulture recommends a pH of 5.5-6.6.
Just a Little Bit of Maintenance
One of the reasons I’m such a fan of the elderberry is that they are very easy to maintain. Seeing them do so well in the wild, even after being cut and sprayed by local farmers, is proof that they are an incredibly hearty breed. Once they survive their first year, they are going to be around to stay!
So, how do you handle their first few tender months? As with any plant, carefully ensure that they are watered well. Elderberries can handle (and need) a good amount of water at first. As long as the moisture can drain away from the base of the plant, there is little risk of overwatering. Fertilization is never a bad idea, either. Your soil can provide much of what the plant needs if it’s amended with some manure or compost. Read here for further breakdown on elderberry fertilizer requirements. The Horticulture Department at Cornell also recommends that you “apply 1/8 pound of ammonium nitrate (or 0.5 lbs. 10-10-10) for each year of the plant’s age, up to one pound per plant (or up to 4 lbs. 10-10-10).” This should be done in the spring every year after its initial planting.
A Word on Weeds
If there is a kryptonite to this incredibly strong plant, it would be the common weed. Elderberry plants have shallow roots, so they can easily get crowded out by aggressive types. I always pull weeds by hand, but any forceful cultivation should disturb no more than 2 inches of topsoil.
One way to ensure your plant doesn’t go into shock from the disruption of weeding is to prevent the existence of unwanted weeds to begin with. Lay some good landscape cloth down around the plant and cover with mulch. Any stray weeds can be pulled or even handled with an edge trimmer.
Is Pruning Necessary?
I’ll be honest. I rarely prune my elderberries. Since many are native to my yard, and the rest were thoughtfully planted by chickens running amok, I tend to let them to their thing. If you are the thoughtful type, you can always cut the largest, oldest hardwood sticks from the plant after the end of the season, to allow the energy of the plant to be directed into new shoots the following year. But don’t overthink it. You can find more pruning tips here.
Harvesting the Fruits
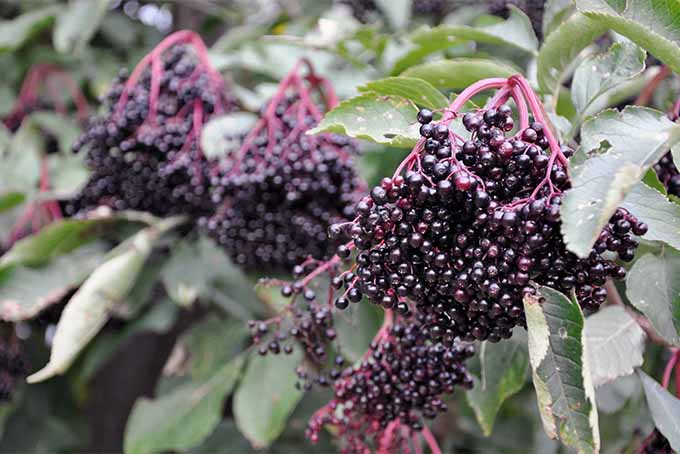
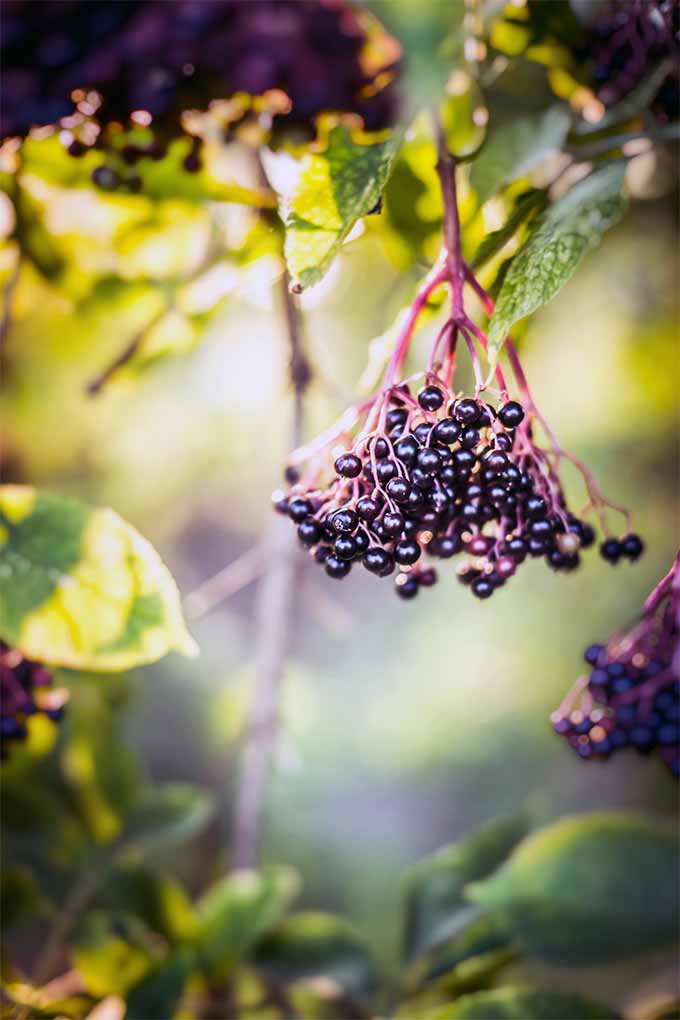
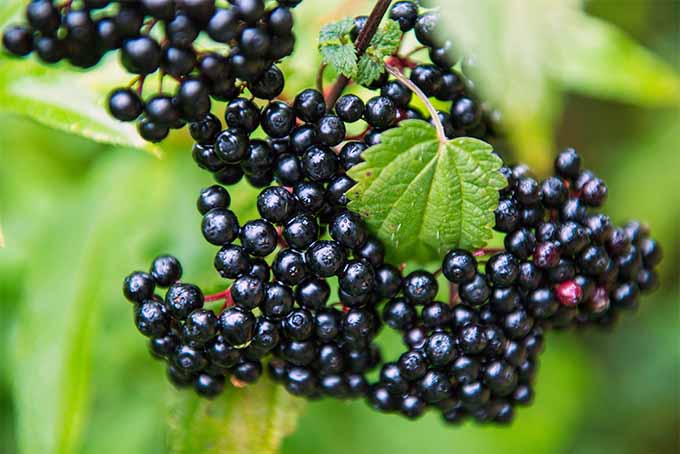
If you ask me, the most labor-intensive part of owning an elderberry is harvesting the fruit. Removing the berries from the plant is easy. Everything after that, however, takes some skill. You’ll want to harvest when the berries are as dark purple, or even as black, as you can imagine they will get. They should be very soft and juicy.
If they appear shriveled, like a raisin, you’ve waited too long. Picking them before the birds do is tough. If you have a good number of berries in clusters that are close to being ready, you may go ahead and get all of them. It’s impossible to pick individual berries, so you must eyeball the group and go for a good percentage of ripe ones when making your decision. Again, if almost all are ripe, the birds will probably get to them by the next day. Using a good pair of pruning shears, cut the entire cluster just under the base of where the fruits begin. I put them into a 5-gallon plastic bucket from the hardware store and take all of them home at once. Read more about harvesting elderberries here.
Preparing the Fruits
Whether you plan on canning for jelly and jam, making a pie, or concocting a tincture to fight colds and flu, this process is necessary for any use of the fruits. If bugs are crawling all over your fruits, you can allow the clusters to soak in water for a few hours and then use right away. Or, you can wait a day and do this easy freezing method:
- Rinse the clusters of berries and lay flat on a towel to drain.
- Place each cluster on a parchment-lined cookie sheet. Place the entire sheet into the freezer for at least 24 hours.
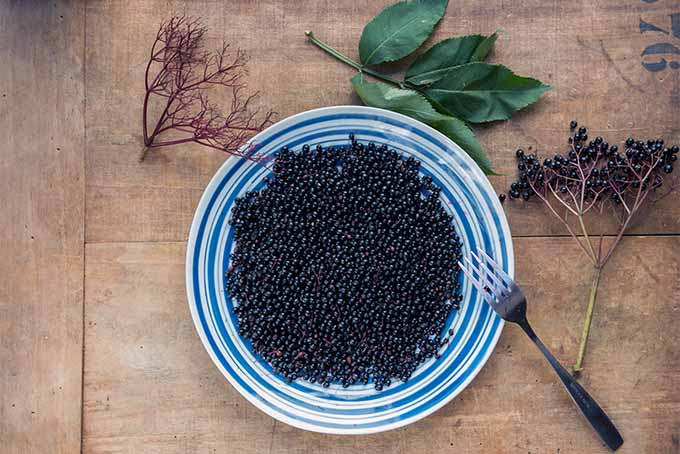
- Once the fruits are frozen, remove them and place into a plastic gallon storage bag.
- Hit the bag gently against a counter until you hear all of the little frozen fruits rattling around in the bag. Separate the stems, which should be mostly in one piece, from the fruits. Voila! If you don’t like the idea of freezing, lack storage space, or want to use the fruits right away, you can use a fork to remove the fruits from the stems. Starting at the thickest part of the berry bunch, scrape along each stem, pulling the berries with it as you go. Note that you’ll also gather quite a bit of stemmy material with this method. I like to follow it up with a triple rinse in a fine mesh strainer afterwards.
Uses for the Fruit
I could go on and on about my favorite ways to eat elderberries. Since they are sour and have a funny aftertaste that I can’t quite explain, they are not your typical “pack in a lunchbox” snack.
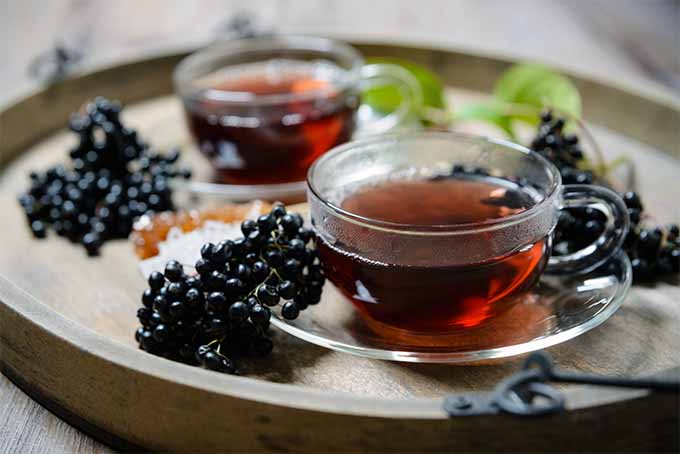
They do, however, have some impressive reported health benefits, and can be baked, canned, or juiced in several ways. Some of the common ailments for which people may use elderberry in symptom relief include:
Bacterial Sinusitis Colds Flu
As with any remedy (natural or otherwise) seek the consult of your health professional before starting anything new. I’ve been making elderberry tincture for years and find it to be my preferred way to use the berries.
Means of Propagation
According to Patrick Byers, Regional Horticulture Specialist at the University of Missouri Extension, there are three ways you can propagate the cuttings of the elderberry plant: softwood, hardwood, and hardwood with sprouts. To do this at home, you’ll have the easiest time with the softwood cutting process – and you can accomplish this without rooting hormones or additives.
Softwood Cuttings
These must be taken while the elderberry plant is growing, sometime before mid-July in the Midwestern region of the US. (Note that the exact time of year may vary slightly, depending on your location.) The process involves cutting three to six inches of the greenest tips of the branches. You can strip the leaves, keeping just one main leaf at the end of each branch intact.
To keep your softwood cuttings fresh, submerge the cut ends in a mason jar of water for about 12 hours before placing each in soil to root, with the proper pH for elderberries (5.5-6.6). Small seed starting containers may be used to allow the cuttings to grow strong roots before transplanting to their forever spot in the yard or garden or even into a large pot (if you have smaller cultivar). This should be done sometime in the fall. If you are sure that the new cuttings won’t be disturbed, you may place them directly in the soil after the 12-hour soaking period instead. Be sure to keep the soil around the new planting moist, but not to the point of creating standing water. The cuttings should take root and start to grow into mini versions of the original plant within a few weeks! Read more about propagating from cuttings here.
Why You Should Grow Your Own
For now, the ditches and wetlands of the Nebraska River Valley are overgrown with these amazing berry bushes. But this could change at any moment.
With changes in landscape due to farming and modernization, the elderberry plant could cease to exist in the wild acres near my home. That’s why I’ve taken it upon myself to be purposeful in my planting of these hearty and beautiful bushes. Adding them to my orchard, along the fence lines of my pasture, and in the corners of my yard ensures that my family will have fresh berries every year – regardless of what happens in the wild. We know so much about this plant to help with successful planting and care.
What’s stopping you from trying out this plant that’s rich in history (and antioxidants)? Grow your own this year, by grabbing a few hearty seedlings from your favorite garden center or online source (or a friendly neighbor with cuttings to spare)! Do you have a favorite elderberry recipe that you’d like to share? Please let us know in the comments below – we’re always looking for new ways to enjoy this delicious homegrown fruit. And if you’re looking for other berry guides, check these out:
The Ultimate Fall Berry Planting Guide Grow Your Own Gorgeous Mulberry Trees How to Plant and Grow Ground Cherry, A Tasty Tropical Berry
Photo credit: Shutterstock. The staff at Gardener’s Path are not medical professionals and this article should not be construed as medical advice intended to assess, diagnose, prescribe, or promise cure. Gardener’s Path and Ask the Experts, LLC assume no liability for the use or misuse of the material presented above. Always consult with a medical professional before changing your diet or using plant-based remedies or supplements for health and wellness.