They are the only species in the Caladium genus, one of many aroids, or plants in the large Arum (Araceae) family that includes calla lilies, peace lilies, philodendrons, and taro. Native to tropical and subtropical regions of Central and South America, they grow in the sun-dappled shade and moist earth beneath the canopies created by high-branched trees. Plants are suited to cultivation as tender perennials in USDA Hardiness Zones 9 to 11. They grow as annuals in other temperate zones, and may be enjoyed as container plants both indoors and out. We link to vendors to help you find relevant products. If you buy from one of our links, we may earn a commission. Let’s get started! Here’s what I’ll cover:
What Is a Caladium?
Caladiums grow from corms, or thick, rounded, tuber-like roots. Similar to a bulb, the corm stores food that the plant uses during the growing season. It has bumps on it called eyes. These are the growth nodes from which the leaves sprout.
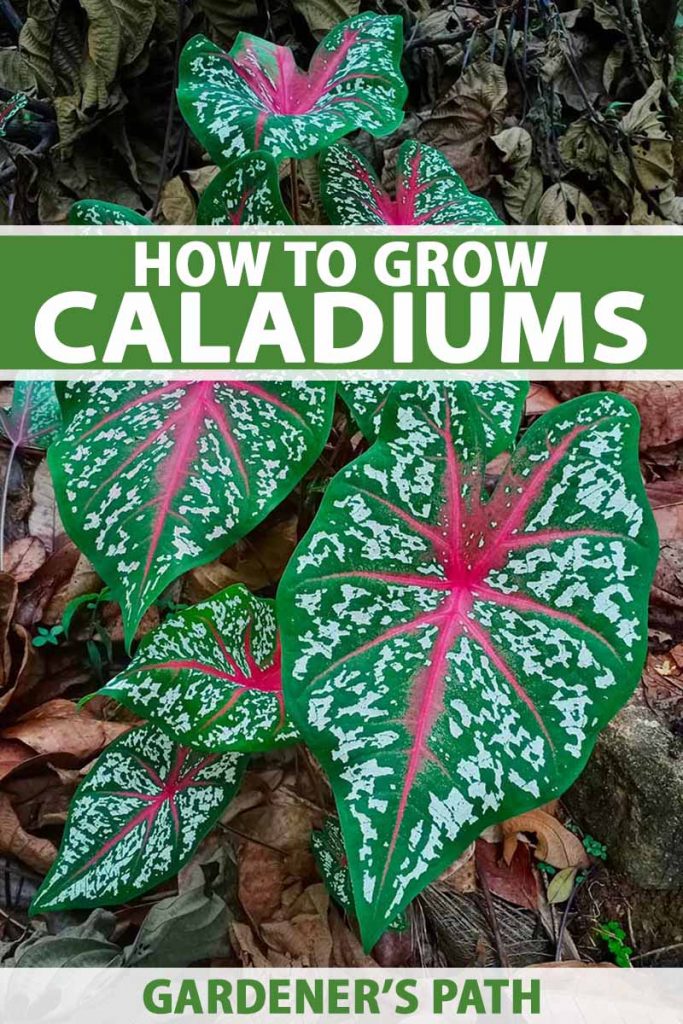
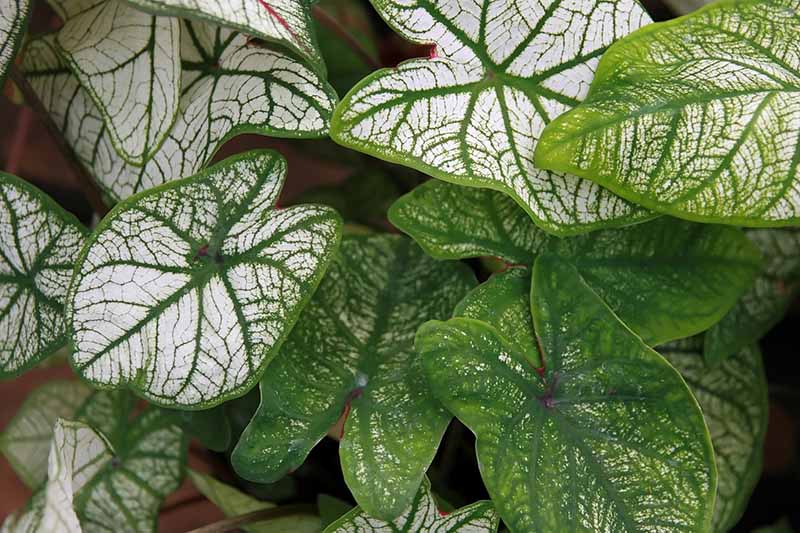
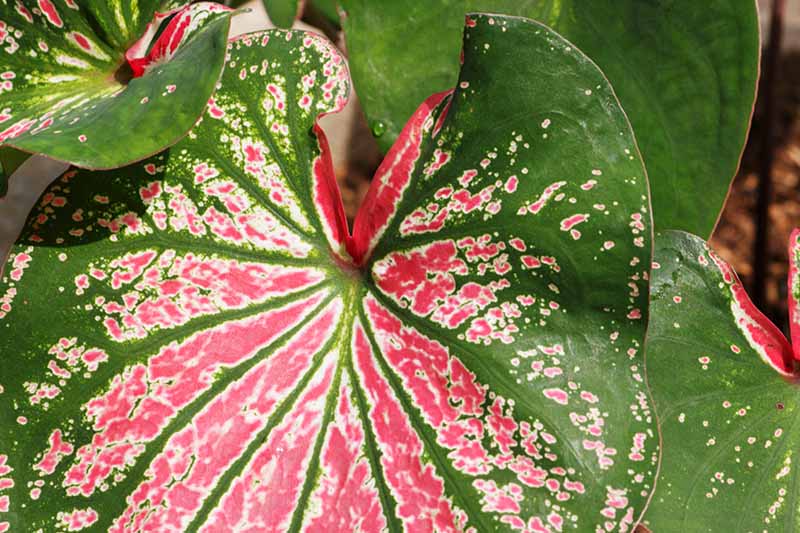
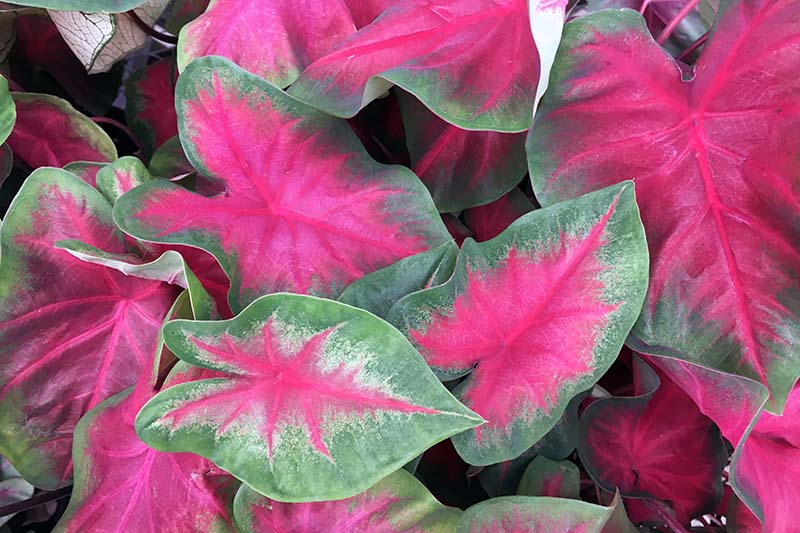
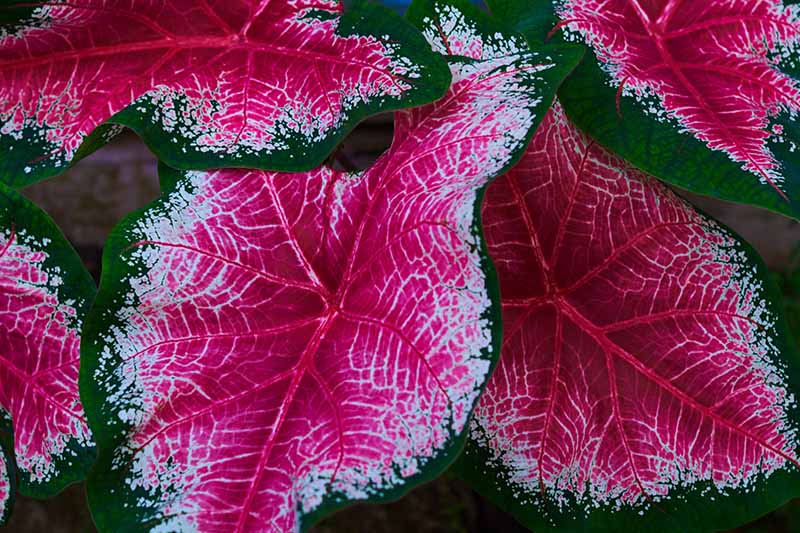
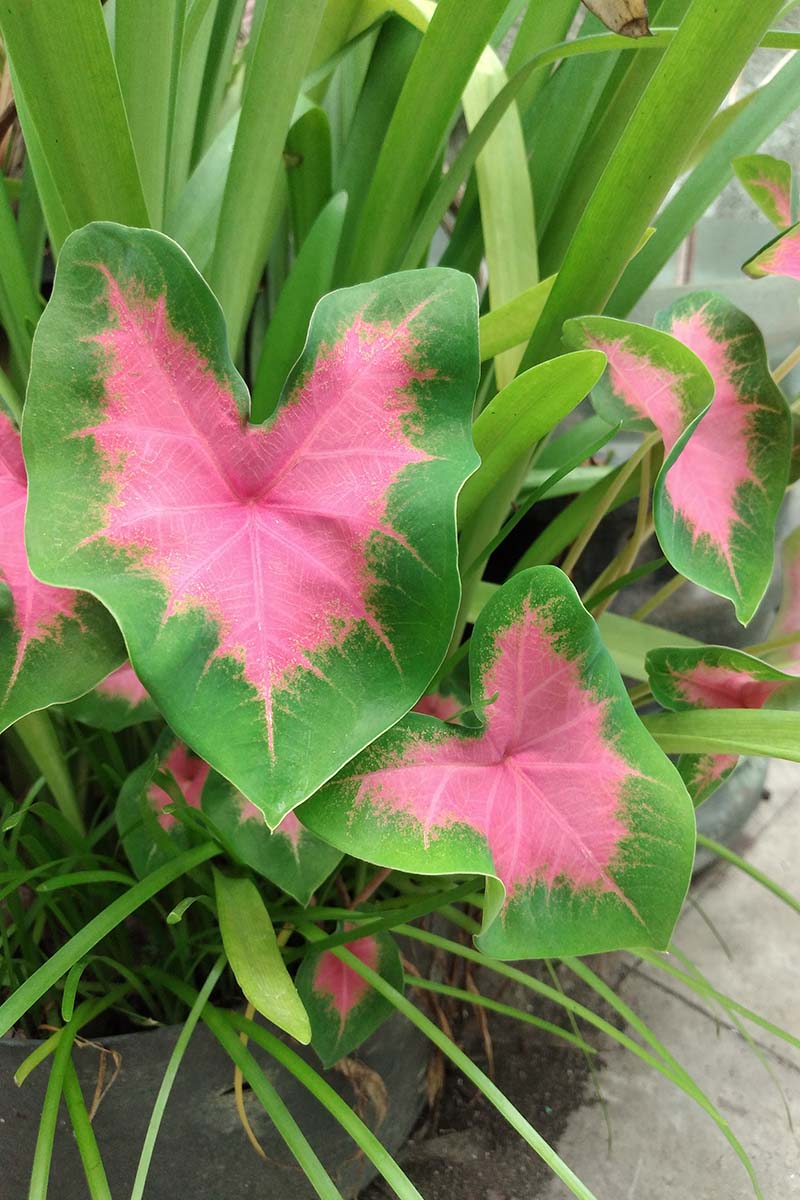
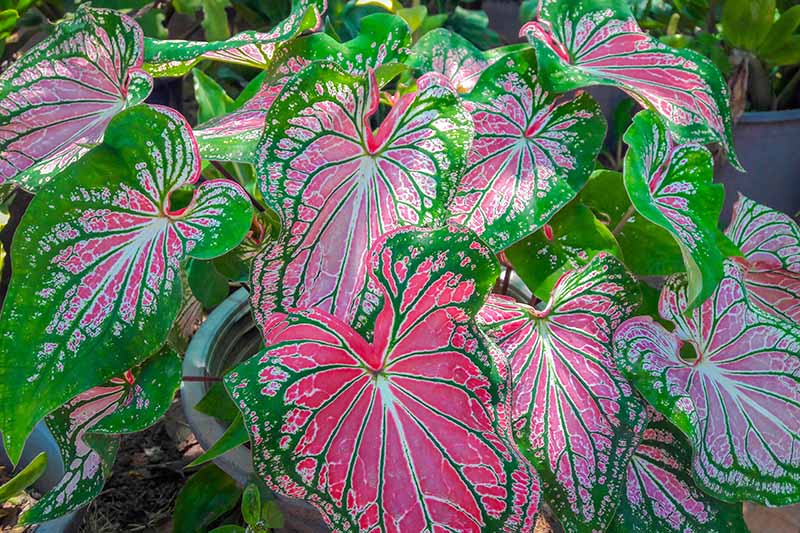
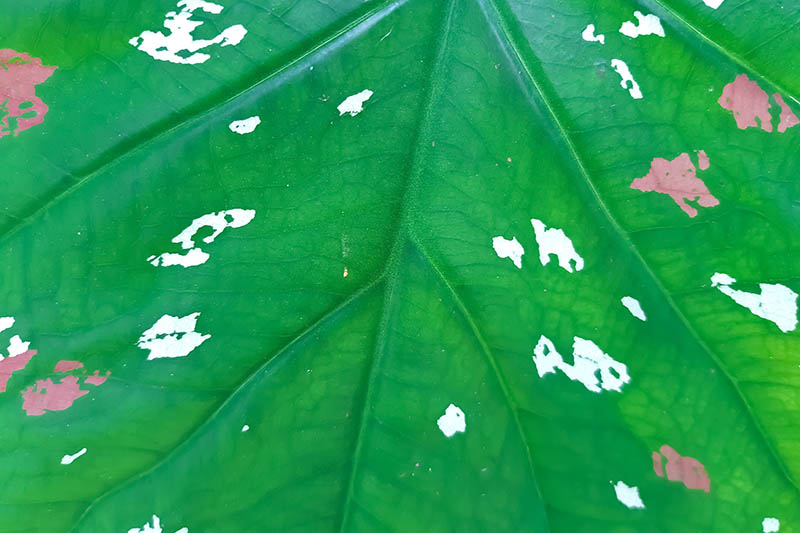
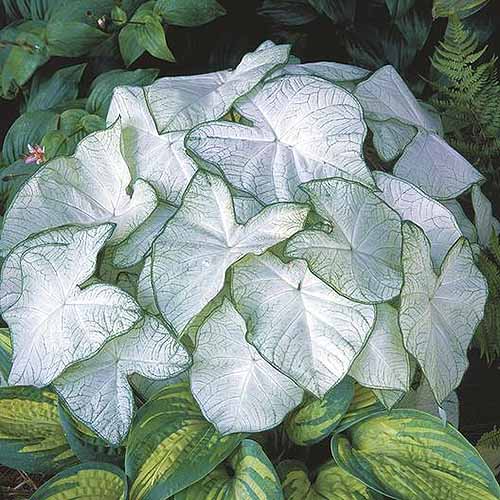
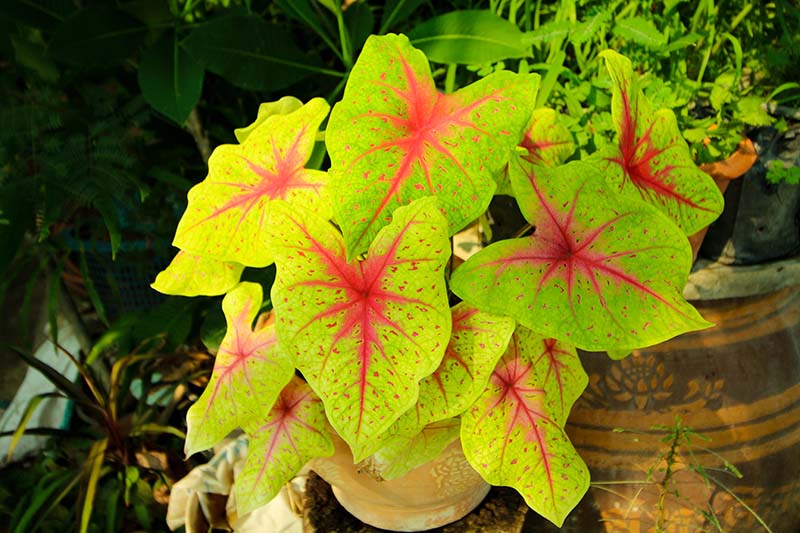
Unlike a bulb, the roots do not sprout from the bottom of a corm. Instead, they emerge beside the sprouting leaves, on top of the corm, and spread sideways. Another unique feature of this type of plant is that there are no stems. The leaves grow directly from the corm via leaf stems called petioles. There are two types of caladium plants in cultivation: fancy-leaf, and lance or strap-leaf. The fancy-leaf types have a little dip where the petiole meets the leaf, and leaves that look like hearts. These are the largest plants, with mature heights ranging from 12 to 30 inches. The lance or strap-leaf ones have no dip, and they feature elongated leaves. These plants are smaller, topping out at 12 inches or less in height. There are many cultivated varieties that are hybrids of two or more species. They are called, generically, C. x hortulanum. The hybrid species name is often followed by a specific cultivar name, such as ‘Candidum Junior,’ a white fancy type with dark green veining, or ‘Miss Muffet,’ a chartreuse and deep pink strap-leaf variety. As a result of extensive hybridization, an array of colorful plants with contrasting mid-ribs, veins, margins, mottling, and striping are available to home gardeners.
Cultivation and History
Also known as heart of Jesus, angel wings, or elephant ears (not to be confused with other elephant ear plants, such as Colocasia esculentum), caladiums grow in hot, humid weather where the soil is organically rich, moist, and well-draining.
The ideal pH is between 6.0 and 6.5.
They perform well in understory placements that receive filtered sunlight, as well as locations that get morning sun and afternoon shade. Some of the newest cultivated varieties have greater sun tolerance than the botanical species plants.
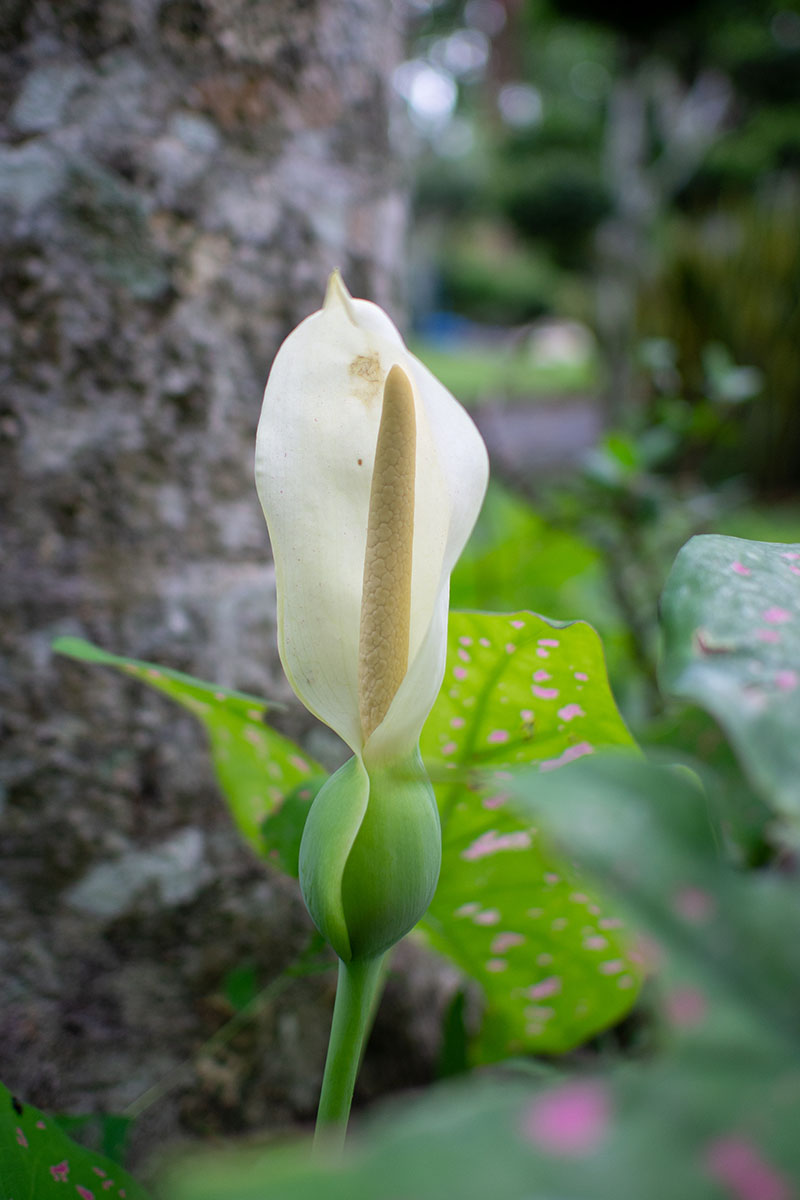
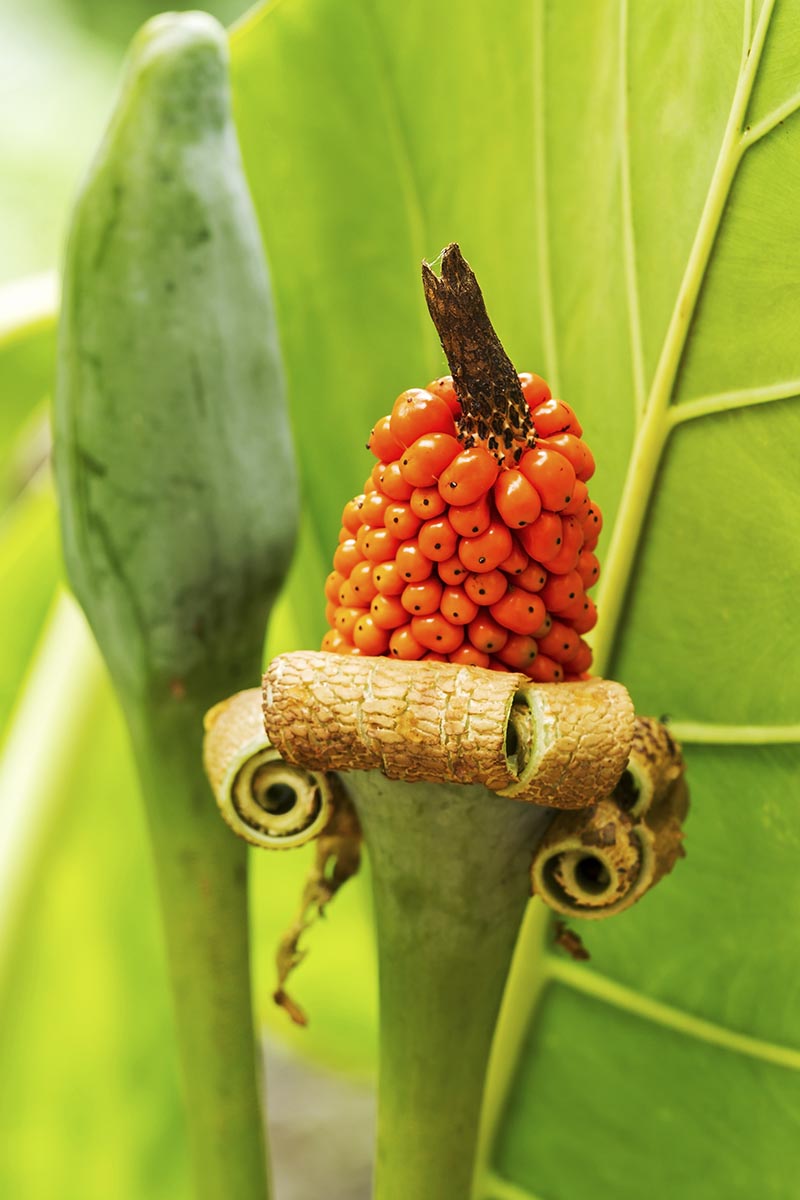
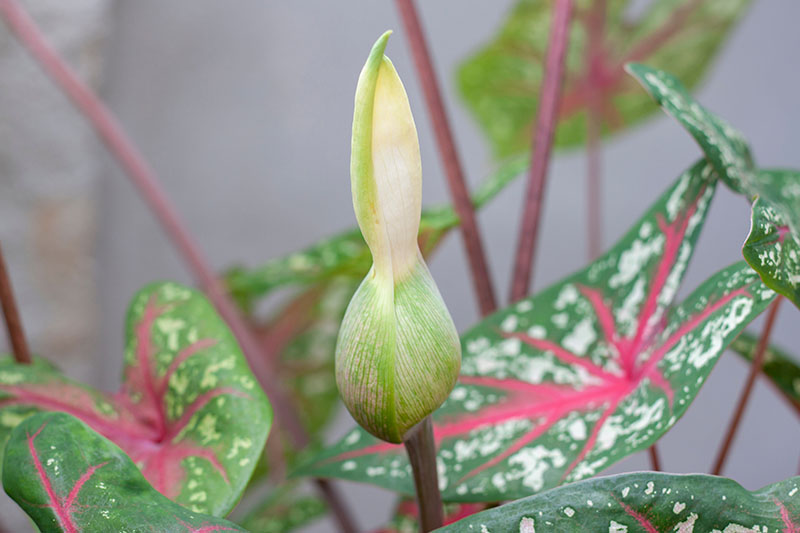
Occasionally, plants produce a single pale green, white, or pinkish flower. It consists of a concave leaf-like bract, or spathe, surrounding an upright spike called a spadix that is covered with minute blossoms. After blooming, a tight cluster of orange or white berries, each containing up to 10 seeds, will appear.
By the 1700s, there were ornamental specimens growing in European gardens. Breeding plants with desirable characteristics was well underway in the 1800s and continues today. Caladium cultivation is a big business, particularly in the state of Florida, where advances in leaf thickness and sun tolerance have created a wide array of outstanding choices that are certified to be of exceptional quality.
Propagation
To grow this plant at home, you will need to purchase a dormant corm or nursery plant, or obtain a division from a friend’s plant.
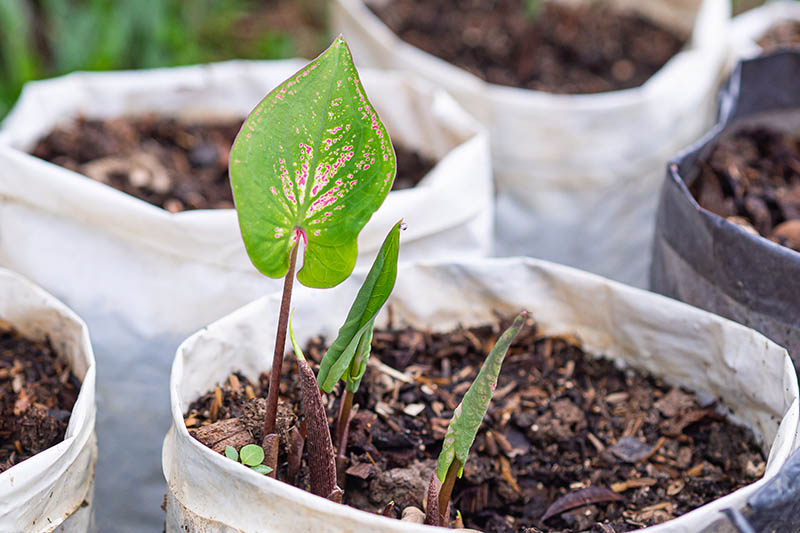
To divide a plant, dig it up in early spring to reveal the thick, tuberous root. To make new plants, slice down through the corm to make separate pieces. Each must contain one or more eyes. Growing from seed is also possible. However, plants seldom bloom, and the tiny blossoms are not self-pollinating. Commercial growers often cut budding stems off to invigorate plants, as well. As such, seed formation is a rarity, and seeds are not readily available for purchase.
How to Grow
If you’re in Zones 9 to 11, you may direct sow corms in the spring when the soil is at least 70°F. Soil that is too cold makes the corms susceptible to rotting.
Get your corms into the ground as soon as possible after purchasing them at the nursery or receiving them by mail. If you can’t get them in the ground right away, store them in an airy location that’s 70-80°F until you are ready to plant them out. Because the corms crave warmth and moisture, some folks like to soak them in warm water for an hour before planting. The experts at the Kansas State University Agricultural Experiment Station and Cooperative Extension Service recommend a temperature of 120°F to jump-start growth. The next step, also optional, is “de-eyeing” or “scarring.” Here’s how: Remember those bumpy growth nodes called eyes? The key to having attractive clusters of foliage is to “scar” or “de-eye” the corms prior to planting. This is a simple task that requires a sharp paring or garden knife to dig the eyes out, as you would with a potato. Remove about one-fourth of an inch from each eye. Doing so ensures that no eye achieves “apical dominance,” growing at the expense of others, and causing them to grow slower and smaller. Sometimes there is an obviously large “central” eye, and folks cut that one out and leave the rest alone. At other times, no one eye seems significantly larger than the rest, and people cut them all to promote even growth. Next, it’s time to plant.
To Plant Directly Outdoors:
Select a location that receives filtered sunlight through tree branches, or one with morning sun and afternoon shade.
If your soil is not organically rich, amend it with compost, peat, or humus. This improves drainage, as well, and contributes a modicum of acidity. Work the soil down eight to 10 inches, adding amendments as needed, until it has a loose, crumbly consistency. Mix in a well-balanced, slow-release, all-purpose granular fertilizer at this time, if desired. You may continue to feed your plants throughout the growing season per package instructions, but don’t overdo it, or the leaves might become entirely green. Set the corms bud side up, and plant two inches deep, covering them completely with soil. Space plants eight to 12 inches apart to accommodate mature dimensions of 12 to 24 inches, depending upon the cultivars chosen. Water in well. Apply about two inches of organic mulch, such as pine bark or pine needles, to keep weeds down, aid in water retention, and add nourishment. Once sprouts appear, maintain even moisture throughout the growing season.
To Start Indoors:
If you’re cultivating plants as annuals in cool regions, start them indoors in mid-spring for planting out in early summer. To do so, fill a shallow, well-draining container with perlite, vermiculite, or another well-draining potting medium. Place the corms bud side up, and use enough potting medium to just cover them from view. Place them in a location with indirect sunlight that is at least 70°F. Keep the soil moist, but not soggy. Plant out when ground soil temperatures are at least 70°F.
To Grow in Containers:
To grow plants in containers, choose pots with adequate drainage holes that are sturdy enough to accommodate mature plant dimensions of 12 to 24 inches tall. A depth of about eight inches is adequate, as roots have a shallow growth habit.
Plant corms two inches deep in a quality potting medium that drains well. Mix in fertilizer as described above, and use it throughout the growing season per package instructions. Remember that containers dry out faster than ground soil, so be vigilant about keeping the soil moist. Place containers outdoors in locations with partial shade during the growing season, and bring them indoors as houseplants in locales that freeze. Indoor plants need a location that is at least 70°F and gets indirect sunlight.
Even inside, plants have a dormant period. Ease up on the watering when foliage growth slows down, and pick it up again when fresh growth appears, keeping the soil evenly moist. The greatest challenge with indoor cultivation is to maintain adequate moisture. To increase the moisture in indoor air, mist plants daily. Fill a shallow pan with pebbles, and add enough water to barely cover them. Place the pot on top, making sure there is airspace between the wet pebbles and the pot drainage holes, to prevent “wet feet.” Read more about growing caladiums indoors in our guide. (coming soon!)
To Plant Divisions or Potted Nursery Plants:
To plant, place corm divisions with the eye sides up in two inches of soil or potting medium as we did above. Some folks like to wait a bit before planting divisions, allowing the scars of being cut away from the parent plant to heal in a warm, dry location before replanting. Mix some fertilizer into the soil as described above. For nursery pots, unpot and place into the ground or container of your choice so that the depth is the same as it was in the nursery pot. You may plant potted caladiums with foliage at any time during the growing season. Only corms need to be started in the spring. Remember to keep your plants moist, but not soggy. Consider installing a drip irrigation system to make the task easier. Plants should never dry out completely, nor should they have “wet feet.”
Options at Season’s End
If you don’t live in a frost-free zone, you will need to lift your corms from the soil at season’s end, like you would do with dahlias and canna lilies, to store them until the appropriate time for replanting next year. Some folks in warm regions do this as well, as a wet winter can cause them to rot. Here’s how to lift and store corms: To lift corms at season’s end, wait until the leaves wither in the fall. Carefully dig them up before the first frost, and lay them on newspaper until they are dry enough to gently brush the clinging soil off. Allow the corms to dry out for a week or so in a warm, dry place, out of direct sunlight. Place them on a bed of vermiculite or sand in a container with a ventilated lid. Store it in a dark, dry location with temperatures that don’t go below 55 to 60°F. You may also pot them up and bring them indoors to store over the winter. If you are growing in containers already, bring them indoors when nighttime temperatures are predicted to drop below 60°F, or they risk wilting and rotting. See this guide for more details on lifting corms.
Growing Tips
As you prepare to cultivate this ornamental foliage plant, keep the following in mind:
Soak corms to jump-start germination. De-eye corms to reduce apical dominance. Plant when the soil is at least 70°F to avoid rotting. Maintain even moisture throughout the growing season.
Pruning and Maintenance
Caladiums are not “set and forget” plants. Tropical beauties, these divas need attention to keep them in ideal condition.
While they seldom bloom, bud and flower production direct vigor away from the foliage. For this reason, most growers snip off stems that produce buds. If you have one that blooms, it’s fun to see, especially if you’re gardening with children. Use a clean pair of pruners to make a clean cut across the stem as near to its source as you can safely get without risking damage to leaf stems. Another task that benefits plants is to keep the garden weeded. As mentioned, mulch aids in this task, inhibiting weed growth and competition for water. In addition, remove any dead or damaged leaves throughout the growing season with a snip at the base of the leaf stem. If you are growing plants as perennials, as new growth appears each spring, fertilize and refresh the mulch. As described, for those growing plants as annuals, and those in warm regions where the winters are wet, you’ll want to lift the corms from the ground to store or pot up and take indoors at season’s end. We discussed dividing plants to make new ones, so you may be wondering if you should divide them when growing them as perennials. Although some folks do, it’s not necessarily going to extend their lives, as the corms lose vigor with age. In addition, foliage that grows best in partially shaded locations may suffer from sun scald if exposed to hot summer sun. This is particularly true for white varieties. Avoid it with shady placements. Strong wind and heavy rain may damage large, thin leaves, so protect plants from severe weather if possible.
Cultivars to Select
When shopping for plants, you are likely to find them listed under the umbrella classification C. x hortulanum, with or without a specific cultivar name.
With well-draining soil and a weed-free garden, pests are generally not a problem. However, if things get too wet and weedy, pest may move in, including: The following are cultivars you’re sure to like:
Aaron
C. x hortulanem ‘Aaron’ is a fancy-leaf cultivar that has creamy white leaves and wide green margins. It grows best in part shade locations. Too much sun may cause scorching.
‘Aaron’ Mature heights are between 12 and 18 inches. Find corms now from Eden Brothers in bags of 5, 10, and 25.
Autumn Beauty
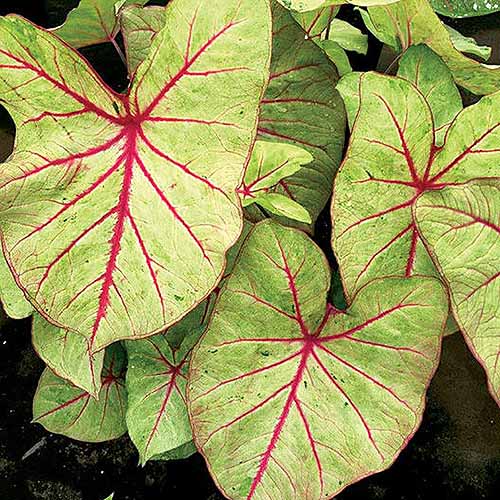
C. x hortulanem ‘Autumn Beauty’ is a fancy-leaf variety with light green leaves, finely veined and edged in contrasting red.
‘Autumn Beauty’ Heights range from 18 to 24 inches. Find corms now at Eden Brothers in bags of 5, 10, and 25.
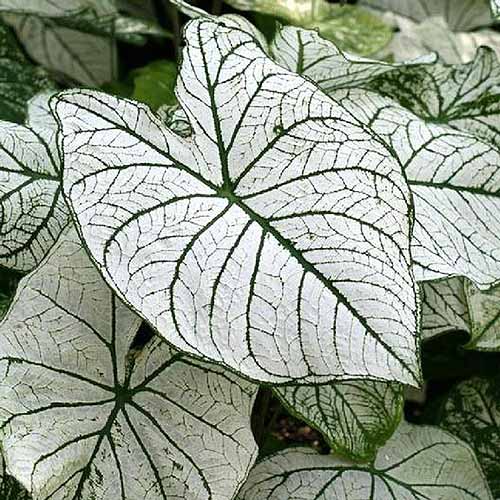
Florida Moonlight
C. x hortulanem ‘Florida Moonlight’ is a fancy-leaf type that is snowy white, with fine green veins and margins. It thrives in locations that are partially shaded, and may scorch with too much sun.
‘Florida Midnight’ Plants top out at 18 to 24 inches. Find bulbs now from Eden Brothers in bags of 5, 10, and 25.
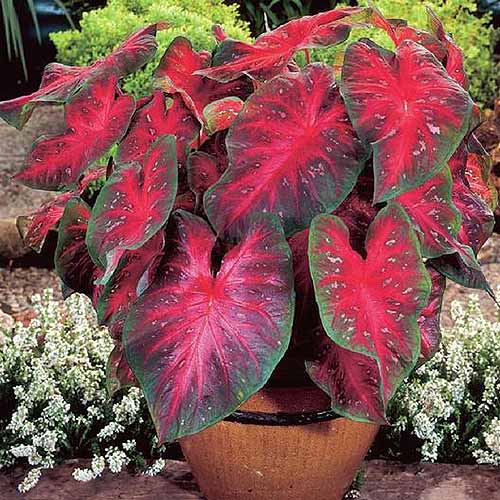
Red Flash
C. x hortulanem ‘Red Flash’ is a fancy-leaf cultivar with bright red leaves that are flecked with white and pink. The margins are green. It does best in part shade.
‘Red Flash’ Heights are 12 to 18 inches. Find bulbs now from Eden Brothers in bags of 5, 10, and 25.
White Christmas
C. x hortulanem ‘White Christmas’ is a fancy type with silvery-white leaves and green veining. It requires part shade, and as with many white types, may scorch with too much sun.
‘White Christmas’ Plants top out at 12 to 18 inches. Find bulbs now from Eden Brothers in packages of 5, 10, and 25.
‘White Christmas’ Alternatively, grab yourself a plant in an eight-inch decorative metal pot available from Terrain.
White Queen
C. x hortulanem ‘White Queen’ is a fancy leaf variety with creamy white leaves and bright red veins. It needs a partially shaded location to avoid scorching.
‘White Queen’ Mature heights are 12 to 18 inches. Find bulbs now from Eden Brothers in bags of 5, 10, and 25.
Managing Pests and Disease
Caladiums are not prone to pests or disease.
Aphids Caterpillars Grasshoppers Mealybugs Mites Slugs and snails
Handpicking the pests and spraying plants with insecticidal soap should do the trick. Soil-borne pests like the root-knot nematode (Meloidogyne spp.) can cause stunted growth and leaf dieback. They can also damage the corms, leaving them susceptible to disease. Additionally, critters such as chipmunks, deer, rabbits, squirrels, and voles may nibble plants. If they are a problem in your yard, you may want to grow in containers in sheltered areas near the house rather than planting out in the ornamental beds. As for diseases, they are more likely to occur during production, prior to the consumer’s purchase of corms or plants. These can include:
Bacterial diseases, like bacterial blight, caused by Xanthomonas axonopodis. Fungal, such as corm rot, via the pathogen Fusarium oxysporum. Soil-borne, as is the case with the oomycete (water mold) that causes root rot, Pythium spp. Viral, like Dasheen mosaic virus, which is transmitted via aphids.
Once planted out in the garden, best practices for planting, watering, weeding, and keeping corms warm should ensure disease-free cultivation. The most common issue for the home gardener is fungal disease from overwatering. Prevent it with good drainage and address any issues with a fungicide.
Best Uses
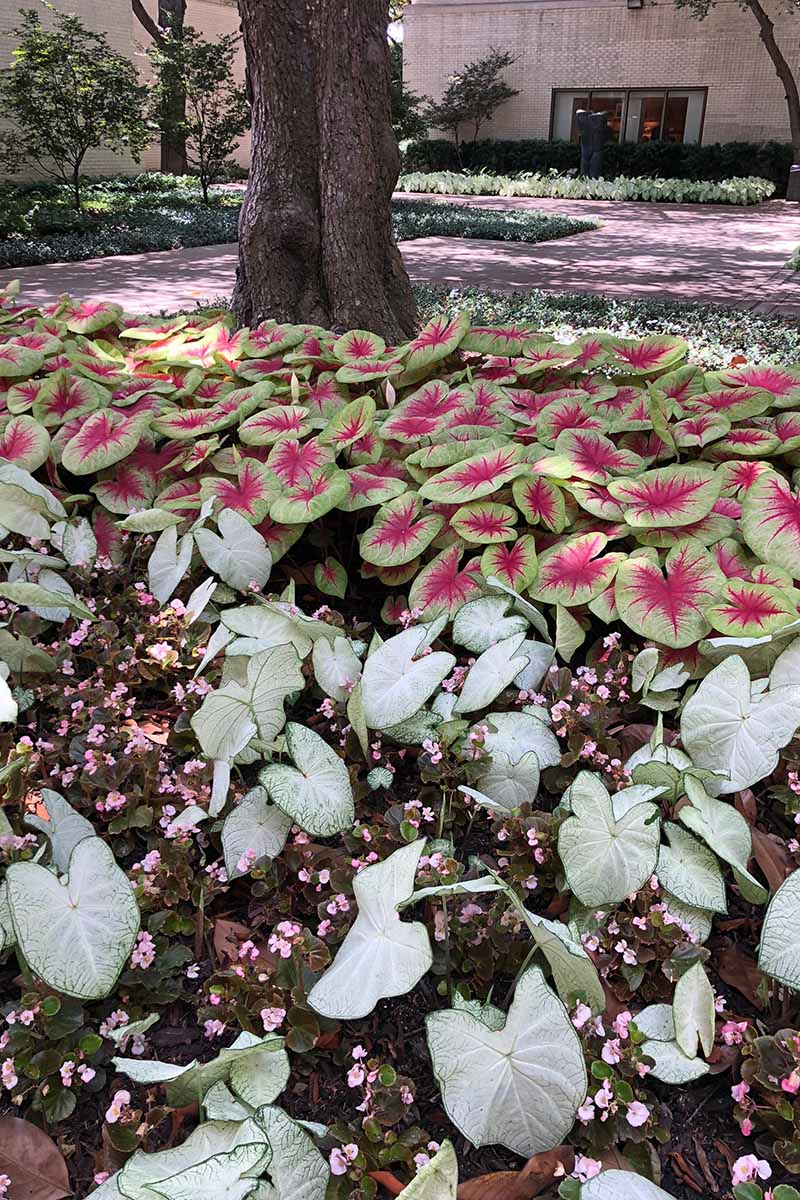
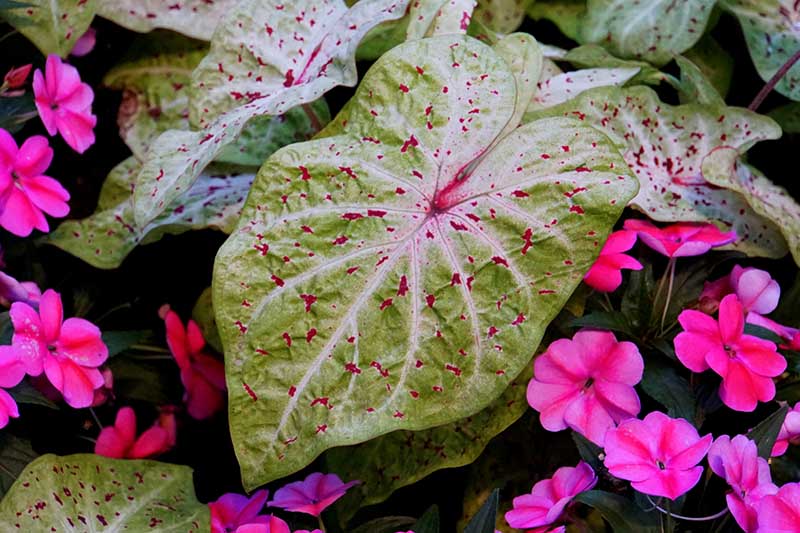
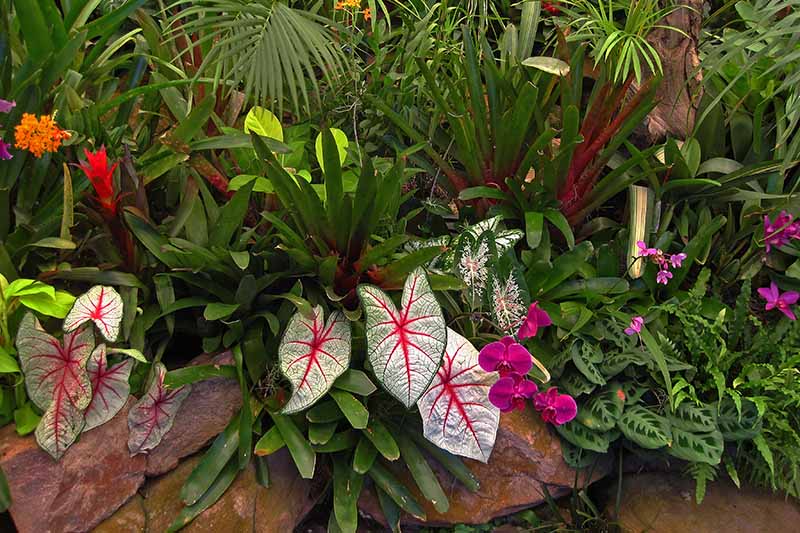
To show off the foliage of this exceptional plant to best advantage, mass plant one type, mix and match, or pair plants with companions such as astilbe, Asiatic lilies, begonias, bromeliads, calla lilies, ferns, fuchsias, gladioli, hostas, and impatiens, which share similar growing requirements.
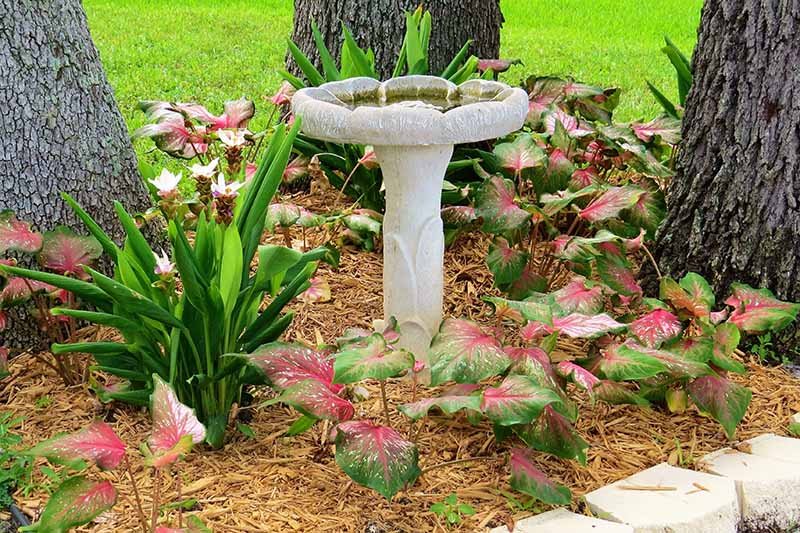
Brighten shady areas that get morning sun, like beds, borders, and window boxes. Make use of the foliage as an understory ground cover or specimen planting. Use it as edging along a partially shaded walkway, and to add a touch of color to green shade gardens.
Quick Reference Growing Guide
Tropical Dreams
Caladiums make me think of the proverbial kid in the candy store. Just when you think you’ve found your favorite, you find another you like even more. Living in the Northeast, I ran into my first caladium in a “dish garden,” as we call them in the floral trade. I believe it was a ‘Candidum Junior,’ like I showed you at the beginning of this article. And while I have not grown them outdoors, I can attest to their vigor as houseplants, and their striking color combinations.
It’s time to brighten up the dim places in the garden with lush and vibrant foliage. Find room beneath that high-branching tree, or in the nook that gets the morning sun, and let your imagination run wild. Why not create an oasis with masses of colorful foliage and assorted blooms, a trickling water feature, and a restful bench? Or a cluster of potted white varieties that bask in the glow of your lighted pool as you enjoy an evening swim?
And how about making room on your desk in the home office, where you spend your days dreaming of vacations to come? Imagine the possibilities, and set the tropical mood of your dreams with the colorful foliage of caladiums. If you want to learn more about foliage for your garden, check out these guides next:
19 Favorite Hosta Varieties 23 of the Best Defensive Plants for Your Landscape
© Ask the Experts, LLC. ALL RIGHTS RESERVED. See our TOS for more details. Product photos via Eden Brothers. Uncredited photos: Shutterstock.