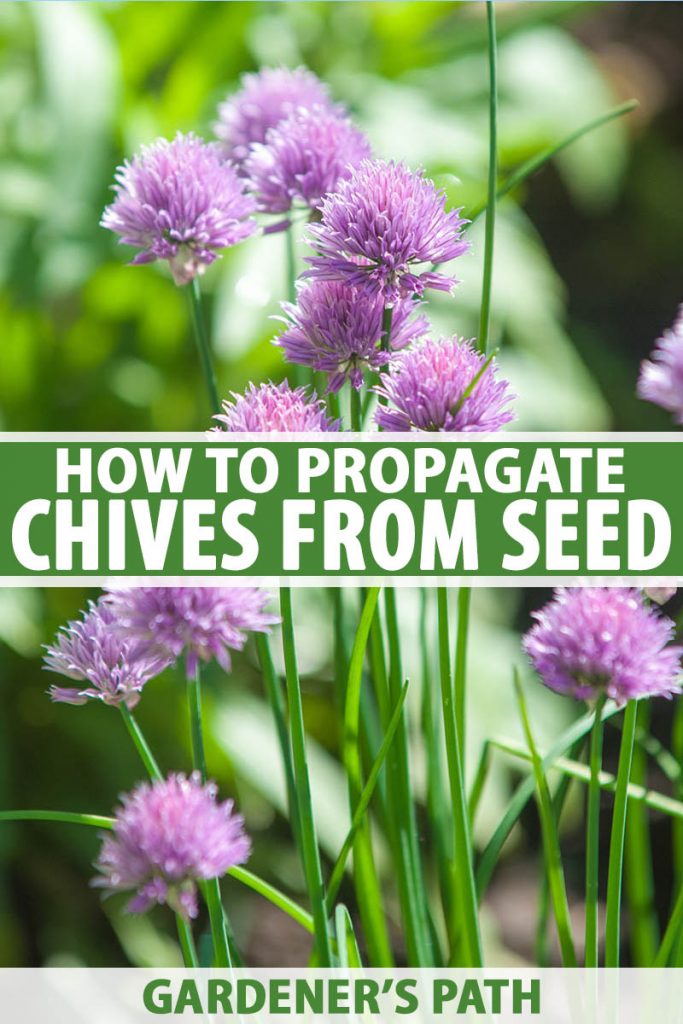
Plus, once you have a plant going, it will reproduce as long as you let it. That’s because chives send up pretty flowers that turn into seed heads. You can easily harvest these seeds and start a whole new crop. If you’re new to gardening, I think it’s one of the best plants to try for your first attempt at seed saving. Or, if you want to purchase seeds, they’re not too difficult to start. We link to vendors to help you find relevant products. If you buy from one of our links, we may earn a commission. Ready? Let’s get planting.
A Bit About Chives
Chives are part of the Allium genus, which includes onions, garlic, shallots, leeks, and scallions.
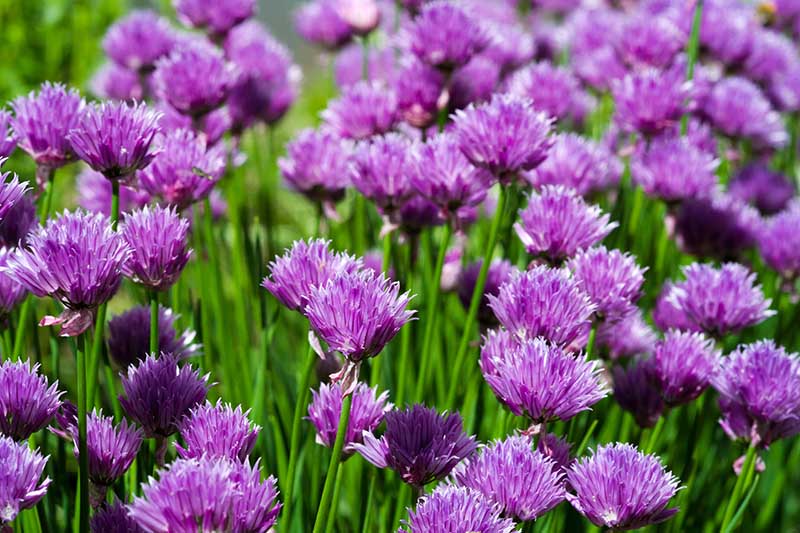
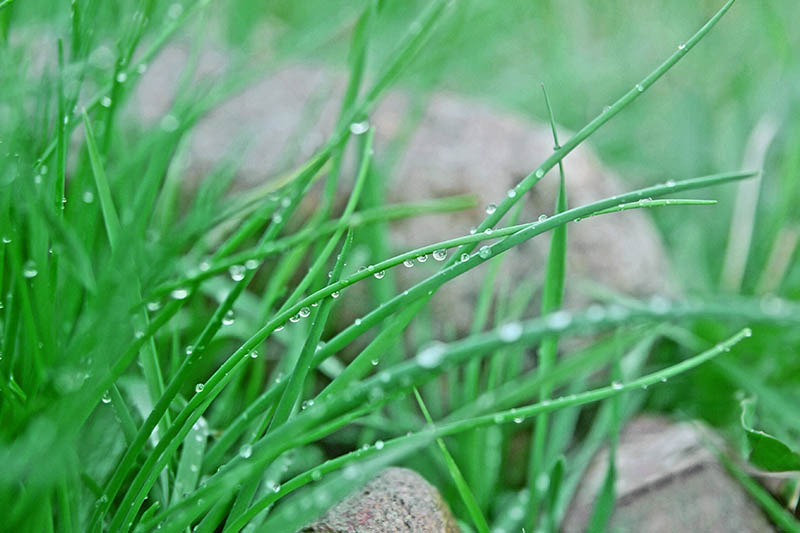
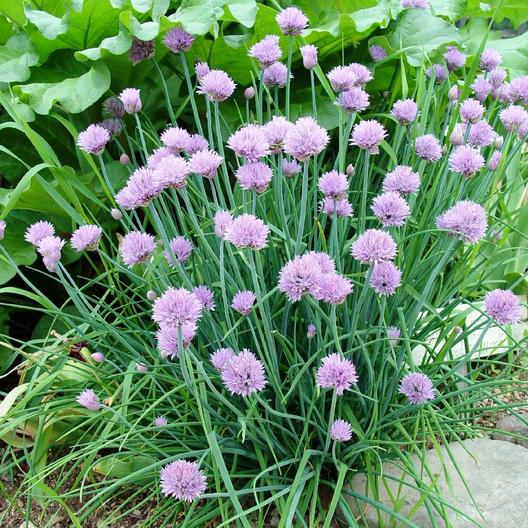
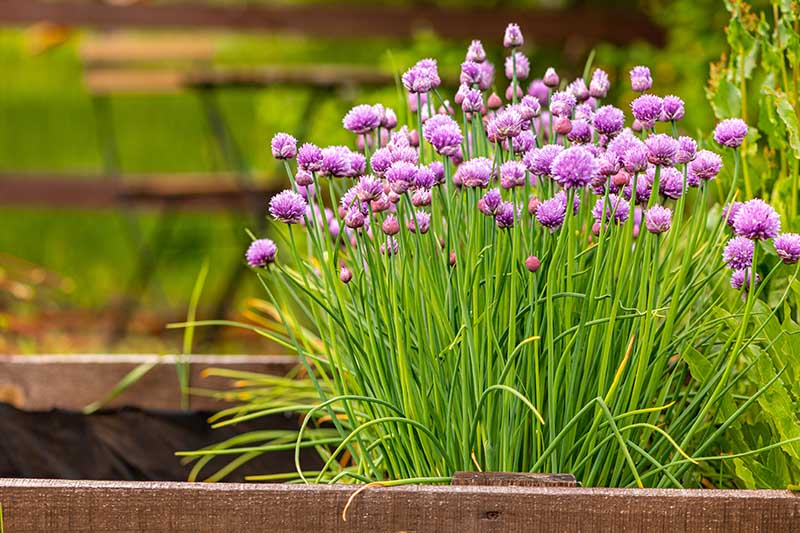
This plant has a clumping growth habit and forms long, slender leaves that emerge from an underground bulb. When people talk about chives, they’re usually referring to onion chives (Allium schoenoprasum), but garlic chives, sometimes called Chinese chives (A. tuberosum), are a common relative that looks and grows in a similar way to the onion type. The difference between the two is that, as their common names suggest, one has a mild onion flavor, while the other has more of a garlicky taste. A. tuberosum also has flat, slightly wider leaves compared to A. schoenoprasum, which has hollow, tubular leaves. Garlic chive flowers are white, whereas blooms of the onion variety are pink or lavender. There are a number of different cultivars of A. schoenoprasum. ‘Forescate’ grows 12-18 inches tall, with a spread of 18-24 inches, and produces rose-pink flowers. ‘Schmittlauch’ grows in dense clusters to about 12 inches tall, also with delicate pink flowers.
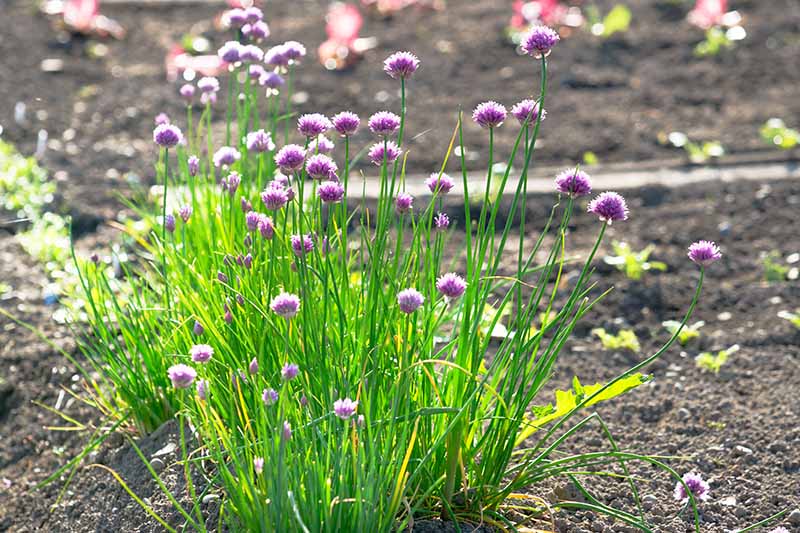
The plants form blossoms with a round shape and petals radiate from the center. Onion chives bloom in late spring or early summer, whereas garlic chives blossom in late summer in most areas. If the flowers are pollinated, they’ll eventually dry out and produce seeds. If you don’t snip the flowers, the plant will eventually release the seeds and new chive plants will grow wherever they land if they are allowed to germinate. Our goal is to nab these seeds and use them to make new plants when and where we want them, rather than leaving the plant to its own devices. Of course, if you have a patch in your garden that you want to dedicate to these herbs, you can let the seeds fall to the ground and your chive patch will continue to expand. Both species offer beautiful ornamental interest in addition to their usefulness as a flavorful additive to your favorite dishes, and they grow in a wide range of climates encompassing USDA Hardiness Zones 3-9. You can also grow your chives in containers, to limit their spread. Instead of snipping away any flower heads, allow some of them to form fully.
Where to Find Seeds
You can always buy chive seeds from your local nursery or online.
Common Chives You can find common chives in a variety of packet sizes available at Eden Brothers.
Seed Saving
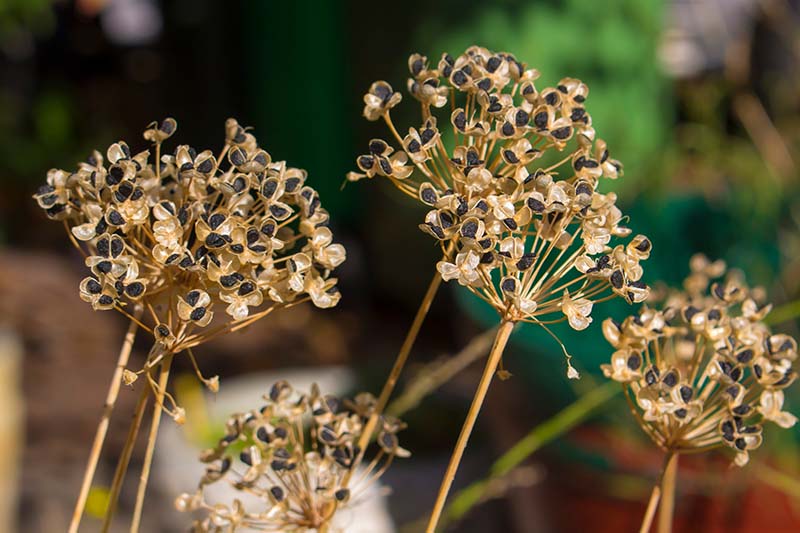
If you have access to a mature plant that has been allowed to flower, the seeds are incredibly easy to harvest. Each of the delicate, star-shaped flowers contain both male and female reproductive organs. After pollination occurs – by bees or other beneficial insects – the seeds will develop and the blossoms will start to dry out.
Once the heads dry up and turn tan, cut them off of the plant using a pair of scissors or clippers. Don’t let the heads get too dry or the seeds could blow away or fall onto the soil before you can get to them. Once you see them turn tan, it’s time to act. Hold the flower head over a plate or tray and gently roll it in your fingers to separate the seeds from the chaff. You could also place the seed heads in a paper bag, seal it shut, and gently shake it. Once you’ve separated the seeds from the dried flowers, gently blow away the chaff, and voila! Store them in a sealed container somewhere away from heat and moisture. They can stay viable for up to two years. There’s one important thing to keep in mind if you want to harvest and save your own chive seeds: These plants are pollinated by insects. What does that mean for the gardener? If you have different varieties growing near each other, cross-pollination may occur. Keep different chive varieties apart – ideally one mile apart, according to expert recommendations – if you want to harvest the seeds, or snip away the flowers from one variety, leaving the flowers on the other. Don’t worry about planting garlic and onion chives near each other – cross-pollination doesn’t happen between different Allium species.
How to Propagate
Chives grow equally well indoors or out in most growing zones. When propagating, you can start plants inside before moving them out, or simply keep them indoors. Or, you can sow them directly outside in the ground or in containers.
Starting Outdoors
In the early spring, after the chance of frost has passed and the ground is about 65°F, prepare an area of well-draining soil by working in some well-rotted compost. Chives like loamy, fertile earth and a spot in full sunshine.
You don’t want to over-fertilize the soil because this will result in milder-tasting leaves. Don’t add any fertilizer to the soil unless you know it has a deficiency in nitrogen, potassium, or phosphorus. Aim for a pH of 6.0-7.0. If you haven’t tested your soil this year, now is a good time to get it done. A soil test will tell you if you need to add fertilizer or adjust the pH of your earth. Sow two inches apart or broadcast them on the planting area and cover lightly with 1/4 inch of soil. Keep the earth moist but not waterlogged. In 10-14 days, the seedlings will begin to emerge. When the shoots are one or two inches tall, thin them out so there’s only one seedling spaced every four inches.
Starting Indoors
Indoors, you can sow whenever you want. As long as they have access to at least six hours of sunlight or supplemental lighting per day, they can grow happily in your home.
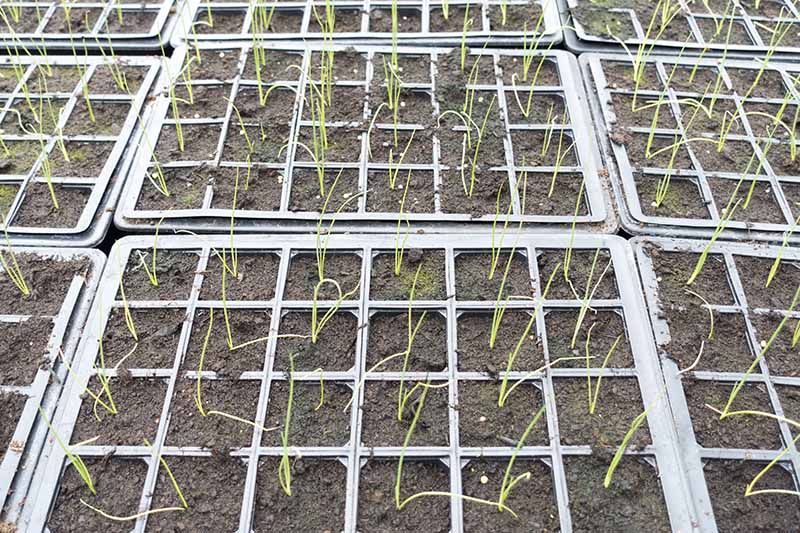
Sprinkle 10-15 seeds in a pot with drainage holes at the bottom that is at least six inches wide and equally as deep. Use an all-purpose potting mix and cover them with 1/4 inch of soil. Water the seeds using a spray bottle and keep the soil consistently moist but not wet. If you plan to move them outside, be sure to start the seeds indoors six weeks before the average last frost date in your area. Rather than starting in a larger pot, you can sow six or so seeds per cell in a 72-cell plug tray. When the chives grow one to two inches tall, thin them so the six strongest, tallest seedlings remain in one container. If you’re growing in plug trays, thin so two or three strong seedlings remain per cell.
You can continue to grow them indoors or transplant them outside when they are four to six inches tall, after all danger of frost has passed. Harden seedlings off for a week before moving them to their permanent home. You can harden seedlings off by putting them out in indirect sunshine for one hour on the first day. Then, bring them back inside. The next day, put them in the sun for two hours. On the third day, add another hour. Continue doing this each day until the plant can stay outside for seven full hours. At that point, you can leave them outside full time.
Troubleshooting Tips
Yes, I told you in my introduction to this guide that growing chives from seed is incredibly easy. And it is. But that doesn’t mean you won’t run into trouble now and then.
Here are a few problems you might face and my tips for dealing with them:
1. Seeds Fail to Germinate
If seeds fail to germinate, the usual culprit is either not enough water, the wrong temperature, or a disease. Chive seeds need soil temperatures to be somewhere between 60 and 70°F. Much hotter or colder, and they will either stay dormant or they’ll die off. If you live in a cold area, you can use a heat mat to keep your seeds happy indoors. Outdoors, make sure you wait until it’s the right temperature outside to start planting. If it’s too cold, all is not lost, but you might need to wait a few more weeks for shoots to start emerging. The soil should be kept moist – but not wet – at all times. You can cover trays with a piece of plastic with holes poked in it until seeds germinate to retain moisture if you think you might have trouble keeping the soil moist. Just keep in mind that the soil should feel like a well wrung out sponge.
2. Damping Off
A disease known as damping off is another potential problem. Damping off is caused by two different genera of fungi: Fusarium spp. and Rhizoctonia spp. If your seeds are infected with this disease, they’ll become mushy and will rot. Once seedlings emerge, they may begin to die off. You’ll notice your seedlings collapse or their growth will be severely stunted. Be sure to wipe out your containers and tools before planting if you’ve used them before. A mix of one part bleach to 10 parts water will get the job done. Use only fresh potting soil. Don’t overwater your seedlings, and ensure that your soil is well-draining.
It’s Easy Being Seedy
Whether you have plans for your chive seeds right away or not, saving the seeds from your plants is always a good idea. You never know when a pest or a change in the weather could wipe out your crop. Having some seeds set aside makes it that much easier to start over, particularly if you’ve saved multiple generations from your own garden that have already adapted to thrive in your local conditions.
One year, my irrigation system failed and I lost dozens of plants I’d nurtured over the years – including some of the happiest chive plants I’d ever seen. Thank goodness I’d saved some seeds! I was able to start a new crop in no time. Plus, harvesting your own seed for future planting can save you money. Instead of buying new packets every year, you can work with what your plants are already offering you. Propagating chives is as simple as it gets, and it’s so rewarding to see the new seedlings pop up after all of your (not-so-) hard work. Are you growing chives in your garden? Let us know in the comments below! And don’t forget to check out our guide to growing chives for more information. If you’re interested in learning about more easy-to-grow herbs, check out these guides next:
How to Grow and Care for Spearmint Plants How to Grow Parsley in Your Home Herb Garden How to Grow Oregano
© Ask the Experts, LLC. ALL RIGHTS RESERVED. See our TOS for more details. Product photo Eden Brothers. Uncredited photos: Shutterstock. With additional writing and editing by Allison Sidhu and Clare Groom.