The past month or so has been all about staying on top of weeds, keeping pests away, watering your garden during dry periods, and harvesting some of your well-earned veggie bounty. But as any seasoned vegetable gardener knows, summer crops that move out of the soil and into the kitchen call for some new additions in your growing space. Before you know it, you’re weeding, prepping, and amending fresh beds to make room for yet another round of crops suitable for the autumn. We link to vendors to help you find relevant products. If you buy from one of our links, we may earn a commission. There’s one vibrant veggie that always gets me stoked to plant in the cool seasons of spring or early fall: the beet!
Cultivation and History
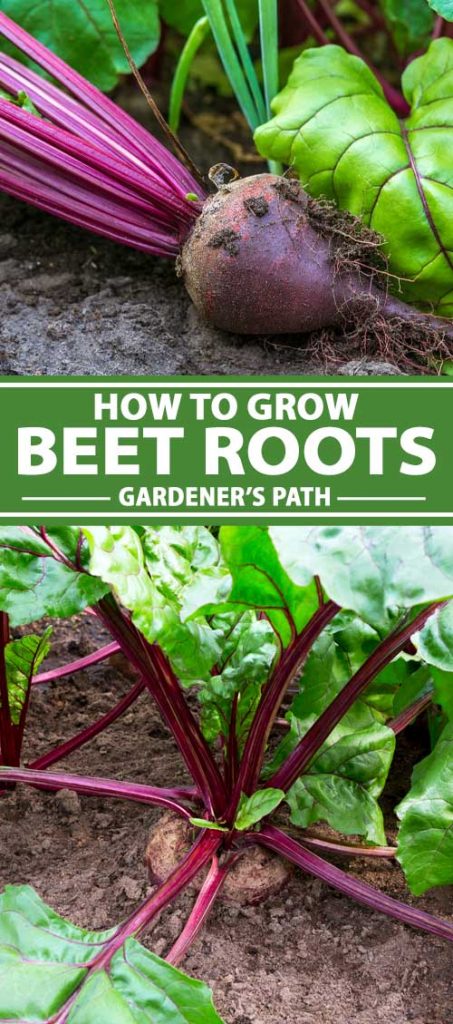
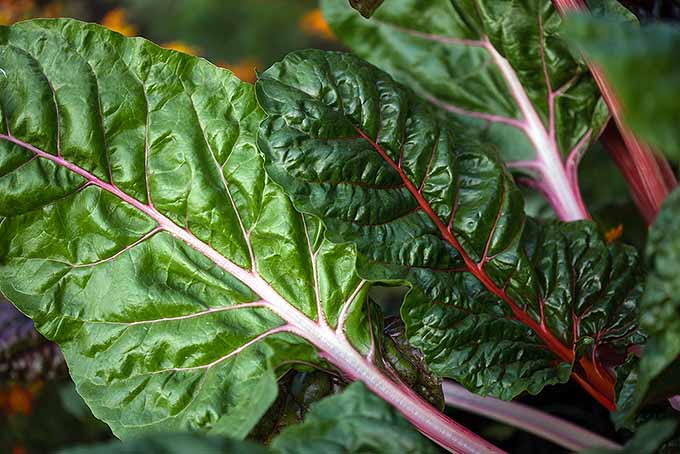
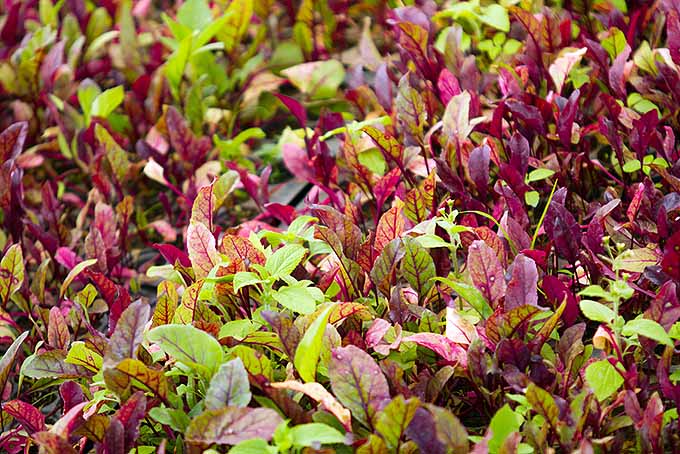
Beets are so versatile. A root veggie notorious for that earthy taste you either love or hate, they also provide leafy spinach-like greens. They are full of healthy nutrients like vitamin C, vitamin B9 (folate), iron, fiber, potassium, and manganese. Did you know that beets are actually close cousins to spinach, quinoa, and amaranth (as well as the more obscure orach – have you tried it before)? All of these are traditionally called goosefoot vegetables, part of the Chenopodiaceae family (or “goosefoot family” in Latin) in the older Cronquist taxonomic system. In the modern APG III taxonomical system they are all classed within the amaranth family (Amaranthaceae) . Here’s a surprise fun fact for you: chard – another goosefoot and lookalike to beet greens, though more colorful – is in fact a variety of beet. Chard is grown for its above ground edible greens rather than its root. Chard roots do become bulbous and they are edible, but they’re less sweet and markedly tougher. Both beets and chard belong to the same species, Beta vulgaris, and they do look strikingly similar. Beets go by the botanical name B. vulgaris subsp. vulgaris, while chard is another variety of beet selected and bred for its leaves rather than its roots: B. vulgaris subsp. vulgaris var. cicla (flavescens, in the case of Swiss chard). Try saying that five times fast! Back before beets and chard were officially recognized as different varieties, they had one shared ancestor: the sea beet, scientific name B. vulgaris maritima, and a denizen of the Mediterranean coast. Beets have a rich and colorful history. Historical records show that the ancient Egyptians, Greeks, and even Babylonians cultivated this taper-like wild root into the bulbous, delicious produce varieties that we have today.
Identifying the Right Location
Get out your gardening journal and start planning where to plant your beets!
1. Where Should They Go?
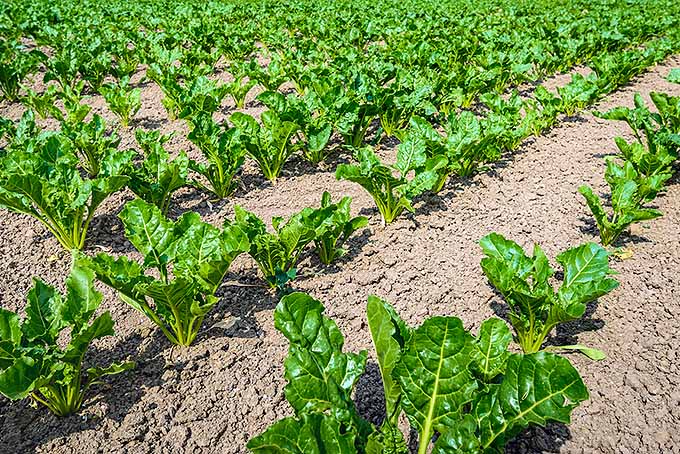
Choose an open, sunny position. Some late afternoon or early morning shade is okay.
2. What Soil Do They Need?
Soil should be well-draining, fertile, loamy, and amended with plenty of compost and nitrogen for a successful crop. Don’t skimp on the phosphorus or potassium either – these plant nutrients are vital for healthy root growth. In fact, beets are known to love plenty of potassium!
3. What About pH?
Aim for a neutral pH level of between 6.5 and 7.5, somewhere snugly in the middle between basic and acidic.
4. And Temperature?
Beets are cool-weather crops, basking and flourishing especially in mild temperatures of around 60°F – typical of spring or fall. Since they can tolerate light frosts (28-32°F), they may overwinter in areas that don’t suffer from harsh winters, or they can thrive in a cold frame. In zones with harsh winters, avoid planting them outdoors too early in the spring or too late in the fall.
5. Any Important Tips?
These veggies, along with carrots, spinach, and parsnips, do best when direct seeded (i.e. planted straight into a garden space). In some cases, transplanting has been known to work. It works best if containers are deep and if seedlings are small – we’ll get to some transplanting tips later in this article.
Propagation
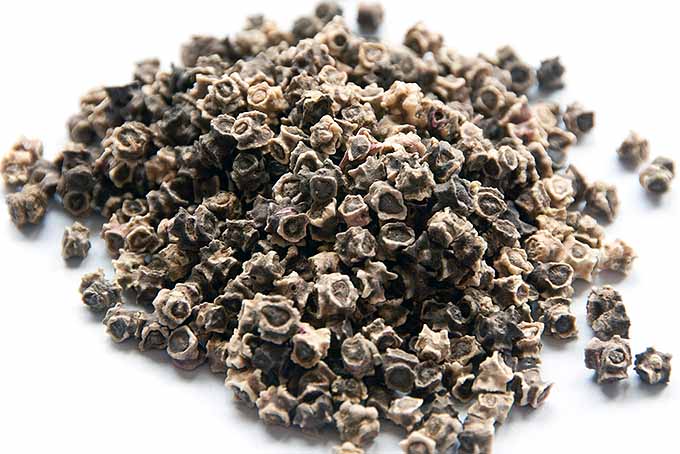
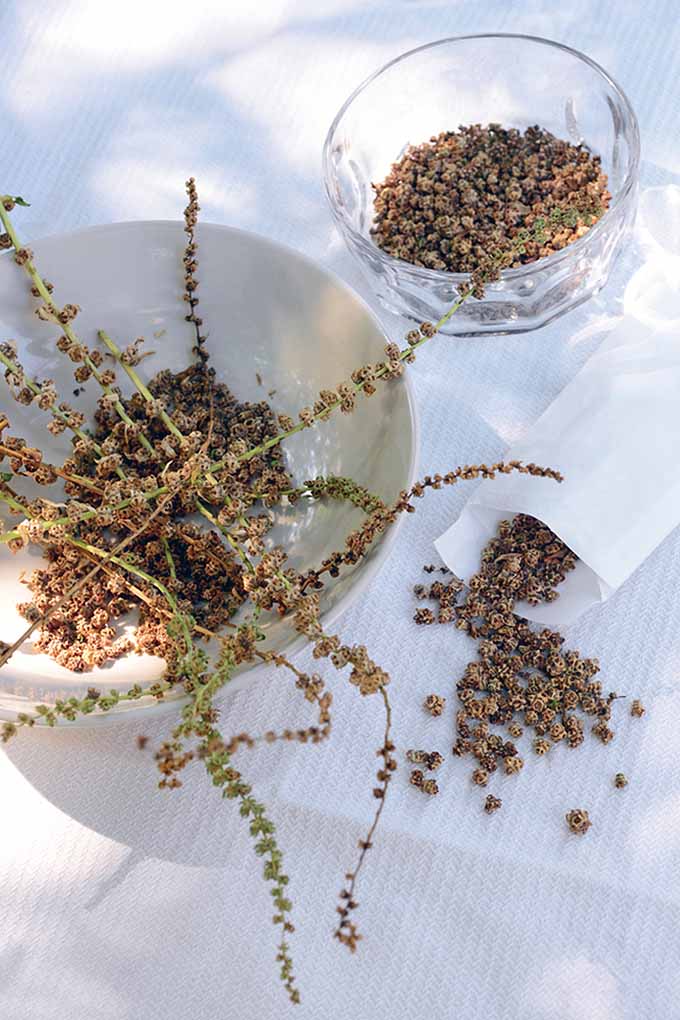
Ready to get started? On average, your harvest is less than two months away after seeding your little guys. The first thing to take stock of are the beet’s fascinating (and odd) looking seeds. Somewhat big, chunky, and almost cereal-like (they remind me of Grape Nuts – then I get hungry!), each seed is actually a fruit cluster of encased multiple seeds, usually about two or three. So even if you feel you are planting just a few beet seeds in total, you’re really sowing a twice or three times as many. Pretty awesome, huh? The tough seed casing, while protective, can hinder germination in some ways. And this is a common complaint among gardeners when planting these roots. I’ve had experiences of this myself: laying down a ton of beet seed and expecting a huge turnout, only to be disappointed when just a couple little sprouts push their way up. Luckily, gardeners have a couple tricks to help you get the most plentiful crop, and an optimal germination rate.
Soaking
This is my preferred method. Simply run your seeds under warm tap water in a colander or strainer until sufficiently wet, about half an hour to an hour before planting. As an alternative, you can soak them in a jar or bowl of warm water for half an hour to an hour. I have actually soaked beet seeds in a jar of room temperature water overnight for full 12 hours, and then seeded them in the morning. Compared to times when I haven’t soaked them at all, germination is admittedly much, much better – so give it try!
Scarification
Scarification is a botanical term for assisting with the opening of a casing or shell around a seed, so it may germinate more easily. Technically, soaking your seeds is a form of scarification, too. However, there are other ways to scarify seeds. The most common is by actually rubbing or grating the surface. Scratching them against a piece of sandpaper works to help them open up before planting. I’m no champion of this method (because it takes a bit more time and effort – call me lazy), but give it a try if it’s up your alley.
Sowing
After your preferred scarifying method (or after you’ve elected to skip it, if you’re feeling confident), it’s time to do the deed and get your seeds in the ground. Beets love the cool weather of spring and fall, but that doesn’t mean you should just toss them haphazardly onto the still-cold ground very early in spring (or, similarly, push your luck by planting them too late in fall). In the spring, wait for average soil temperatures above 45°F. Anything colder than that causes germination to happen very slowly, or to fail altogether. If you elect to take a chance and sow beet seeds indoors in containers for transplant, you can warm the soil with a heating pad or another method, if you like. I have done this successfully before, but this may be a method reserved for more experienced gardeners. Take note that the ideal temperature for beet seed germination is 61°F. In the fall, don’t plant seeds outdoors less than about 50 days before the first expected hard frost in your growing zone. Check your seed packet for the expected days to maturity for the cultivar you have selected. After working your soil, amending it with compost or green manure, and prepping the ideal bed for your future beets, place one or two seeds together into holes or ruts about 1/2 to 1/4 inches deep, and at least one inch away from each seed planting. If row planting, keep each row about four inches away from the other. With biointensive or square foot gardening methods, follow the suggested directions or patterns for planting beets, and just make sure to keep that one-inch distance. Water thoroughly after planting so the topsoil has a good soak, but don’t go overboard and continue until the ground is waterlogged. Germination should happen in five to 10 days, at optimal temperatures, if soil is always kept moist but drained. In colder conditions, seeds may emerge later – somewhere in the 15- to 25-day range. Thin to three inches when plants are two to three inches tall.
Transplanting
If you’re a weird, brave gardening soul like me who has some bizarre methods up her sleeve, you might want to give transplanting beet seedlings a try. I know, I know – I will probably receive a good harping from some old-timey gardeners out there (and believe me, I already have). But I have actually experienced noticeable success from this. Similarly, some of my friends who are young community growers and farmers have also had transplanting success using these methods, even with some of the beet’s close relatives like spinach and chard (all of which, along with beets, are famous for hating it when you transplant them – tending to dither, wither, and die). Every gardener knows that starting seeds indoors in containers for later transplant adds a little extra legwork, but it can be well worth the effort with certain other vegetables. So, what’s the situation with beets? I have done a side-by-side comparison of direct seeding and transplanting beets, and found that transplanting (correctly) leads to a higher success rate of strong seedlings. When you sow seeds straight into the ground, there is always the risk that some won’t germinate – and when that happens, you wind up with a patchy, scraggly-looking bed that doesn’t look quite as bountiful as you would have hoped. But this is not the case with transplants. Each seed tray container offers at most 6 potential seedlings, at least a few of which will make it to maturation. What’s more, you’ll choose to plant only successful seedlings, ridding yourself of any chance of having that patchy, only partially bountiful beet bed. Every single space only takes an already robust seedling, leaving no holes or partial beds that look incomplete and bare. Plus, I have observed that protecting small seedlings indoors greatly increases their ability to withstand common beet-loving pests that especially savor the chance to get at your little guys early, including rabbits, deer, and flea beetles. You can give them a little jumpstart this way with some extra growth indoors – and voila, you have a thick, lush bed of beets! Of course, this all depends on transplanting them and seeding them correctly. Here’s my method:
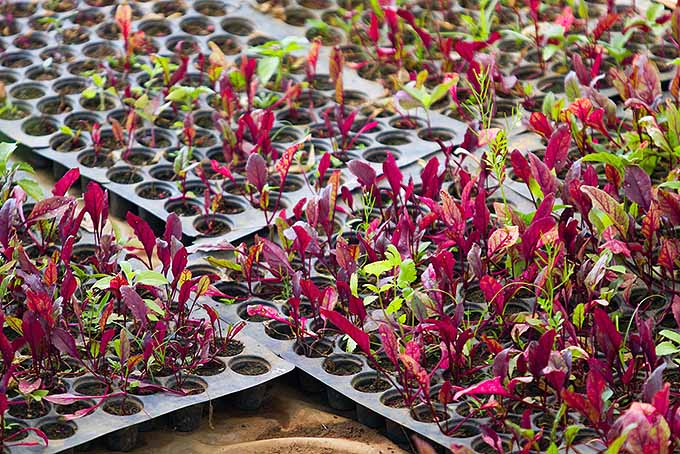
1. Plant in Seed Trays
Seed your beets in a seed tray with individual containers, each container having around three inches of soil depth. It may surprise you that beets have one of the deepest root systems of all veggies out there (yes, deeper than carrots or parsnips). Giving them that extra leg room in their youth can really help them to get ahead.
2. When Mature, Transplant Intact
Before seedlings have produced their first true leaves beyond their cotyledons (the botanical term for their first non-true leaves, which will look long and slender comparatively), get them ready for transplant. Using a very long flat tool (like a popsicle stick or something similar), push the entire beet seedling out of its container whole, by sliding the stick lengthwise into the soil at the container’s edge. Without breaking up the container-shaped soil around its roots at all, the entire seedling should just slide right out with the help of this tool. Watering before removing them from the container helps. If you’re having difficulty, slide the popsicle stick into the container around all sides to help loosen it even further.
3. Pop in Your Seedling
Without removing any soil from around their roots, and keeping the soil and root ball intact, pop the beet seedlings into three-inch holes that you have prepared for them in their outside home. Cover the roots and attached soil completely, leaving their foliage above the ground. Feel free to gather soil up close around your seedlings. Water deeply and thoroughly, and you’re done!
How to Grow
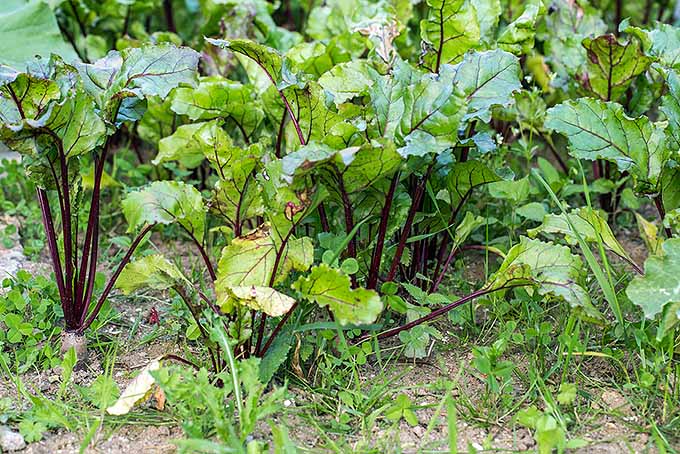
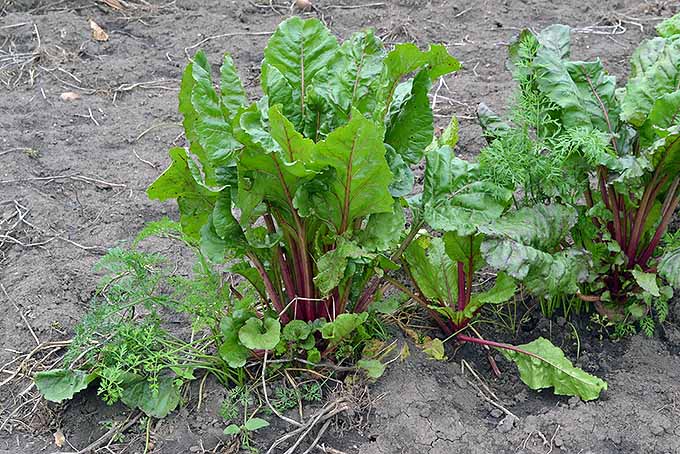
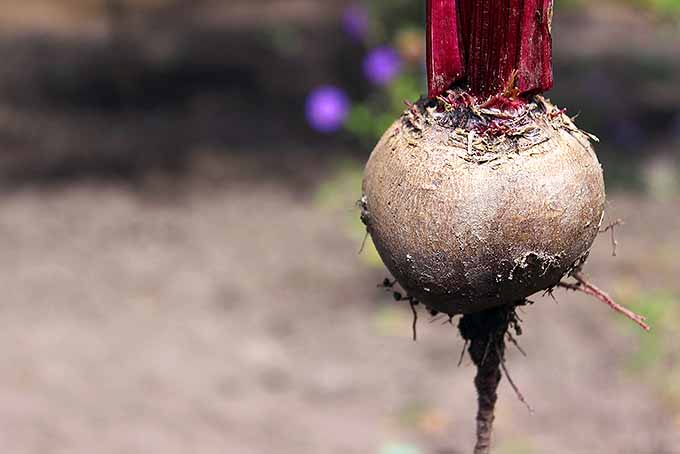
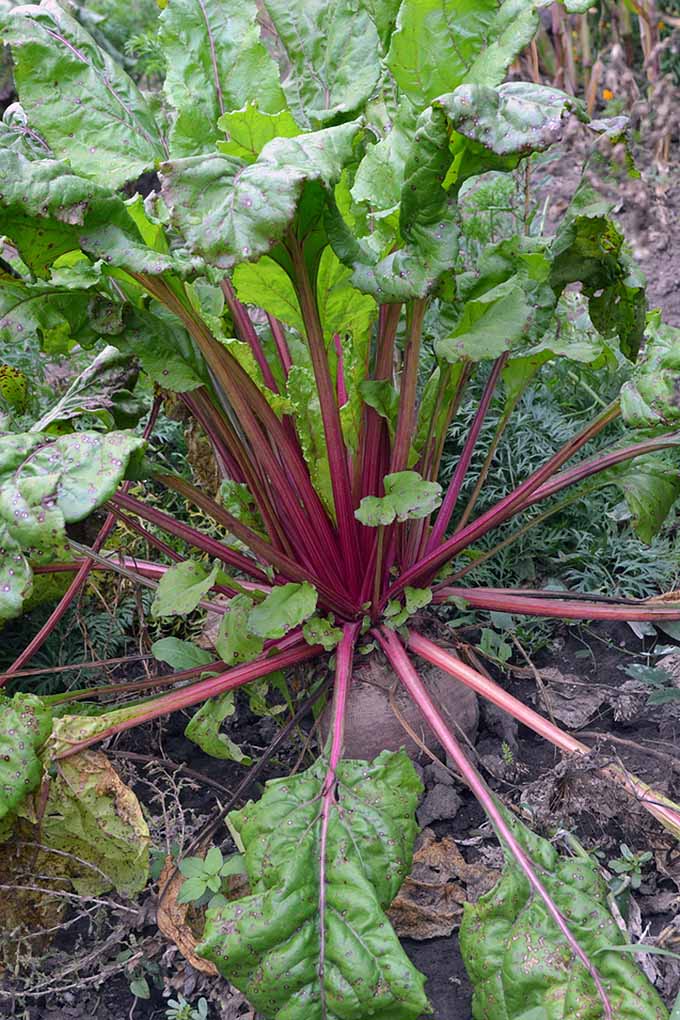
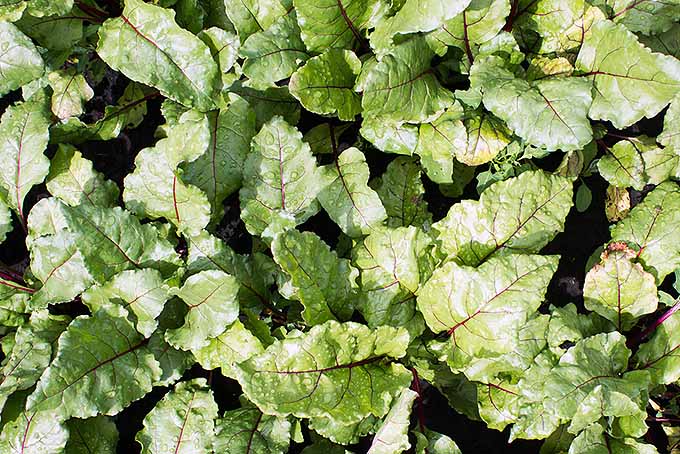
Getting beets seeded and planted is the hardest part of the process, and the remainder of their life cycle is an easy ride for most gardeners. As you watch them grow and mature, you’ll notice their true leaves coming on – small at first, then getting bigger over the weeks to come. You will begin to notice root growth at the very base of the leaf stalks, right above the dirt, about three to four weeks after seeding. Be patient – especially with golden varieties. It takes some time before you will finally see a tiny nub forming at the base of the plant. But with patience, this will eventually become a delicious beetroot!
Weed Management
Weeds are the greatest concern when beets are at their smallest. At one to four inches tall, most weeds (even if they are tiny themselves) can rapidly overtake, overshadow, and sap nutrients from your little guys, crowding them out and injuring their growth potential. At this height, use a very small hand hoe around them and as closely as possible to keep the bed weed-free. In the bigger spaces between plantings, such as between rows, you can use a larger hoe to get rid of unwelcome weeds. Avoid using larger tools for delicate work in the immediate vicinity of your precious plants to avoid accidentally damaging the roots or pulling them up. Once they are about five to six inches tall, I give them one last close hand-weeding, and weed the rest of the bed with a larger hoe. Then I leave them alone for the next few weeks. If you have planted a close-spaced crop of beets that hasn’t been thinned yet, the foliage will grow large enough to shade out and deter weeds from outcompeting them. As the beets enlarge with time, just a few weeds may grow to tower above your plants. Every couple of weeks, I just go through and pull each of these out. With a weeding cycle like this, I have found that my beets do just fine!
Lots of Water (Or Not)?
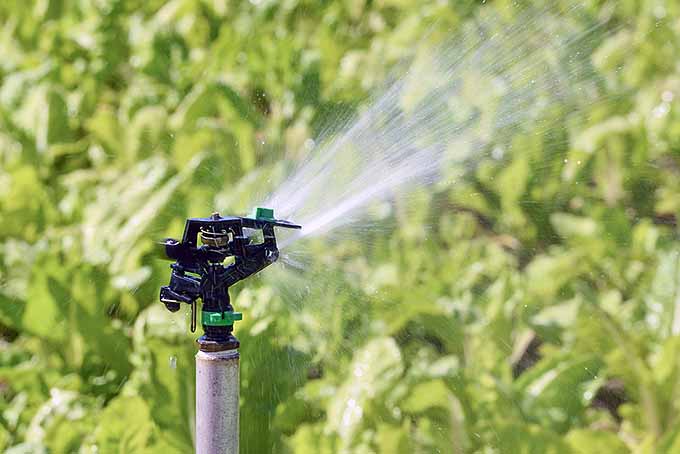
One of the nicest things about beets is that you don’t need to water them much. Some may offer a counterpoint to this, describing their confidence and experience in watering their beets everyday, and I won’t argue with that. Whatever helps the gardener sleep soundly. But many experienced gardeners will tell you that excessive watering of your beets will actually take away from full root development. An abundance of water can cause the plant to redirect energies to its leaves – which isn’t a bad thing either, since beet greens are definitely delicious. But if you want those big, hefty bulbs, go easy on the water. And regardless of whether you are aiming for more greens or roots, don’t forget that beets prefer well-drained sites. It is important to avoid soaking your soil every day, as this can backfire and lead to issues of rot and disease, both in the bulb and the greens. How do I personally water my own crop? If it rains at least an inch or two once a week, I leave them be and don’t pay them any mind. During very hot weather or in periods of drought, that’s when I do water them every day (sometimes multiple times). Regardless of whether the water comes from the sky or my spray nozzle – or if it’s wet or dry season – I always allow the soil to completely dry out before their next watering. Are your beets showing cracked roots? This is a sign of a lack of moisture, but it can’t be reversed once you notice it. The best you can do it take this as a lesson, and make sure you give your next crop even more moisture.
Managing Pests and Disease
The round, plump, and jovial beet tends to be a more robust veggie than some – but it does have some adversaries. Or maybe – like me – you want to try all of them, and grow a rainbow of these colorful gems in your garden! Regardless of your choice, each variety needs the same basic conditions to grow – though forage or sugar beets will require a little more patience, thanks to their slower maturation rates. Otherwise, the same growing approach applies to beets of any size, color, or shape. Here are a few options to get you started:
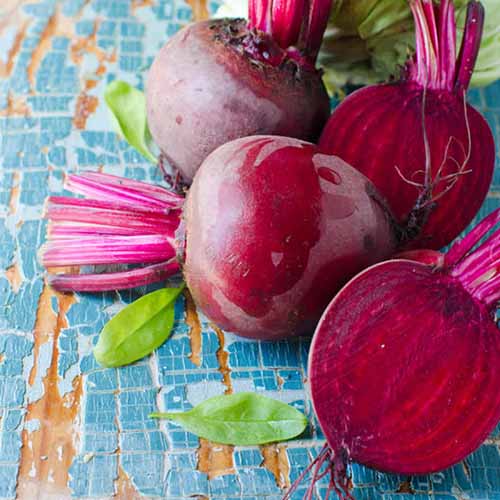
Detroit Dark Red
This is a classic heirloom variety that dates to 1892 and was originally called ‘Detroit Dark Red Turnip.’ However, that was marketing; it’s not a turnip, but a beet. A smooth skin surrounds a deep red flesh. This variety is mild and tender making it the ideal general purpose cultivar. It works well for raw eating, roasting, pickling, or for canning. ‘Detroit Dark Red’ The tops shouldn’t be ignored either. Dark green leaves with red stems and veins make this one of the prettier varieties. And they taste just as a good as they look, with a tender texture and a mild flavor. Use for a pop of color in your salads. It takes just 35 days from seed to harvest the greens and the roots are ready at about 60 days. Find seeds available at Eden Brothers.
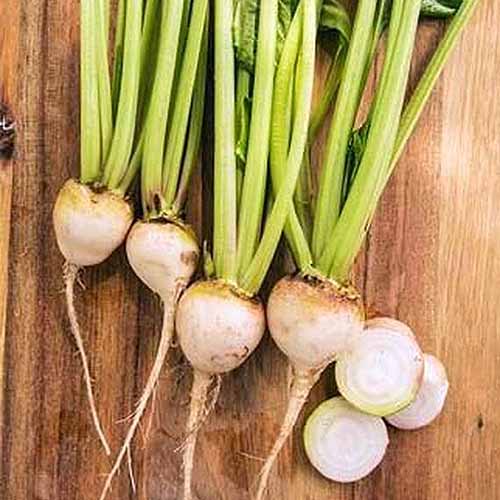
Avalanche
‘Avalanche’ is a beet that doesn’t look like a beet to the untrained eye and is a perfect way to introduce this vegetable to those children and adults who are convinced that they don’t like them. ‘Avalanche’ This open-pollinated white cultivar was an All-America Selections winner in the Edible category in 2015. The white roots are sweet, with no hint of bitterness. The mild flavor is great for adding a crunch to salads and they are equally delicious when roasted, boiled, or used in soups or stews. Two to three-inch roots mature in just 50 days. You can find seeds available at Burpee.
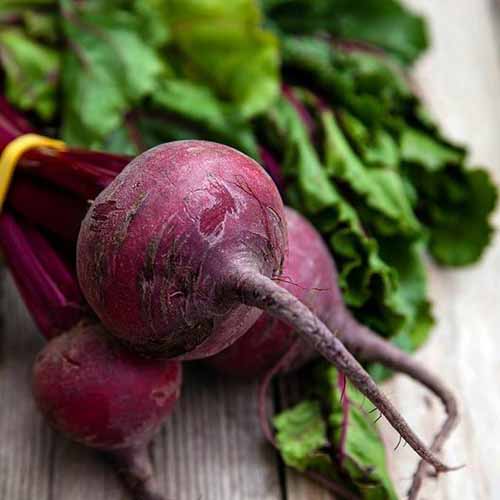
Ruby Queen
This heirloom cultivar was awarded an All-America Selection winner in 1957. ‘Ruby Queen’ ‘Ruby Queen’ is an ideal variety to grow in poor soils, and it produces globe-like two to three-inch roots. These deep-red roots are great for canning and pickling and feature a mild, sweet flavor. The greens grow to just 10 to 12 inches tall, and roots can be harvested after 55 days. Find your seeds from Eden Brothers. Be sure to check out our supplemental post: “Top 17 Beet Varieties to Plant This Season.”
Whether it’s pests or disease, you’ll want to watch out for and protect your crop against these top threats to your patch.
Pests
Everything from creepy crawlies to larger herbivores love to munch on beets. Here are some of the common ones that might threaten your crop:
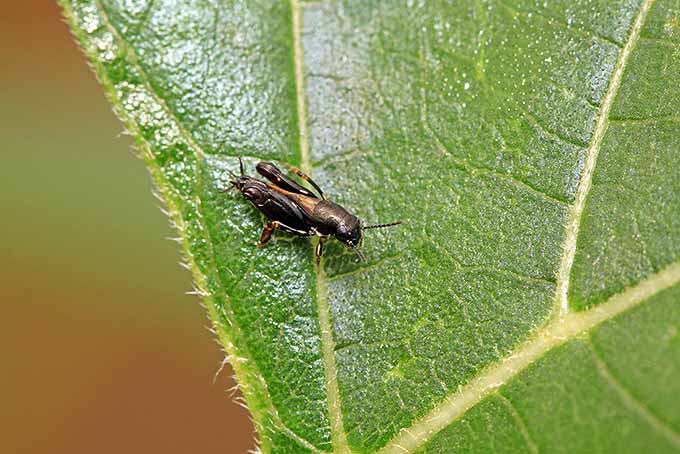
Flea Beetles
If the leaves of your plants (especially when young) are covered with numerous tiny, almost pinprick-sized holes, this could indicate flea beetle damage. This may come with some yellowing of the foliage as well. Diatomaceous earth works to kill this infestation. Just sprinkle it on top of your plants. You can learn more about how to manage flea beetles in your garden here.
Cabbage Looper
While this little guy tends to be more attracted to brassicas (like kale, cabbage, and broccoli), you may sometimes find them on your beets. An adorable green caterpillar, these chew large holes in the foliage, and can completely defoliate a plant. Floating row covers during the day can protect plants from butterflies that lay their eggs, and prevent the next generation of destructive cabbage loopers from munching away at your crop. Read more about cabbage looper control here.
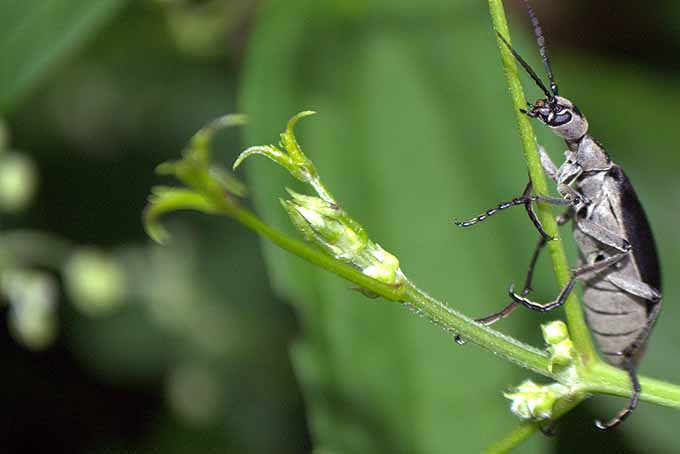
Blister Beetles
Blister beetles are one of the worst beet pests I have ever beheld. They’ll go after your chard, too. These typically grey and black nickel-sized beetles (though they can come in other colors, too) will eat very large holes in the foliage, sometimes only leaving only the veins behind. They reproduce rapidly and are very destructive. Your best bet is removing them directly by hand and killing them, but wear gloves – these insects release a chemical that can cause blisters on the skin. You can use a pyrethrum spray (a naturally sourced spray made from chrysanthemum) to help deter them from returning.
Rabbits
If there’s one thing I’ve learned, it’s that rabbits love beet greens – more than carrots, lettuce, or any other veggie. They’ll also target spinach and chard too before anything else, finding goosefoots to be especially tasty treats. Setting a sugar trap nearby will draw them away and kill them. You can do this by burying a quart jar in the soil and mixing in sugar, honey, or molasses with water, and leaving the mouth of the jar uncovered. NOLO Bait (5 lb Bag) Putting a fence around your garden is a good first resort, but if the bunny-raiding becomes a real problem, check out our full article on the best rabbit-repelling tips and tricks.
Deer
Unfortunately, deer also tend to find beets (as well as chard and spinach) irresistible, and often make a beeline for these veggies. Fencing and deer-repellent sprays will be your best bet to keep them away from your veggie patch. For more tips to keep deer out of your yard, check out our full guide on deer-proofing your garden.
Diseases
Wildlife and pests are not your only concern. Plant diseases caused by a variety of different fungi, bacteria, water molds, and viruses can attack your crop. Be sure to check out our full guide on identifying and controlling beet pests.
Here are few of the most common diseases that can affect your beets:
Damping Off
Damping off is caused by different types of soil-borne fungi that thrive in damp, humid conditions. If your seedlings die suddenly, not too long after planting – and plants appear blackened and rotting – it is very likely to be damping off. To avoid it, refrain from overwatering your seedlings. Let the seed-starting mix dry out completely before watering, and improve the drainage of your containers. Read more damping off prevention tips here.
Curly Top Virus
Certain insects can spread this virus through your crop, most notably the leafhopper, a tiny little cute grasshopper-like bug. Veins of leaves will darken, plant growth will be stunted, and leaf edges may also curl upward in the presence of this virus. There’s no treatment for this virus, if you see signs of infection, remove and dispose of all plant material (do not place it on the compost pile).
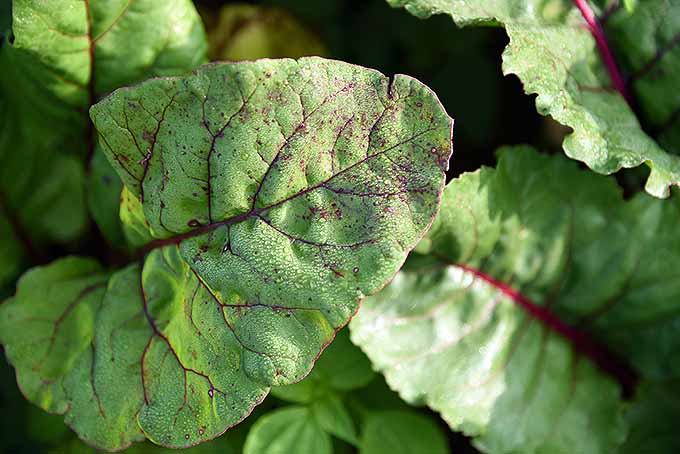
Cercospora Leaf Spot
This is probably the most common illness I’ve seen on beet plants. Cercospora leaf spot is a fungal infection, and manifests as dark, patchy spots all over the leaves that can be a brassy-purple color. In some cases, the color can engulf the entire leaf. The warmer, wetter, and rainier the weather, the more likely that this fungus will show up. Try removing and tossing out (not composting) affected leaves without touching the good leaves. Make sure you thin your beets if they are planted closely together, as crowded plants increase the chances of spreading. Water in the middle of the day if conditions are hot and humid, and use of anti-fungal sprays may be effective – organic preferred. Find more cercospora leaf spot prevention and treatment tips here. Or read more about the different diseases that can affect beets here.
Harvesting
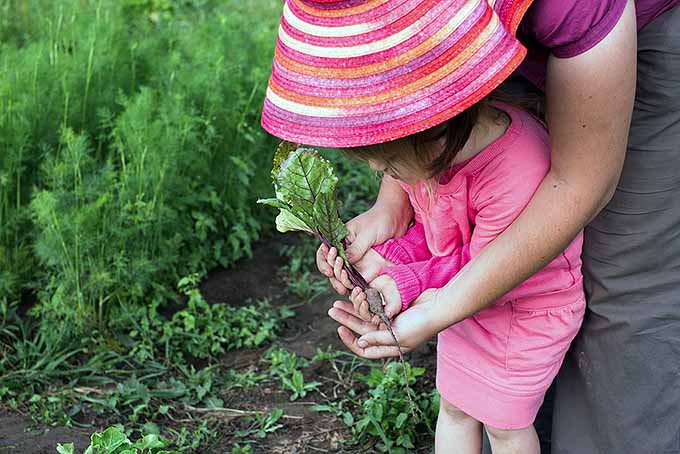
Here’s to hoping all that watering, weeding, and pest-battling yields you successful, happy, and mature plants – all to get you to that last and best step: harvest time!
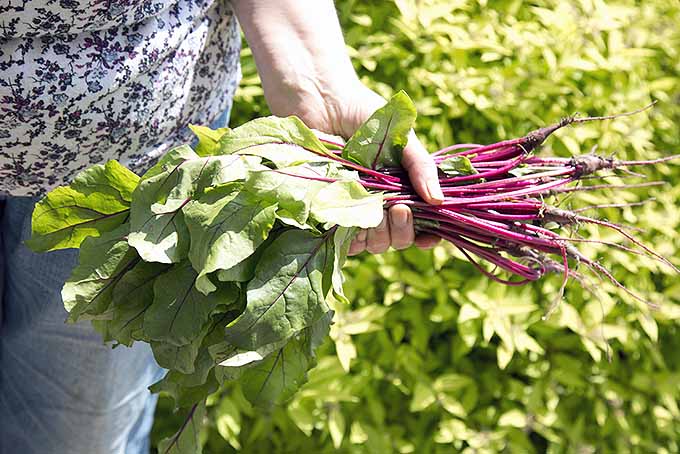
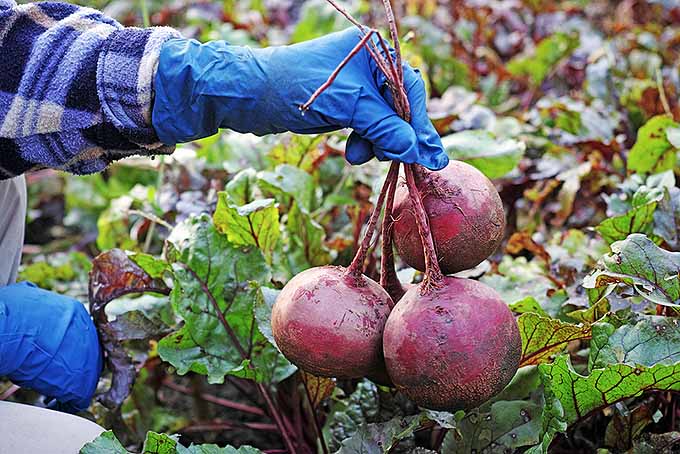
Harvesting Roots
With most types of beets, you will want to harvest the whole plant right around the maturity date (depending on the variety – see above), which will give you the biggest roots. Leave it in the ground, and the root could grow larger, it’s true; but the larger most beets grow, the woodier and less edible they may become, too. Really, you can harvest your beetroots any time before their maturity date if you are satisfied with the size of the root. If you planted beets close together, you can also thin out every other beet while they’re still small, leaving the rest in your bed to get bigger. Small beets are called baby beets, and are quite delicious. Plant plenty, and you can harvest tons of baby beets and full-sized beetroots over the course of the season! Read more about harvesting beets here.
Harvesting Greens
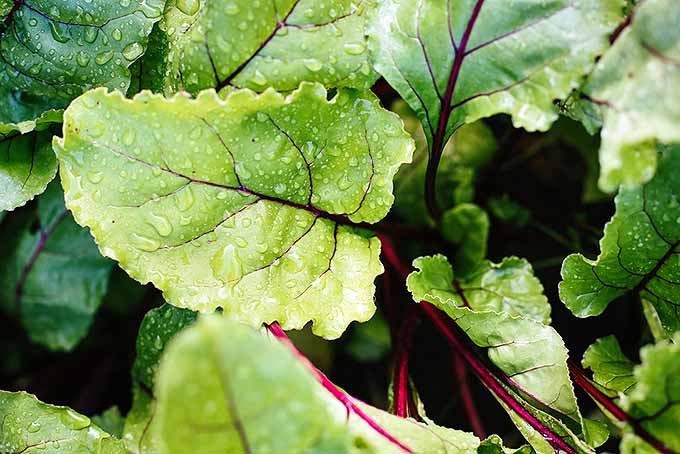
If you’re impatient for a spring or fall salad or two, you can harvest some small greens here and there, even before the first little nubby showings of a beetroot. Wash these leaves and toss them in with your greens and leaf lettuce, and enjoy. Or, you can harvest larger, more mature leaves and cook them in much the same way as spinach. Of course, just make sure not to harvest all of the leaves – the plants need them to survive and grow those little roots into larger, tastier bulbs. Always leave at least three fully grown leaves attached, and avoid removing any of the smaller leaves at the very center. Even as the roots swell bigger and bigger, you can continue harvesting greens throughout the season. Read more about how to harvest beet greens here.
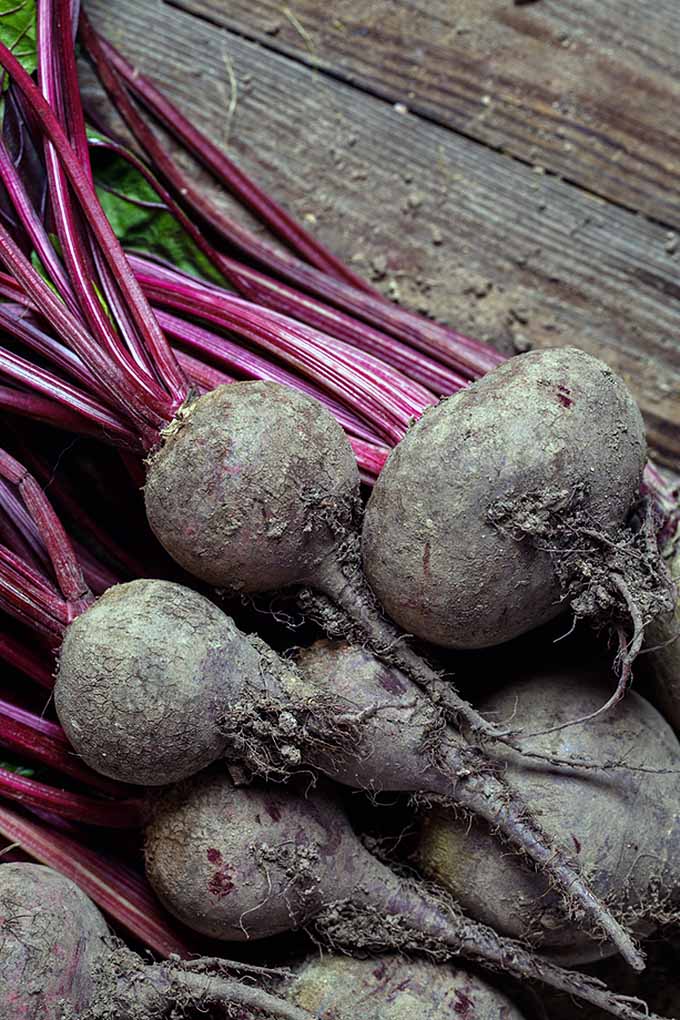
Storing
Once you’ve pulled up your farming fare from your garden, you’ll probably want to store it for the long haul and keep it fresh for as long as possible. If you have pulled whole plants out of your garden and know you’re going to be eating them up soon, you can store the whole plants – roots and greens intact – in a closed container or sealed-up plastic bag in your fridge. Roots, of course, last much longer than beet greens. Greens are likely to wither and become inedible after a week or two, so use them quick. You can cut greens from your beetroots as you use them, and save your roots for later by keeping them in their plastic bag in storage. Beetroots will store well in a dry area in a root cellar as well, preferably in a food-grade wax cardboard box. In the fridge, however, make sure to keep bags airtight to prevent moisture from seeping into the bag, a factor that could lead to the roots spoiling quicker. Sometimes, the outside skin of beets will lose their supple quality over time, feeling a bit softer and mushier to the touch (kind of like a ripe avocado, though firmer). While this may deter some people from eating them in this state, cooking them has not been a problem for me, as the inner texture tends to remain crisp regardless, while the outer crisps up with cooking. If you do long-term storage (such as in a dry root cellar) for the winter, your roots could last upwards of two months.
Cooking and Eating
Just the mere mention of the word beet is enough to spook some people straight out of the kitchen. It’s true – the plant’s earthy, hearty flavor is irresistible to some, repugnant to others. If you’ve only ever enjoyed store beets from a can (if you could even call it that), then you don’t know the vegetable in its full glory – especially when grown and harvested straight from the garden. This can be partially to blame for why some people dislike it: because they haven’t gotten to know it well enough. On that note, this red root does not have to be devoured in its classic canned, pickled form in salads. You can also boil, roast, bake, steam, sautee, or fry it after slicing it up. One of my favorites? Large slices of beets straight on the grill! Slice them extra thin, and you could easily turn them into chips (this works in an oven, too). They also make a colorful addition to soups, most notably borscht, a chilled soup made from the fermented juice. Want to keep things simple and traditional? Then just slice them up raw and enjoy them on a salad, as most who like the canned kind are wont to do – though if you try your very own homegrown beets raw, you’ll taste the difference (and probably never go for those canned ones again!). Making beets taste amazing also depends a lot on what you cook them with.
Additional Recipe Ideas
If that’s not enough to entice your taste buds and get your mouth watering, try out some of these recipe ideas:
Nutritious and Delicious Wraps
Kids and adults alike will love these nutritious wraps, perfect for a quick lunch. Spiralizing is a great way to utilize your harvest! Get the recipe now on Foodal.
Creamy Red Roasted Beet Soup
Made with roasted roots for a deep, rich flavor you can easily put this soup on the table at a moment’s notice if you already have roasted beets on hand. You’ll find the recipe on Foodal.
A Tasty Dessert Option!
Still have room for dessert? Perfect for any celebration, your guests are going to be tickled, well… pink! When they see this gorgeous chocolate cake with its colorful cream cheese frosting, you’re sure to get compliments – it’s totally Instagram-worthy. And they won’t believe you when you tell them what the secret ingredient is, in both the cake and the frosting. Jenni at The Gingered Whisk shares the recipe.
Quick Reference Growing Guide
Can’t Beet ‘Em? Join ‘Em!
Beets are wonderful veggies to grow in your garden. If it’s the middle of spring or fall and the first hard frost is over two months out, give them a try! Almost all varieties have similar growing requirements (except for the sugar type), and are very simple to get started. Once they get going, the rest is easy – including watering, harvesting, storing, and more. Do you grow beets? What are your favorite tips and tricks? Share with us in the comments below! And for more information about growing beets in your garden, check out the following guides next:
How to Grow Beets in ContainersTroubleshooting Deformed Beets and Reasons Why Beets are Too Small