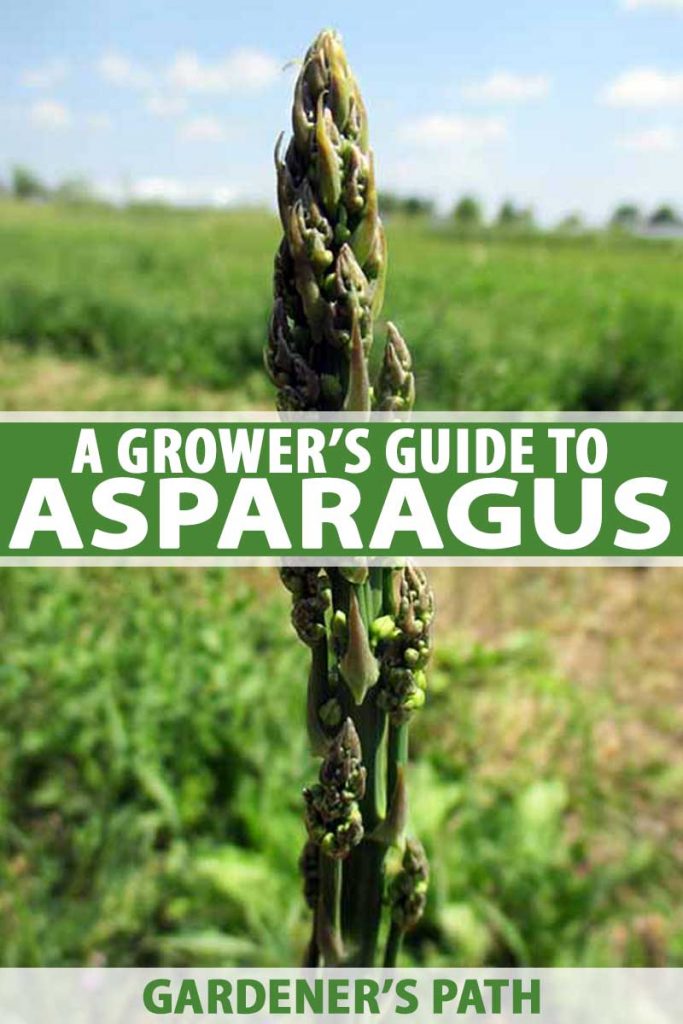
Maybe you’ve already spent a few years growing annual crops for food: starting them from seed, tending young plants, and harvesting them – only to see them die and return to the soil again. If you’ve seen many rounds of veggies come and go, it could be time for a little something different – such as planting asparagus, the king of perennial crops! Especially if you have a nice, permanent corner of your garden that you’d never want to change (for at least 30 years), this could make an excellent home for this fern-like vegetable. You’ll be investing in a food source that comes back again and again, giving you fresh food year after year. So when the end of the season arrives, you won’t have to say goodbye to ALL your hard work and plant companions that grow in warmer days. Asparagus will be here to stay – if you take good care of it!
In this article, we’ll give you a thorough guide on how to successfully introduce these delicious spears into your garden space – whether you’re a veggie veteran, or new to the game.
History and Background
Asparagus (Asparagus officinalis) has an interesting past. While perusing several accounts of its history, I did find some debate over its true origins, though I’m sure the conflict is unintentional (and I’m still fascinated about where this discrepancy may have cropped up). Some claim this cut-and-come-again veggie has ancestors hailing from boggy, lowland moors. Various growers I’ve talked with and other sources go so far as to say it’s a native of Scotland and the British Isles! Even some prevailing gardening guides say that modern cultivars still prefer these swampy conditions, being similar to where they originated. Demanding constant moisture, they flourish in soggy areas where other vegetables would languish. More credible sources, however, coupled with my own experiences growing asparagus, find this to be untrue. In fact, if you look up cultivating practices in Scotland, you’ll find that growing it in those regions can be quite a hassle. While the vegetable’s spears do emerge in spring in response to rainfall, excess water and clammy cold is a real bane to asparagus. Its reanimation in spring requires a well-drained site, warmth, and average – not heavy – rainfall to get it going. More likely, this fernlike distant relative of onions and garlic (once sharing the same family, Amaryllidaceae) is widely presumed to be local to the Mediterranean coastal regions of Europe and Asia – and you’ll find this mentioned more often than Scotland. And while not a lover of cold and wet, this native coastal locale does explain its temperament that’s suited for sandier, saltier soils– something to keep in mind! According to most historical accounts and online sources, the wild ancestor of asparagus was foraged and enjoyed principally by the ancient Greeks, and later the Romans around 200 B.C.E. Beginning around that time, it was bred from a feral plant into the widespread, globally popular cultivated culinary victual that it is today. With more wild asparagus being found in countries like Italy and Greece than any other, it is pretty settled that these stalk-producing crowns are Mediterranean in origin. During the Roman conquest in later years, growing and eating the delicious, tender shoots spread to the rest of the world and other parts of Europe. In many cultures, it didn’t just catch on as a food, but was also revered as a medicine. The name of the plant is thought to come from Greek, though it is uncertain exactly what the Greek word roots might mean. At one time though, the word asparagus transformed into a new folk term for the vegetable in English: “sparrow-grass,” a popular sobriquet still.
Varieties
Moving on from the plant’s rich history, we enter into its interesting varieties – which happen to tie in some of its fascinating background as well. In addition, the way asparagus is separated into different varieties sets it apart from most other vegetables. The types you can buy are designated by heirloom, open-pollinated, or male and female breeds on the one hand, or strictly all-male hybrids on the other.
All-Male Hybrids
If you’re looking for a large yield, it’s recommended to start with an all-male hybrid. These almost always have the word Jersey in the name, due to the research that engineered these breeds at Rutgers University in New Brunswick, New Jersey. Asparagus crowns grow as two different sexes, and their ability to pollinate can greatly detract from their productiveness in producing spears for food. All-male cultivars are greatly preferred since they don’t self-pollinate or divert that energy away from producing new stalks. If your asparagus fronds produce bright red berries at the end of their season, you know you have an heirloom variety with females, but your production may be somewhat lower. Read more about the differences between male and female plants.
All-male hybrids are likely to produce 2-3 times more than heirloom varieties on average. Jersey Giant Asparagus Crowns available from Burpee An early producer and one of the oldest developed varieties, does better in cool weather and yields large, thick spears.
Jersey Knight
Jersey Knight Asparagus Crowns available from Burpee A popular choice, agrees with a wide variability of soils (including clay) and tolerates warmer climates.
Jersey King
Much like Jersey Knight, wide variability and performs well in warm climates.
Jersey Supreme
Jersey Supreme Asparagus Crowns available from Burpee Great producer and earlier than Giant, but pickier about being grown in sandy soil. Prefers cool weather.
Heirlooms
These types will be less productive than their male counterparts, but nonetheless come with their own perks.
After all: if you want to breed your own kinds of asparagus, or even have your patch potentially reseed and spread, you’ll need some females!
Mary Washington
Mary Washington seed and crowns available from Burpee One of the oldest American heirloom varieties, Mary Washington still manages to be a high producer while including female plants.
Precoce D’Argenteuil
An old traditional heirloom from Europe (particularly Italy), its stalks are perfect for blanching.
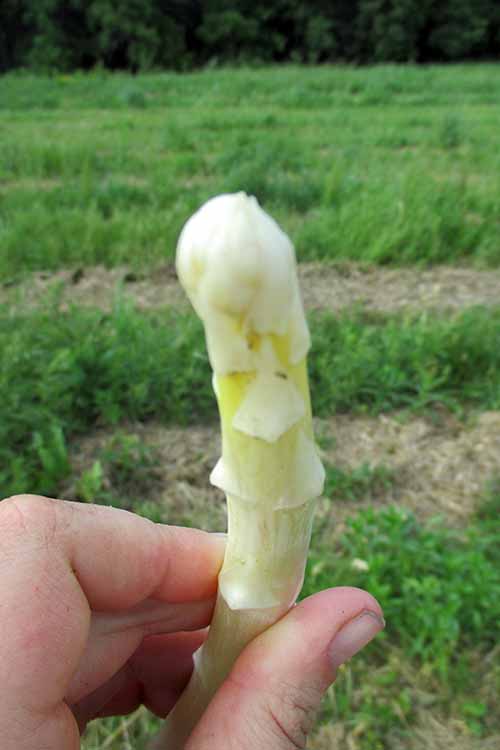
White Stalks
You might have seen white varieties at certain grocery stores or farmers markets. Perhaps the thought has crossed your mind: what exact variety produces white asparagus, and how do I go about growing it?
The answer: you can grow white asparagus from any variety you choose to propagate! This is done through a method called blanching, which restricts sunlight exposure to any stalk of any variety, thus whitening it – a method used with certain other delicious crops as well, like Belgian endive, cauliflower, and celery. There are a few ways to do this: The commercial method is through the use of special arched row covers over beds, which shield the plants from light in order to whiten them. Another way is with a thick layer (2-3 feet) of loose straw mulch, placed over the beds before the spears emerge. This blocks a good portion of the sunlight, while allowing the spears to still rise into the material where they can then be harvested after removing the mulch. While white spears are a more popular delicacy throughout regions of Europe, that doesn’t mean you can’t enjoy your very own from your garden or backyard anywhere else in the world!
Purple Spears
While a purple variety of asparagus may seem like an offshoot all its own, in truth, purple types can be either open-pollinated or heirloom (male and female) or all-male hybrids. When looking into purchasing crowns of this type, make sure to check the description and get the designated category you’re looking for (if any). Otherwise, purple crowns are completely unique in their own way: they’re known for a sweeter taste, more tender texture, and – of course – they’re purple! However, the purple color does fade with cooking – but it will remain if used raw, in salads for example.
Sweet Purple
Widely tolerable range like Purple Passion, but tends to come in an all-male hybrid variety. Has the widest range of tolerance to weather, both hot and cold, among purple kinds – equivalent to purple Jersey Knight, tends to be an open-pollinated or heirloom variety.
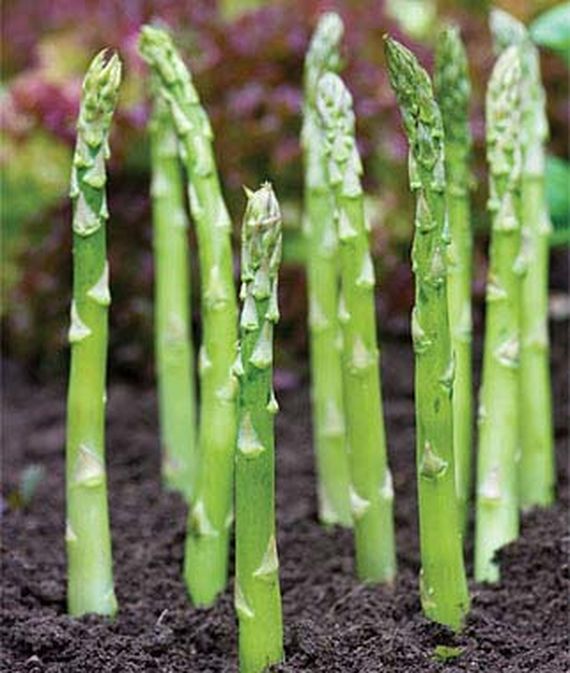
Growing
When growing asparagus, the most popular method to starting your patch is by planting crowns. Crowns are typically year-old, single root systems of the vegetable that can be replanted to start a new patch. You can order crowns online to get your own started. Otherwise, you can begin asparagus from seed, though the method is much less successful, slower, and can yield more female plants than male – which may cut into how many spears you produce. In comparison, crowns are highly preferable. It is best to get started with planting your crowns in the spring, after the last threat of frost and when the soil can be worked. This will give them enough time to build strength and become established throughout the whole warm season. The steps required for doing so are quite simple:
1. Dig your bed
You can plant a few crowns next to one another in a row, or lay out a circle-shaped bed to give yourself a nice little patch. If you choose the former, dig yourself a rut at least 8 inches to 1 foot deep to your desired length; if the latter, dig whatever area you wish to plant your crowns in to the same depth.
2. Determine size
How long or big should your bed be? This depends on how many crowns you plan to plant, as each should be spaced one foot from the other. If digging a trench or rut in a row for 5 crowns, for example, you may want to prepare a bed with a 10-foot row. In a circular-shaped patch, make it ample enough to keep your plantings evenly spaced.
3. Amend
Add compost or your chosen fertilizer to the prepared bed, and work it into the ruts where you will be placing and planting your crowns.
4. Plant
When planting these singular root balls of asparagus, you will want to lay the root mass lengthwise into your rut, and take care that the actual “crown” – the knotty mass where all the roots join together – is planted face up. This is where the asparagus spears will emerge from, pushing their way up through the ground for harvest.
5. Cover
Of course, make sure to cover your crowns with a thick layer of earth in their ruts or bed. The actual crown (as discussed in the previous step) should lie somewhere between 6 inches and 1 foot below the surface of the soil.
6. Water
The most necessary step for nearly all gardening projects: watering! When first planting your asparagus crowns, give them a good, deep watering immediately after planting, and water more sporadically throughout the first season as needed (especially during dry periods and in hot, arid regions).
7. Mulch
After watering, it’s a wise choice to mulch over your patch or row with a thick layer of organic matter – straw works best here. This adds a little extra nutrition, protection through cold weather, moisture retention, and reduction of weeds for less competition (and bigger spears). After planting your crowns, your first season will consist of watching them grow as the months go by. If a crown establishes itself successfully, you will notice your very first small asparagus spears emerging. They will most likely be very tiny – only pencil-thin in circumference, or thinner – and you will not want to pick them at all, at least for the first year. Instead, it is best to let them grow tall, spreading out their feathery and fernlike foliage to fully establish and grow strong. Some sources will state that freshly planted crowns must be left alone for at least 3 years, in order for the patch to fully establish. You may do this just to be safe, and to make absolutely sure your patch will flourish – but after the first year, you may get away with harvesting just a few stalks off your young crowns. Make sure you leave the vast remaining majority to their own devices for at least a couple more years to come, and that you follow the very best management and care tips to secure a healthy set of crowns for the future!
Management and Care
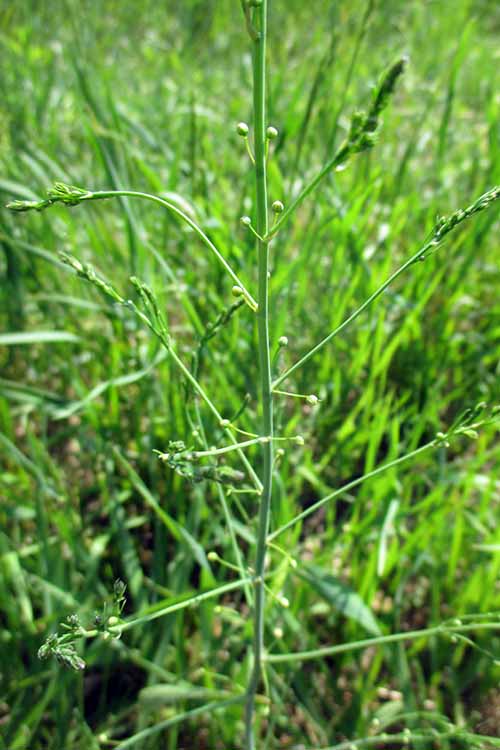
After you’ve planted your crowns and the fronds have begun to rise above the soil (or it’s the end of harvesting season, which we’ll get to in the next section), this opens up a new season to manage, maintain, and care for your mature patch in a number of ways. The true blessing of growing asparagus: management of this perennial is typically light, and nowhere near as intensive as caring for certain other vegetables – like the needy tomato or head lettuce, for example! Around the beginning of the year’s truly hot weather in your region (usually mid-June, though this may be later in far northern climes), you will likely start to notice that the stalks rising from your crowns are thinner, spindlier, and less appetizing-looking, though this is not always the case. When this happens – due to hot weather, fewer quality stalks, or young crowns that need more time to mature – it’s time to leave them be, and allow them to grow into tall fronds. This allows the whole plant to build its stores of energy, and readies it for a great harvest the next spring! Sure, maybe you want to push and get the most harvest out of your patch if that’s the stage you’re at. But remember this tidbit of wisdom: the earlier your let your plants go to frond and flower, the healthier, more robust asparagus you’ll have next year! Besides leaving the aboveground parts of the plant to grow (an easy task), what else can you do to help your patch along?
Clearing your Patch
According to Rosie Lerner, horticulturist from Purdue University, clearing all spears at the end of picking season gives you time to add extra mulch, remove weeds, and even amend with another feeding of compost or fertilizer before fronds grow their full height through summer.
Mulching
Adding extra mulch over the beds when all spears are gone never hurts. A thick layer adds a bit more organic matter, nourishment, and moisture retention, and helps to keep lesser weeds down. In some cases, you may have to clear small holes for your fronds to poke through when the start of picking season returns.
Weeding
You can remove weeds from your patch whether there are no spears, harvestable spears, or towering fronds.
Once plants are plenty tall, however, you won’t need to worry too much about weeding – their height alone helps them out-compete other species in their bed (though removing large, towering weeds like thistle is important).
Amending
When fronds have not gotten too tall or crowded yet in their site, side dressing plants with compost or natural fertilizer (or, placing them right on top of the patch, if there are no aboveground spears present) will ensure that your plants get the adequate energy they’ll need to produce more delicious stalks next year – maybe even bigger ones!
Trellising
As fronds tower over your patch (some over 6 feet), you can stake or trellis them if you like – though plants that have fallen over are not doing any damage to their health (in fact, falling over is how they spread their seeds). A simple way to do this: drive stakes in the ground around the perimeter, and run string around plants so they don’t topple over.
Mowing and Clearing
Of course, once foliage dies back, you can clear it in preparation for the next season’s spears. Clearing will take place in early winter or late fall, though you may wait until the very first signs of early spring to remove them. Mowing, cutting back, burning, or flame weeding all work great! Read more about clearing asparagus foliage here.
Pests and Disease
While a hardy, hassle-free perennial, asparagus does suffer from some pests and diseases. While some of these only cause minor damage and not too much stress, it’s important all the same to check up on any potential issues from time to time. A decimated asparagus patch will take a lot more time, work, and patience to restore to its former glory (sometimes even requiring fresh crown plantings) compared to the efforts required to ensure good pest management!
Pests:
Asparagus Beetle
These are usually orange or orange-red and black, sometimes spotted, and they consume asparagus tips and ferns while laying eggs as well. They can be removed with sprays (preferably organic), or introduction of a high population of natural predators (like some wasp species and ladybugs).
Asparagus miner
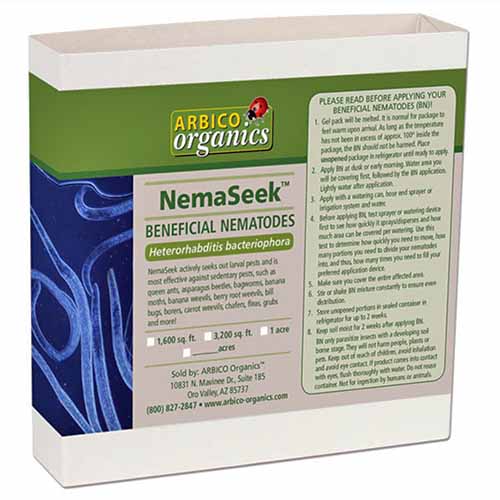
A small black fly that damages stems especially, giving them red, unappetizing markings. Heterorhabditis bacteriophora (Hb) nematodes parasitize the beetles, and then release Photorhabdus luminescens bacteria. Toxins released by the bacteria kill the insect pests. This is an excellent, chemical-free solution.
NemaSeek™ Hb Beneficial Nematodes You can find NemaSeek™ Hb beneficial nematodes available in a variety of package sizes from Arbico Organics. Select the option that is the best fit for your square footage, and follow package instructions for best results. Removal and suppression are helped by early removal of foliage in winter – as well as burning to reduce any carry-over larval population into next spring. Sprays (preferably organic) are available as well.
Japanese beetle
Iridescent-green or coppery-brown, these scarab-like beetles destroy above-ground foliage. These can be kept away from your crops with preferably organic sprays, pheromone traps, or the introduction of natural predators (for example by attracting birds, or letting chickens run through the mature patch).
Disease:
Fusarium rot
A fungus that afflicts root, crowns, and lower stems, it creates unattractive, damaging patches of red on stalks, yellows above-ground foliage, and reduces yields. As this happens to stressed plants, preventive measures are the only key to avoiding the problem: ensuring adequate watering, reducing pests, avoiding crown damage, and avoiding close rotation with previous crowns are all necessary practices. Read more about identifying and treating crown and root rot here.
Purple spot
Purple spots on stalks and brown damage to ferns are the result of another fungal culprit. Preferably organic sprays may help with spread. To prevent it, remove died-back foliage as early as possible, especially through burning. Read more about identifying and treating purple spot here.
Rust
This effects the foliage only, and appears as a change of color to yellow and brown, leading to foliage loss. Burning and early removal of foliage is a great preventative, as well as ensuring that crowns are planted with ample space for maximum airflow, to reduce the spread of disease after removal of infected plants. Read more about preventing and treating asparagus rust here.
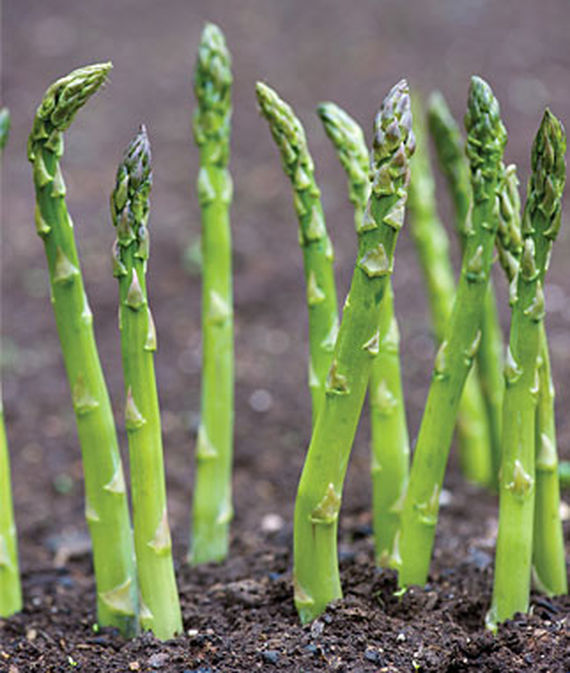
Harvesting
Once your planted, well cared for patch or row has grown tall for a season or two (sometimes over 6 feet, depending on the variety), the following spring brings your first round of thick, harvestable stalks. As soon as the weather begins to warm consistently above 60°F and temperatures stay above freezing at night, the first tips of the year will begin poking up above the soil. In order to get them growing to their ideal harvesting length – and to even get at them to harvest at all – you will need to clear away their tall foliage first. But it is important to do this at the right time. Read more about how to harvest your crop here.
Springtime Tasks
Remove yellowed or browned foliage that has died back over the winter. It can be pulled, cut, mowed, or even burned away or flame weeded to remove competition or add a little extra K (a.k.a. potassium).
Winter is Coming
Before the hard freeze sets in, the same as what was done in the spring can take place earlier in winter, but only after the tall foliage has completely died back and yellowed. Cutting back green foliage can damage and shock the plant, rendering it less productive. After the fernlike foliage is cleared away: it’s time for harvest!
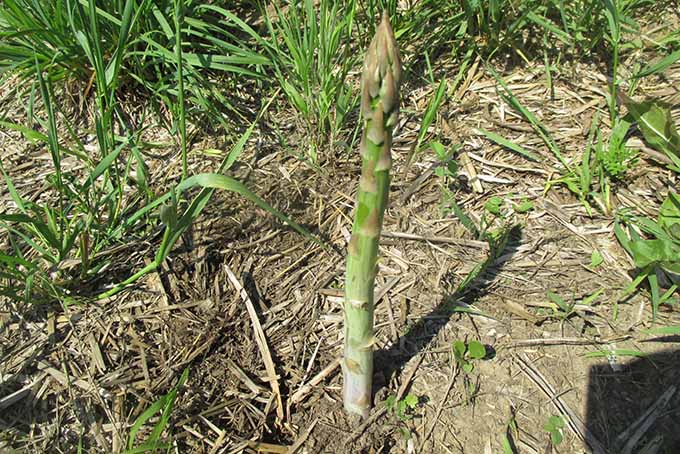
As you first notice the spears rising from your planted crowns, it’s not quite time to harvest all of them at once. Since single heads of asparagus will each emerge at different times (in other words, all spears won’t rise from the bed at once), you will have to assess each one for readiness by checking a few important details:
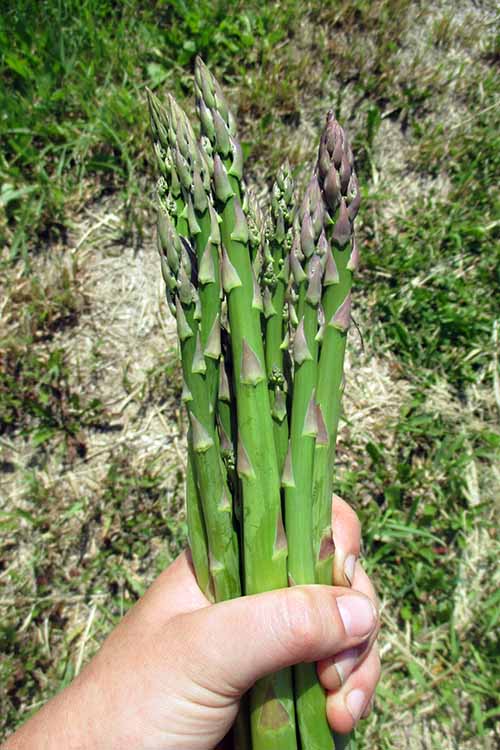
Length
This can be determined by preference, but the ample length of most asparagus spears is 9 inches – though variety can weigh in on optimum length as well. At this height or taller, the tips or buds will begin to open; any shorter, and your harvest will yield less product.
Size
More so than length, size can be a matter of preference as well. You can harvest spears of any thickness or circumference, large or small, and store them for eating. White asparagus tend to be stringier, and you may elect to peel some of the more fibrous outer layer from thicker stalks before cooking.
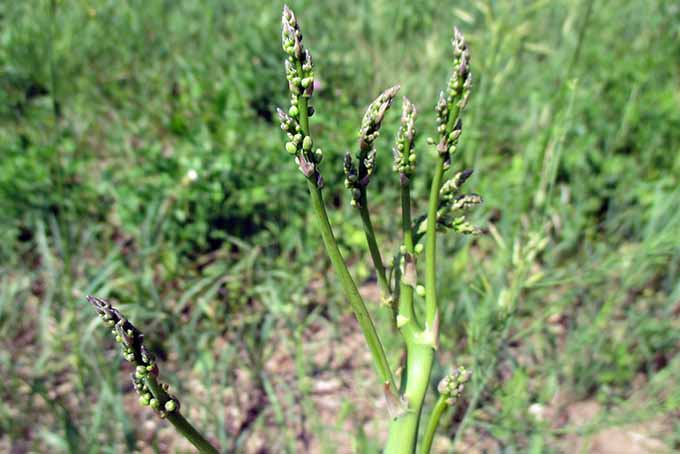
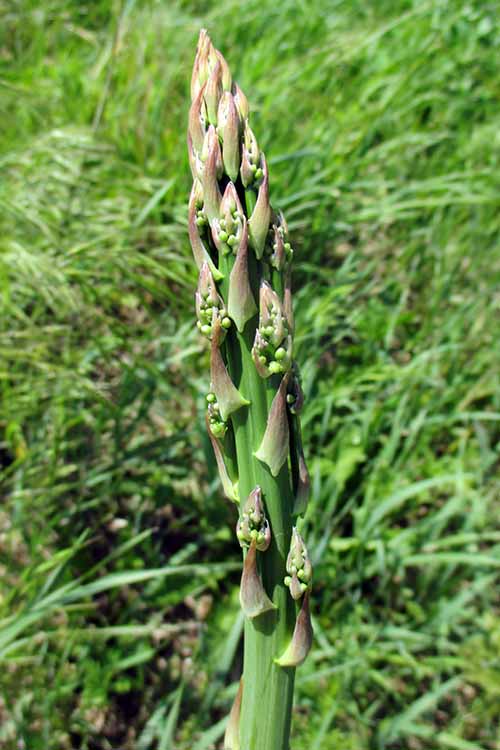
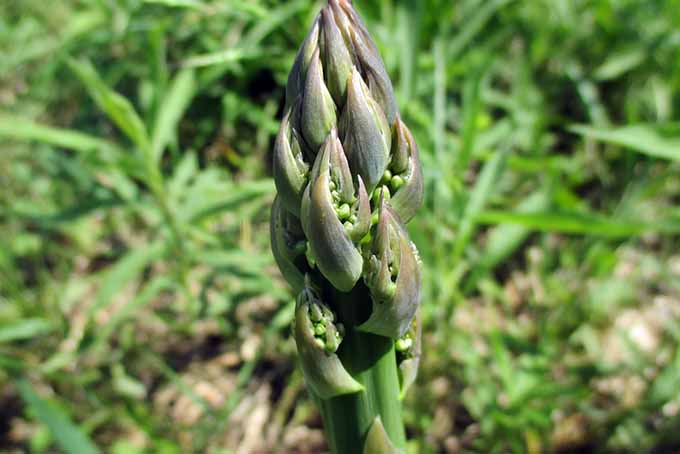
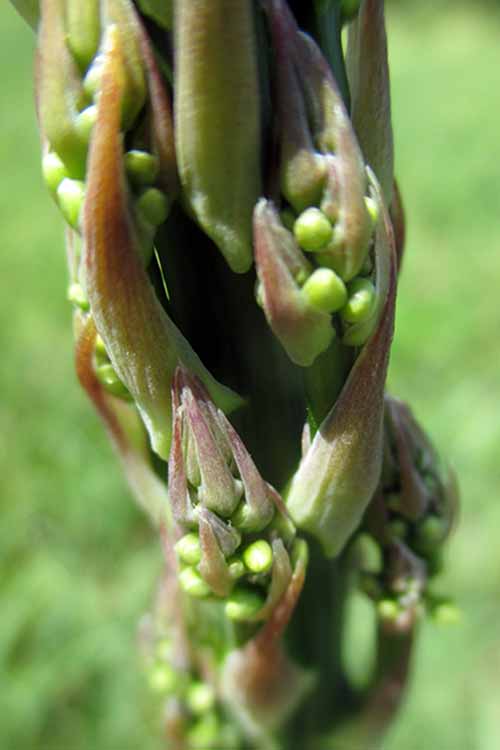
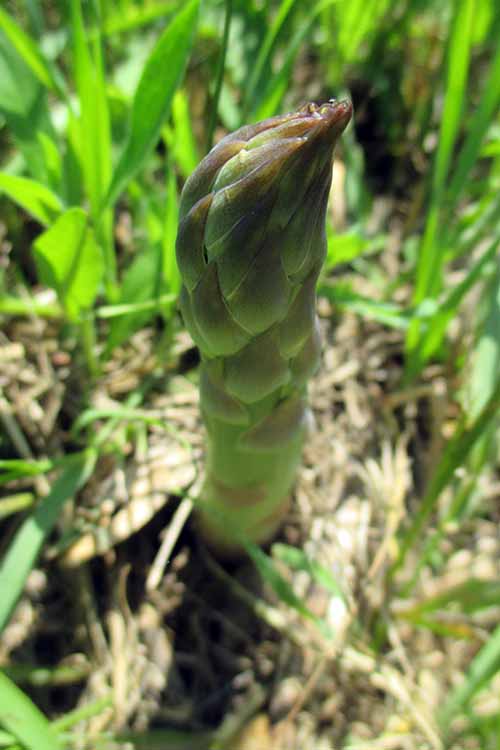
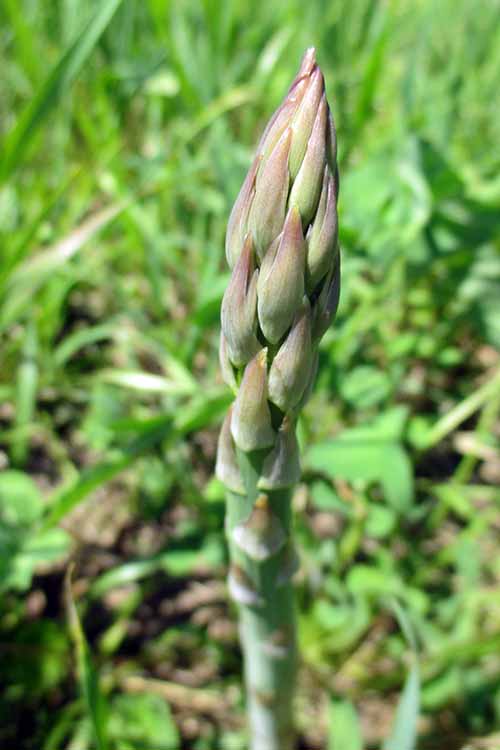
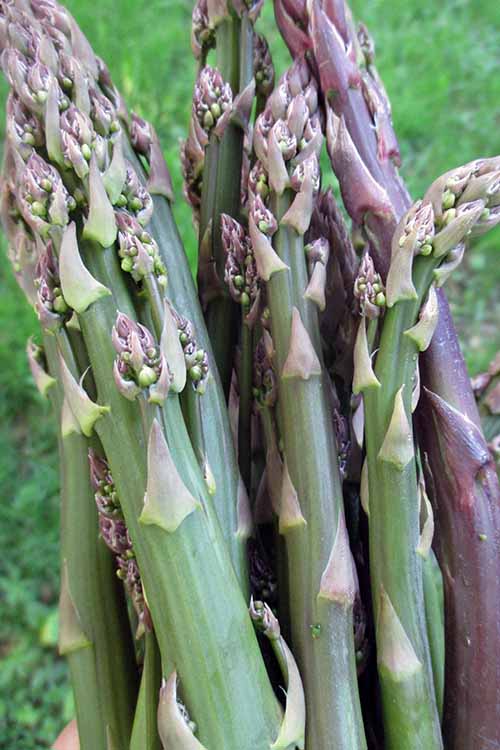
Tip Appearance
The purple, pointed tips are the most delectable part of the stalk; as it rises up, this bud unfolds into giant, feathery ferns and towering inedible foliage. Pick stalks while the bud is still closed, or just barely clustered with small, whitish-yellow side-shoots – and before those too begin to branch off. The more the tip opens, the less tender and tasty the stalks will be.
Color
Spears should always be green with purple buds – or purple with white buds, if you’re growing a purple variety. Or, completely white if you are blanching them. If spears look discolored or bruised, yellow or red, or even appear slightly translucent at the tip, this could be the result of early frost damage, and these will be inedible.
Texture
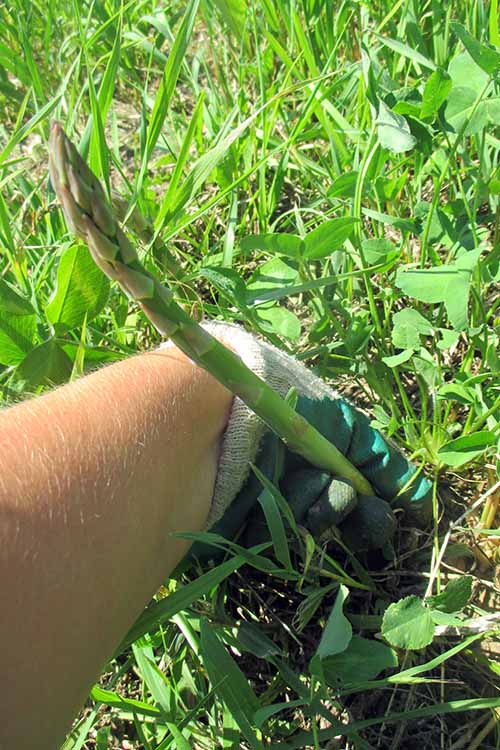
If you particularly fear frost damage, feel the stalks before you pick them. If stalks feel limp and pliable rather than supple and crisp, they have likely succumbed to frost damage and are no longer viable. The best time to pick asparagus is during the morning and first half of the day. On warmer days, you’ll see stalks getting taller and taller by the hour – so you’ll want to get them while they’re the optimum length, with bud tips still closed! Here’s how to harvest:
With one hand, move your fingers down to the very base of the stalk, right to where it rises above the soil. Using your thumb and forefinger, pinch the stalk at its bottom and bend it until it cleanly snaps away. If you don’t want to get your fingers dirty, you may use a knife to cut the stalk away from the earth, right above the soil.
Once you’ve picked all the stalks that are ready from your bed, you’ll want to store them correctly, with some good pointers to be explored in the next section. Make sure not to keep them at room temperature or in the sun for too long afterward, or they’ll wilt and go limp! The next day and throughout the rest of the season (ideally spring until mid-June, or summer solstice at the latest), keep an eye on your bed every morning for more harvestable stalks. You’ll want to keep up a daily picking routine, so that stalks don’t open up to become the plant’s tall fronds. That’s something you’ll only want to happen towards the end of the asparagus season, and when there’s nothing left worth harvesting.
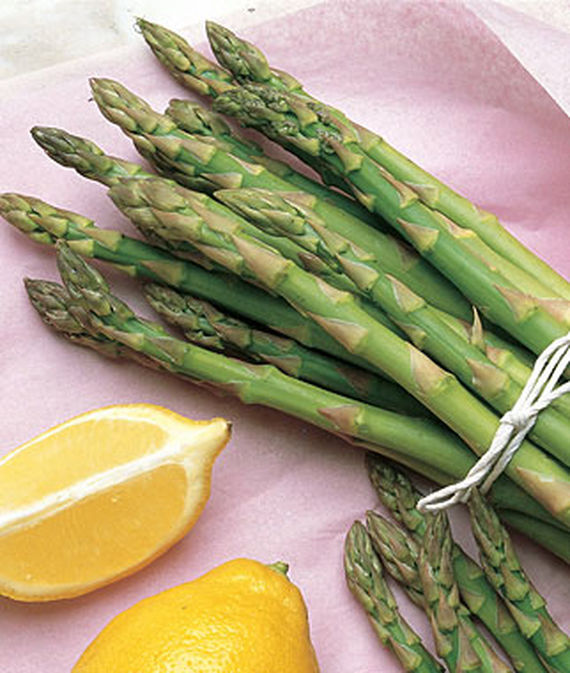
Storing Stalks
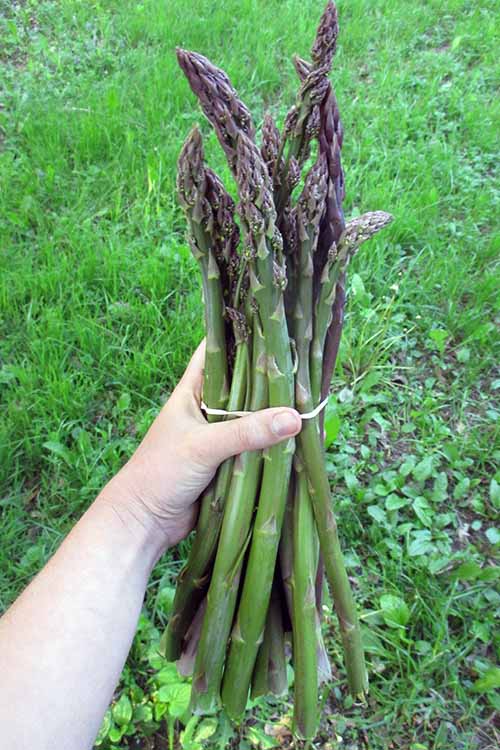
If your patch is successful and productive (especially if you have quite a few crowns), you could be pulling in a pretty good amount of delicious spears every day, week after week! For that very reason, to make your asparagus patch worth all the work you put into it, you will want to store your asparagus correctly so you can make them go that extra mile. Here are some tips for your tips:
Store spears bundled together, with all tips pointing the same way and cut/picked ends pointing the other. This helps to avoid unintentional damage to the tips during handling and in storage. Putting them in a plastic or paper bag in the fridge works well, though picking up and moving the bag can wear away or damage tips. Another alternative: a small food-grade wax box, which can be moved, opened, and shut without affecting the stalks, and a plastic bag draped over the stalks within the box to retain moisture. Stored correctly, spears can stay in great condition for up to about 2 weeks. To ensure maximum storage life, sprinkle a bit of water on the picked or sliced ends (not the tips) as soon as they get into the fridge, which helps rehydrate them. Leaving stalks in the fridge uncovered will dehydrate them – taking away flavor and texture, and making spears limp, mushy, and floppy. So make sure to store them correctly! Standing bunches of asparagus in water in the fridge is not recommended, as the ends can become soggy if you’ll be storing them for more than a couple of days.
Cooking Tips
The highlight of growing asparagus is eating it! So you’ve picked your first stash of spears, and you’re ready for a little home dining.
The most common way to prepare this garden delicacy is by sautéing those delicious tips (oh yes – especially the tips), maybe with that classic bit of butter and lemon juice, or roasting them for a little while in the oven. But did you know you can also blanch, boil, and steam them as well, for a more delicate eating experience? This goes particularly well with white blanched asparagus, which tend to have a more delicate flavor profile than the typical green or purple varieties. If you’re growing purple asparagus, this type may be so tender and sweet that you can add it raw straight to salads! Give it a rinse and a quick chop, and you’re ready to go. Furthermore, grilling and pan-searing the spears are great methods, too – bringing out more interesting flavors the more blackened they get on the outside.
Protein:
Chicken (and chicken stock) Eggs Ham Crab Shrimp Salmon
Veggies and Nuts:
Garlic Shallots Mushrooms (like morels and porcini) Hazelnuts
Dairy:
Butter Parmesan cheese
Herbs, Seasonings, and Condiments:
Parsley Tarragon Mustard Black pepper Sea salt Lemon juice Olive oil Truffle oil Hollandaise, mayonnaise, aioli, or romesco sauces Vinegar and vinaigrette White wine
Healing and Medicinal Use
As prefaced in asparagus’s fascinating history, the growing of this vegetable was not always for food. In fact, some could argue that it has a longer history as a medicine than it does as a delicious delicacy! Many are acquainted with the strong smell you might experience during a bathroom trip after eating it – and this occurrence could have sparked its use as a diuretic and urinary medicine: to lower blood pressure, prevent heart disease, and help with kidney stones back in old days.
The shape of the spears was also an inspiration for its use in sexual health, especially for men in improving fertility and performance while reducing impotence. However, it had applications to female health, too. A close relative to the common edible asparagus, shatavari (Asparagus racemosus), is an Ayurvedic remedy of both today and the past that’s used for many female reproductive imbalances: PMS, irregular periods, menopause, and more. Interestingly, today there are studies supporting a lot of these classical uses. One study in the past decade confirmed that consumption of the vegetable increases production of androgens, thus making it helpful for male sexual health – while also noting effects against cancer and cholesterol. Other more recent research pointed out notable kidney effects in line with traditional use. Plus, they’re high in fiber, iron, calcium, manganese, vitamins A, C, and B vitamins (including folate), and especially vitamin K – making it a healthy veggie no matter what!
The Taste of Spring
Have you grown enough annual veggies, and think you’re ready to tackle asparagus next? After reading this comprehensive guide, I’d bet you are! If you want to tend to, eat, and enjoy a healthy perennial food source that will come back again and again for years, this is the one to try – and if you do it right, it will become a beautiful, delicious, and semi-permanent addition to your garden or yard.
Ordering crowns and planting them is quite an easy task. With only a few important management tips to follow, the most you really have to do is harvest them regularly when the time comes – and once harvest season is over, just sit back and watch their statuesque fronds billow and grow, collecting energy for more spears next year. Of course, watch out for the few bugs and diseases that can plague your patch. Vigilance is important when cultivating these succulent spears, but knowing what to look for isn’t all that hard, once you read up on what to watch out for. Are you ready to plant asparagus? What are your personal experiences with growing, tending, and eating this delicious produce? We hope to hear from you – and please feel free to comment below! Photos by Adrian White © Ask the Experts, LLC. ALL RIGHTS RESERVED. See our TOS for more details. The staff at Gardener’s Path are not medical professionals and this article should not be construed as medical advice. Gardener’s Path and Ask the Experts, LLC assume no liability for the use or misuse of the material presented above. Always consult with a medical professional before changing your diet, or using herbal remedies.