The ol’ pancreas may not appreciate my carbolicious meal, but with each bite I become more and more appreciative of maple syrup – the savior of bland breakfasts everywhere. We link to vendors to help you find relevant products. If you buy from one of our links, we may earn a commission. With twice the sugar content of other Acer species in its sap, this tree has truly helped to make breakfast the most important – and tasty! – meal of the day. The sugar maple is also a gorgeous tree, might I add. That, in combination with its hardwood, makes it a plant of many talents. It’s certainly worth adding to anyone’s garden… especially yours! If having this tree in your landscape is appealing, then oh boy, do we have a treat for you! Our A. saccharum guide has all the know-how you need to start growing a sugar maple for yourself. Here’s what we’ve got for ya: Onto the sugar maple!
Cultivation and History
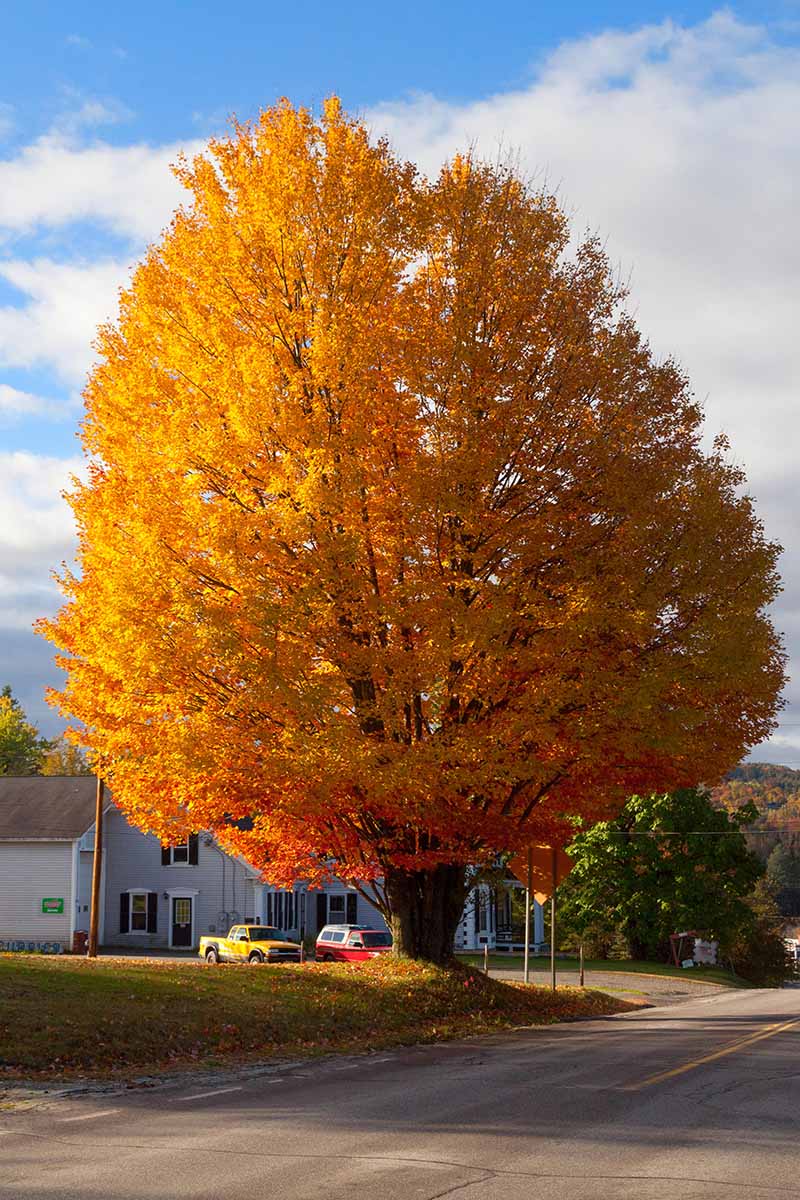
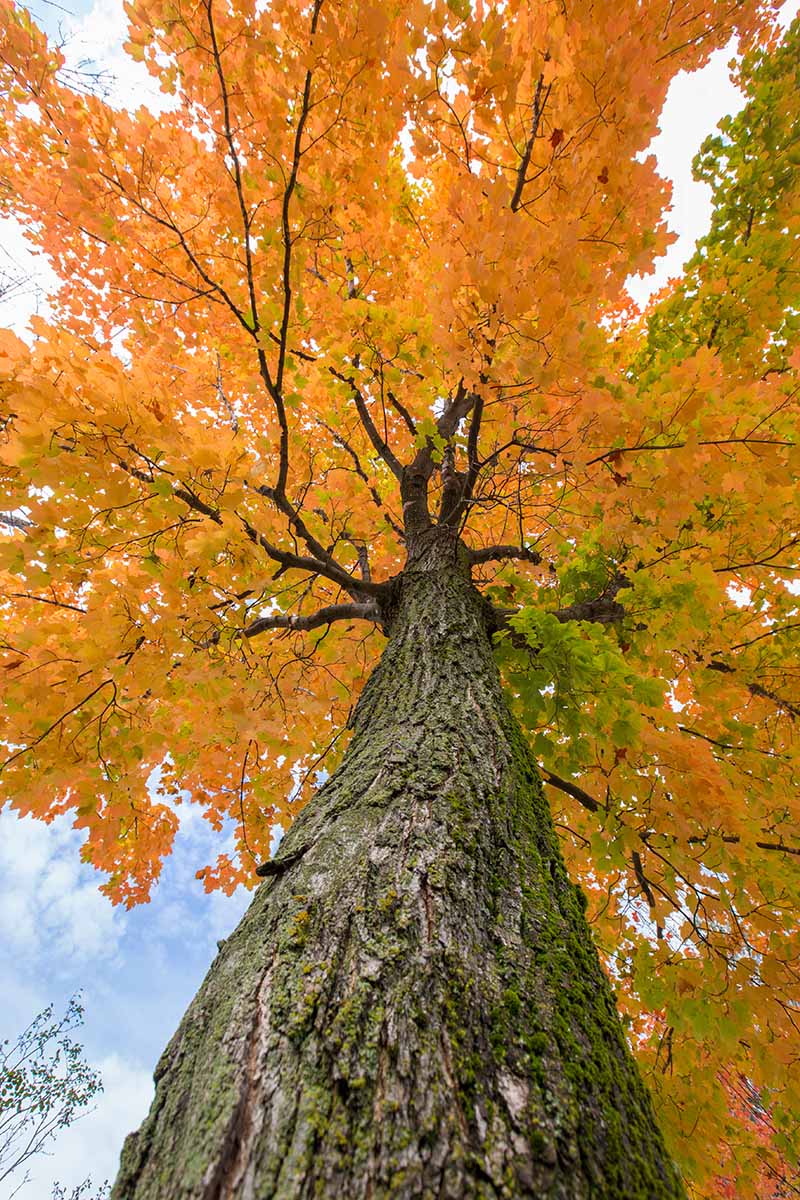
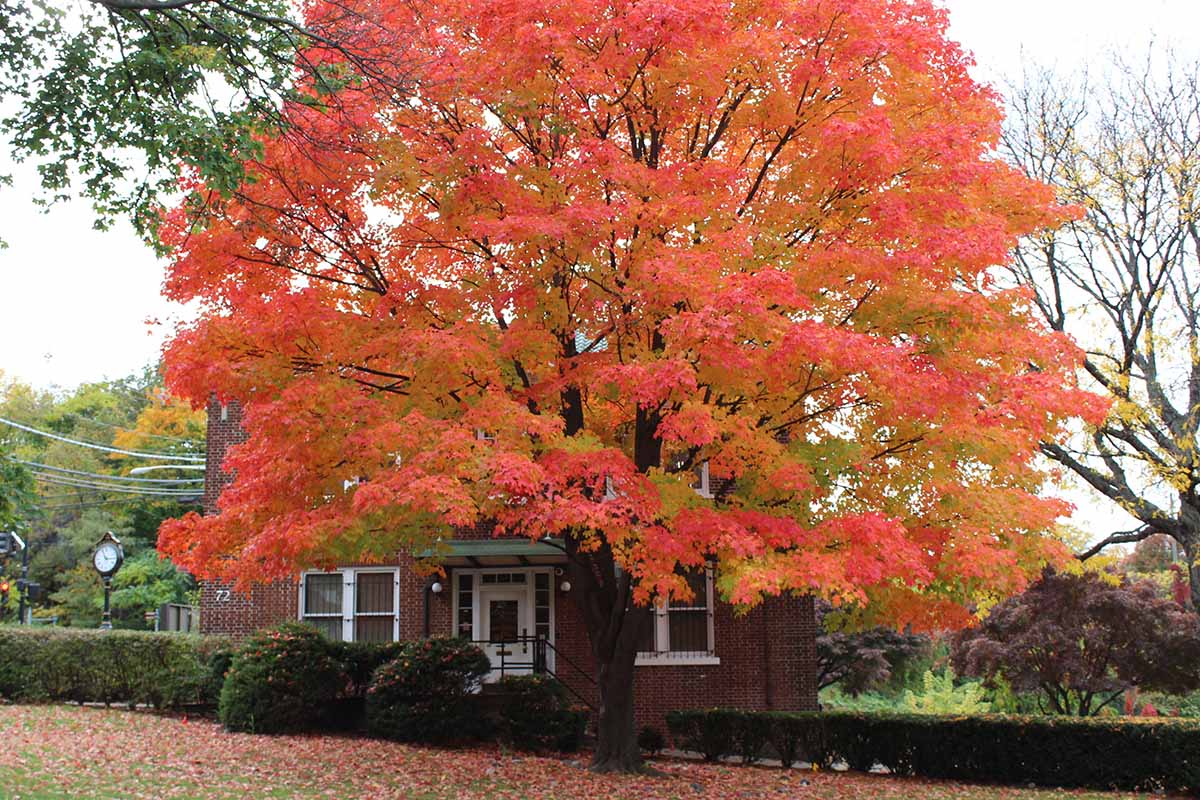
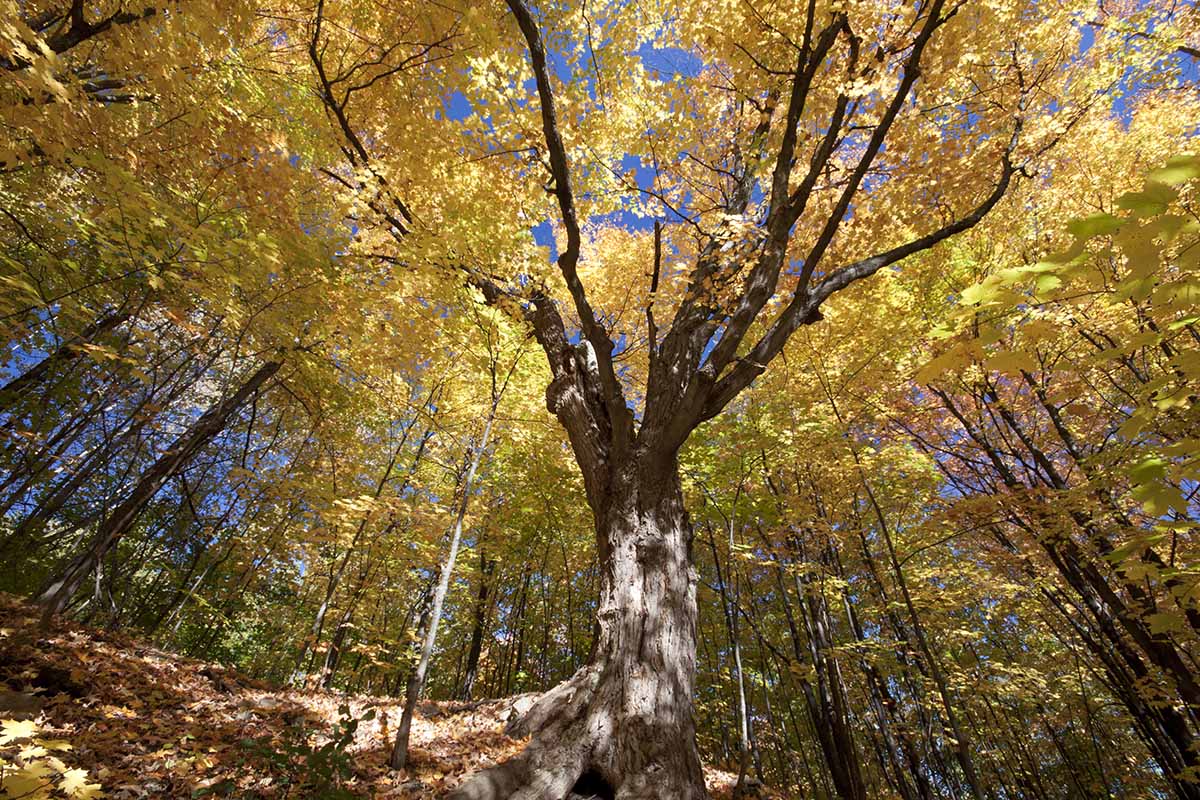
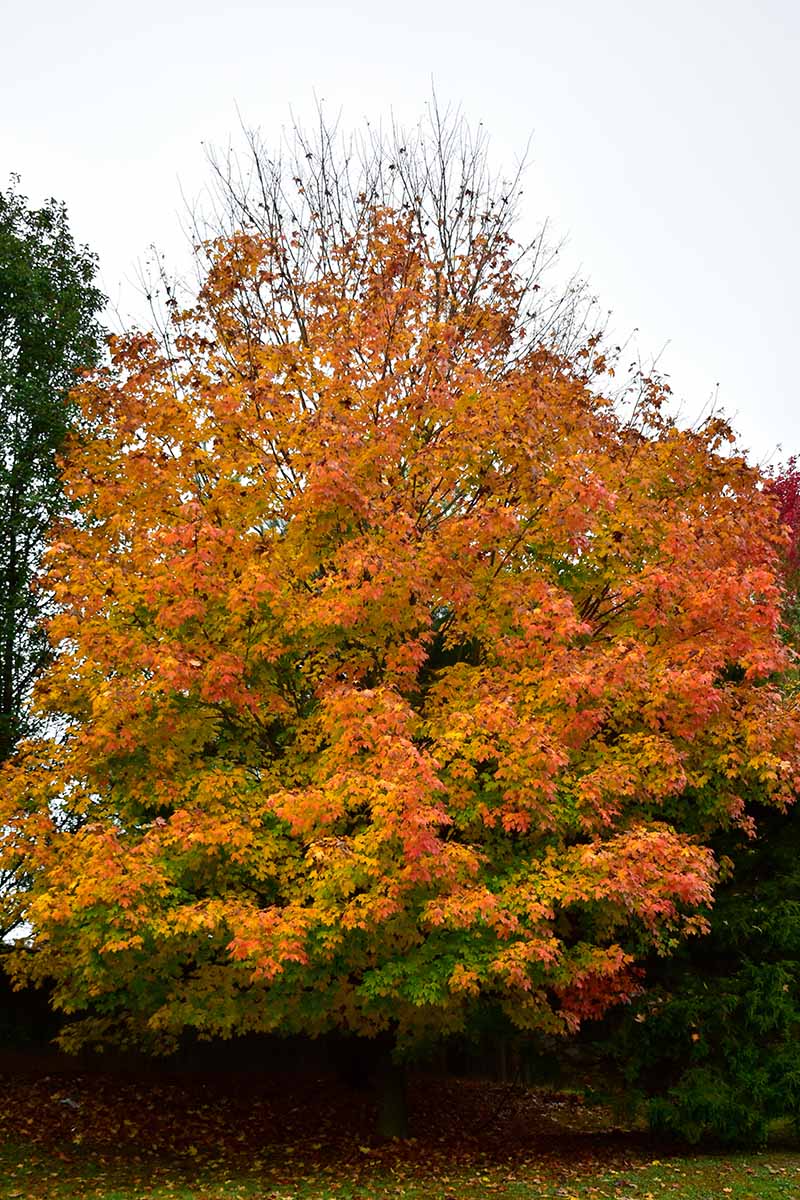
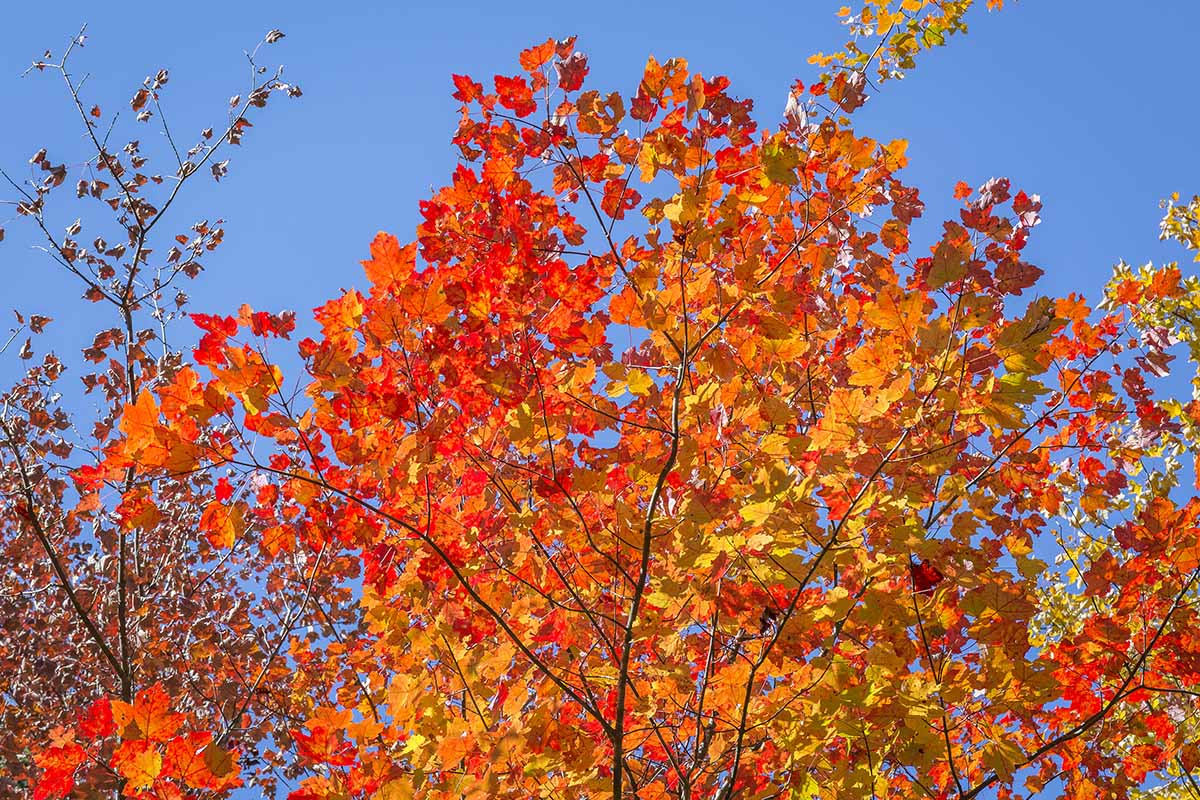
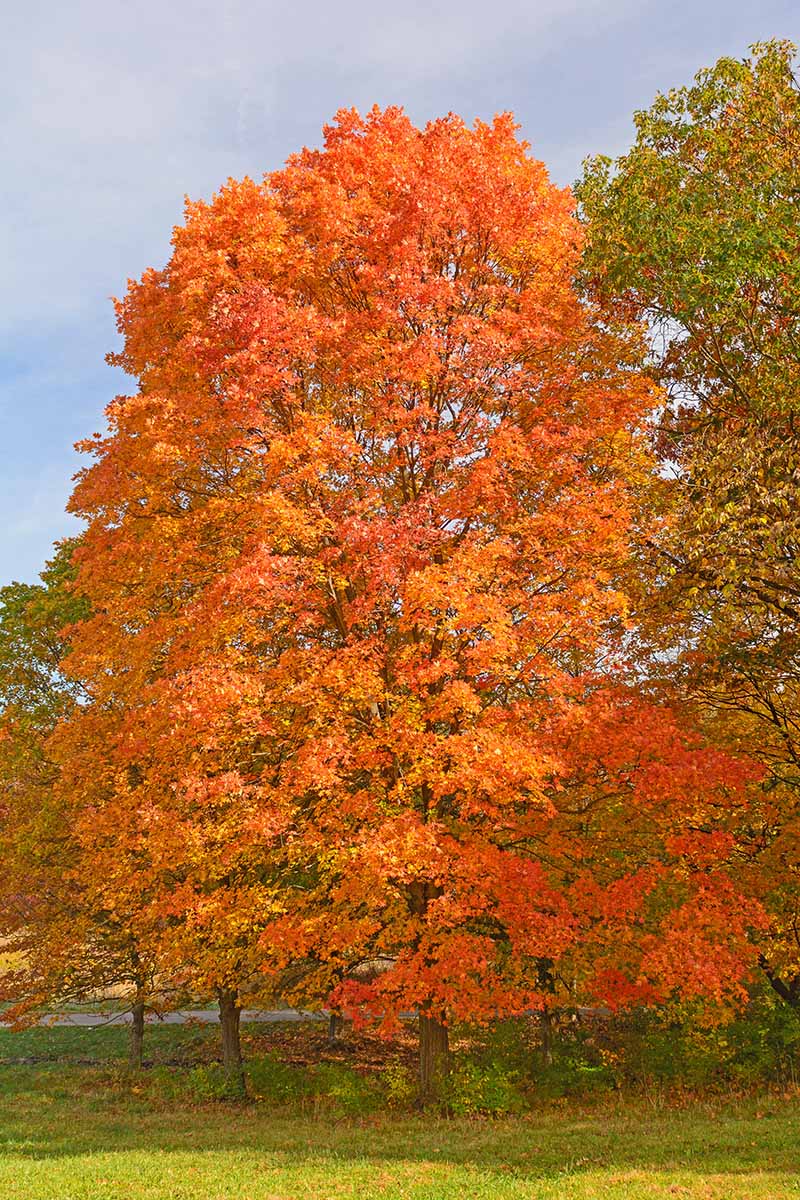
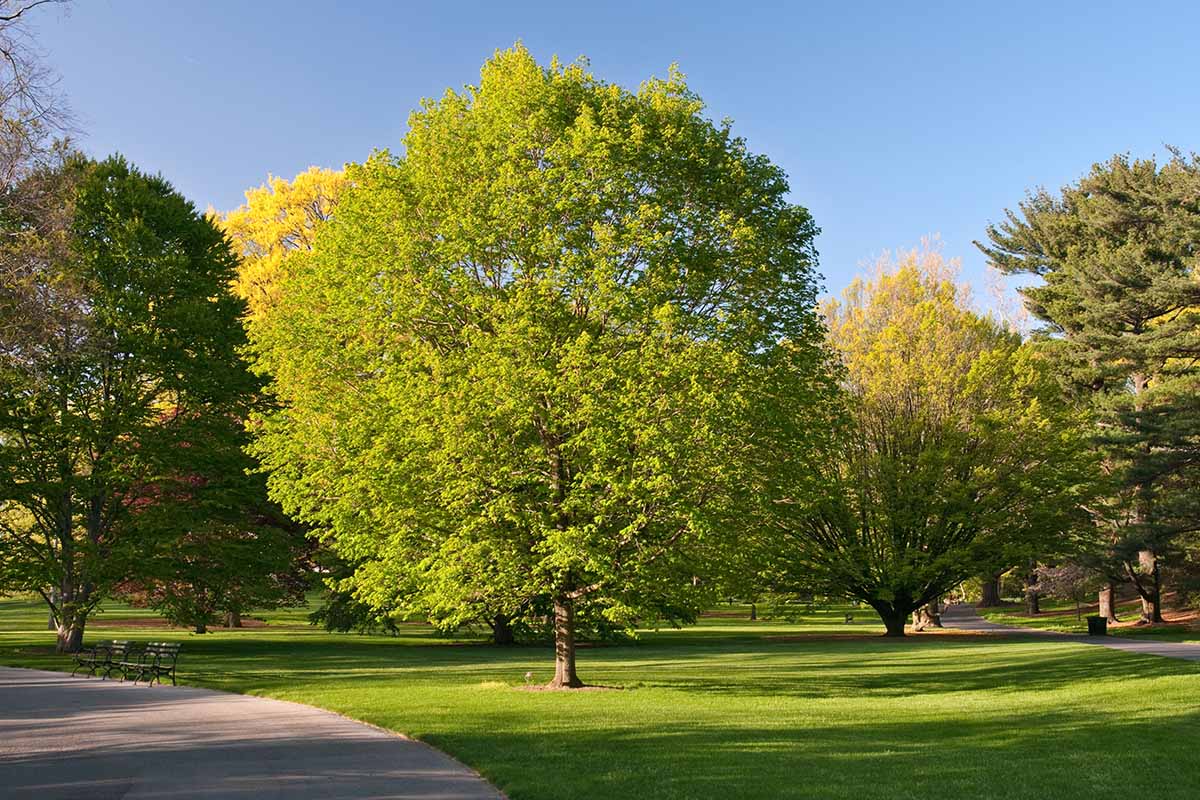
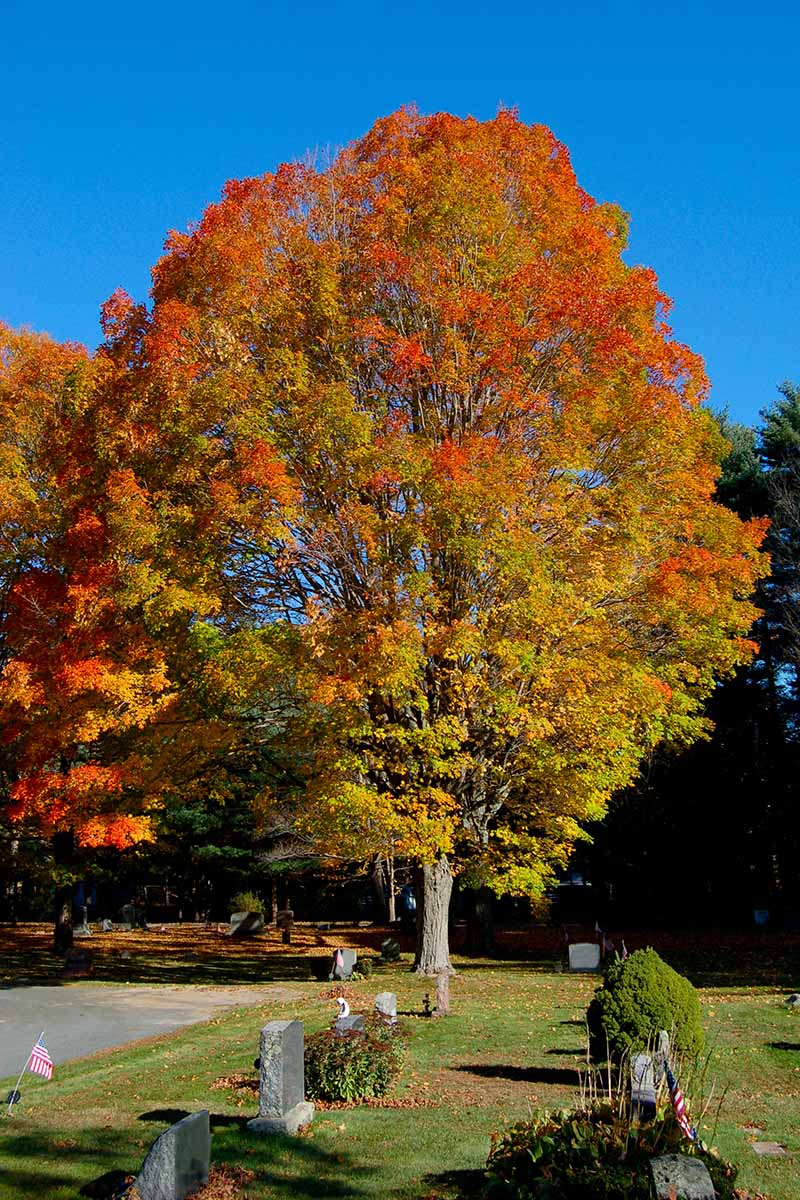
Best grown in USDA Hardiness Zones 4 to 8, sugar maples are native to North America, and can be found growing all across the eastern and central regions of the United States and Canada. With a dense, ovate-to rounded form and three- to five-lobed, medium green leaves that turn shades of yellow, orange, and red in fall, it’s certainly recognizable. Heck, you’ve undoubtedly seen a sugar maple leaf on the Canadian flag, at the very least! The flowers, while subtle, are nevertheless beautiful: greenish-yellow, five-sepaled, and hanging from branches on long stalks as they emerge before the leaves in April. A sugar maple’s bark isn’t too shabby either, what with its gray-brown color and rich texture that develops deep furrows with age. Its botanical name holds a special meaning: the genus name Acer means “sharp,” while saccharum translates to “sugar.” The lobes of the foliage have sharp, pointy tips, while the “sugar” part refers to this tree’s ability to produce mammoth amounts of sweet sap. Indigenous Americans utilized sugar maples long before Europeans did, and for much more than just their syrup. These native peoples found many other uses for the plant. Maple sap was used for sugar, and sap that was allowed to sour made for good vinegar. Medicinally, sugar maple bark came in handy for use in eye drops, cough suppressants, blood purifiers, and dermatological aids. A. saccharum lumber was used to make oars, furniture, handles, and woodenware. As settlers from the Old World came over to the New World, they traded for maple syrup with Indigenous Americans, and learned how to collect and boil sap from them. The sap of a sugar maple is highly valued in maple syrup production nowadays. It takes a lot of work, though – after distillation, 40 gallons of tapped sap only yields a single gallon of pure maple syrup. This explains why that top-tier, grade A, pure maple syrup at the grocery store sets you back a pretty penny! The sugar maple also goes by the common names “rock maple” and “hard maple,” which both refer to the hardness of its lumber. One of the most valuable hardwoods, A. saccharum lumber has a multitude of applications today in furniture, bowling alleys and pins, tool handles, cabinets, firewood, gun stocks, sporting goods, fine woodworking, and musical instruments. And sugar maples aren’t just cultivated for their sap and wood – they’re also grown for ornamental purposes. Beautiful specimens, these trees provide abundant shade anywhere they’re planted, but areas where they really shine include lawns, parks, and golf courses. Many different A. saccharum cultivars have been bred to create new varieties with desirable characteristics, such as certain sap traits, hardwood qualities, or ornamental attributes.
Propagation
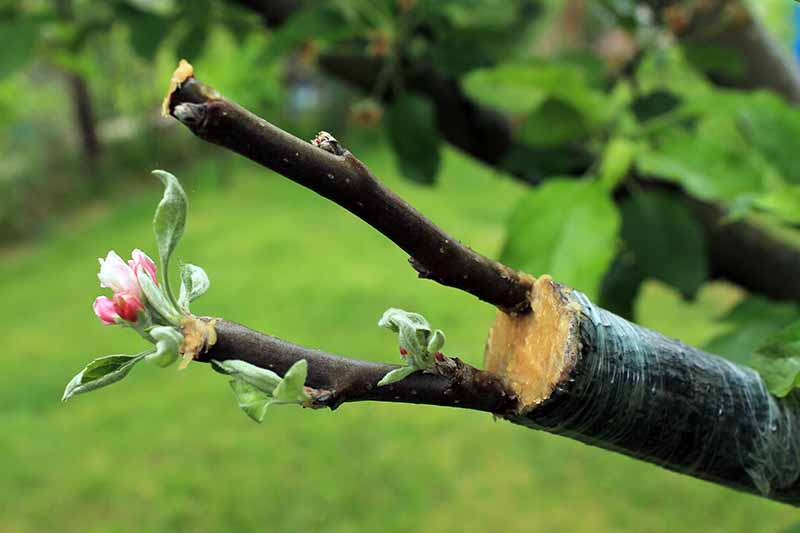
Sugar maples can be propagated in a variety of ways, with methods ranging from the easy and practical to something that might make fellow gardeners say, “Okay, now you’re just showing off.” Here, we’ll explore several common methods of propagation. Grafting is one common practice that we won’t cover in great detail here. When you join two different plant parts, a scion and rootstock, together in a way that encourages them to attach and grow as one, you can combine desirable characteristics of both, such as a rootstock’s hardiness with a scion’s high yield. Grafting is one of the coolest forms of propagation, if you ask me, but it’s also one of the trickier techniques to pull off successfully. It’s probably best to leave this one to the pros, i.e. the folks at arboretums and tree nurseries. Proper grafting protocols are a bit beyond the scope of this guide, but we have plenty to cover when it comes to starting from seed, rooting cuttings, layering, and transplanting. Let’s take a look.
From Seed
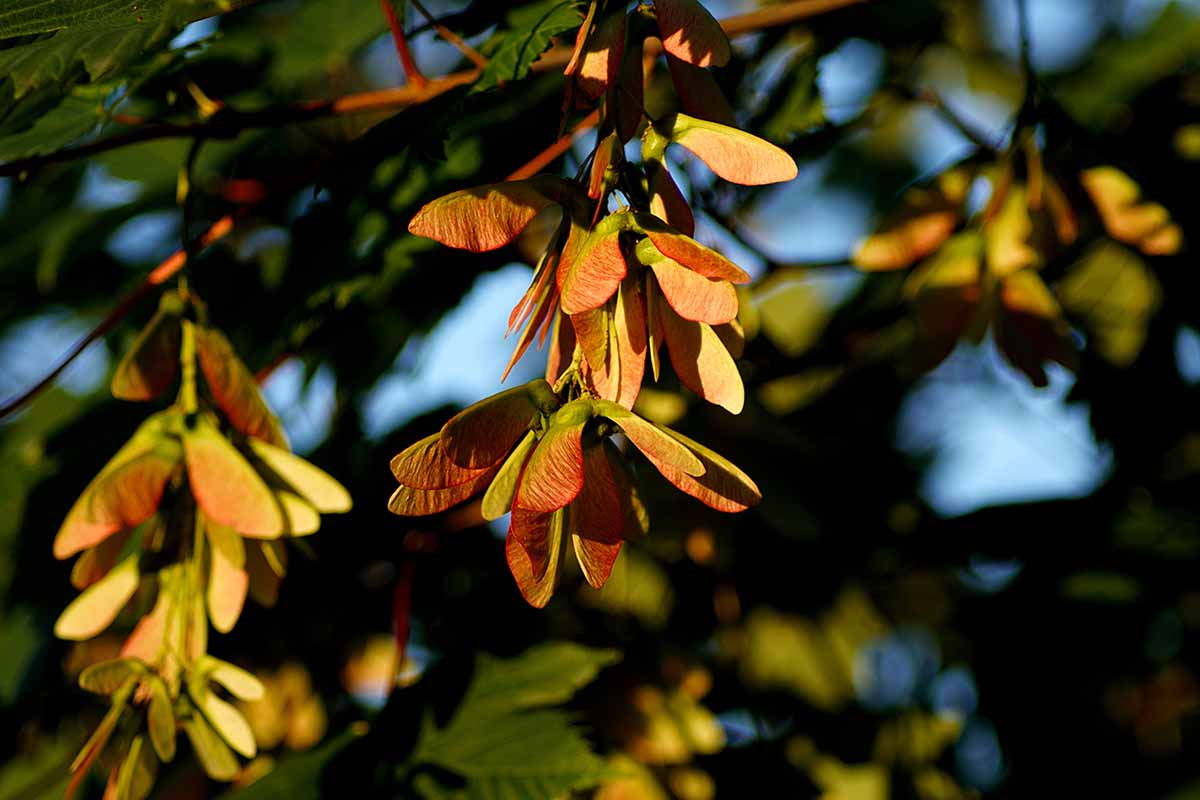
Seed propagation is very feasible for the home gardener. A. saccharum seeds are housed in samaras, or winged fruits that spin as they fall like a helicopter coming down for a landing. The seeds within can be harvested when they turn yellow, red, or brown, which usually happens in September or October. The seeds will need to be stratified prior to sowing. Do this by sowing the seeds a quarter-inch to one inch deep in a plastic baggie of moist sand, then stick the baggie in a refrigerator set to 33 to 39°F for 40 to 90 days. Next, move the seeds to a tray filled with a 50/50 mix of sphagnum peat moss and perlite, spaced about two inches apart. Keep the tray at room temperature indoors in a patch of indirect light until spring, making sure to keep the medium moist with gentle sprays of water as needed. After the last frost in spring, you’ll want to harden off the seedlings. To do this, leave the tray outside in part sun or partial shade for a half hour to a full 60 minutes before bringing the tray back indoors. The next day, do the same thing, but add another 30 to 60 minutes. Repeat until the seedlings are able to withstand outdoor conditions for a full day. Once the seedlings are hardened off, prepare a patch of well-draining, slightly acidic soil in a suitable location in your garden. Sow each seedling 30 to 60 feet apart, at a depth of a quarter-inch to a full inch deep to cover the roots. Keep the soil around the seedlings moist.
From Cuttings
Cuttings can be taken from the tips of living softwood shoots, but they can also be taken from the suckers that grow from cut sugar maple stumps. Keep the growing medium moist with gentle sprays of water, and keep the container in a well-lit area near a sunny, south-facing window, where it will ideally receive at least four hours of sunlight a day. Take cuttings 12 to 20 inches in length from suckers or softwood branch tips with developed leaves in June. Defoliate the bottom half of each cutting, and dip the defoliated ends into an IBA rooting hormone, such as this powder sold by Bonide, available from Arbico Organics. Bonide Bontone II Rooting Hormone Stick the cut ends three inches deep into a 1020-sized tray that’s filled with 50/50 mixture of perlite and sphagnum peat moss, making sure to space them two inches apart from each other and the edges of the tray. Once the cuttings develop an extra set or two of new leaves, you can begin the hardening-off process. On a spring day after the last frost, leave the container outdoors for 30 to 60 minutes before bringing it back inside. Add 30 to 60 more minutes of exposure each day to follow until the cuttings can tolerate an entire day of outdoor exposure. Once the cuttings are conditioned, they’re ready for transplanting.
Via Layering
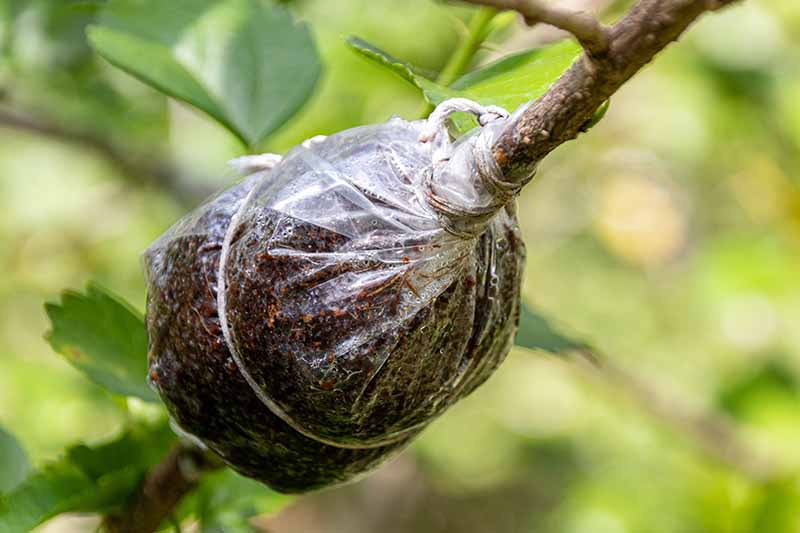
There are two ways to layer a sugar maple to propagate new plants: mound layering or air layering. For mound layering, you’ll begin with a nursery-grown plant or one started from seed. Plant a sapling with a central stem diameter of eight to 10 millimeters in spring as directed in the transplanting section below, and let it grow for an entire season. Before the next growing season begins in early spring, cut it back to a height of one inch. As the sapling grows new shoots, keep mounding soil or sawdust on them so it covers half the height of each of the new growths. Maintain this mound at half the height of the shoots until the mound layer reaches a thickness of six to eight inches. At this point, the shoots that have been kept covered should have developed new roots at the base. Cut them away just under the roots and transplant them as you would rooted cuttings. Air layering is another suitable technique, one that begins with a mature A. saccharum specimen. In spring, select a healthy, vigorous softwood stem about as thick as a pencil in diameter, and select a point 12 to 18 inches away from the stem tip. Make two horizontal cuts all the way around the stem, spacing these cuts about an inch apart. Between the cuts, peel off the bark and scrape away the green cambium beneath it. Dust the wound with powdered rooting hormone, wrap it in sphagnum peat moss, and then wrap that in plastic wrap or polyethylene film. Secure the whole thing with aluminum foil, and check it periodically for root development. Keep the peat moist. Once the roots grow to be a couple inches long, in about six to 10 weeks, sever the stem below the newly formed roots and treat the air-layered stem just like you would a rooted cutting, transplanting as described below.
Via Transplanting
On a day in early spring or fall, prep a patch of well-draining, moist, and slightly acidic soil. All transplants, from nursery saplings to cuttings and divisions propagated at home as well as plants started from seed, will need to be given enough space to grow to accommodate their dimensions at maturity. Dig holes that are approximately as wide and deep as the root system of your start or sapling. Stick the transplants in the holes, backfilling them with nearby soil. Water them in, and continue to keep the soil moist in the absence of rain. For bare root specimens – whether grafted or not – you’ll want to soak the roots in water for three to six hours prior to transplanting. The process is pretty similar to what you’d do for a potted transplant with a ball of soil around the roots, except you’ll want to make a mound of soil in the planting hole and spread the roots out over it before the backfilling and watering it in. Make sure any graft points are kept an inch above the soil line when transplanting as described above.
How to Grow
Like most plants, sugar maples require certain conditions and care for optimal growth and development.
Climate and Exposure Needs
A. saccharum thrives in USDA Hardiness Zones 4 to 8. Its light needs are very flexible – full sun to partial shade is ideal, but it tolerates full shade just fine, and it can be found growing from dense forest floors under the canopies of taller trees in the wild. This tree tolerates air pollution poorly, so it’s not the best option for planting in urban areas.
Soil Needs
Well-drained and fertile soil that’s constantly moist is ideal for this species. In addition, it grows best in soil that’s slightly acidic – a pH range of 5.5 to 6.8 should suffice. Sugar maples don’t like compacted soil, so try to keep heavy foot traffic and motor vehicles away from the root zone of this plant, extending out about two to three times the radius of the canopy. They also don’t like salt, so keep A. saccharum plantings away from seasides, coastlines, and roadsides that are salted heavily during snowstorms.
Water and Fertilizer Needs
Sugar maples need soil that is constantly moist but never wet or soggy, so good drainage is a must. Don’t provide any supplemental water if the soil is already moist. Instead, water the soil as soon as the top inch or two feels dry in the absence of rain. In a suitably moist location, you shouldn’t need to water frequently once trees are established. A. saccharum also loves fertile soil, so working a couple inches of humus, such as compost or well-rotted manure, into the root zone in early spring will go a long way towards providing the nutrition that this plant so craves.
Growing Tips
Full sun to partial shade exposure is ideal, but full shade is tolerated very well.Slightly acidic soil is optimal for growth and development.Choose a planting location with good drainage and consistently moist soil.
Pruning and Maintenance
Sugar maples should be pruned in December or January to prevent the loss of excess sap. For more detail on the ins and outs of the process, check out our guide to maple pruning. In addition, keeping your specimen mulched will go a long way in moderating soil temperature, conserving moisture, and preventing structural injury. Apply and maintain three to four inches of organic wood chips around the trunk, making sure to spread it two feet out from the trunk. Don’t heap the mulch around the trunk like a volcano – this encourages decay and disease. Instead, pull the mulch three to six inches away from the trunk and root flare, piling the mulch like a donut. Once the mulch has been applied, thoroughly water it in so that it all settles nicely.
Autumn Splendor
With heat resistance, drought tolerance, and dark green leaves that resist tattering, the theme of ‘Autumn Splendor’ is beautiful toughness. Acer Saccharum Bare root sugar maples are also available from Home Depot. However, there are many cultivars with traits not offered by a plain ol’ A. saccharum. Emphasis on “many”… almost too many. For brevity’s sake, let’s go over the top five. Standard sugar maples aren’t really known for their durability, so a resilient A. saccharum cultivar is definitely worth a mention. With a mature height and spread of 45 feet, this cultivar can trace its botanical heritage back to the ‘Caddo’ variety, which is known for its heat and drought tolerance. ‘Autumn Splendor’ grows about a foot per year, and dazzles onlookers with brilliant orange-red foliage in fall. The crown is filled with glossy, dark green leaves that have 150 percent of the thickness of the standard species. These tatter-resistant leaves wait until early November to turn a gorgeous yellow-orange. Also known as A. saccharum ‘JFS-Caddo2,’ its growing habit is neatly oval shaped, which gives this cultivar an attractively tidy appearance. ‘Flashfire’ Besides the color, ‘Flashfire’ possesses more resistance against summer heat and mildew than the standard species, proving that it has toughness to back up its good looks. For a four- to six-foot specimen, visit FastGrowingTrees.com.
Legacy
The first thing I noticed when I discovered the ‘Legacy’ cultivar of sugar maple is how dense and heavy the growth habit looks. In addition to its ornamental assets, ‘Legacy’ is also quite drought resistant. The tree reaches a height of 50 feet and a width of 35 feet at maturity as well. Overall, quite the impressive specimen!
Oregon Trail
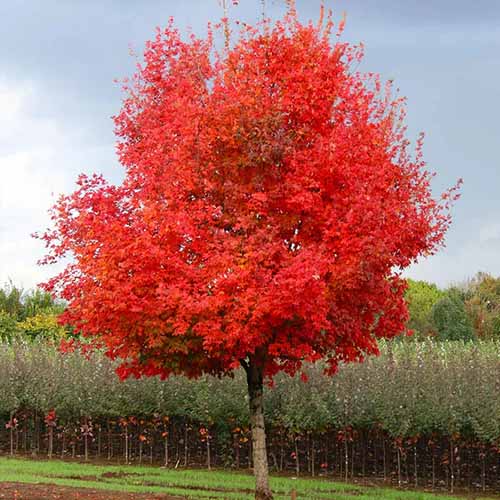
Aka ‘Hiawatha 1’ and hailing from Hiawatha, Kansas, “The City of Beautiful Maples,” Oregon Trail™ is another tough customer with tatter-proof leaves and good heat resistance. It grows a bit larger and faster than ‘Autumn Splendor,’ with a mature height and spread of 50 to 60 feet and a yearly growth rate of 12 to 18 inches. The fall color on this one is more of a straight-up red than orange-red – truly stunning!
Unity
Also known as ‘Jefcan,’ Unity® is the Iceman to the Human Torch that is ‘Autumn Splendor.’ While ‘Autumn Splendor’ withstands heat, Unity® is very cold-resistant, to the point where it can survive the winter in USDA Hardiness Zone 3. It resists frost cracking and dieback – conditions that other sugar maples are susceptible to when planted so far north. It grows 12 to 18 inches annually, and reaches a mature height and spread of 50 feet. Like ‘Autumn Splendor,’ Unity® also has orange-red autumn foliage. A real beaut!
Managing Pests and Disease
Many pests and disease pathogens are better able to exploit stressed and unhealthy trees, so properly cultivating your sugar maple from the get-go is one of the best forms of health care.
Herbivores
A. saccharum is a one-stop shop of botanical tastiness: the foliage, stems, bark, roots, seeds, sap, and floral nectar are all consumed by animals. In particular, this plant is susceptible to many different species of herbivorous mammals… unless it’s protected. This is especially important for young saplings, which don’t have the inherent protection provided by the height of more mature specimens.
Large Mammals
Moose, elk, and deer like to munch on the leaves and stems, while porcupines may consume the bark and girdle upper stems. The best way to keep them away is with a tall fence – seven to eight feet should do the trick. Don’t forget to put in a strongly latched gate!
Small Mammals
Mice and rabbits will nibble on the leaves and bark, and gophers will consume the roots. Despite all of these creatures being furry and adorably aggravating, they each require different management approaches. For mice, avoid mulching with straw or fluffy material that’s perfect for nesting. Wrapping trunk bases with hardware cloth or tree wrap provides some physical protection. Standard, peanut butter-laden mouse traps, covered outdoor bait stations, and ammonium-based mouse repellents work as well. Onion, mint, or garlic plantings will help to repel mice, and it never hurts to have a cat around. Rabbits are best kept out with a physical barrier. Chicken wire sunk six inches below the soil, in combination with fencing like you might use against larger herbivores, will work just fine. Should they find their way in, frequently-moved snake decoys might work as a deterrent. Learn more about preventing rabbits from destroying your garden in our guide. To prevent gophers from feeding on your trees, plantings such as catmint, lavender, oleander, and salvia are great deterrents. Gopher repellents are readily available on the market, while natural alternatives include castor oil and peppermint oil. Gophers adapt to different forms of control, so switch things up frequently to keep them guessing.
Insects
Many insects are vectors for disease, so keeping pests away will also help to deter pathogens.
Aphids
These insects are soft-bodied, translucent green pests that will suck phloem sap out of plants, excreting honeydew all the while. The honeydew is a tasty enough incentive for predatory ants to provide protection for these pests, while the honeydew also encourages the growth of fungal sooty mold. Besides the structural damage of feeding, a sugar maple losing its sap will have decreased health and vigor. Borer feeding tends to cause discolored foliage, premature leaf drop, cracks in bark, and branch dieback. Along with reducing health and vitality, this could all eventually culminate in plant death if an infestation is severe. High-velocity water sprays will physically knock aphids off of plant surfaces, as well. Monterey Horticultural Oil
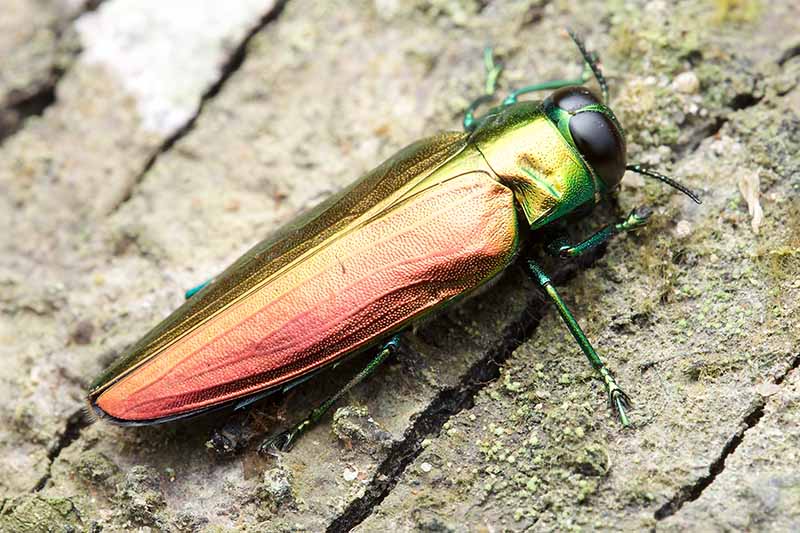
Borers
“Borer” is simply a catch-all term for many different insects who tunnel and feed in woody plant structures as part of their life cycle. Clues to indicate a borer infestation include bleeding tree sap, as well as the sawdust-like frass that collects in niches and divots in the bark and branches. Plant stress is the chief precursor of a borer infestation, so take good care of your A. saccharum. If it’s too late for proper cultivation, drenching the soil with imidacloprid and contact sprays of cypermethrin are solid forms of control.
Scale
Scale insects come in two forms. Soft scale insects are lightly colored and excrete honeydew just like our aphid friends (enemies?). Scale can also be armored, but these guys don’t squirt out honeydew, thankfully. Both types, while being little in stature, may cause damage that can’t be ignored. Yellowing foliage, premature leaf drop, and stunted growth are all symptoms of a scale infestation. Not usually fatal, thankfully, but still a botanical nuisance. Feel free to scrape off scale by hand or with an old toothbrush when you see them. Ladybugs and parasitic wasps munch on scale, and permethrin, bifenthrin, cyhalothrin, or cyfluthrin are insecticides potentially worth considering in cases of severe infestation. Whether you use beneficial insects or chemical control is up to you – just don’t use them simultaneously.
Disease
A sanitary gardening environment will aid you greatly in preventing infection. Sanitize your garden tools, use disease-free soil and seed, and keep a sharp eye out for disease symptoms before they progress from bad to worse.
Anthracnose
Anthracnose is a fungal disease which tends to strike in cool and wet conditions. Symptoms include irregularly-shaped, tan-to-brown blotches or spots on leaves, along with foliar distortion, curling, or cupping in younger foliage. As the disease progresses, premature leaf drop often occurs. Most of the time, anthracnose only causes minor stress to a tree, so you don’t have to do anything, per se. Removing nearby plant detritus and pruning to increase intra-plant airflow are both sanitary practices worth adopting. In cases where severe defoliation has occurred, fungicides may become necessary for preventing future seasons of total defoliation.
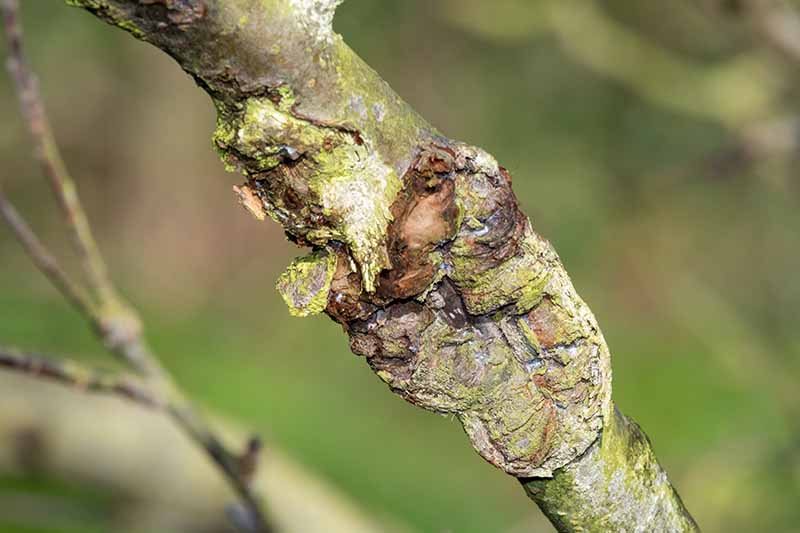
Cankers
Cankers occur when bacteria or fungi infect an open wound on a plant, and appear as discolored, sickly-looking lesions on branches or the trunk. They tend to bleed sap, and hinder nearby growth. Adjacent leaves become discolored, curled, or wilted, and the entire affected branch often dies back. In addition to proper wound care, pruning away branches afflicted with cankers is essential. Give your pruning cuts several inches of leeway from where the lesion is located, and only prune on dry days to prevent fungal spread. Don’t slice and dice a canker directly, and hire a professional arborist to take care of a canker that’s directly on the trunk.
Leaf Spot
The term “leaf spot” refers to a variety of diseases, and afflicts leaf surfaces with small, darkened lesions. As they grow, these spots can merge with each other into larger, irregularly-shaped blotches. Besides the resulting eyesores and a bit of defoliation, leaf spot diseases aren’t typically fatal. To prevent leaf spot: avoid overcrowding, prune to increase airflow and light penetration, avoid overhead watering, and gather up plant debris for later destruction. Fungicides can be used if needed in extreme cases, after many simultaneous years of complete defoliation.
Tar Spot
Tar spot is a fungal disease which, thankfully, is more of an aesthetic condition than an actual threat to Acer health. The tar spot seen on maples is caused by Rhytisma acerinum, R. americanum, and R. punctatum. Tar symptoms show up in spring as lightly colored green or yellow-green spots on the leaves. Come summertime, the blemishes darken into the tar-like spots that give the disease its name. As more time passes, afflicted foliage may drop early. Don’t sweat a tar spot infection too much. You can always clean up and destroy any nearby plant detritus for prevention, though. And while fungicides can also work preventatively, they’re probably not worth the effort and cost of application.
Verticillium Wilt
I’ve saved the gnarliest, most serious disease for last. Caused by soilborne species of Verticillium fungi that enter roots and aboveground wounds, verticillium wilt basically clogs up a plant’s xylem – the internal plumbing of a plant – which prevents water normally collected by the roots from reaching leaves. Sapwood streaking, chlorosis, necrosis, and eventual plant death are all notable symptoms. A professional’s opinion can really save you a lot of time in diagnosing and treating this problem. Prune dead branches, and replace dead trees with Verticillium-resistant species. As a fungus that can persist in the ground for years, it’ll probably infect any susceptible plants chosen to replace your tree in that infected patch of garden.
Best Uses
Ornamentally, A. saccharum dazzles as both a specimen and a shade tree in wide open, non-polluted spaces. In autumn, the leaves will amaze and astound. The sugar maple’s hardwood offers a multitude of uses, for both amateur and professional woodworkers. And perhaps the best part of this plant is the syrup that it provides. Whether it’s a lone tree or one of many, growing A. saccharum is the most efficient way of harvesting that sweet, delicious pancake condiment other than buying it at the store.
Tapping Sap
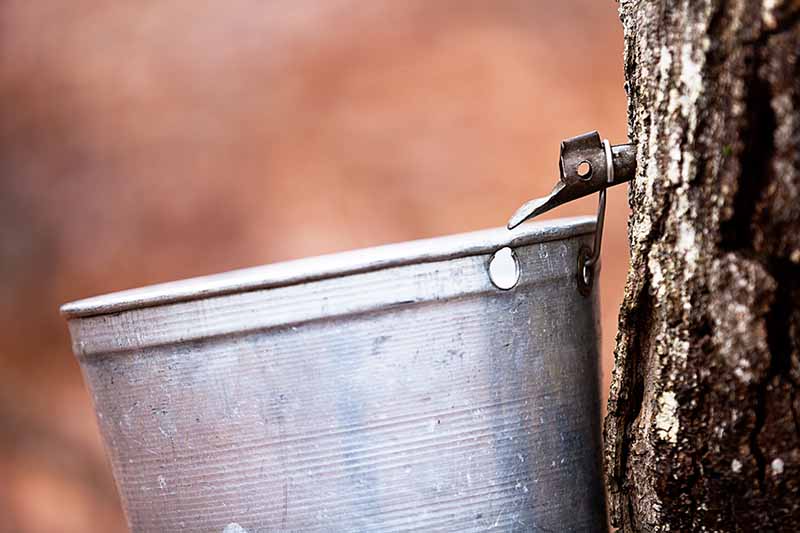
When tapping sap for the first time, it’s important to select trees that have been growing out in the open, with no competition or crowding from the canopies of other trees. When temperatures are above freezing in the daytime, drill a two- to two-and-a-half-inch-deep hole at a slight upward angle about two to three feet above the ground. Drill the hole in a section of wound-free, healthy wood. You’ll need a drill bit that’s 7/16 of an inch in diameter, a maple spile or spout, a bucket with a cover for sap collection, and a metal collection pail. Lehman’s offers a tapping bit for a hand drill, a stainless steel spout with a bucket-hanging hook, a three-gallon high-impact plastic sap collection bucket, and a blue plastic bucket cover. Begin tapping in late winter or early spring, when nighttime temperatures still drop below 32oF and daytime temperatures rise above freezing. Choose a tree that’s at least about four to five years old, with a minimum trunk circumference of 31 inches at four and a half feet above the ground. Wood shavings light in color indicate that you’ve chosen your spot for drilling correctly, while darkened shavings mean you should choose another spot on the trunk to tap. After drilling, insert the spout into the taphole, and lightly tap the spout in firmly with a hammer. Position a collection bucket so it will catch the sap pouring from the spout, and place a cover on top so rain and debris won’t contaminate the sap. Empty the pail into a clean collection container at least once daily, if possible. Use a paper filter or a clean cloth to filter out debris as you transfer the sap from the pail into the storage container.
Syrup Processing and Storage
Maintain a constant sap depth of at least two inches as you reduce the liquid, adding more as needed. Once the boiling syrup reaches a temperature 218oF, your syrup is ready. It may be helpful to have some step-by-step instructions handy in the field throughout this whole process. Backyard Sugarin’ Lehman’s has two helpful texts on making maple syrup from sap available: “Backyard Sugarin’” and “How To Make Maple Syrup.” How to Make Maple Syrup While they both thoroughly cover maple syrup production, the former goes into more detail on backyard evaporator construction, while the latter provides additional tips for marketing your syrup once it’s made. Boil sap as you collect it, since the sap’s main ingredients – water and sugar – provide a prime environment for pathogens to thrive. Place a thermometer in your pan to monitor the temperature at which the sap boils, which will increase as more and more water is boiled away. Maple Syrup Test Kit For a glass-encased thermometer with accompanying hydrometer and tin testing cup, visit Lehman’s. Evaporator Pan Only boiling two inches of sap at a time results in more efficient boiling, since heat has to travel through the layer of syrup at the bottom in order to heat the water above. But feel free to boil a thicker layer for speed or convenience. Apply a drop or two of vegetable oil to reduce foam production. As foam develops, skim it off the top and discard it. Immediately filter the syrup through a wool or synthetic Orlon cone filter to remove gritty potassium nitrate, aka “niter,” from the product. Bottle and seal the syrup while it’s hot in your choice of canning or glassware. A water bath or pressure canner can be used for processing before storing in a cool, dry spot, or your syrup may be stored in the refrigerator.
Recipes and Cooking Ideas
When it comes to the palatability of my everyday meals, I’m pretty basic. Other than mixing maple syrup with oats and peanut butter – or simply drenching my waffles with some Mrs. Butterworth’s – my culinary skill with maple syrup is not exactly fit for fine dining. Luckily, I have the inside scoop on some tasty concoctions, created by folks over at our sister site, Foodal, who actually know what they’re doing in the kitchen. For maple syrup connoisseurs, let me walk you through a full day of glorious, maple syrup-infused eating: Start your morning off right with a breakfast porridge made with einkorn grains and maple-roasted blueberries that is delectable as it is nutritious! Keep the mid-morning munchies at bay with a sweet pumpkin pie smoothie until lunch: a pear arugula salad with maple vinaigrette and creamy fried goat cheese! A handful of nuts and seeds glazed in maple syrup will keep you sated until dinner… which happens to be a maple-glazed pork roast with potatoes and carrots! Post-dinner dessert is sweet potato blondies with a maple syrup glaze, while syrup-infused pear sorbet will make for the perfect midnight snack. A. saccharum takes a bit of work to cultivate, it’s true. But with such a big payoff, it’s well worth the effort. Plus, how cool would it be to tap your own syrup? Any questions, anecdotes, or random remarks can go in the comments section below. I’d love to read and respond to what y’all have to say! For other maple tree guides, take a gander at what we’ve got on tap:
How to Grow Japanese Maple TreesHow to Grow and Care for Norway Maple TreesHow to Grow and Care for Red Maple Trees