Though they are fairly commonplace as far as houseplants go, for me, spider plants have always instilled a sense of awe. When I was a child, my mom’s friend Sue had a beautiful mature spider plant. I’ll admit, I fell in love with it. I remember going to her home, where I would gaze up at this houseplant hanging from the ceiling, bathed in afternoon light, and admire the seemingly countless masses of little spider babies cascading down from it. We link to vendors to help you find relevant products. If you buy from one of our links, we may earn a commission. These days, my own spider plants aren’t quite that awe-inspiring. Not yet, at least. Just wait – they’re still young. I’m going to guide you through the best care tips for this lovely and easygoing foliage plant, so you can keep yours happy and healthy, and help it grow into a houseplant worthy of admiration. Here’s what I’m going to cover: If you’re a newbie houseplant parent, you’ve made a good choice to start with. This is one of the easiest plants you can care for in your home – and learning how to give it proper care will set you on a good path toward growing more challenging indoor vegetation. And just to make sure we’re all on the same page, this houseplant is not to be confused with cleome, the flowering annual that is sometimes known by the same common name.
What Is a Spider Plant?
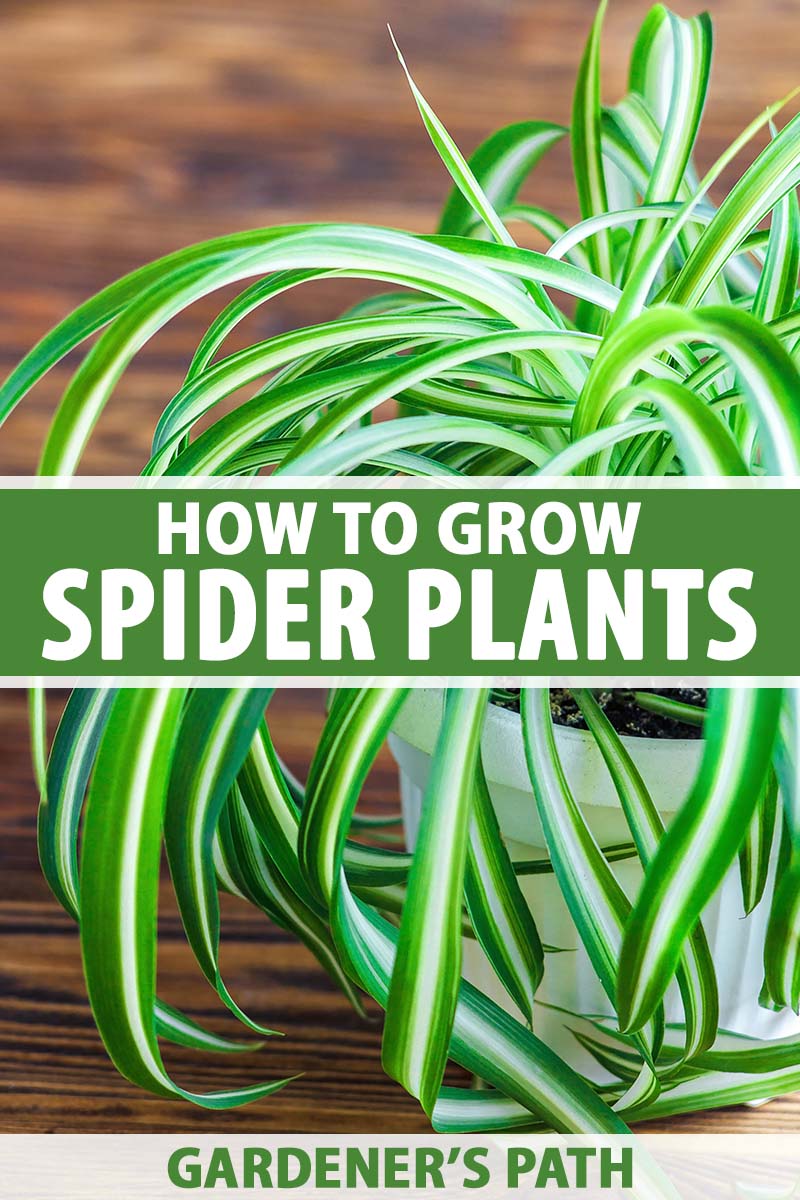
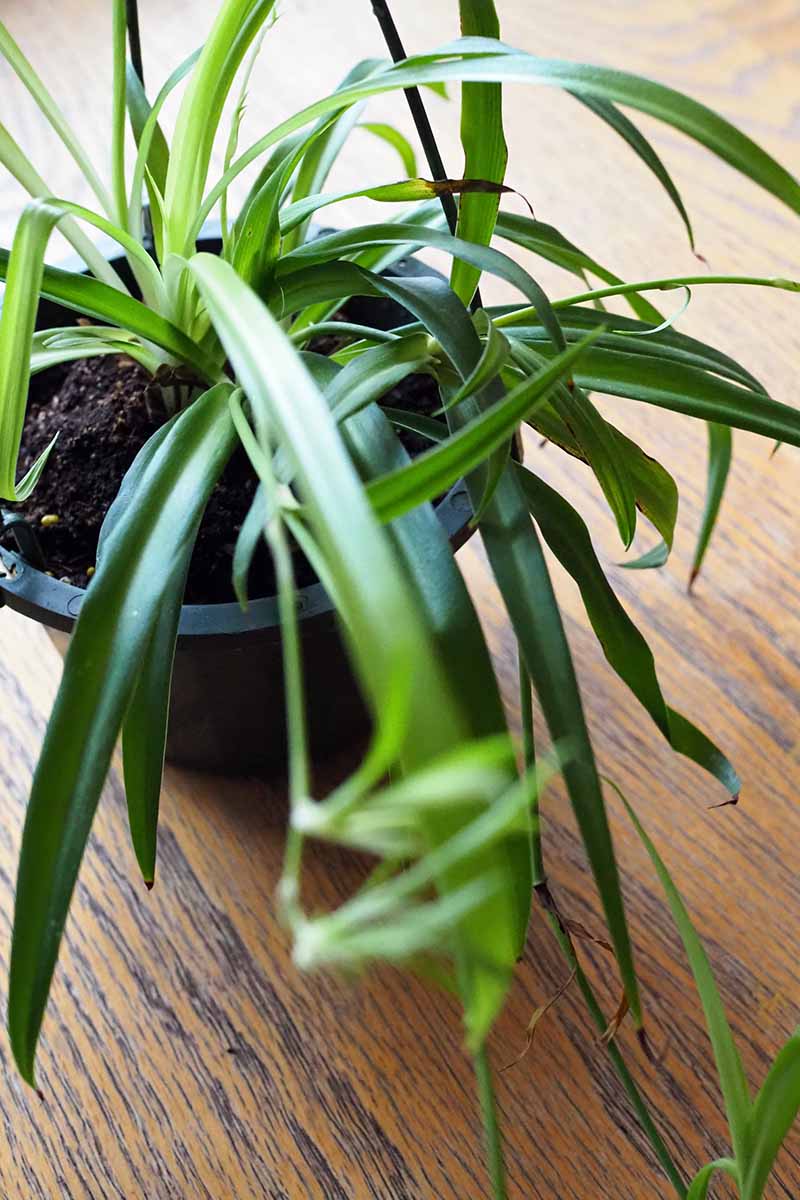
Chlorophytum comosum, more commonly known as “spider plant,” is an herbaceous tropical evergreen perennial enjoyed for its abundant foliage and ability to produce masses of plantlets.
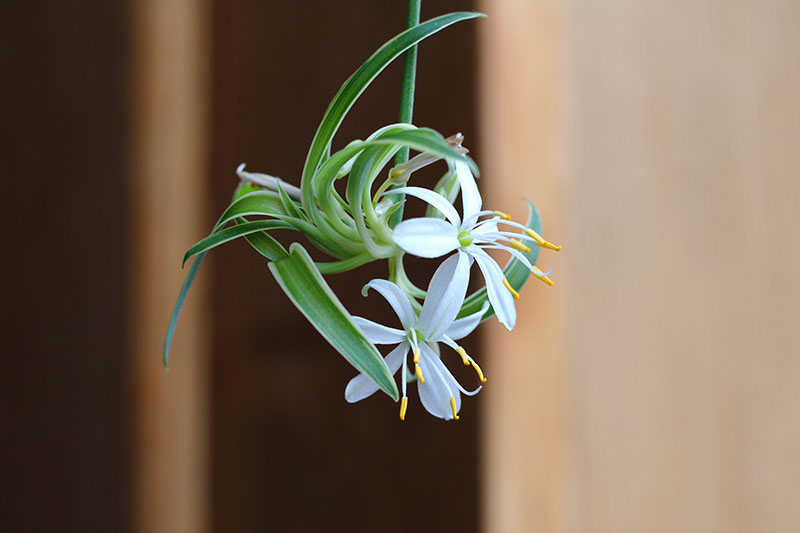
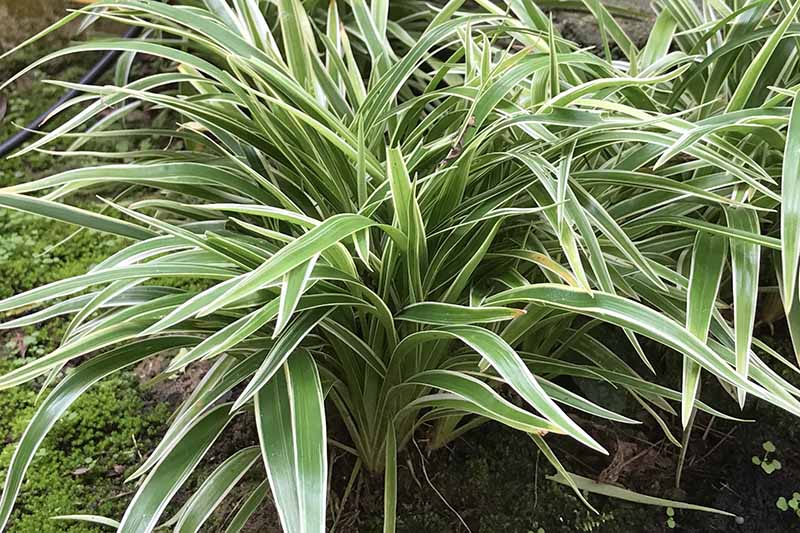
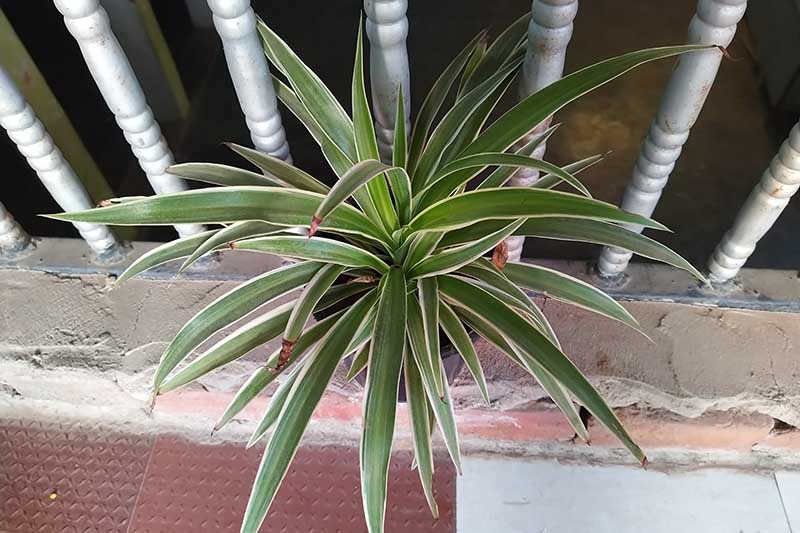
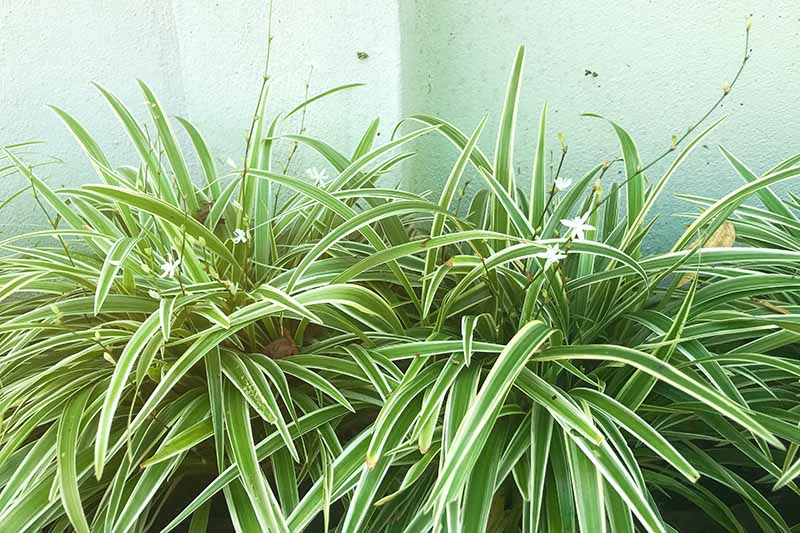
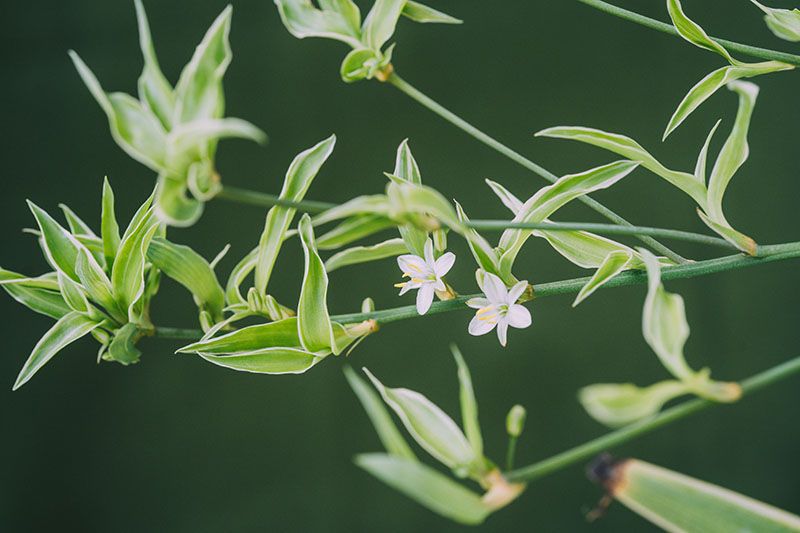
It’s known around the world by several other common names as well, including “airplane plant,” “ribbon plant,” and “spider ivy.” Some call it “St. Bernard’s lily” but this common name is used for another member of the asparagus family, Anthericum liliago, as well. This tropical species is grass-like, with slender, arching leaves that grow in a rosette form. Its leaves are either all green, or variegated in either green and white, or sometimes green and yellow, depending on the cultivar. Long stalks grow in the midst of its leaves, on which it produces small, white, star-shaped flowers, as well as tiny offsets or “spiderettes,” as its vegetative babies are called. This characteristic of producing babies that remain attached to the mother plant gives C. comosum yet another name, “hens and chicks” or “hens and chickens” – not to be confused with the various succulent species that go by the same common name.
Spider ivy can grow and nourish multitudes of these babies without seeming worse for wear.
Cultivation and History
These productive houseplants are a familiar sight in our homes, but odds are you know little about where they actually come from. C. comosum is native to a wide swath of sub-Saharan Africa, ranging from Cameroon and Ethiopia all the way down to South Africa. Its wide native range is telling – C. comosum has flexibility built into its genetics. In its native habitat, it has adapted to a diverse range of locations – growing on cliffs, in river valleys, and in flat thickets – as well as in a variety of different soil types and water conditions. This adaptability is what makes it such a resilient houseplant.
With a glance at its grass-like growth habit, you would probably have a hard time guessing that C. comosum is related to a common garden veggie – asparagus. C. comosum is taxonomically classified as a member of the asparagus family, and in addition to asparagus, its relatives include agave, hosta, sansevieria, yucca, and monkey grass. The latter is also known as Liriope, and members of this genus bear a strong family resemblance to the subject of this article. Other members of the same genus including C. laxum and C. viridescens are also commonly called “spider plants.” The meaning of this tropical species’ scientific name couldn’t be more literal – “Chlorophytum” means “green plant” and comosum means “tufted” or “leafy.” Swedish naturalist Carl Thunberg was the first European known to collect this species in the wild, and he gave it its scientific name in 1794. As for its common name, some sources suggest that its long, thin leaves are the inspiration behind the name “spider plant,” while at least one writer claims the nickname is inspired instead by the offsets, which resemble spiders rappelling down from a spiderweb.
C. comosum has been enjoyed in the home – and shared – since at least the early 1800s. The German writer and poet Goethe reportedly had a specimen of his own and shared its offsets with his friends. But long before Europeans discovered it, local populations were likely using C. comosum in a variety of ways. The Nguni people, who live primarily in South Africa, use it medicinally, administering it to new mothers and young infants in particular. And in addition to its traditional medicinal use, this species is also considered edible and can be consumed like a vegetable. While its grass-like, extremely fibrous foliage can be eaten, the real edible interest of C. comosum lies under the soil, in this species’ fleshy, tuberous roots. These roots store both nutrients and water, and are the secret to this plant’s resilience. I’ll delve into how the roots help to bolster C. comosum a little later in the article, so keep reading! C. comosum has naturalized in some countries outside of Africa, and many researchers have published studies looking into this species as an important potential source of locally available food. One paper published in 2014 in “Nutrition and Food Science Research” by Ali Aberoumand, Associate Professor in the Department of Fisheries at the University of Technology in Behbahan, Iran, asserts that the edible parts of this species contain significant amounts of vitamins C and E. Another paper by the same researcher, published in the “Journal of Medicinal Food Plants” in 2009, claims the tubers of C. comosum contain “good sources of plant fibre, potassium, zinc, lipid, protein and carbohydrates.” As a wild food enthusiast, I’m always interested in adding new edible plants to my list, but I’m not quite ready to subject my spider ivy to my kitchen knife just yet. Perhaps when my home is brimming with extra specimens propagated from offsets, I might sacrifice one in order to have a taste test.
Its edible potential is certainly fascinating, but spider ivy is used primarily as a houseplant, and may be one of the most commonly cultivated houseplants in the world. It’s enjoyed primarily for its foliage and extensive populations of pups, but its small delicate flowers can appear throughout the year and add to its overall delightful appearance. While most of us will enjoy this species from the tropics indoors, it can be grown outdoors as an evergreen perennial in USDA Hardiness Zones 9-11. It can also be treated as a perennial in Zone 8, but its foliage will be killed back in winter, and it will start producing new growth in the spring.
Propagation
While propagating C. comosum from offsets is the most well-known method, it can also be propagated through division, and by sowing seeds.
From Seed
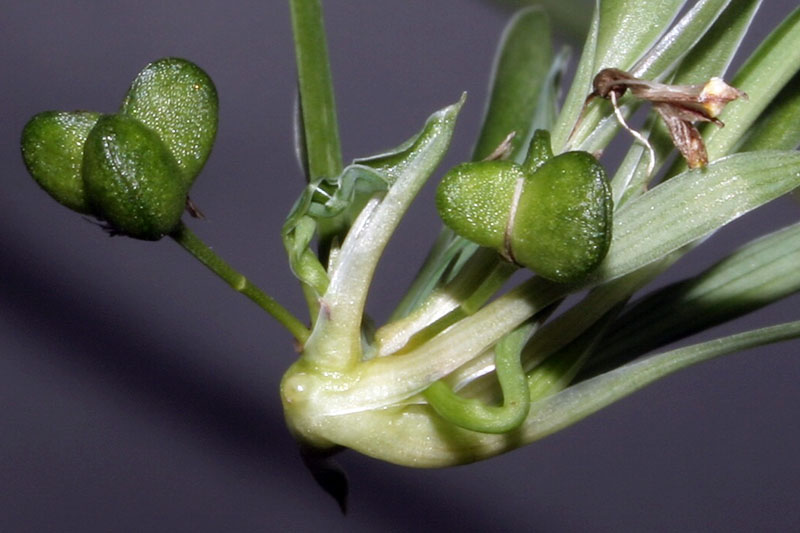
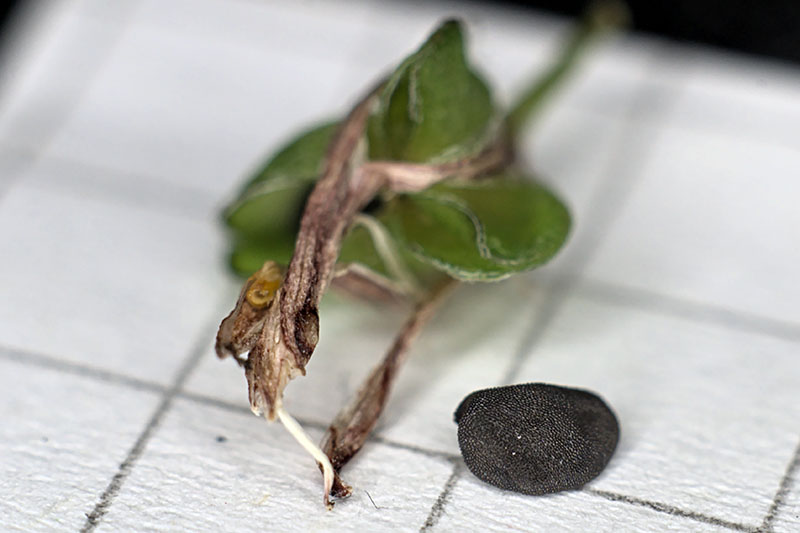
Growing spider ivy from seeds isn’t what first comes to mind when one thinks of propagating this species, but seeds are one of the plant’s reproductive strategies, and we can take advantage of this as well to grow new specimens. Before you launch into such a project, though, consider that if the specimen is a hybrid cultivar, the seedlings may end up looking a bit different from its parent. If you don’t have a parent plant to start with, make sure to purchase seeds from a reputable source. In order for C. comosum to produce seed heads, it will need to be pollinated. If your ribbon plant is flowering during the summer, place it outside where some friendly bees, wasps, or hoverflies can find the monoecious flowers and do the job for you. Once your spider ivy flowers are pollinated, they will produce fruit, which will contain the ripening seeds you’ll be harvesting. Wait for the fruit to dry out to ensure that the seeds are fully matured. Once the seed heads are dry, you can harvest the seeds. Sow the harvested seeds in a sterile potting medium, and water them gently with a mister to avoid oversaturating the soil. Repot the young plant as needed, as indicated in the repotting section of this article below – and be aware that young plants may need more frequent watering than established specimens.
From Offsets
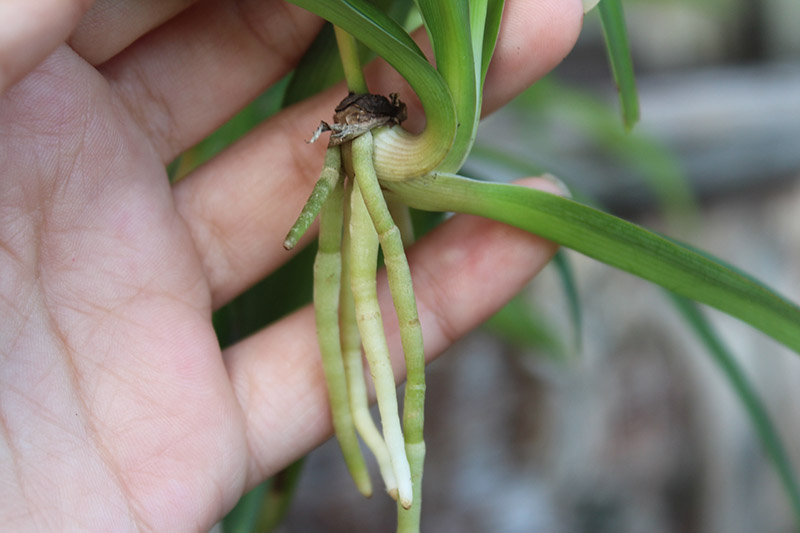
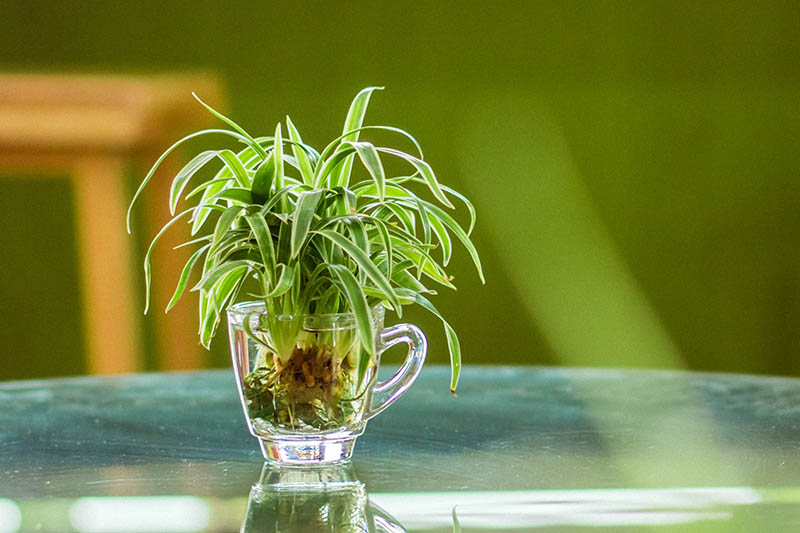
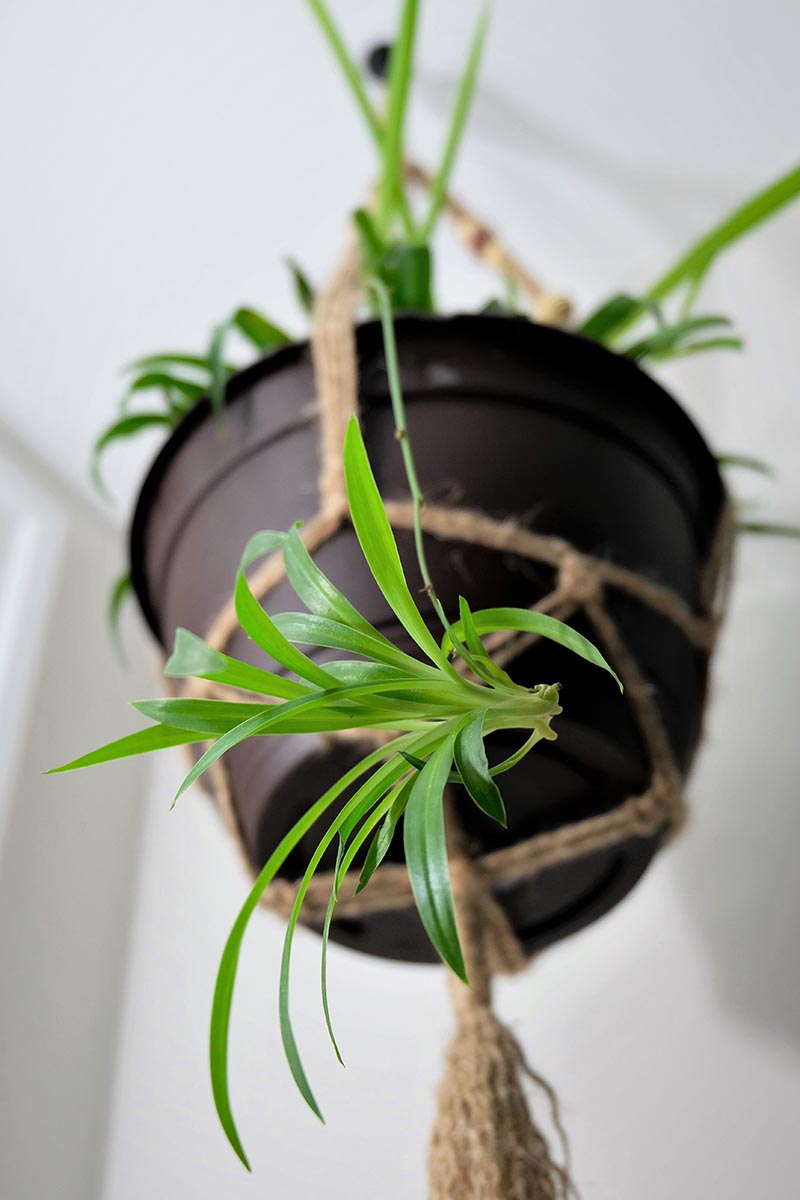
Propagating C. comosum from offsets is probably the easiest way to create new spider plants. Since this species is so giving – or from its point of view, so eager to spread its genes – why not take advantage of the situation? If Mama Spider is covered with babies, and the babies have roots growing from them, your work will be exceptionally easy. All you need to do is to snip off an offset from the stalk, and pot it up.
Sometimes, your plant might have many offsets on it that don’t yet have roots of their own. In this case, you can help a spiderette grow roots in a few different ways. One option is to snip it off and set it in a small glass of water. With this method, you want the base of the offset to be touching the surface of the water, but don’t submerge the entire offset.
Another method of propagating unrooted offsets is to mimic what would happen in nature, and root the offset while it is still attached to the parent plant. Simply place a small pot with potting soil under the offset, and allow it to root while it’s still attached to its parent.
Or, you can snip it off from its stem and pot it up, letting it root in the soil on its own. When using any of the methods described here that involve soil or potting medium, I recommend watering with a mister or spray bottle. This will help to keep the medium from becoming overly wet, granting your baby a higher chance of survival. Once your offsets are rooted well, begin caring for them as you would for a potted plant. Check out our guide for detailed step-by-step instructions for rooting spiderettes.
From Division
Since propagating offsets is so darn easy, you might be wondering – why would anyone bother with division? Division can come in handy when your plant is outgrowing its pot, and you want to limit its size. Rather than letting it continue to grow wider, you can divide it, creating two smaller specimens – or more, depending on your preference.
To divide spider ivy, you’ll want to remove your plant from its pot and then work a clump away from the main plant, with both leaves and roots intact. Continue by potting up as described in the repotting section below.
How to Grow
Unlike the high-maintenance prayer plant, spider ivy is fairly undemanding in its care.
Choosing a Plant
You’ll start off on the best foot with your spider ivy if you begin with a healthy specimen.
Here are a few tips on what to look for when choosing yours:
Make sure the foliage is free of pests, such as scale or mealybugs. You’ll learn more about these pests below. Look for specimens without any browning. They should also be free of yellowing leaves, unless the cultivar is supposed to have yellow variegation. Pick the best size for your needs, and remember that these houseplants grow quickly.
When you find a healthy-looking specimen, check the pot. Does it have drainage holes? If not, make sure to repot your spider ivy as soon as possible. You’ll find repotting instructions below.
Light
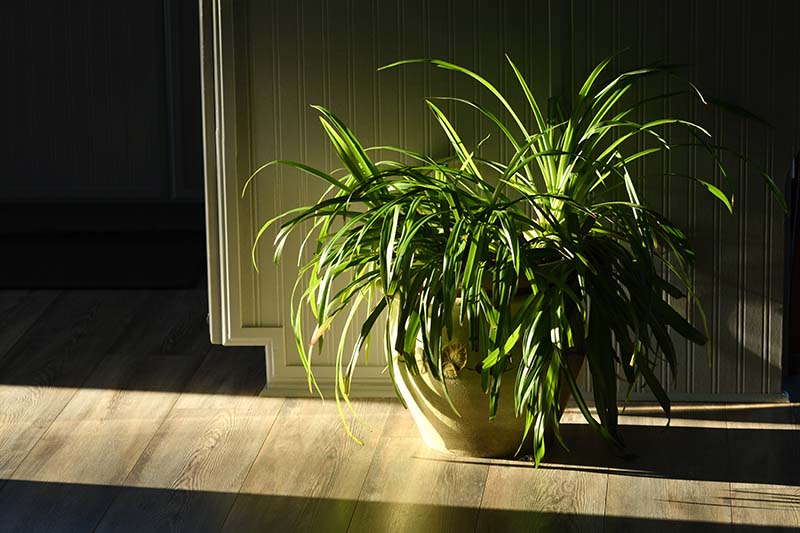
Spider ivy can adapt to conditions ranging from part sun to full shade. But what will give you the best results? Medium to bright indirect sunlight.
Some direct sunlight is okay, just make sure your spider ivy isn’t sitting in full sun all day long, or its leaves will scorch. And while these houseplants can live in shade, their leaves will not be as vibrant when grown in very low-light conditions. Bright, indirect light will give you the best foliage color. Bright, indirect light is also what you should aim for if you want your spider ivy to produce lots of offsets.
Many people like to place their houseplants outdoors during the summer. If you do this, make sure to put your spider ivy in a sheltered position where it receives dappled sun exposure, and not too much direct sunlight.
Temperature
Being from the tropics, C. comosum does best in a “Goldilocks” temperature range – meaning it appreciates conditions that are not too hot and not too cold. Temperatures between 65 and 75°F are ideal. If you will be placing your spider ivy outdoors for the summer, remember to bring it back indoors before nighttime temperatures fall to 55°F. Temperatures starting in this range will be a bit too chilly for your houseplant. C. comosum is not cold hardy, and can be killed when temperatures dip below freezing.
When deciding where to situate your spider ivy in your home, avoid drafty locations such as areas next to exterior doors or drafty windows, as well as spots near heating and cooling vents. Always try to keep your ribbon plant at a temperature below 80°F, both indoors and out. In hot conditions, spider ivy becomes more susceptible to certain diseases. (I’ll get to that a bit later.)
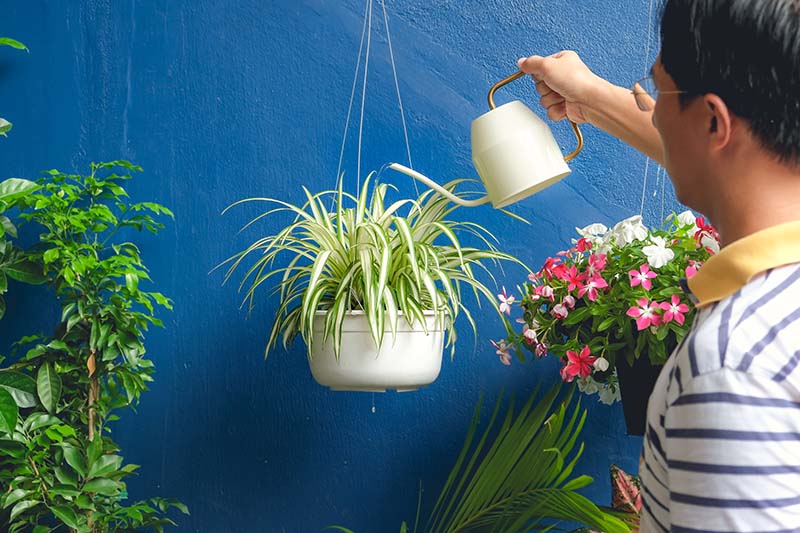
Water
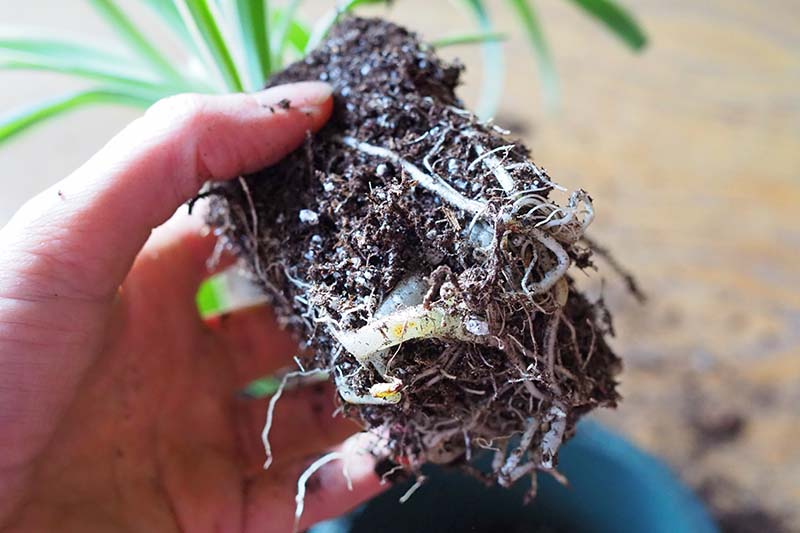
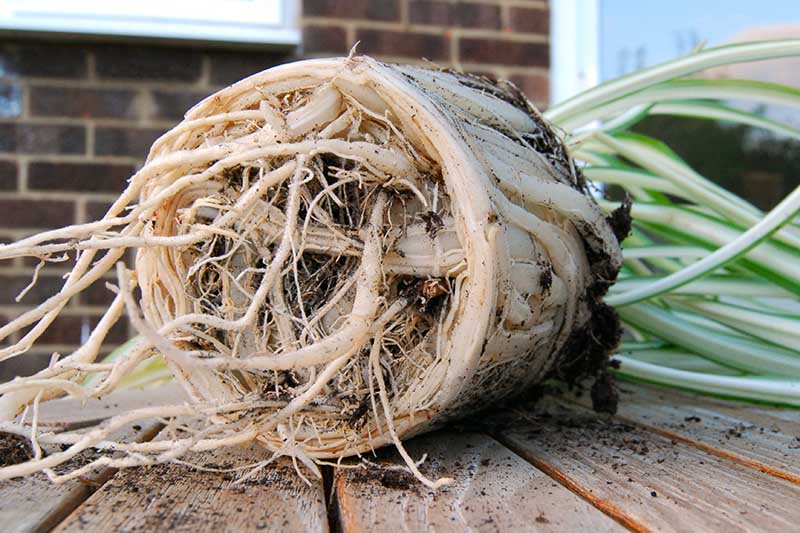
Now we come to one of the secrets of the spider plant’s resilience: C. comosum is able to store water in its roots, making it more tolerant of inconsistent watering than some other types of houseplants. While your spider ivy will be likely to forgive you if you miss a watering, in general, it should be watered when the top inch of its soil dries out. However, rather than digging my finger into the potting soil, I test these houseplants for dryness by lifting their pots – when they start to feel light, I know it’s time to water.
If the water you give your plants is supplied from your municipality and otherwise unfiltered, be aware that spider ivy is quite sensitive to fluoride, and will exhibit browning tips in response to it. In fact, a variety of grass-like monocots (short for “monocotyledons,” plants with seeds that contain only one embryonic cotyledon) can suffer fluoride toxicity that may lead to tip burn. Others include dracaena, and lilies. Watering with rainwater instead, or filtered or distilled water, can help to prevent this. If you are using filtered water, double check to make sure your filter is able to remove fluoride – not all water filters do. If you’ve been watering with tap water containing fluoride and your houseplant’s foliage has lots of brown tips, go ahead and switch your water supply. You can also help the plant recover by removing the potting soil around its roots, soaking them in fresh filtered or non-fluoridated water, and then repotting with fresh soil.
Humidity
Spider ivy isn’t as picky as orchids are when it comes to humidity. It will thrive in environments where the relative humidity is between 25 and 49 percent. Unless you live in an extremely dry climate, or your plant is in a warm, dry room, you probably won’t need to take any additional steps to provide it with extra humidity.
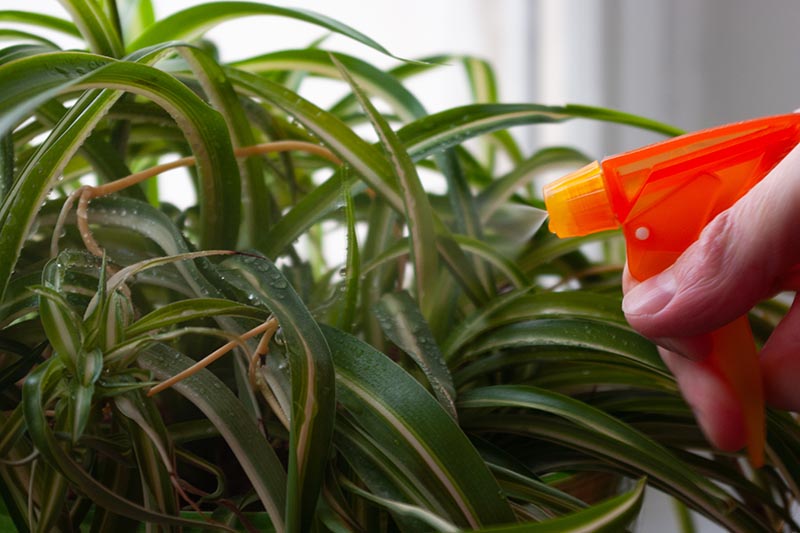
On the other hand, if you do live in an arid climate or your indoor air is extremely dry during the winter, go ahead and give your spider ivy a morning mist from a spray bottle. Just make sure to do this in the morning while temperatures are warming up, instead of at night when they are cooling.
Fertilizer
With spider ivy, you’ll want to limit your applications of fertilizer. There are a couple of reasons for this. The first is to avoid unwanted side effects. This plant is sensitive to the buildup of salts and other minerals that can occur if it is fertilized heavily, and it can exhibit brown leaf tips as a result. Overfertilizing can also prevent C. comosum from producing offsets.
Secondly, this houseplant has a built-in method for storing nutrients in its tubers. Unlike other plants that may be heavier feeders, these really don’t need much! To protect my spider ivies from unwanted tip burn, I use worm compost tea to fertilize them, which is a more gentle, organic approach to fertilizing in contrast to chemical-based products. If you don’t have a worm compost system of your own yet, you can purchase readymade worm compost and make your own “tea.” For this purpose, I love TeaDrops, which are “tea” bags that contain worm compost. To use them, you soak a bag in room temperature water, and use the resulting worm compost tea to both water and fertilize your houseplants. TeaDrops Organic Houseplant Fertilizer
Growing Tips
Provide medium or bright indirect light. Allow the top inch of soil to dry between waterings. Keep at 65-75°F and away from cold drafts.
Maintenance
Being the low maintenance houseplants that they are, spider ivy really only requires occasional repotting, and a bit of trimming if leaf tips turn brown. If you’re aiming to cultivate a lush plant with trailing babies, you’ll also want to know what to do to encourage offset production. Let’s take a look, starting with this desirable feature.
Encouraging Offsets
If, like me, your plans for your spider ivy include encouraging it to produce cascades of spiderettes that trail down from the parent plant, there are a few things you can do to encourage offset production. First, these houseplants respond to changing day length, much like poinsettia and Christmas cactus. When C. comosum is exposed to short days and long, dark nights for at least three weeks, it takes those long nights as a cue to reproduce. These conditions will trigger your plant to send out a long stalk, on which it may produce both flowers and offsets.
To replicate these natural conditions, try to keep your spider ivy in a location where it isn’t exposed to artificial light in the evening and throughout the night. The next thing you can do to encourage offset production is to refrain from repotting frequently. Specimens that are slightly pot bound are more likely to produce offsets. Why? From the plant’s point of view, if it’s unable to continue to stretch its roots through the soil, then it had better get busy ensuring another way of spreading its genes. And that way is through producing offsets.
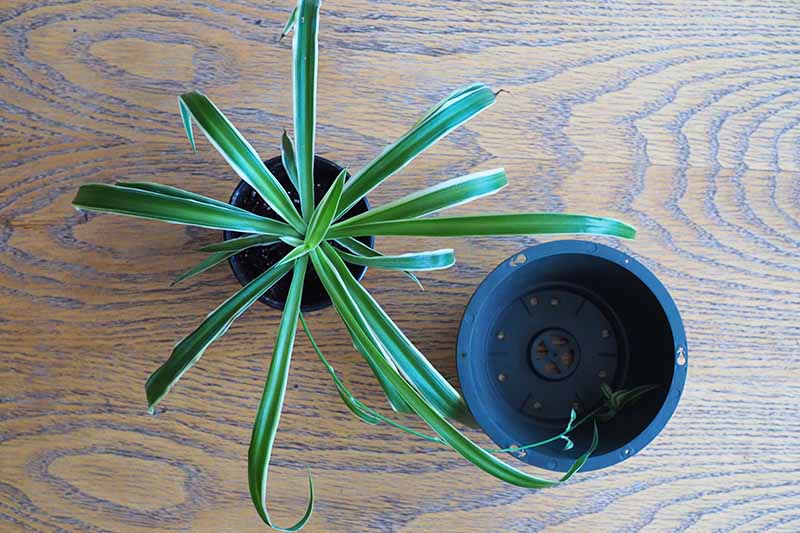
Repotting
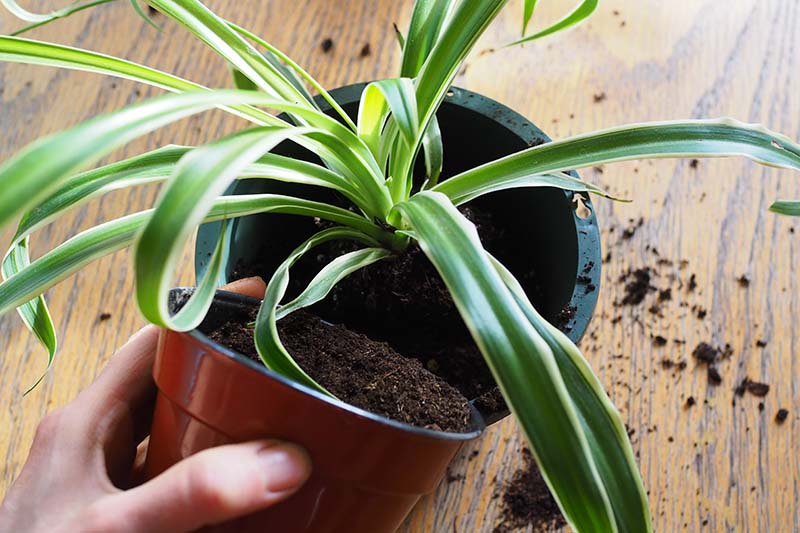
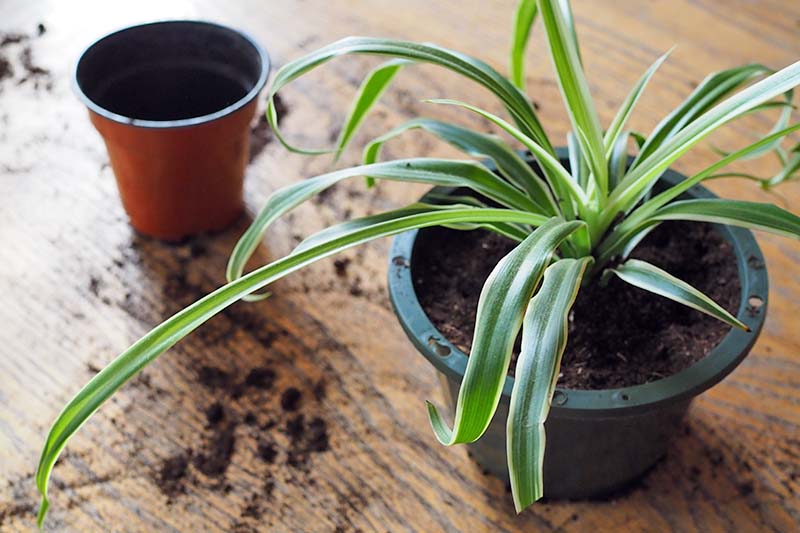
There will come a time, however, when you’ll need to repot your plant. If it has become so pot-bound that its roots are bursting through the drainage hole in the bottom, or emerging above the surface of the soil, these are clear signs that it’s time to repot! In general, you should plan to repot young plants once a year and more mature specimens every two years, but adjust this schedule to your plant’s surroundings – those placed in lower light conditions won’t grow quite as fast. Before you begin your repotting project, make sure you have a new pot that is only one or two inches larger than the current pot. If you are thinking of moving your plant up to a much bigger pot to avoid having to repot so frequently, I invite you to reconsider. An oversized pot can be too slow to drain, and this may cause root rot. Stick with a pot that has just enough room for your spider ivy to grow over the next year or two. Also, make sure the pot you choose has adequate drainage holes, also to avoid wet feet, aka soggy roots. Once you have decided on a pot, choose a potting soil. You’ll want something that has a pH of around 6.0-6.5, and will drain well, but that also has some water-holding capacity, to prevent your spider ivy from drying out too quickly. While it does have those fascinating water-storing roots, it’s not a cactus, after all. Standard commercial houseplant potting soil will work fine. First, place a little potting soil in the bottom of your new pot.
De La Tank’s Houseplant Mix Once you have your soil and pot at the ready, it’s time to get down to the business of repotting. Next, remove your plant from its old pot. Loosen up the old potting soil and try to gently loosen the plant’s roots. Set your plant into the new pot. Is it sitting low enough in the new pot that you’ll have a half an inch to an inch of headspace at the top, below the rim? If not, adjust the potting soil so that the plant is sitting at the right level. When the level looks good, fill in with potting soil around the edges of the plant. When filling in with fresh potting soil, make sure you don’t bury the crown of the plant – keep the soil surface at the same level. Water the soil, and return your houseplant to its previous location.
Pruning
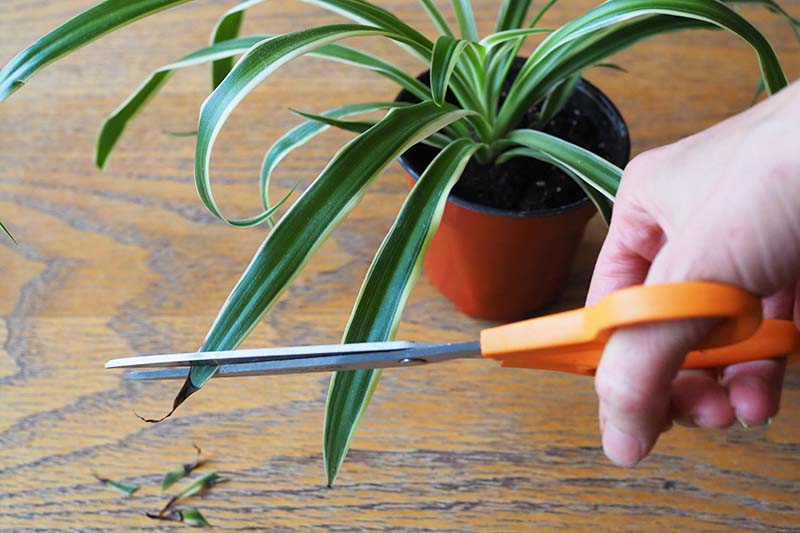
Your spider ivy won’t need to be pruned, per se, but you will want to trim any brown tips that appear. Since the leaves of these houseplants are very fine and thin, a pair of garden pruners will likely be overkill for this task. Instead, use a pair of sharp, sterilized scissors. If you are seeing a lot of brown tips on your plant, make sure to review the sections on watering, temperature, and fertilizer above – the most likely causes of this browning are underwatering, fluoridated water, exposure to cold drafts, or too much fertilizer.
Managing Pests and Disease
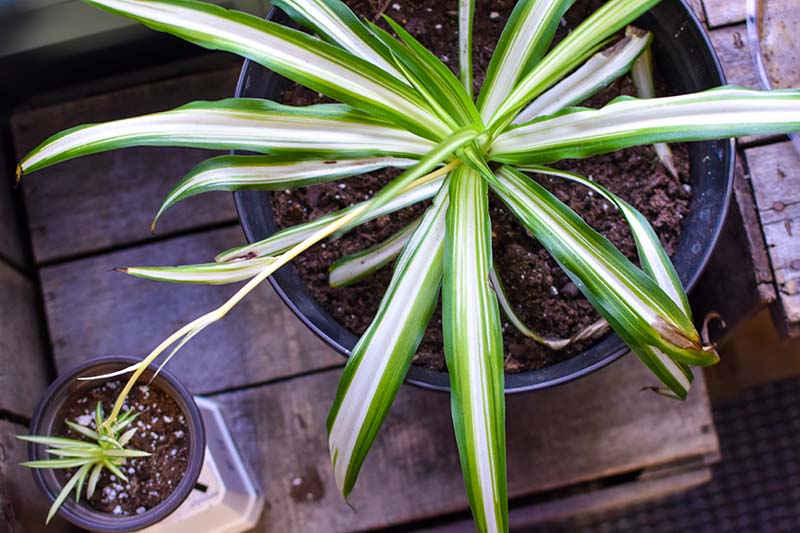
These easy-care houseplants aren’t terribly prone to pests or disease. However, it’s important to know what to be on the lookout for. In the beginning, there was green – just green. C. comosum is the uncultivated species plant, and it sports no variegation. Its long leaves are medium to dark green, and it readily produces plantlets. If you’re curating a spider plant collection of your own, you’ll want to make sure to include a specimen of the basic species, whose green leaves will contrast nicely against the variegated foliage of your other cultivars. Surprisingly, the pure green species is now among the more rare and harder to find types of spider plants – so if you come across one, you might just want to snatch it up. Most of the differences between the available C. comosum cultivars are fairly subtle – but they do offer features that are unique, and some are more surprising than you might expect.
Bonnie
‘Bonnie’ is a cultivated variety that comes with a surprising twist – it has curled leaves! At least to this writer, ‘Bonnie’ looks like a spider plant that went out and got a perm. The curled leaves of this variety are variegated as well, with green on the margins, and white running down the centers. While I’ve always wished I had curly hair myself, I’m not entirely sure how I feel about this variety… I suppose I like the long, thin, wispy leaves of the species plant and other available cultivars, and I don’t really see a need to improve upon its growth habit. Or maybe I’m just too stuck on that particular incarnation of houseplant beauty, the spider plant of my childhood. But I will certainly admit that novelty can be enticing! ‘Bonnie’ Live Plant in 6” Pot
Ocean
‘Ocean’ is a newer cultivated variety that has streaky green leaf margins, and a white stripe down the center of its leaves. A more compact variety, ‘Ocean’ foliage reaches just eight to twelve inches in length at maturity. Because of its shorter, broader leaves, it has a somewhat spiky appearance. ‘Ocean’ Live Plant in 4” Pot
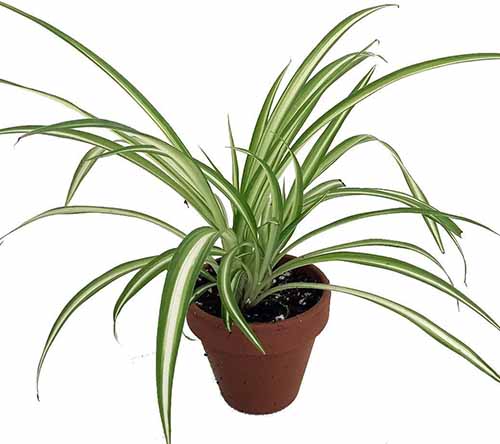
Variegatum
‘Variegatum’ is a cultivated variety that has green leaves with thin white margins. Its long, graceful leaves can reach ten to sixteen inches long. This cultivar is also called “reverse variegated” because its markings are the reverse of the most common variety, ‘Vittatum,’ which is coming up next in this cultivar list. While this type can handle more direct sun than most others, it does not produce a load of offsets that is as heavy as what you would typically find with other varieties. ‘Variegatum’ won the Royal Horticultural Society’s prestigious Award for Garden Merit in 1993.
‘Variegatum’ Live Plant in 4” Pot
Vittatum
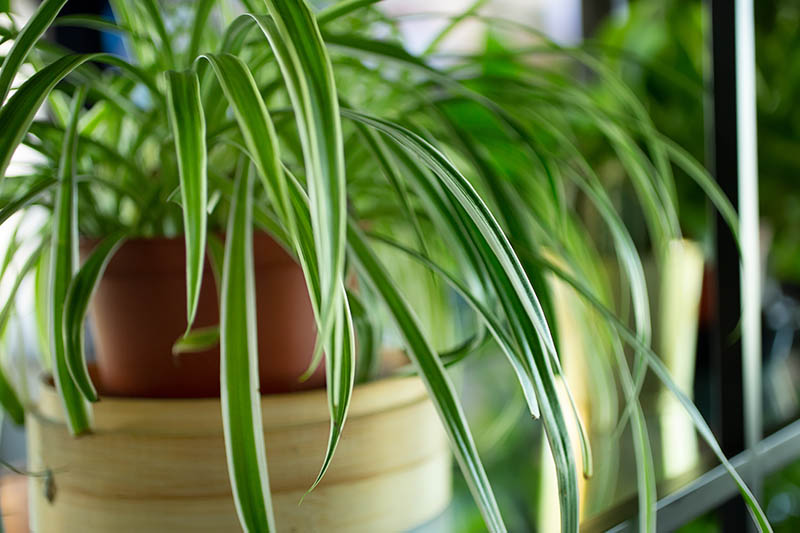
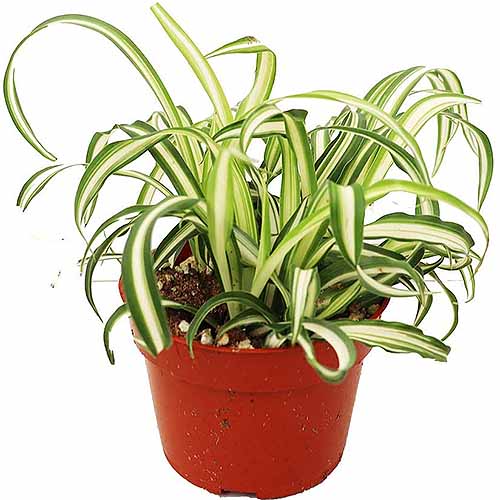
‘Vittatum’ is the most common cultivar of C. comosum found in garden nurseries today. It has foliage with pale green margins and a white stripe down the center. Some growers call this variety “variegated spider plant,” without mention of the species or cultivar name. Like ‘Variegatum,’ mentioned above, ‘Vittatum’ also won the Royal Horticultural Society’s Award for Garden Merit in 1993.
‘Vittatum’ Live Plant You can find ‘Vittatum’ plants available for purchase at Nature Hills Nursery.
Pests
Here are some of the most common pest problems for C. comosum:
Mealybugs
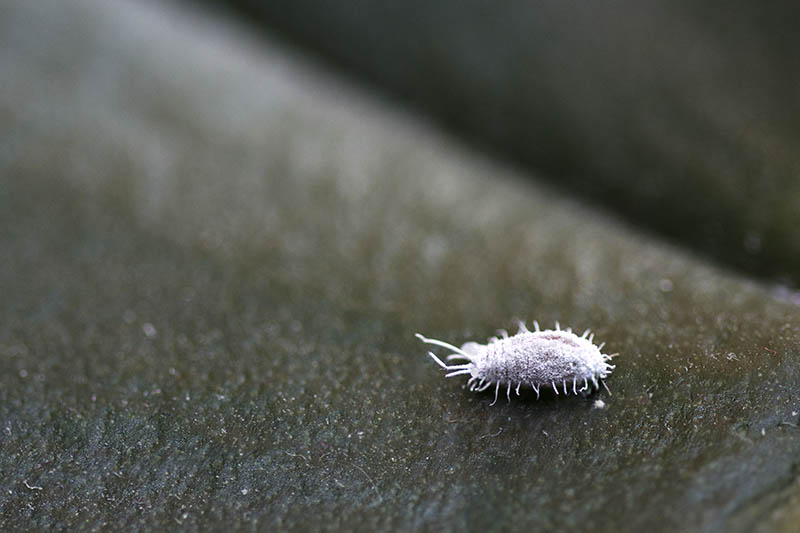
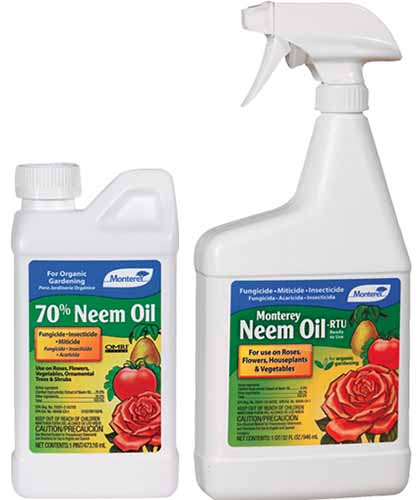
Mealybugs are one of the most common houseplant insect pests, and they sometimes attack spider ivy too. Luckily, they’re easy to recognize and stand out like a sore thumb, so you’ll be likely to catch them before they cause much damage. Have you ever seen a white fluffy residue on the stems of a houseplant? That was actually an insect: the infamous mealybug. Members of the scale family, mealybugs can make foliage look like it has little pieces of cotton stuck to it. Mealybugs will latch onto and feed on your houseplant, stealing valuable nutrients. This will weaken the plant in turn, and can eventually kill it if the problem goes on too long. Making matters worse, mealybugs secrete honeydew, which can give a foothold to fungi, causing further risk to your plant’s health. You can control these cottony-looking pests by wiping them away with a paper towel moistened with rubbing alcohol. Be sure to inspect the base of the leaves as well as the leaves themselves. If rubbing alcohol isn’t enough to wipe out an infestation, your next mode of recourse is an application of neem oil, an organic treatment that can wipe out both pests and fungi. Make sure to follow the manufacturer’s instructions for applying this product. Read more tips on controlling mealybugs.
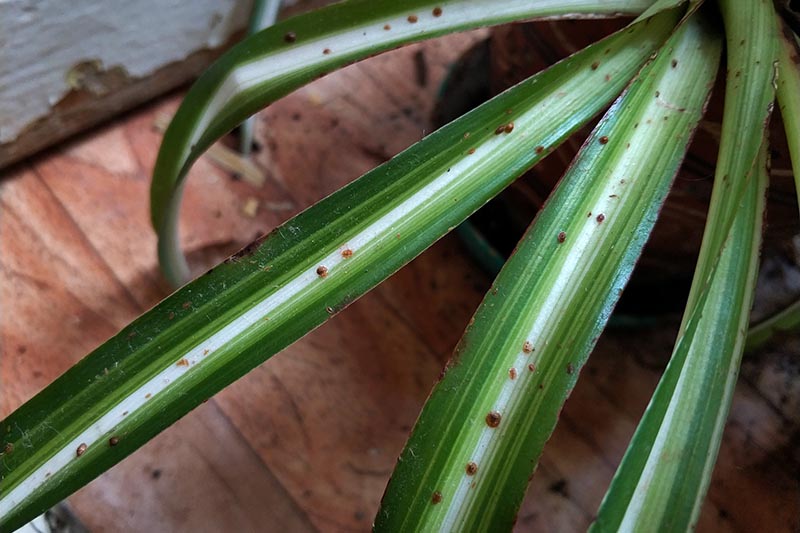
Scale
Scale is an insect masquerading as a little brown bump. Related to mealybugs, they have hard brown shells. Once they get settled in on your C. comosum, you might think it has some dirt on it, or perhaps that it has some sort of disease.
Just like mealybugs, scale insects will suck nutrients out of foliage, weakening your plant. Yellow leaves are one of the telltale signs of their presence.
Spider Mites
It would seem fitting, wouldn’t it, if the spider mites found your spider ivies? Monterey Neem Oil These pests can be treated in the same way as mealybugs, with rubbing alcohol or neem oil, such as this product from Monterey, available at Arbico Organics. Find more tips on identifying and controlling scale insects. Fitting, perhaps, but also frustrating. If you notice yellow spots on the foliage – or worse, webs – inspect it well, because you may have mites. You may also be able to see tiny colonies of red or brown mites moving about the webs and the undersides of the foliage. These pests also suck nutrients from the leaves, and can leave your plant sick and malnourished. To treat an infestation of these pests, first wipe them off of the foliage with a damp paper towel, then treat with rubbing alcohol or neem oil. Read more about combating spider mites.
Other Insects and Pests
Aphids, root knot nematodes, whiteflies, and fungus gnats can all infest spider plants (as well as other houseplants).
Disease
C. comosum isn’t very prone to disease, but it does sometimes exhibit signs of illness. Here are a couple of problems to look out for:
Root Rot
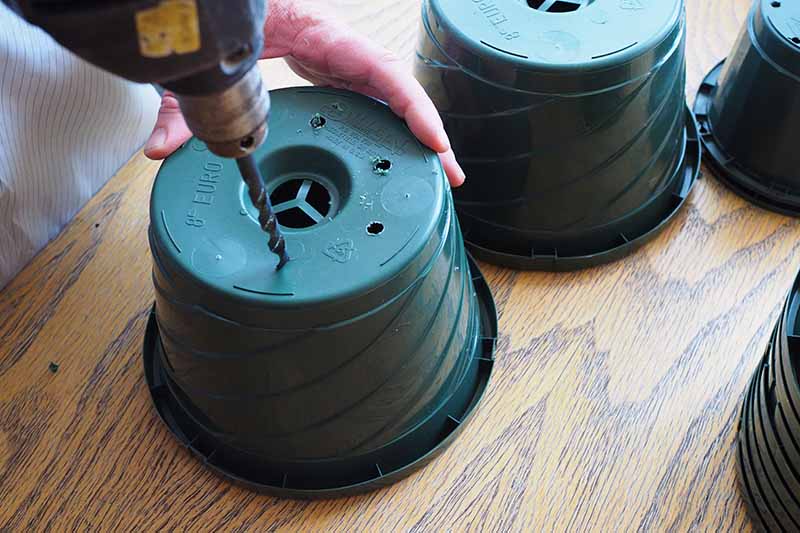
If the foliage on your specimen starts to turn yellow or wilt, and its soil looks a little wet, root rot may be the problem. Root rot is often caused by overwatering, insufficient drainage, poorly draining soil, a pot that’s too large – or all of the above. When your houseplant’s roots sit in soggy soil, they can’t get the oxygen they need. This causes them to fail to transport water to the foliage, and they will eventually die off. Ironically, plants with oversaturated roots that succumb to root rot will eventually start to suffer from dehydration. And meanwhile, fungi and bacteria can easily proliferate in that soggy soil, just making matters worse. If root rot seems to be a problem for your plant, try to determine what the cause is: Are you overwatering? Is the soil holding too much water? Is the pot oversized? Does the pot – heaven forbid – lack drainage holes? (Gasp!) If your plastic grower pot lacks holes, or seems to have otherwise insufficient drainage, drill more holes into the bottom of the pot. (Do remove the plant from the pot first, please.) If root rot is a problem, it’s a good idea to switch out the potting soil to remove any fungi or bacteria that have been given a foothold. If you’re reusing the same pot, go ahead and clean it, then sterilize it with some hydrogen peroxide while you’re at it. Inspect the roots of your plant, and trim any that are rotten with a pair of sterilized garden pruners or scissors. Repot the plant in the same sized – or smaller – pot as indicated in the repotting section above.
Southern Blight
Southern blight is a disease caused by a fungus, Sclerotium rolfsii, which can affect many garden species, such as apples and tomatoes. Spider ivy is prone to this fungus too, which is also referred to as Athelia rolfsii. Symptoms of Southern blight include wilting or collapse of the foliage. The fungus is more active in hot weather, so keeping your houseplant indoors in its preferred temperature range is a good preventive measure. If your specimen seems to be infected with Southern blight, remove all infected plant material, and switch out the soil. Rather than placing infected materials in your compost bin, dispose of them in the trash to avoid inadvertently spreading this disease throughout your garden. And if your spider ivy is wilting and you’re not sure why, be sure to check out our article on why spider plants wilt!
Best Uses
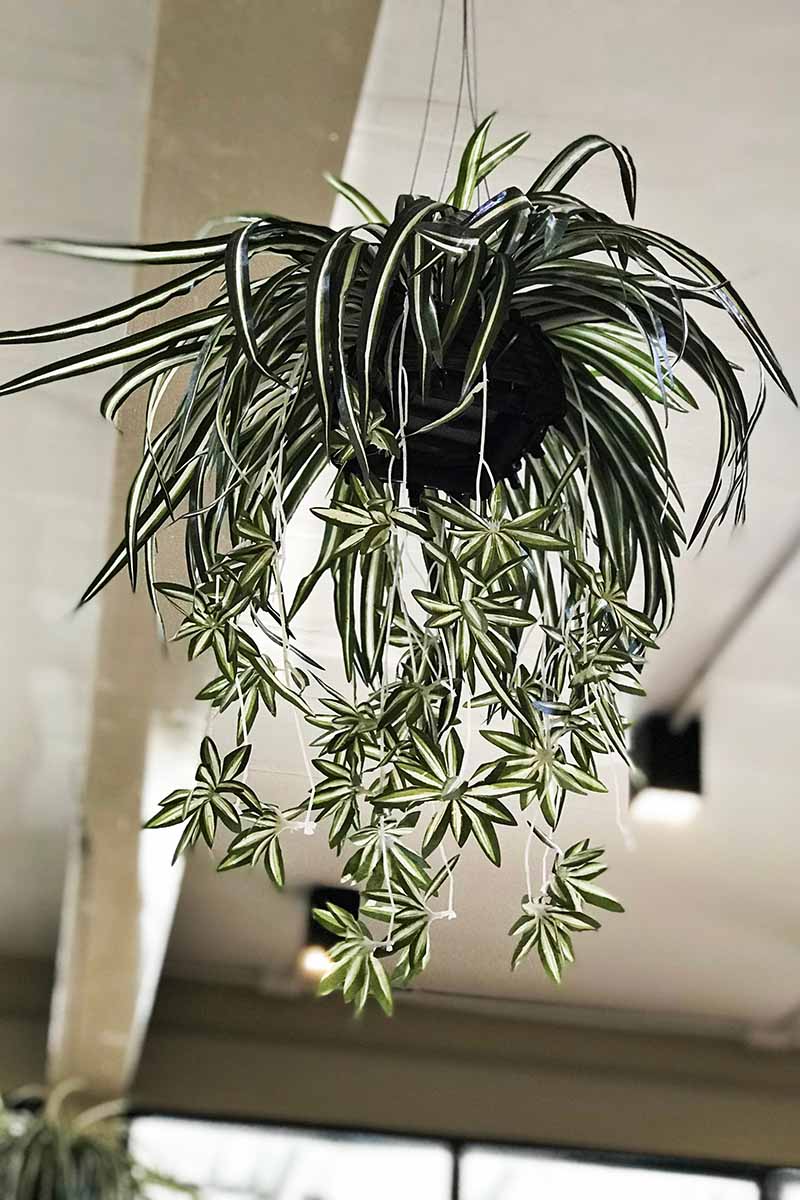
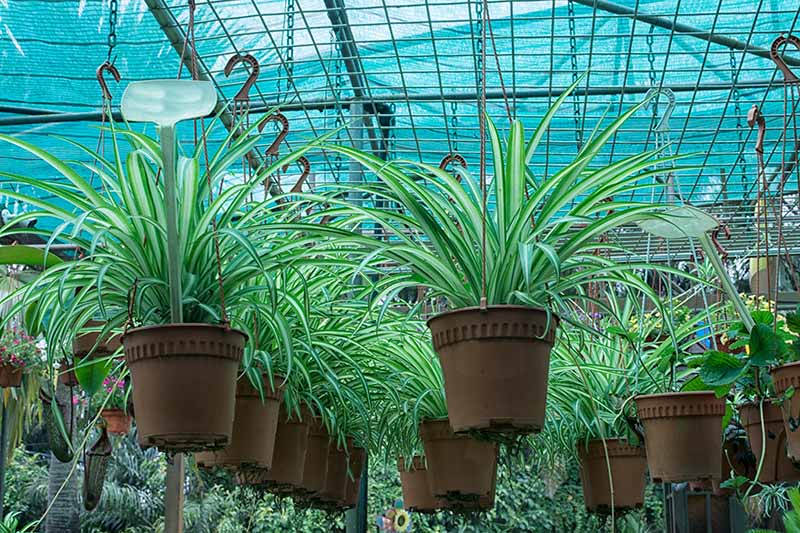
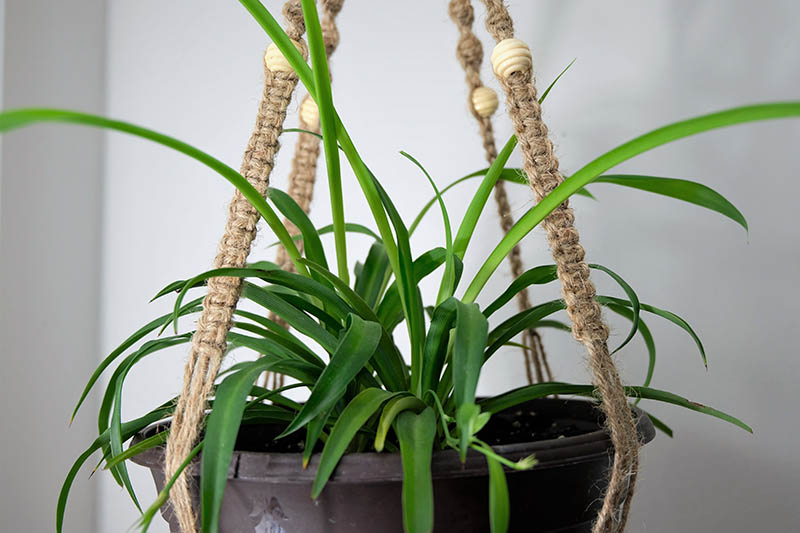
As far as houseplants go, this species looks beautiful in a hanging basket.
And it also works wonderfully on a stand, where its offsets can spill down. But that’s not all you can do with it. It also looks great in decorative pots, grouped together with other houseplants. Outdoors, in USDA Hardiness Zones 9-11 C. comosum makes a nice ground cover, or it can be used to cascade over a low stone wall. It can also be grown outdoors as an annual in zones with cold winters. And above all, enjoy the bountiful spider babies that are bound to come!
Have you ever fallen in love with a spider plant before, like I did as a child? How do you feel about the curly cultivar, ‘Bonnie’ – yay or nay? Let us know in the comments section below. And if you’re interested in learning about other low maintenance houseplants, here are some more articles that you might enjoy:
How to Grow Norfolk Island Pine, Your Living Christmas Tree How to Grow and Care for Peace Lily Houseplant Primer: A Guide to Basic Care and Durable Plants
Photos by Kristina Hicks-Hamblin © Ask the Experts, LLC. ALL RIGHTS RESERVED. See our TOS for more details. Product photos via California Tropicals, Hirt’s Garden Store, Monterey, Nature Hills Nursery, Soil Mender, and TeaDrops. Uncredited photos: Shutterstock.