At 300,000 million years old, they were, indeed, among the dominant plant species when dinosaurs roamed the Earth. And as many as 15,000 species now call our planet home. We link to vendors to help you find relevant products. If you buy from one of our links, we may earn a commission. But we know there are more than enough for you to choose from to include in both your landscape and inside your home, as these green beauties can make versatile additions to either place. Dinosaurs didn’t survive into the current era, but ferns did – a testament to their resilience and adaptability. In order to make them thrive in your own Jurassic Park, or just your backyard, here’s everything we’re going to go over, coming up: Because there are thousands of fern species, there is quite a range of options out there, from teeny-tiny evergreens to massive deciduous types. There are some that like full sun and many others that thrive in deep, dark shade. Some are epiphytes, some change colors, and some even produce fuzzy flower-like structures. With so much to cover, we shouldn’t wait one minute more, right? Let’s take a look!
What Are Ferns?
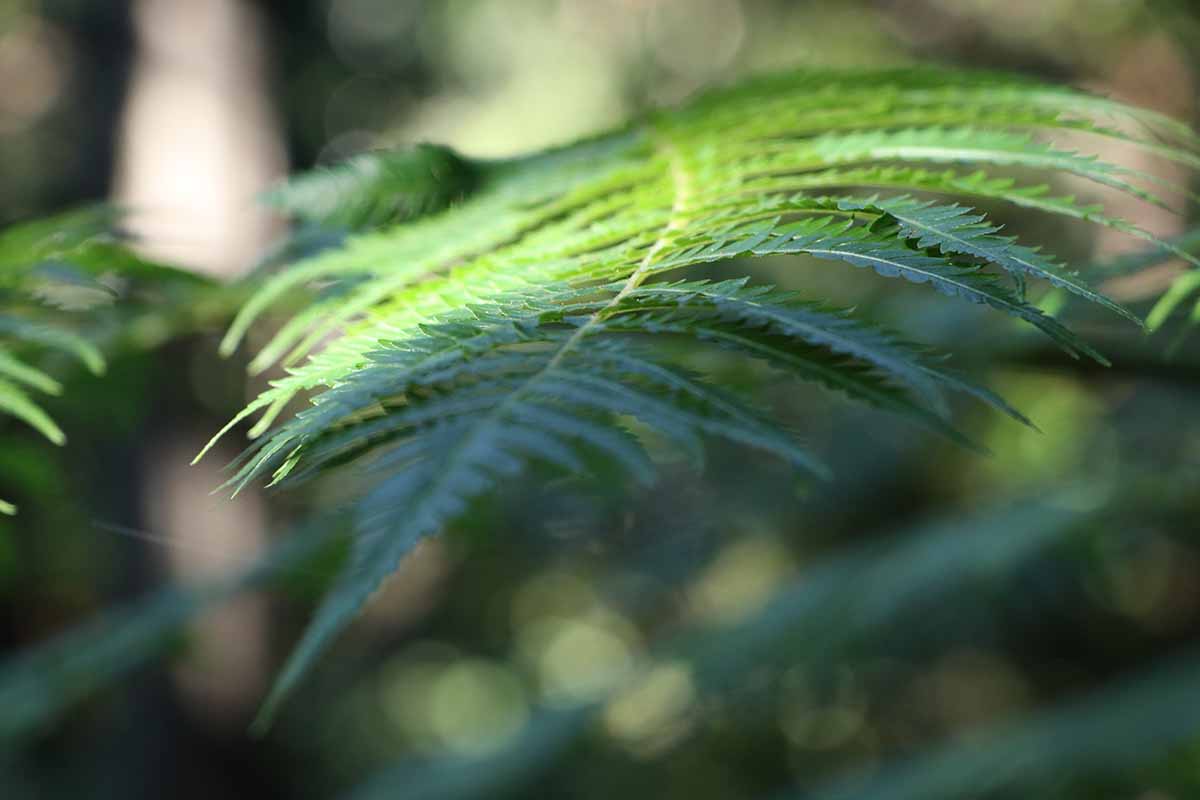
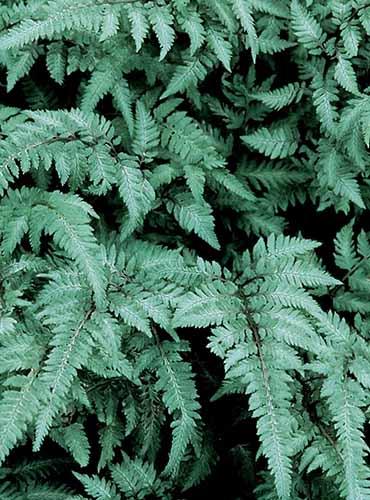
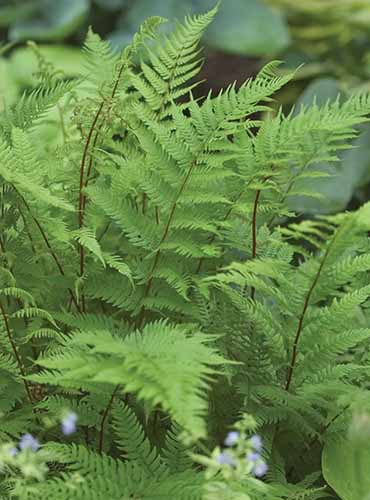
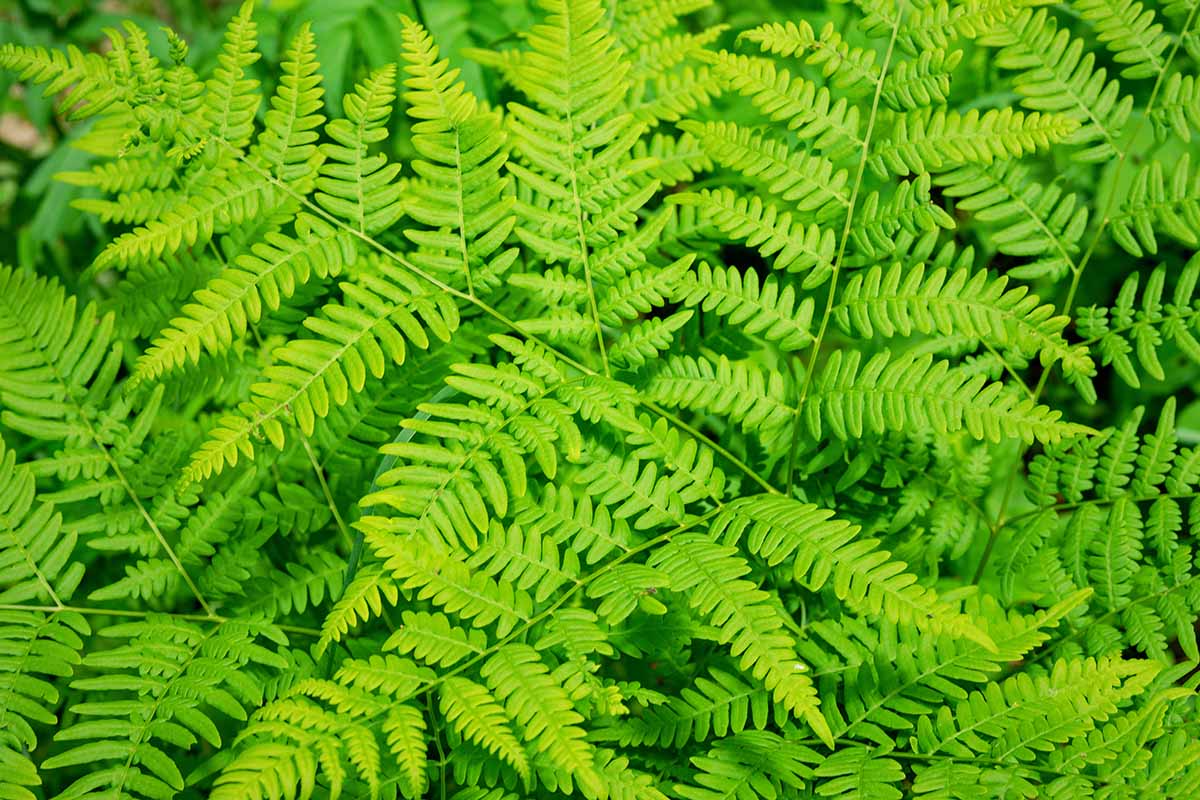
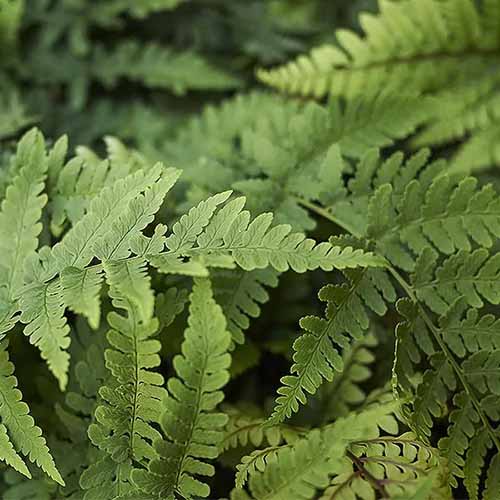
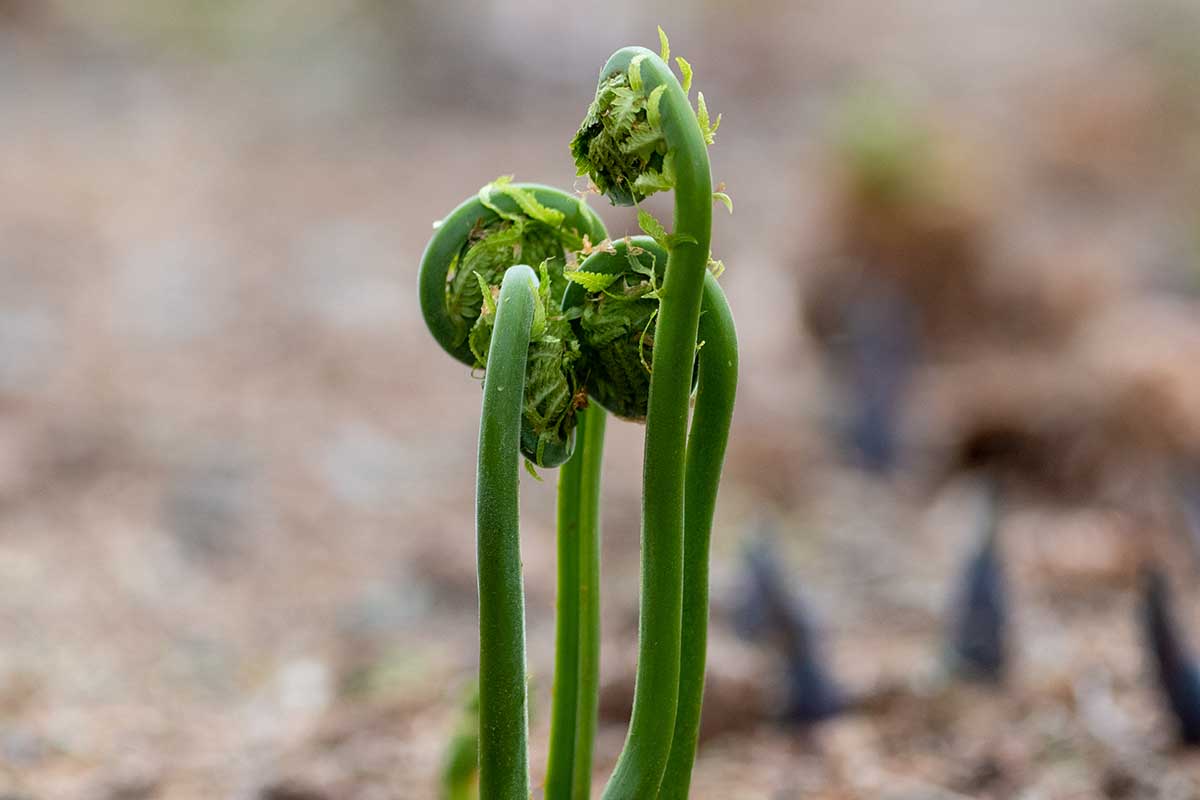
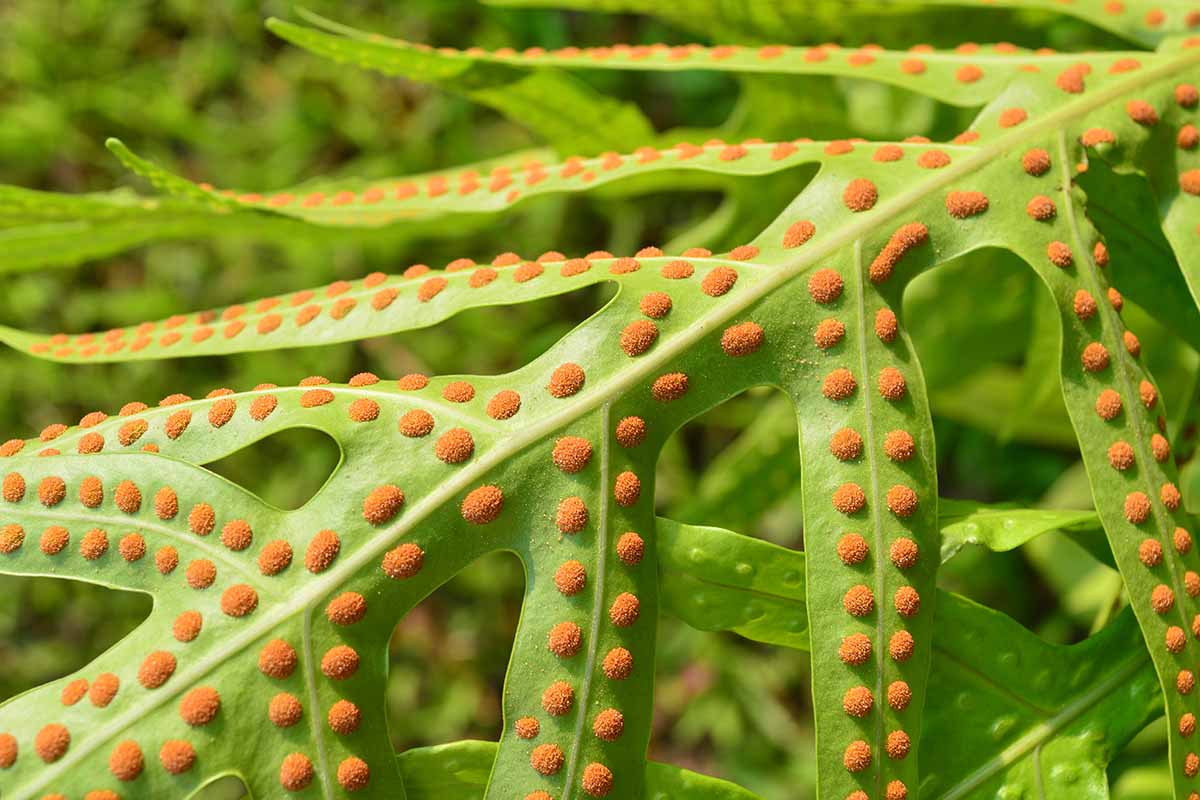
Ferns are plants in the Polypodiopsida class and the Polypodiophyta division of the plant kingdom. They’re closely related to club mosses, horsetails, and quillworts. With over 20,000 different known species out there, you’re probably wondering what unites all the different ferns of the world. Essentially, they’re vascular types of greenery – land plants with rigid, woody tissues that form “tubes” used to conduct water and minerals throughout. They reproduce via spores and have neither seeds nor flowers, and are distinguished from other spore-bearing plants, such as moss, by the fact that they have true roots, stems, and complex leaves. A spore is a reproductive cell that can develop into a new individual without joining with another reproductive cell. And spore-based plants are evolutionarily much older than seed-based ones. They spread via underground rhizomes that can either be creeping or clumping. Clumping types are better to choose if you’re concerned about them spreading in your garden. Instantly recognizable by their lace-like fronds (or divided leaves) and hues of green ranging from olive to chartreuse, ferns range in size from the Kevin Hart to the Shaquille O’Neal of the plant world, varying in size from a quarter-inch to something as tall as 80 feet. Beyond the fronds and rhizomes, ferns are also made up of stipes, which are stem-like structures. The frond itself is made up of a rachis (the center branch-like part) and pinna (the leaf-like part). New fronds emerge as curled structures known as fiddleheads. Once the plant sends out spores for reproduction, you’ll often see sori, which is a cluster of spores. Because ferns evolved in the shadows of the giant conifers that dominated the landscape in the time of the dinosaurs, they are generally fond of indirect light. This makes them wonderful go-to’s for areas of your garden that are shady and frustrating to fill, since so many plants want sun, sun, and more sun. Of course, there are exceptions to every rule. Some species – which may be evergreen or deciduous – will do well in sunny areas. For instance, Asplenium species grow on trees and walls and have evolved to tolerate a good amount of direct sun. Species in the Cheilanthes genus are xerophytic and can tolerate direct sun and drought. They just curl up and go dormant when the conditions are too dry and hot, and unfurl again when things look better. In addition to tolerating a wide range of conditions, these plants are also very geographically diverse. “There are ferns that do well in almost every area of the United States,” says Skip Richter, a county extension agent with the Texas A&M Agrilife Extension Service. “Check with a local source to find the best varieties for your area,” he recommends.
Cultivation and History
Ferns first popped up around 360 million years ago and diversified during the Cretaceous period, though many have since gone extinct. Most that grow wild or that we cultivate today evolved more recently, during the past 70 million years. A vast majority of ferns grow in tropical areas, but they appear on every continent, including Antarctica. But while most areas have their own native species, many gardeners and growers were, as so often is the case, interested in growing species not native to their region. As a result, these plants spread even further, carried by humans across oceans and landmasses. While they rarely become invasive, brackens (Pteridium spp.), as well as some types of Salvinia and a few other species, have done so in certain areas. Brackens are one of the oldest and most evolutionarily persistent types of ferns. Scientists have identified bracken fossils that are more than 65 million years old. But beware – brackens can be quite invasive with their extensive branched rhizomes, which may grow to 1,300 feet in length. Ferns found their footing as houseplants during the Victorian era, primarily in Britain, when “pteridomania” took over. Many ferns were grown indoors in terrariums or Wardian cases at this time because they couldn’t survive in the polluted or dry areas where many people lived. But they also gained popularity as outdoor plants. And in areas where they wouldn’t thrive in the existing conditions, enthusiasts cultivated them in dedicated fern houses and ferneries. The perennial favorite commonly known as the lady fern (Athyrium filix-femina) was the most popular in Victorian times.
Propagation
Ferns don’t produce seeds, as we mentioned earlier. But you can propagate new plants from spores, runners, division, or by planting purchased transplants.
From Spores
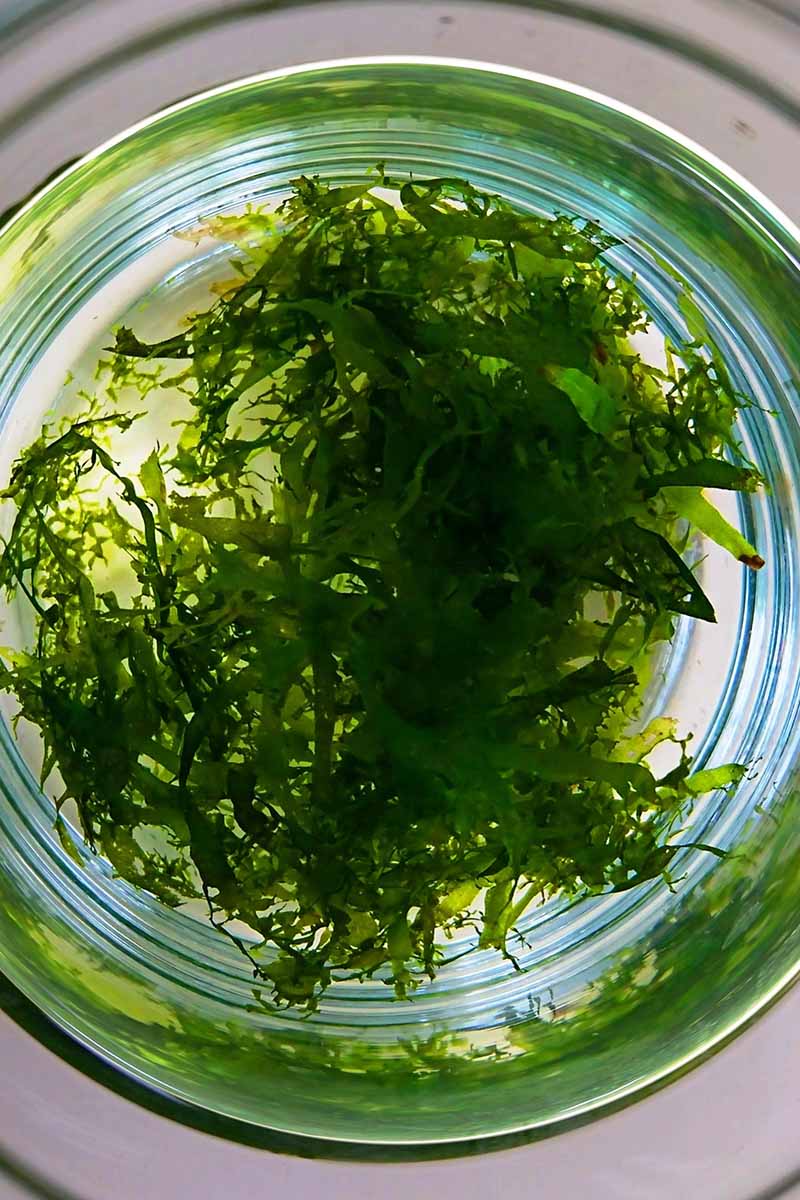
Creating new plants from spores is trickier than any other method on this list, but it can be done fairly easily. Many people reproduce wild ferns that they come across while hiking using this method. If you decide to nab any wild plants, always make sure you know the laws and rules governing the collection of wild plants in your area. Also, be sure that you are correctly identifying the species you’re collecting. You don’t want to accidentally take a protected or endangered species out of its home. Collect spores when they look plump and furry. The time of year when this will happen varies dramatically between species. Some ripen as early as May, while others, like the climbing fern, don’t ripen until November. You’re looking for the time when the spore is about to release from the frond. When the spore capsule starts to darken and split open, it’s time. You’ll need to check your plants frequently because spores can go from unripe to ripe rather quickly. Remove a healthy frond and place it in an envelope or between two pieces of paper – white waxed paper works best. Leave it overnight at room temperature and out of direct sunlight and then lift the frond away. You should see a spore print on the paper. If not, the spores weren’t at the right point of ripeness when you collected your specimen and you’ll have to try again. If you have a spore print, fold the paper and put it in the refrigerator, unless you intend to sow right away. Most spores can remain viable for a year or more if stored this way, but you don’t need to wait to sow the spores. They’ll germinate at any time of year. You’ll need to dust the spores over wet, organic, sterile potting soil in a flat tray with a lid. Before you add the spores, you can microwave your soil to kill any pathogens. To do this, moisten the soil so that it is damp but not waterlogged and place it in a microwave-safe container. Cover with a paper towel or ventilated lid and heat for about 90 seconds on full power for every two pounds of soil. Don’t microwave seeds or spores, as that will likely render them infertile and destroy their ability to germinate. Be sure to allow the soil to cool before placing the spores on top. Place the tray of soil indoors in indirect light, and keep the soil moist at all times. It can help to place a glass or plastic over the container to retain moisture and humidity. Maintain temperatures somewhere between 65 and 75°F. Eventually, you’ll see a green coating on the surface of the soil. Spores don’t turn into seedlings like other plants do. The plant goes through an intermediary phase where it produces both eggs and sperm, known as the gametophyte generation. After reproduction is complete and you have a mature fern, this is known as the sporophyte generation. After the spores begin to mature, that’s when you start to see that green stuff on the surface of the soil. This is made up of water and gametophytes, which are about half an inch wide when mature. These contain sperm, which develops in the antheridium, and an egg, which develops in the archegonium. The tiny sperm swim through the water to find the eggs. If there isn’t a good amount of water, the sperm can’t swim to the egg, which is why you need to maintain appropriate soil moisture. Keep the soil moist and a few months later, you will see small fronds popping up. Now, you finally have a fern forming. If you haven’t seen fronds popping up after three months, fertilize the gametophytes with an all-purpose houseplant fertilizer diluted by 75 percent. This can encourage the sperm to become active. As soon as you can discern individual plants, thin them out. If the developing plants don’t have enough room – and note that spacing varies by species – they won’t be healthy. Alternatively, you can dig out two-inch square or larger clumps of developing ferns and the soil they’re growing in, and place each clump in a container. The container should be at least twice as wide as the clump you’re transplanting.
Dividing
You can also propagate these multifaceted plants by dividing them. Start by watering the mature plant the evening before you intend to divide it. Gently dig up the plant or remove it from its container, and then cut or pull it into two or three clumps. Each divided clump should have at least one growing tip – this is the structure from which the fronds grow. Replant the clumps as desired and keep the starts moist until you see new growth.
From Runners
Some varieties produce stolons or runners. To create a new plant from one of these, simply “pin” a runner to the top of the soil using landscape staples, wire, or a small stone. Keep the soil moist and look for new growth, which can take anywhere from a few weeks up to a year. At this point, you can cut the stolon from the mother plant and transplant it as desired.
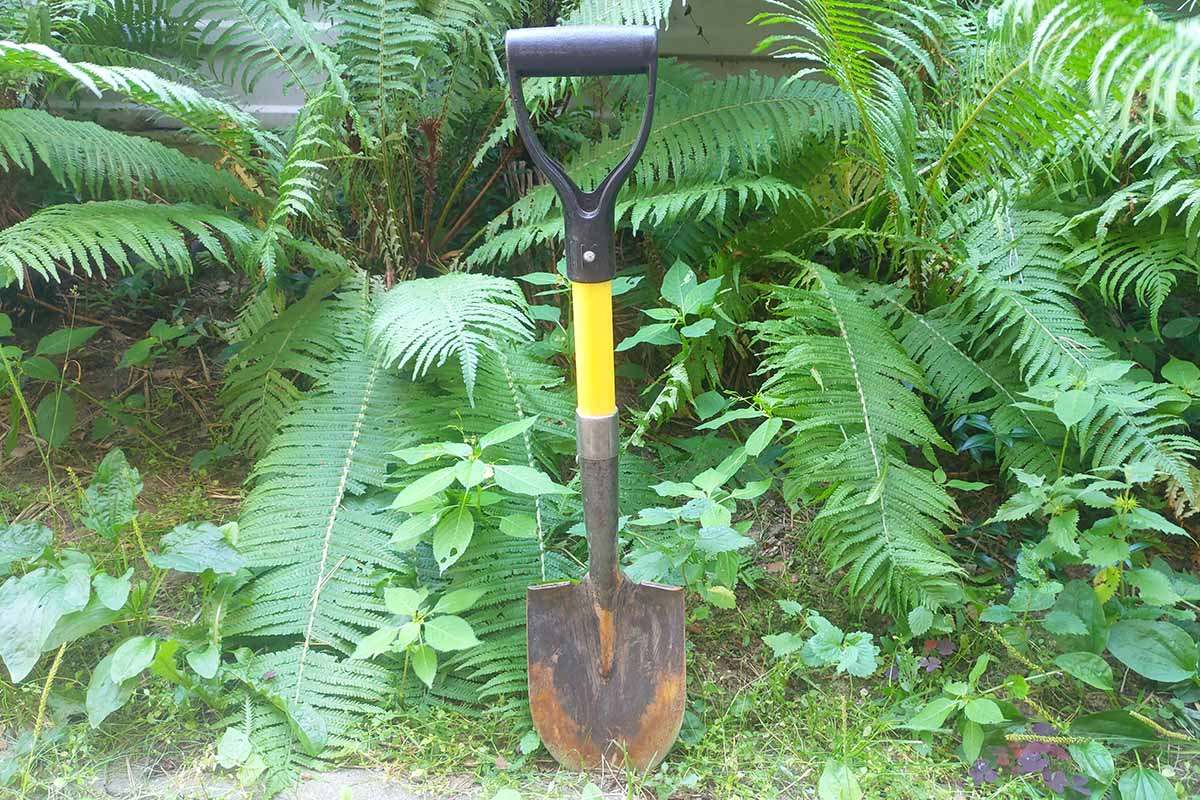
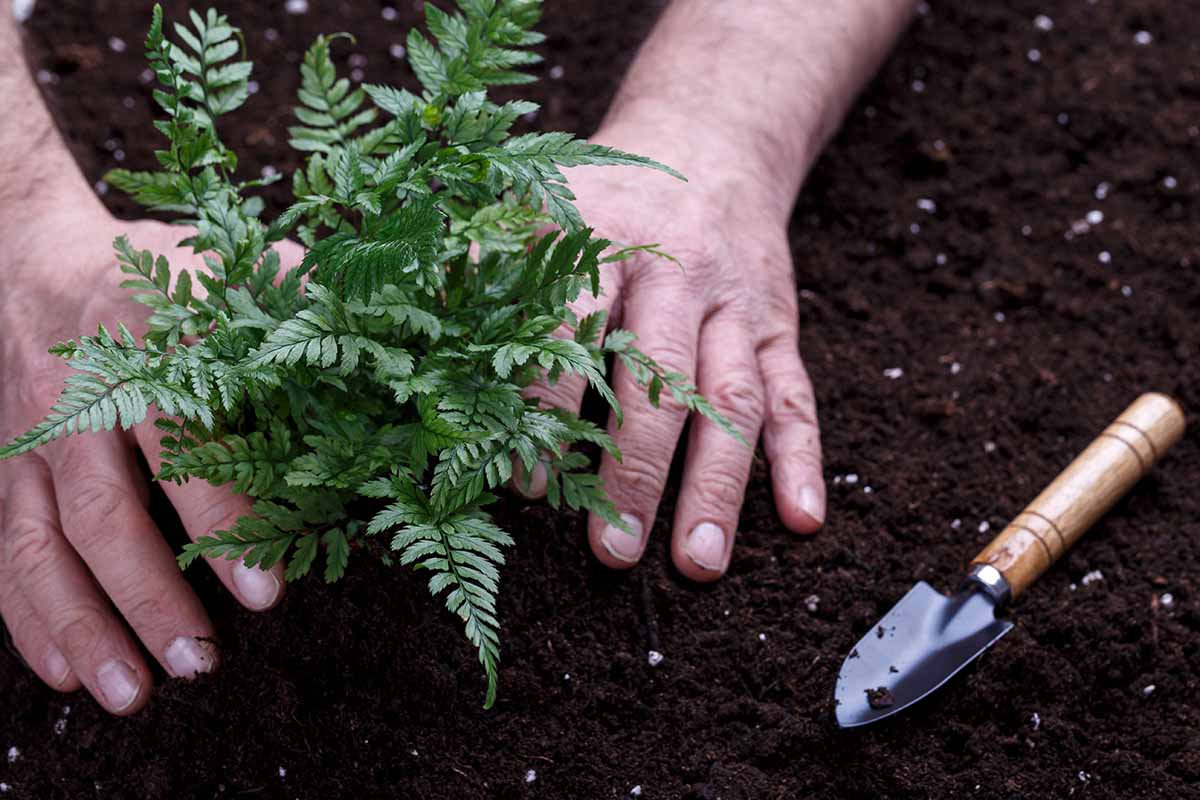
Transplanting
Spring is the best time to transfer these plants from one place in the garden to another. If planting a purchased plant or one that you started in a container by planting spores, any time of year is fine. In either case, you may want to do the work when it’s cloudy, to lessen the shock to the plant. Water the plant the day before you begin the process of transplanting. Then, simply dig a hole about the same depth as the container or root ball and twice as wide. Remove the plant from its container if you need to. Place it in the hole, then fill in with amended soil that is rich in organic matter. Water well, and add a layer of mulch to retain moisture.
How to Grow
As we said, ferns generally prefer full or dappled shade. Some are perfectly fine in morning and early afternoon sun, and a few varieties can even handle full sun, though probably not in a dry, hot region like a backyard in Phoenix, Arizona. Speaking of dry, hot regions, these plants also generally prefer some humidity. If you don’t have a lot of humidity in your area, planting near a pond and under the canopy of trees can help. Avoid windy areas, as wind promotes transpiration and water loss. That said, some species, such as Woodwardia areolata, do well in hot, humid climates. With few exceptions, these plants need constantly moist, but not wet soil. If you can stick your finger into the soil all the way up to your third knuckle and it feels moist but not wet, there’s nothing to worry about. But if the soil is dry halfway to your first knuckle, add water. Mulch helps to retain water, but even still, you might want to invest in soaker hoses to make your life easier. You want to avoid planting in areas with soggy soil or standing water. Even though ferns like moisture, they generally grow in places where the water is always moving, not sitting. There are only a few species that will tolerate boggy soil. Overwatering can contribute to root rot or fungal issues. Somewhere with dappled shade on a slight slope so that any water moves through rather than sitting in the soil is going to be just about right. Whether grown in sun or shade, “they almost always want a high organic matter soil that’s moist,” says Richter. “A forest floor, for example, is ideal. The decaying leaves and understory lighting are just what they need,” he adds. Adding these ancient treasures to a landscape that mimics those conditions will likely offer the best chance of success for most varieties, Richter says. Not all of us have such marvelous soil, so we have to create it. Work in a ton of well-rotted compost and manure until the soil feels loose and crumbly.
Indoors
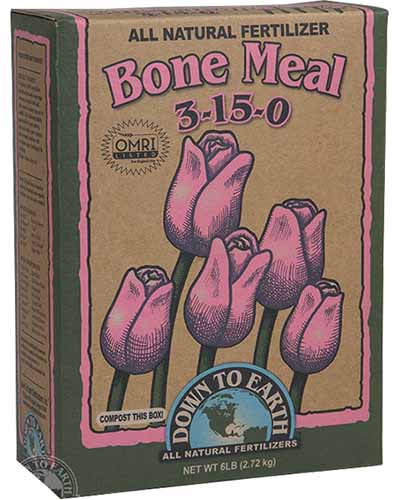
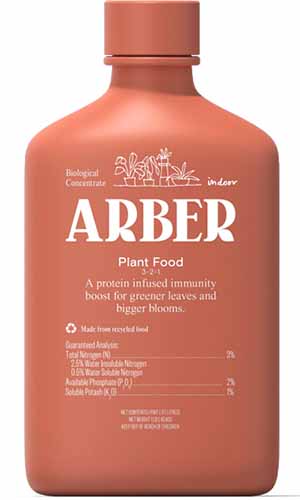
Because of their low light requirements, ferns might seem like they’d make terrific indoor container plants. A top-dressing of organic matter in the spring and fall will ensure your plants are well fed. You don’t need to break out the fertilizer regularly, and these plants do better with a less is more approach. If you want to go the fertilizer route, a little bit of bone meal in the spring will get the job done. Down to Earth makes an excellent bone meal fertilizer in a compostable box, which you can pick up at Arbico Organics in five-pound boxes. Down to Earth Bone Meal Keep in mind that ferns generally prefer soil that is more acidic than alkaline. Something around 6.5 to 7.0 is ideal, though they can happily tolerate soils slightly outside of this range. Anything from 4.0 to 7.5 will typically work, but once again, there are exceptions. There are ferns out there that grow in limestone-based soil, so be sure to double-check the requirements for your particular species. Many types grow well in containers, so long as you remember that pot-grown plants tend to dry out more quickly than those in the ground. Keeping them alive and happy inside is notoriously challenging, but that doesn’t stop them from being one of the most popular types of houseplants out there! You’ll find success by being very precise about the conditions you provide. They need bright, indirect light, oodles of humidity, and consistent water. To provide indirect light, place them near a north- or east-facing window. Avoid south- or west-facing windows, because too much sunlight can scald the fronds. If you live in an apartment or somewhere where you don’t have a north- or east-facing window, using sheer curtains or placing plants near a window that is shaded by a tree outside is also perfectly fine. As many indoor environments tend to be quite dry, be sure to water consistently. The soil shouldn’t be allowed to dry out, though it shouldn’t be soggy, either. You should also provide an adequately humid environment. Try situating your plants in a bathroom, for example, or keeping them in a terrarium. Other ways of increasing humidity include placing the pots on a water-filled, pebble-lined tray, placing a room humidifier nearby, or misting them occasionally. While the asparagus fern is a popular houseplant, it is not a true fern. It is a member of the lily family. If providing regular water and consistent humidity is too much of a challenge, pick brake (Pteris spp.), holly (Cyrtomium falcatum), or rabbit’s foot (Davallia fejeensis) ferns, which can tolerate drier soil and less humidity. While your ferns are actively growing during the spring and summer, apply a liquid houseplant fertilizer such as Arber’s indoor plant food, available at Arbico Organics in 16-ounce bottles, at about one-half the recommended quantity every six weeks. Arber Plant Food Maintain your indoor plants’ healthy appearance by occasionally trimming away brown fronds. Popular varieties for growing indoors include the sword or Boston fern (Nephrolepis exaltata), button (Pellaea rotundifolia), kangaroo paw (Microsorum diversifolium), and ‘Silver Brake’ (Pteris cretica ‘Mayi’). If you’re new to indoor fern growing, start with the good old Boston variety. Advanced growers might like to tackle the extremely challenging maidenhair fern. If you can succeed with that delicate beauty, you can consider yourself a graduate of the master class of growing houseplants.
Growing Tips
Keep soil consistently moist.Most species require at least partial shade, if not full or deep shade.Plant in slightly acidic soil.
Maintenance
There isn’t much work required to maintain ferns. Once they’re happy, they’ll largely take care of themselves. Trim away the dead leaves of deciduous types in the late fall after the frost has killed them. This helps prevent pests and diseases from having a place to hide or breed and simply looks cleaner. Indoor plants and evergreens should be pruned as needed to remove dead, broken, or diseased fronds. Add mulch at the beginning of spring each year to help suppress weeds and retain moisture in the soil. Pine bark is slightly acidic, so it can be handy for using around most ferns, but straw or chopped leaves will also work. If the plants become too crowded or large for the space where you planted them, you’ll probably want to divide them. This should be done in the spring. Follow our guidelines above and either transplant the removed section or toss it in the compost. It’s native to North America and is extremely adaptable, best suited to Zones 4 to 8. It grows from rhizomes, but it isn’t invasive because it is a fairly slow grower. Not only is this better for the environment, but it can also save you a headache down the road. Don’t feel restrained, though. There are so many exceptional options, including:
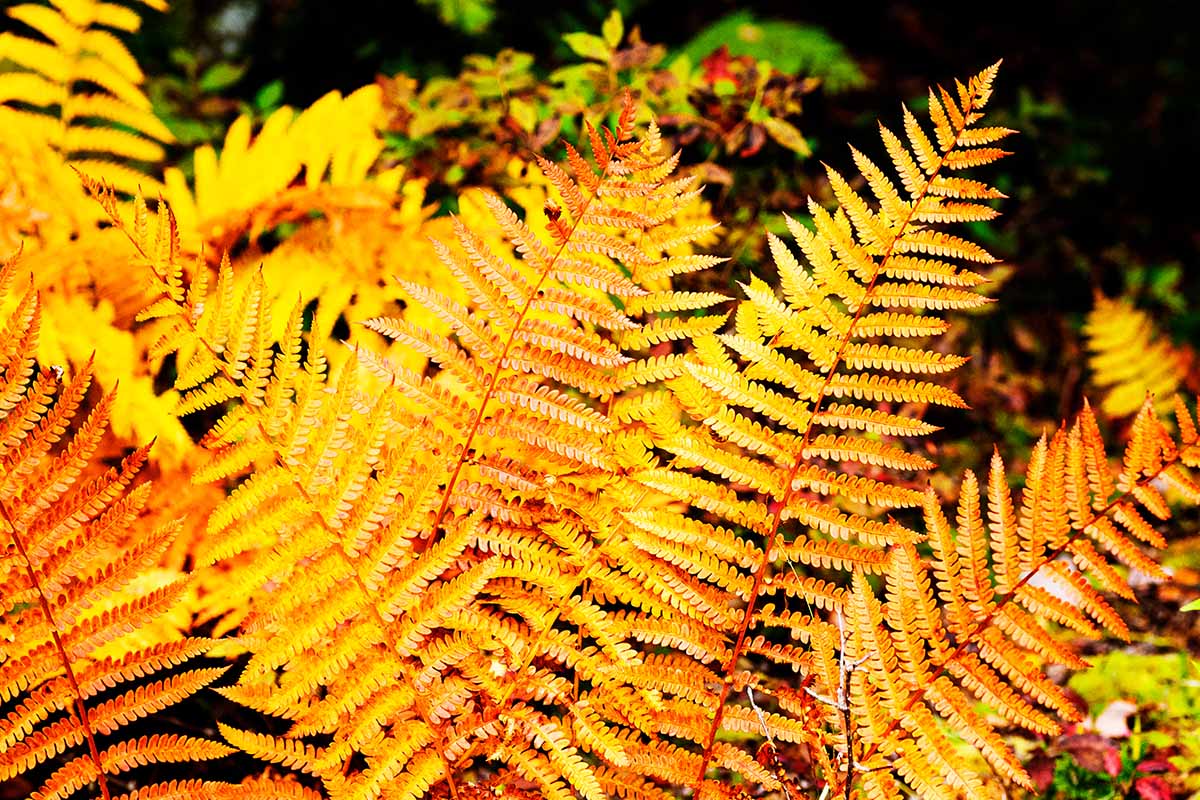
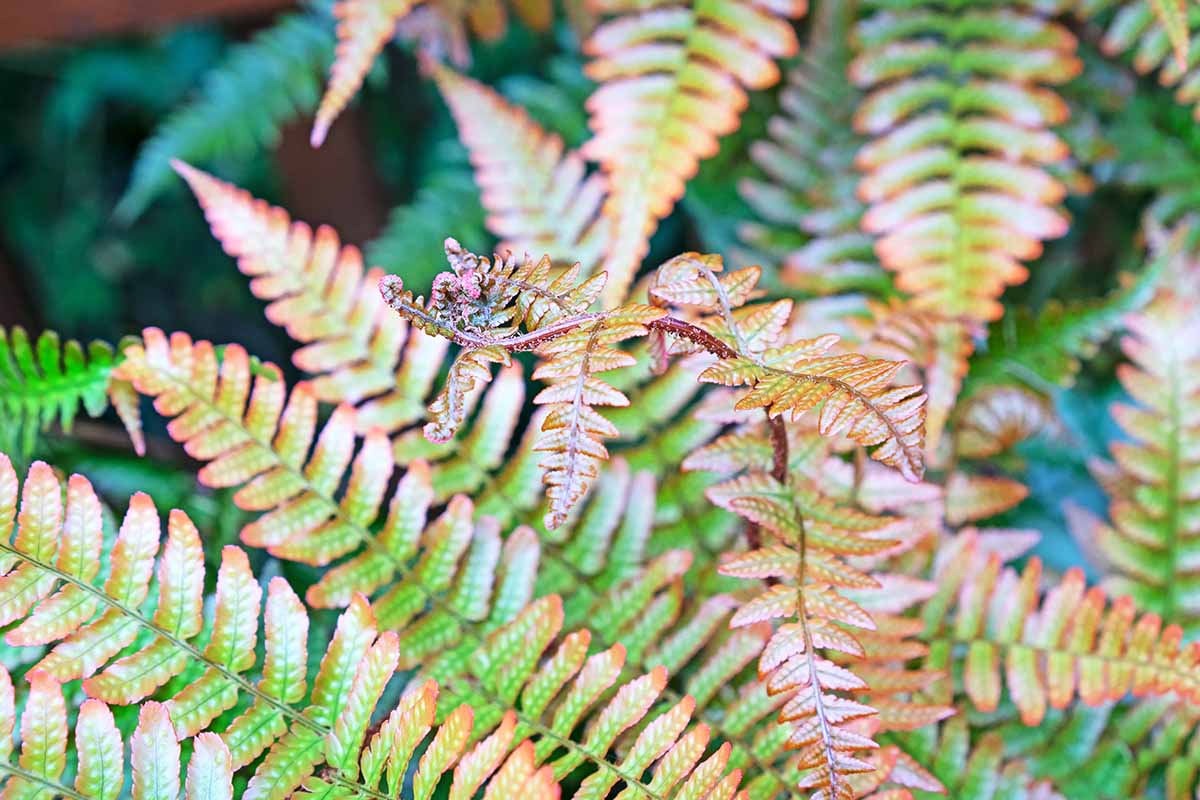
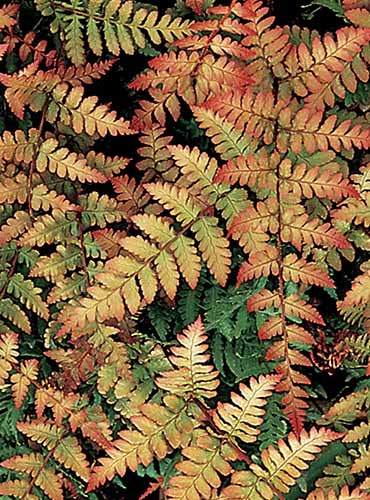
Autumn
Autumn ferns (Dryopteris erythrosora) are beautiful during the spring and summer with their lacy fronds, but early spring and fall are the times when they truly shine. When the fronds emerge, they’re coppery green before transitioning to deep green. Then, in the fall, they turn bronze. Autumn Fern If a little extra color for those areas of deep shade in Zones 5 to 9 sounds like what you’re looking for, pop on over to Burpee to pick up a live plant. Find tips on autumn fern care here.
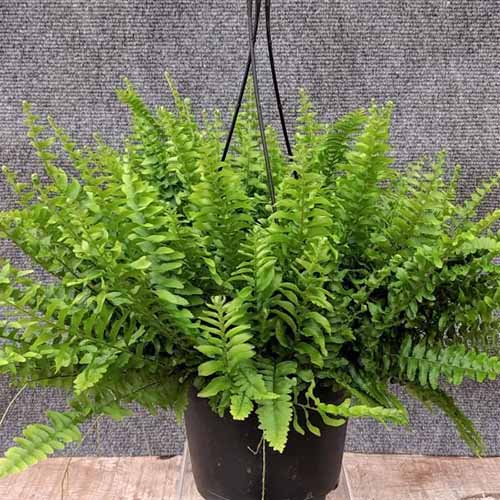
Boston
Boston ferns (Nephrolepis exaltata ‘Bostoniensis’) are probably a genetic variation of a western sword fern (N. exaltata) and one of the most popular for cultivation. Boston Fern Nature Hills Nursery has six-inch pots of this perennial favorite available. Outdoors, you can grow them in Zones 9 to 11. Otherwise, keep them indoors year-round or bring them out to a shady spot during the summer. ‘Dallas’ is one of the hardiest Boston ferns and ‘Verona’ is a noteworthy dwarf variety that grows well outdoors. ‘Fluffy Ruffles’ doesn’t need as much humidity as other varieties of Bostons, and ‘Petticoat’ has masses of fronds if you’re looking for something extra full. Read more about growing and caring for Boston ferns here.
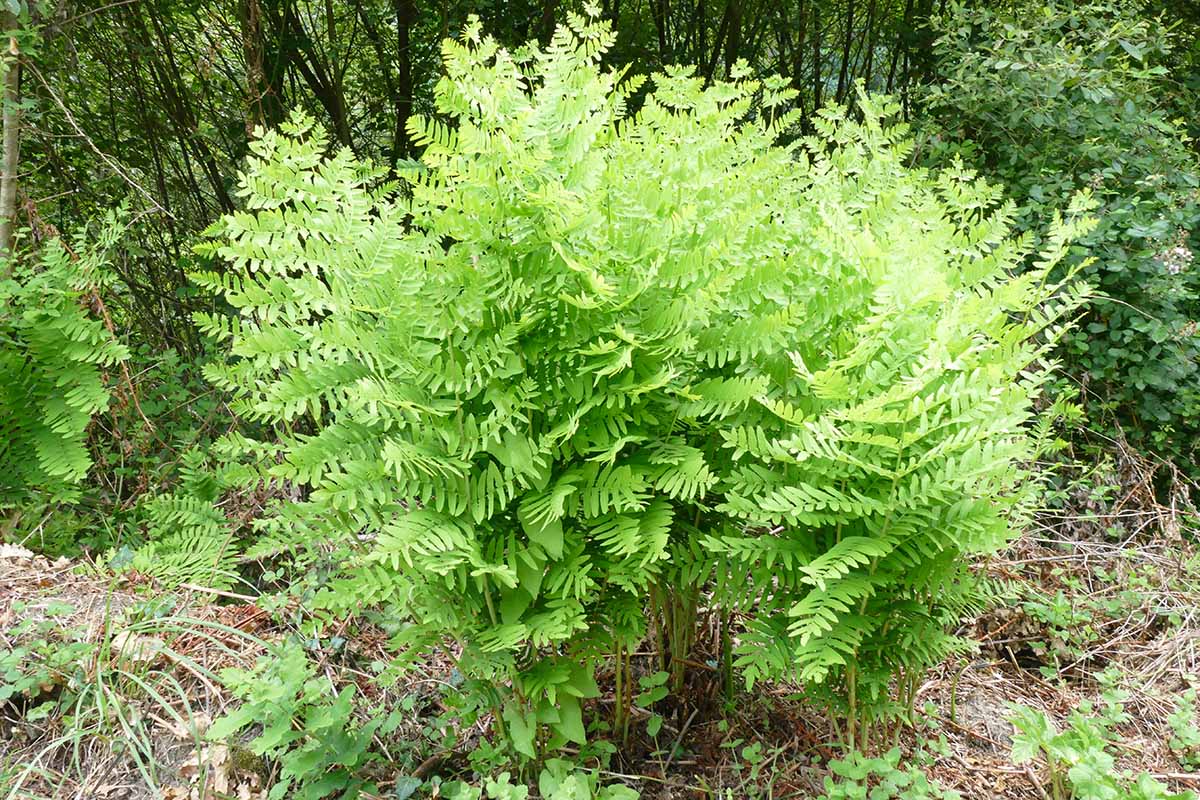
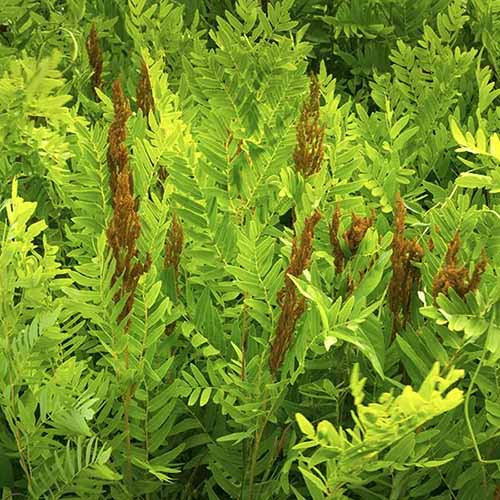
Cinnamon
Osmunda cinnamonmea, commonly called cinnamon fern, has showy, stand-out, cinnamon-colored sporangial cases that cover the fronds. It’s also one of the taller options among those native to North America, reaching up to five feet tall. It’s a clump-forming type and hummingbirds use the fibrous growth that covers the stipes as nesting material. Cinnamon Fern All species in the Osmunda genus including cinnamons can tolerate full sun in northern regions so long as they have consistently moist soil. They can live outdoors year-round in Zones 4 to 10. Add this variety to your garden by purchasing one (or several!) in quart-size containers from Nature Hills Nursery. Find more tips on growing cinnamon ferns here.
Christmas
Native Christmas ferns (Polystichum acrostichoides) grow wild across eastern North America in deep shade. They’re often used as Christmas decor, hence the name, and the deep green evergreen fronds complement a red and green decorative scheme. This plant is extremely shade tolerant and can even survive occasional drought, making it a nice option for challenging spots in Zones 3 to 9.
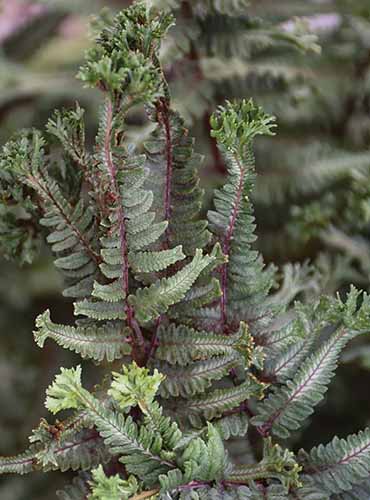
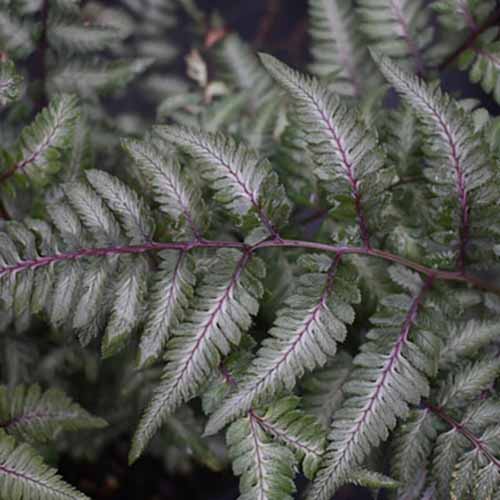
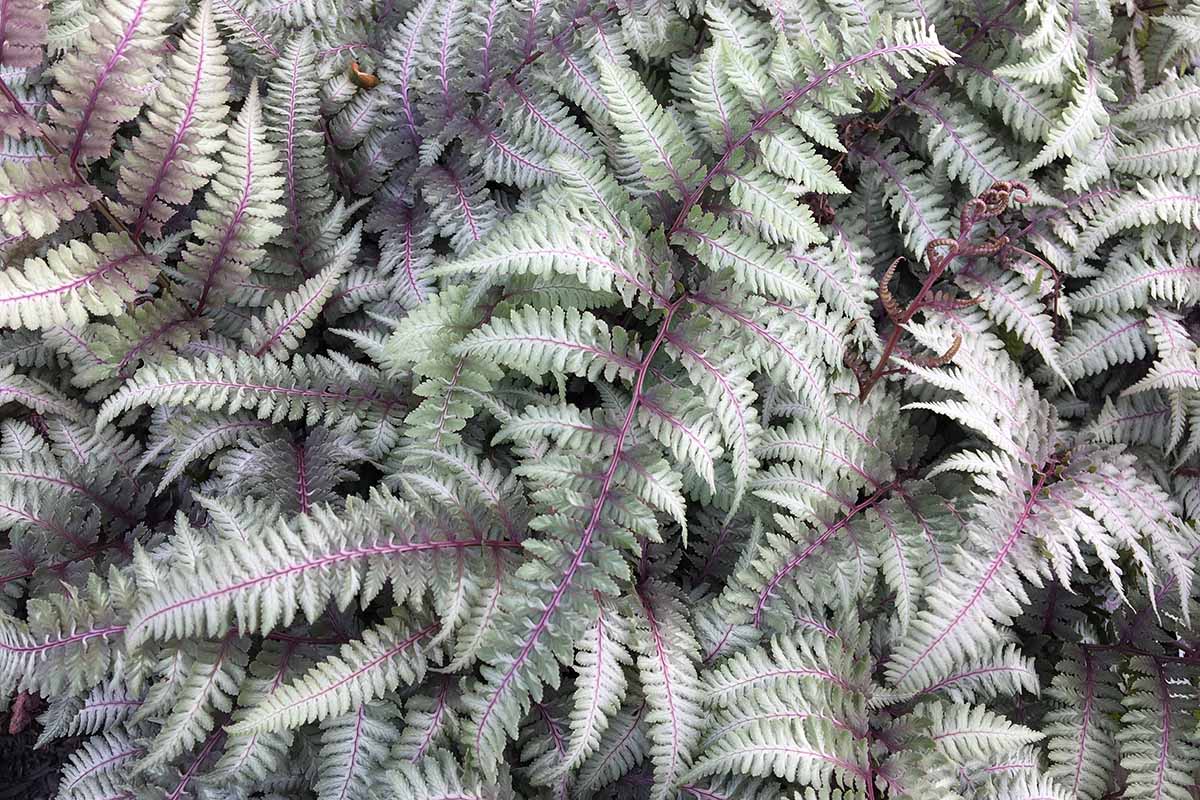
Japanese Painted
Japanese painted ferns (Athyrium niponicum var. pictum) feature colorful stalks and/or leaves that make them stand out from their largely green counterparts. Japanese Painted Fern Most types will grow in Zones 4 to 8. You can purchase a live plant at Burpee, which has dark green fronds with a silver line down the center and bright red stems. Avoid planting this type in too much sun or you’ll lose the color. This was the first fern to ever be honored with the Perennial Plant Association’s (PPA) Perennial Plant of the Year Award, which it nabbed in 2004. ‘Lady in Red’ – characterized by lacy, light green fronds, and striking red stalks – does well in USDA Hardiness Zones 2 to 8. ‘Lady in Red’ To add this colorful plant to your outdoor garden, visit Burpee to grab a live specimen. ‘Crested Surf’ is a real stand-out, with purple stems and double-crested fronds. Crests are clusters of pinnae that only some ferns exhibit. ‘Crested Surf’ Once again, our friends at Burpee can send you a live plant to enrich your outdoor space. ‘Ghost’ will be a welcome apparition in any garden with its metallic silver leaves. But it’s not just the hue that earned this ethereal beauty its name. ‘Ghost’ The young leaves seriously appear to glow, even in shady spots, thanks to their metallic, nearly white sheen. Burpee carries this Japanese variety, as well. Finally, as you may be able to guess from the name, ‘Godzilla’ is huge, dwarfing nearby ferns with its three-foot-tall, silvery fronds with purple midribs. ‘Godzilla’ Give ‘Godzilla’ a place in your landscape and head to Planting Tree to purchase one in a gallon-size container. Read more about caring for Christmas ferns here.
Lady
No fern list would be complete without the lovely, deciduous lady (Athyrium felix-femina). The three-foot-long fronds are pale green in the spring before gradually turning dark green over the summer.
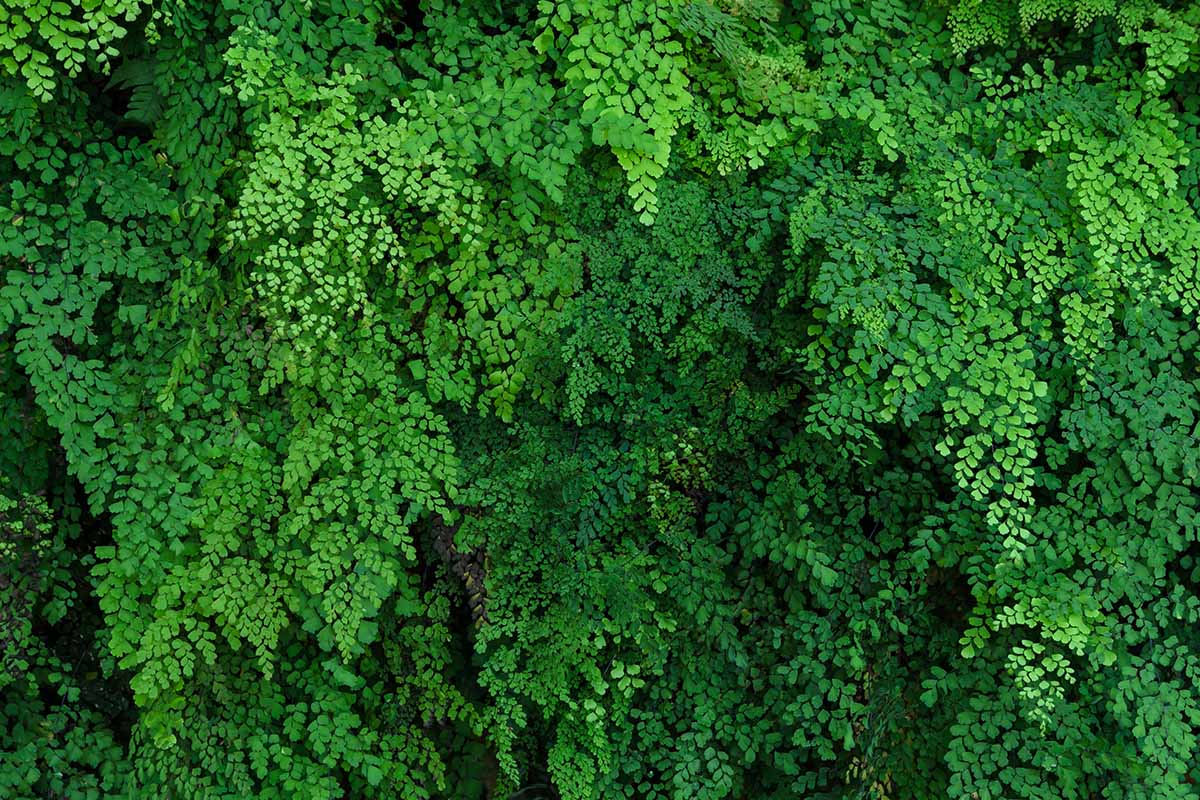
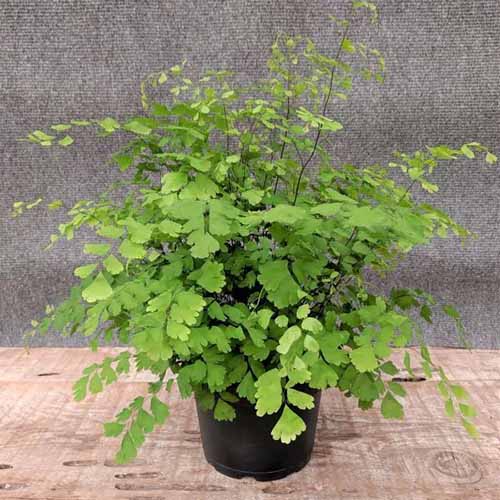
Maidenhair
Many people love the maidenhairs (Adiantum spp.) because they’re so graceful looking. This is a clumping type, so it won’t take over an area, but with its delicate, bright green fronds that gently weep from the black stipes, you might wish it would. Most gardeners need to grow them indoors, but they will grow well outdoors in areas that don’t experience daytime temperatures below about 50°F for an extended period of time. Try your best to give it exactly the type of conditions it likes if you want this plant to really shine. Don’t expose this variety to full sun and don’t allow it to become dry. If it receives too much heat or doesn’t receive enough water, the fronds will collapse and they won’t recover. Maidenhair Fern Feel like you’re up to the challenge? Nature Hills Nursery carries the A. raddianum species with 20-inch-long fronds in four-inch, six-inch, or #1 containers.
Marginal Wood
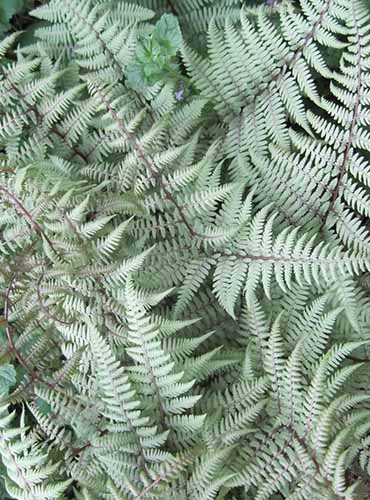
Marginal wood (Dryopteris marginalis) has rhizomatous roots so it won’t spread like wildfire when you plant it, but wherever you place this North American native in Zones 3 to 8, it will stand out with its bluish or grayish-green fronds growing in dense clumps. Marginal Wood Fern Nature Hills Nursery has #1 containers of this species available so you can add it to your space.
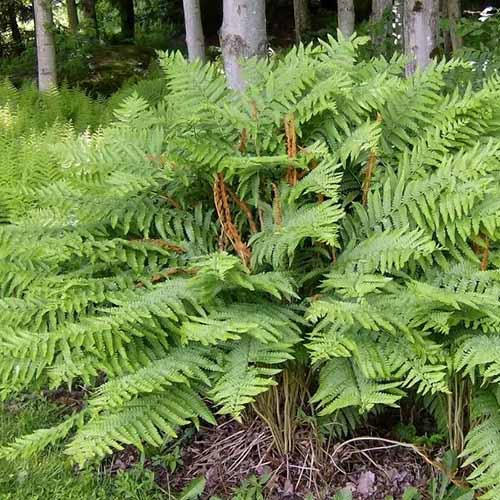
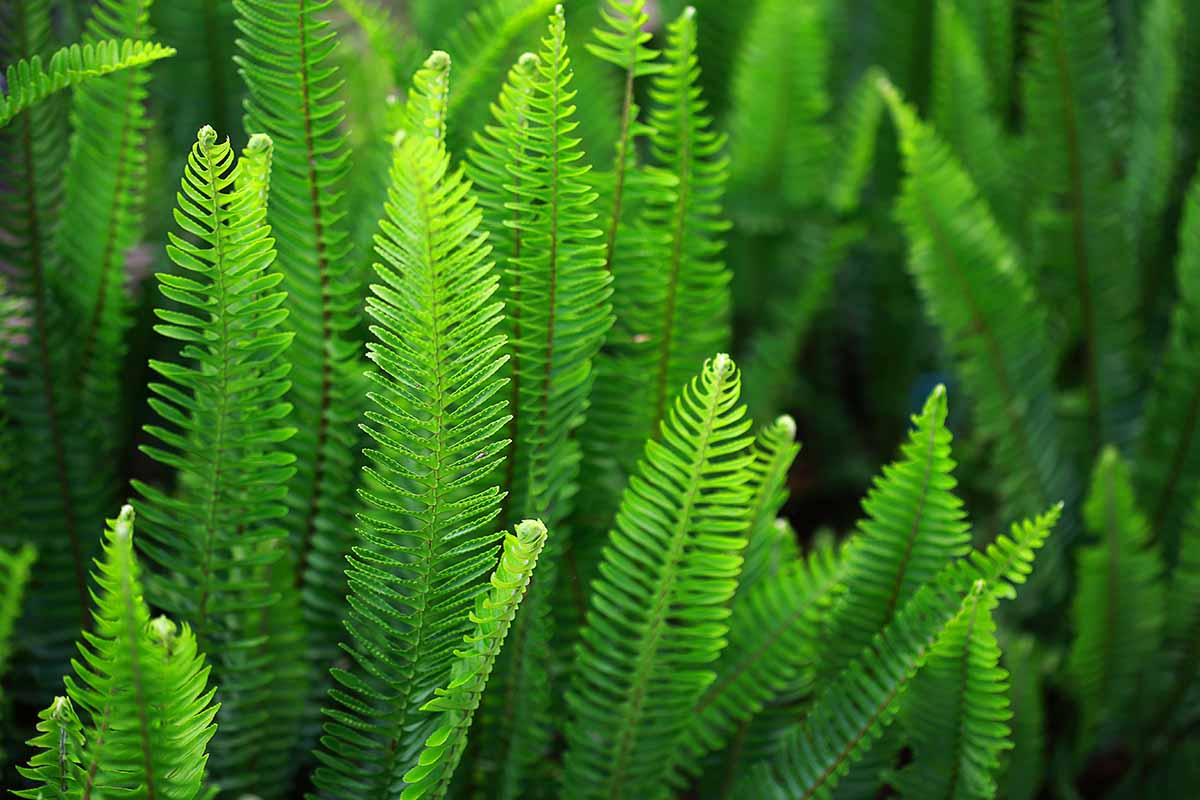
Ostrich
Ostrich ferns (Matteuccia struthiopteris) can top out at a whopping six feet tall. This creeping type becomes established quickly if given the right conditions, which include dappled sunlight and average moisture in Zones 3 to 7. In the northern latitudes of North America, it can grow in full sun. By the way, if you like to eat fiddleheads, plant this pretty option. These fiddleheads are prized by chefs and foodies above all others. Ostrich Fern Burpee carries live specimens of this showy favorite.
Royal
Royal ferns (O. regalis) are close relatives of the cinnamons. They also sport the cinnamon-brown spores and rusty-colored sori growths that look kind of like blossoms, earning this plant the nickname flowering fern. Royal Fern The fronds have a pink hue in the spring before turning green and then cinnamon in the fall in Zones 3 to 9. Bring home a live plant in a #1 container from Nature Hills Nursery to add some unique color to your garden.
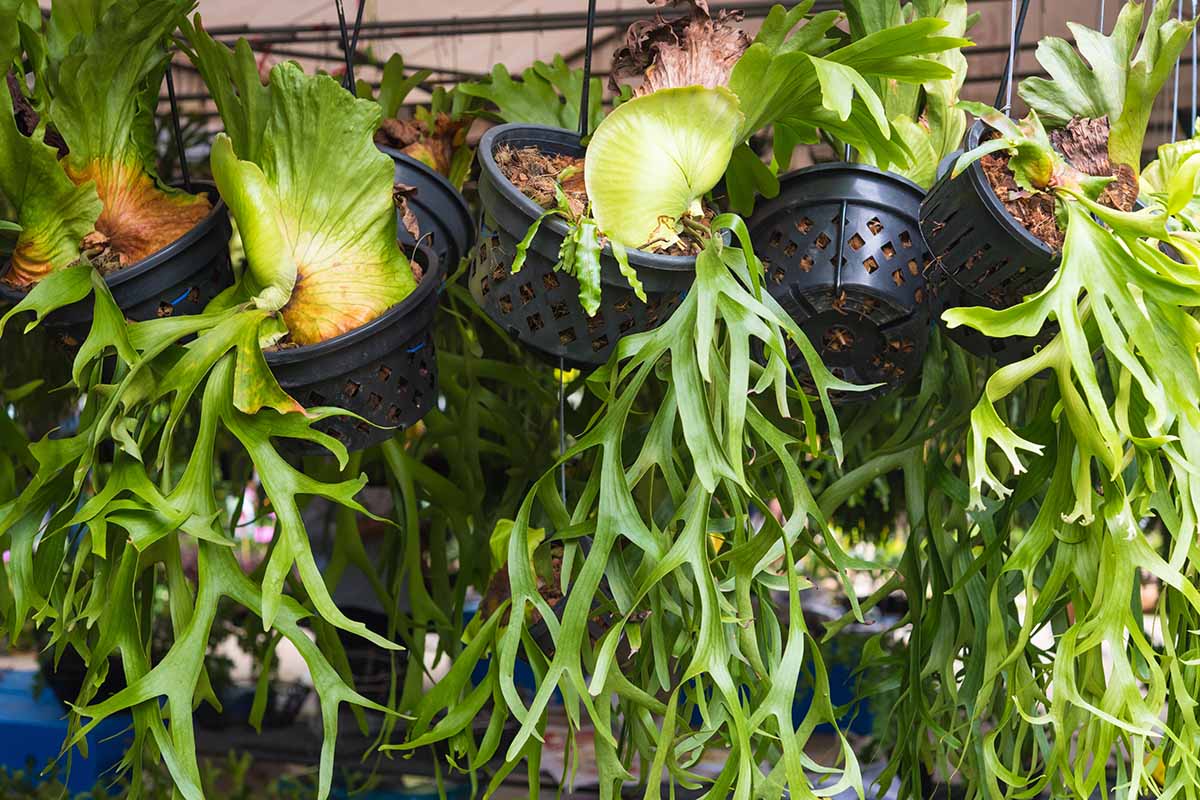
Staghorn
While Bostons are usually considered the easiest to raise indoors, I’ve had more luck with staghorn ferns (Platycerium bifurcatum). They don’t have that delicate, lacy look, but they are pretty darn resilient and I think they’re equally stunning, in their own way. They should never be exposed to a deep freeze, so grow them outdoors only in Zones 8 to 11, or plan to bring them indoors during cold weather.
Managing Pests and Disease
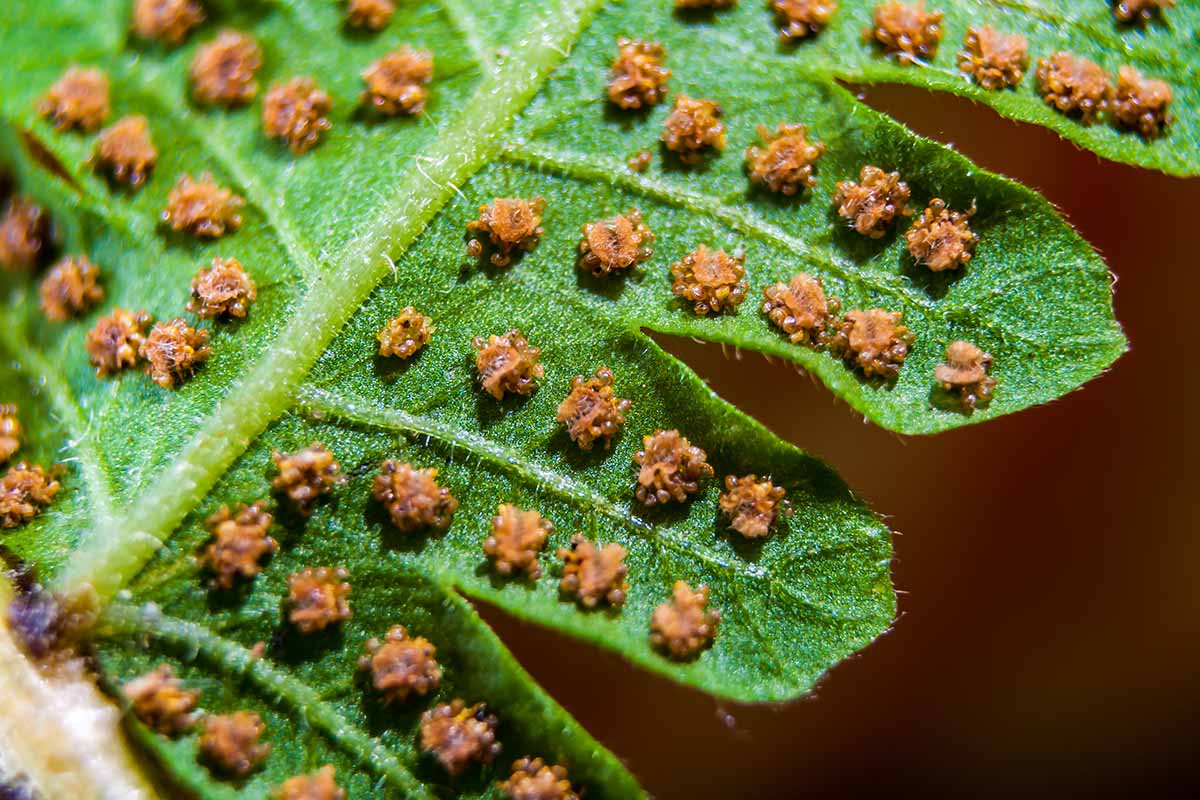
If your fern has little bumps or growths on the underside, don’t panic. These are the spore pods that the plant uses to reproduce. They usually have a somewhat organized formation, which sets them apart from an insect such as scale, which tend to cluster in disorganized groups. Most ferns are ignored by herbivores and those that are nibbled on might only be eaten when they are young or at certain times of the year when most other food sources are scarce.
Insects and Gastropods
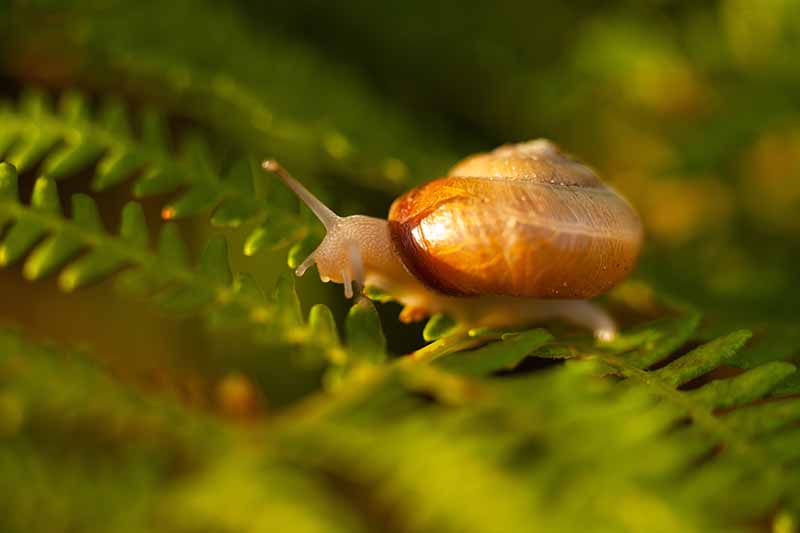
There are several insects that find ferns to be delicious, but gastropods like slugs and snails will likely be your biggest problem.
Caterpillars
Leaf mining caterpillars of fern smut moths (Psychoides filicivora) will devour the fronds of many different species. When they are present, they shelter in the developing spores and leave behind brown spots as they feed. These moths don’t live in North America, so gardeners there can rest easy. Those in the UK, the Republic of Ireland, and Asia need to be vigilant. If they do appear, neem oil and insecticidal soaps can help, but you’ll need to treat infested plants regularly to control the problem.
Scale
Scale is primarily a problem on indoor ferns, though these pests can attack outdoor plants as well. An infected plant might exhibit yellowing on the fronds and you’ll see little black, brown, or gray bumps on the stems. To learn how to deal with these pests, read our guide.
Slugs and Snails
Slugs and snails will nibble on some, but not all, types of ferns. This can be unsightly, but if they eat the young croziers (another name for fiddleheads), they can damage or even kill the plant. Protect your young plants carefully. Mature evergreens are usually less prone to damage from these pests. If you find that the fronds are looking a bit ragged, put down snail bait or read our article on keeping your plants safe from slugs and snails for more tips.
Vine Weevils
Black vine weevils (Otiorhynchus sulcatus) are common pests throughout Europe and North America. While the adults are annoying because they cause unsightly damage to the fronds, it’s the grubs you need to watch out for. The grubs feed on roots and cause infested plants to start drooping and otherwise appear stunted.
Disease
Ferns are one of those plants that you can pretty much count on to be free of diseases. You can increase the chances of yours staying healthy by keeping them well-spaced and cleaning up any dead foliage in the fall. Remove any adult weevils or grubs that you find and treat the soil with Steinernema kraussei beneficial nematodes. NemaSeek Beneficial Nematodes Packages of five, 10, 50, 250, or 500 million nematodes are available at Arbico Organics. Follow the manufacturer’s directions for application. Avoid Asplenium species if these pests are a known threat in your region or you’ve dealt with them in the past, as these are particularly susceptible. Here’s the most common potential ailment to be on the lookout for:
Root Rot
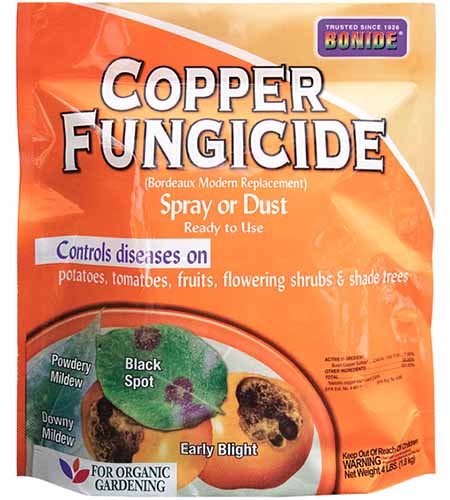
Root rot can either be caused by the roots drowning in too much water because they can’t access oxygen, or by pathogens in the Pythium genus. Look for yellowing and drooping leaves. The first step in treating root rot is to check the soil moisture. If it feels soggy, your plants are probably sitting in too much water. Reduce watering and/or improve drainage by adding well-rotted compost to the soil. Never plant in containers without drainage holes. Cultivated ferns look as lovely growing next to woodland wildflowers as they would in nature. Talk to your local extension office for wildflower recommendations that will grow in shady conditions in your area. You don’t need to purchase two different products. Just grab a dust and mix it with water following the directions on the bottle. Bonide Copper Fungicide Bonide makes an excellent option, which Arbico Organics carries in one- or four-pound bottles.
Best Uses
Of course, the majority of ferns are perfect for growing in shady spots. In fact, they’re even better than those other shade favorites – hostas – for deep shade. Plant groups of them together for a bigger visual impact. Many species are also good for areas with occasionally running water, like slopes. Trilliums, columbine, bleeding hearts, wild ginger, and poppies are all common options that may work for you. This is an actual place in Humboldt County, California, where 80-foot canyon walls are clothed in thousands of lush plants, and where parts of “Jurassic Park 2: The Lost World” were filmed. After that, consider joining the American Fern Society, where you can exchange information and spores with other fern fans. Do you fiddle with ferns? Tell us about your passion for this plant in the comments section below. Need something else to plant, to hang out with those ferns? We have some other guides to help you fill your shady areas. Check out these articles next:
How to Grow and Care for Heart FernsHow to Grow Hellebores, the Winter-to-Spring SensationHow to Grow Bleeding HeartsHow to Grow and Care for Coral Bells (Heuchera)