It is one of about 600 types of non-stinging Pilea species in the Urticaceae, or nettle family. This tropical species thrives outdoors year-round in Zones 11 to 12 as a short-lived evergreen perennial. It is also grown as an outdoor annual or indoor houseplant in all zones. We link to vendors to help you find relevant products. If you buy from one of our links, we may earn a commission. Here’s the lineup: Let’s get started!
Cultivation and History
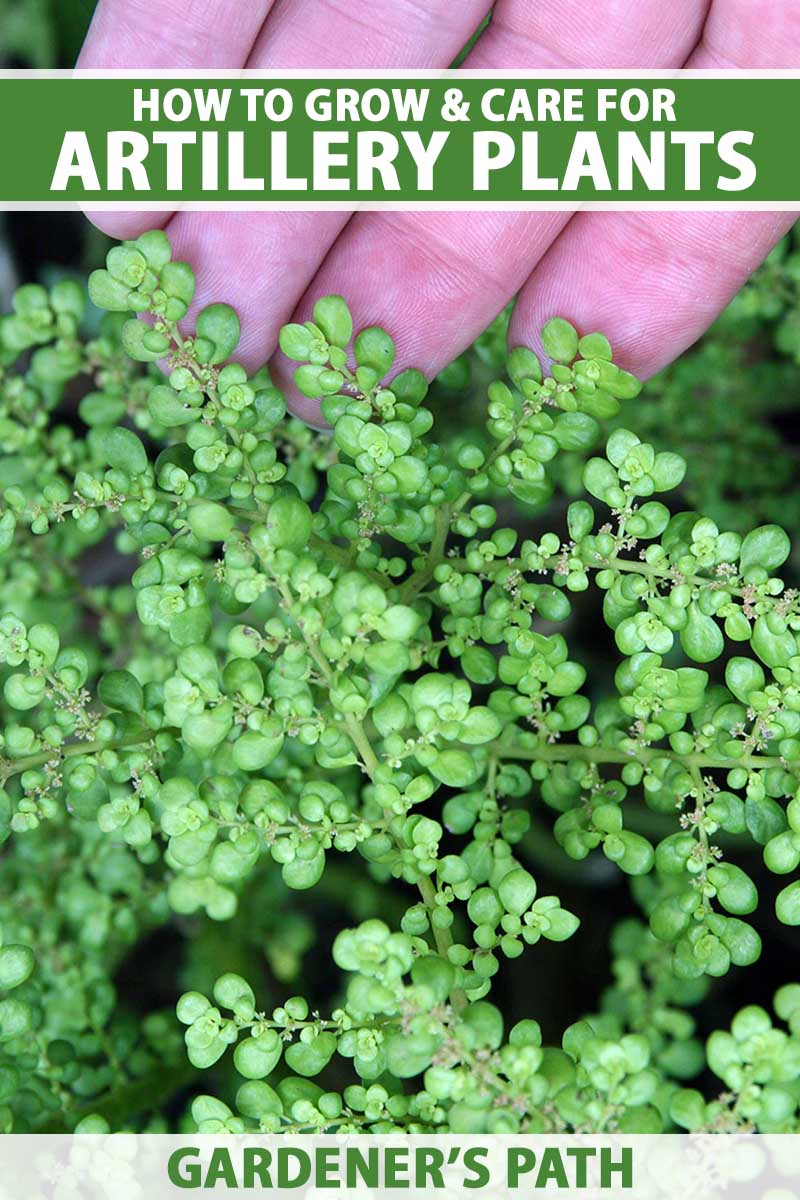
P. microphylla is nontoxic to pets. It has a creeping growth habit and may reach mature dimensions of six to 18 inches high and 12 to 24 inches wide. The artillery species has plump leaves like a succulent. They are either green or variegated pink and white, one-eighth to one-half inch long, and “obovate,” or rounded and narrower at the base. The leaves are arranged in opposing pairs, like a fern frond. In nature, the species produces tiny pinkish flowers followed by brown fruits. And while flowering is unlikely to occur indoors, it’s fun to know about it because the names “artillery,” “gunpowder,” “military,” and “pistol” come from an unusual characteristic. There are both male and female flowers, and the males literally propel pollen into the air, as in an aerial attack. Historically speaking, the artillery species has undergone numerous botanical reclassifications by Swedish botanist Carl Linnaeus and later botanists, including Parietaria microphylla (1759), Pilea muscosa (1821), P. microphylla (1851), and P. trianthemoides var. microphylla (1869). These synonyms and “basionyms,” or name equivalents and their predecessors, still pop up in plant searches, so it’s good to be familiar with them. The artillery species is native to the Caribbean, Mexico, Central and South America, and the southeastern United States. In its native habitat, it is a somewhat weedy, spreading ground cover that commonly sprouts between rocks and in lawns, in margins between land and water, and in masonry crevices. The species has been introduced around the world, and is classified as invasive or at high risk for becoming invasive in many places because it readily naturalizes via stolons, or runner roots, as well as self-sown seed. Today’s cultivated varieties are robust versions of the hardscrabble wild species. And while indoor cultivation does not pose a threat to the landscape, we do not recommend letting P. microphylla spend the summer outdoors in temperate zones as we do with many houseplants, in order to avoid inadvertently introducing it to the landscape. This tropical species thrives best with a daytime temperature range of 65 to 85°F and 1000 to 2000 foot-candles of daylight, which is another way of saying bright indirect light. If the room temperature dips to 50°F, in persistent drafts, you may lose your plant. Lower light is well-tolerated but usually causes shading to dark green, so don’t waste money on a variegated variety if you choose a dim location for your plant. And growth may be more horizontal than upright. A little pruning of leggy stems contributes to a more compact form. If you have a very dim setting, such as a windowless office, that you wish to add a plant to, you’ll need a grow light.
Propagation
To grow your own P. microphylla, you’ll need to start from seed, take a stem cutting from an existing plant, divide an existing plant, or purchase a nursery start. Let’s look at all four options.
From Seed
Outdoors, this is a vigorous self-sower that disperses tiny seeds with gusto, contributing to its invasive tendencies. However, starting from seed may pose a challenge, as most retailers sell live plants and seeds can be hard to come by.
From a Stem Cutting
If you know someone with a plant already, you can get a head start by taking a cutting. To propagate a stem cutting, make your cut about four inches from the tip of a growing stem at any time during the spring or summer. Use clean shears and choose a spot to cut that’s just below a leaf node. This is a natural growing point, where roots will readily sprout. Pinch off the lower leaves to reveal a bare stem about two inches long. Place the bare stem in one inch of water in a narrow container that can support it, like an old unused drinking glass. There should be no leaves below the water line, as they will start to decay and foul the water. Place the glass in a location with bright indirect sunlight, such as near a window with an opaque curtain. Avoid direct sunlight, as it may burn the foliage and roots with its intensity. Change the water daily. When roots sprout over the next couple of weeks, you’ll have a cutting that’s ready to pot up, which we’ll discuss shortly.
By Division
In addition to calling upon another gardener to assist you with the cutting method to get started with your first plant, you may be lucky enough to have a friend who is getting ready to repot. In this case, you can ask for a division. This method involves unpotting and dividing one plant into two or more sections and transplanting the sections to their own containers. You can learn how to divide an herbaceous perennial in our guide. If you haven’t got a repotting friend, it’s time to get your wallet out.
From a Nursery Start/Transplanting
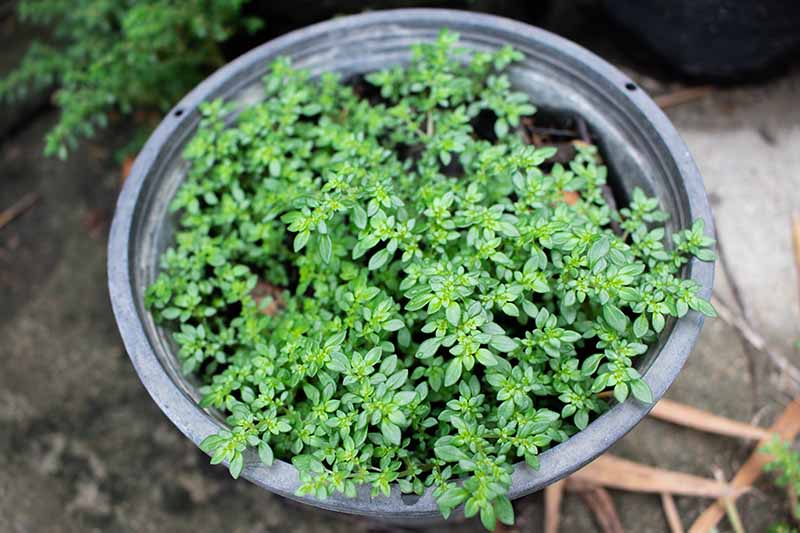
When you buy a pilea, it may be very young or more mature. To transplant it to another container, or to pot up a stem cutting or division, do the following: Choose a vessel that is large enough to accommodate the plant, whatever its size, with two to three inches of growing room all around it. Be sure that it has one or more drainage holes. Keep in mind that when it’s mature, this type of pilea may be between 12 and 24 inches wide. You will probably need to repot more than once before maturity and may want to keep the early containers on the inexpensive side. At maturity, you may opt to select a hanging container to showcase the species’ creeping, trailing nature. Buy potting soil that’s rich in organic matter, moisture-retentive, loose and airy, and well-draining. It will approximate the 5.0 to 6.0 pH that this tropical species prefers. Place a single layer of pea gravel in the bottom to facilitate drainage, and then fill the vessel about halfway with potting soil. Gently unearth the plant from its current pot. Settle it in the potting medium so it sits at the same depth it was in the original container. Backfill with soil and tamp it very lightly to hold the plant upright. Take care not to compact the soil. Light and airy is what you want to aim for. If you are potting a rooted stem cutting, settle it in the soil, taking care not to injure the fledgling roots. Bury the rooted end one inch deep in soil, tamp lightly and loosely backfill. To transplant a division, you’ll want to settle it in much the same way, with about an inch of soil over the roots, at about the same height it was in its original vessel. After potting, water until it runs out the bottom of the vessel, and repeat. When all drainage has stopped, find a location with bright, indirect light. You may want to place the container on a single layer of pea gravel in a shallow, non-rusting pan. Add water to the pan until it comes just to the top of the gravel. This is a great way to increase ambient humidity and replicate the natural habitat of a pilea plant. One final note: With stems that are fleshy like a succulent, it’s easy to bruise or break them, so be sure to handle yours with care.
How to Grow
Once potted and watered, it’s time to apply a half-strength liquid or slow-release granular houseplant food. It’s best to apply this to wet soil to avoid burning tender roots and stems. Feed again in the summer, and continue to feed once in spring and once in summer going forward. Some gardeners recommend feeding more frequently, but overfeeding may prove to be a disaster resulting in a visible buildup of salts on the soil and container that inhibits water uptake. In the event of a buildup, flush the pot through several times with water, and reduce feeding to once a year in the spring. Keep the soil evenly moist by watering when the surface feels dry. Avoid oversaturation, as the roots rot easily, and reduce watering during winter dormancy. Just don’t let the pot completely dry out. In addition, avoid wetting the leaves, especially in low-light locations, to avoid creating a breeding ground for the bacterial and fungal diseases we’ll discuss shortly.
Growing Tips
P. macrophylla is not hard to grow when you remember to:
Use an organically-rich potting soil that is loose, well-draining, and moisture-retentive.Avoid packing the soil down hard when potting. Instead, tamp loosely and leave lots of air holes to facilitate the flow of nutrients, oxygen, and water.Fertilize sparingly to avoid a buildup of salts, and flush several times as needed in the event of overfeeding.Maintain even moisture without oversaturation by watering when the soil surface feels dry.
Pruning and Maintenance
This is an easy species to maintain. For a more compact shape, pinch off a few inches of the growing tips. If you like, use them to make new plants per the propagation instructions above. If a fragile stem breaks, use clean pruners to remove the damaged portion. Be sure to cut just above a leaf node to encourage rapid regeneration. Also, tap water is sometimes so alkaline or “hard” that it causes white spots to form on the leaves. If you note this issue, switch to distilled water.
Cultivars to Select
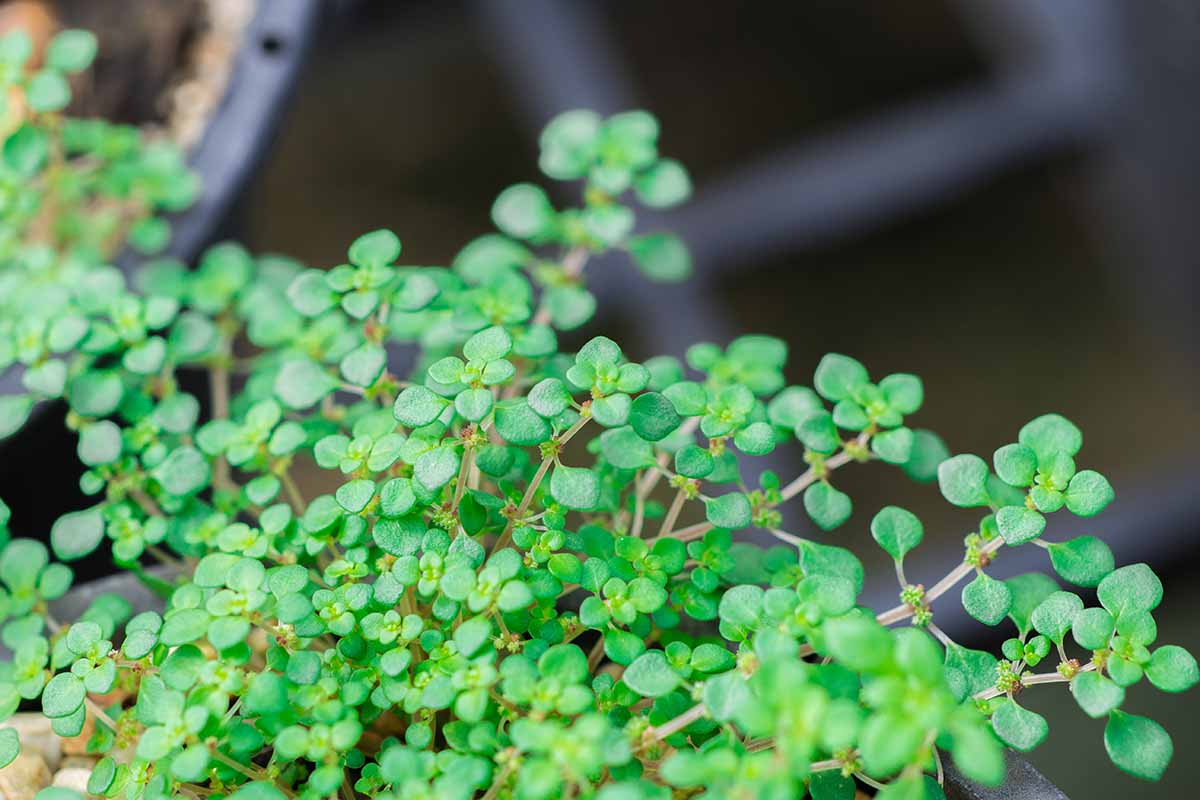
Like many houseplants of tropical origin, P. microphylla thrives in bright, indirect light but it can tolerate a low-light placement. P. microphylla ‘Variegata’ is a variegated pink and white cultivar you may like to choose for a location with bright indirect light. For best results in low light, remember that a green variety is your best bet, as a variegated one is likely to shade to dark green anyway. This species has not been widely developed, and options and availability are currently not extensive.
Managing Pests and Disease
With indoor cultivation, you are not likely to face many issues. Some common houseplant pests prefer very dry environments, while fungi and bacteria favor dampness. Try to keep the indoor humidity at or above 45 percent, and avoid both under- and overwatering as well as direct sunlight. Even with the best care, pests may appear. You may encounter:
AphidsCaterpillarsFalse Spider MitesFungus GnatsMealybugsScaleSlugs and SnailsSpider MitesShore FliesThripsWhiteflies
Some are more likely to prey upon flora grown outdoors, but you should be aware of the possibilities. If a stream of running tap water doesn’t dislodge the offending insects, try one or more of the following: Treat sapsuckers and caterpillars with an application of organic neem oil. Apply food-grade diatomaceous earth to the soil. It addresses sapsuckers as well as flying pests and gastropods, and remains in the potting medium as a preventative measure against future infestation. Place yellow sticky tape products formulated specifically for trapping flying pests near affected pots. In the event of an extensive infestation, you may have to remove severely damaged foliage by cutting stems just above a leaf node or at the base. As for diseases, the following are known to afflict P. microphylla:
Anthracnose (Colletotrichum spp.)Myrothecium Leaf Spot (Myrothecium roridum)Pythium Root Rot (Pythium spp.)Rhizoctonia Aerial Blight (Rhizoctonia solani)Southern Blight (Sclerotium rolfsii)Xanthomonas Leaf Spot (Xanthomonas campestris)
As we said, indoor specimens are less likely to suffer from these ailments than plants grown outdoors. However, if yours should become infected, there are both chemical and biological treatments for fungal and bacterial conditions that you can try. If the damage is extensive, it is often better to discard the plant and sanitize the pot with a 10-percent bleach to water solution (one part bleach to nine parts water). It’s time to get ready for a new addition to your indoor foliage family! Remember that you can start from a stem cutting, division, or nursery start and that a container placed in low light will result in leaves that shade to dark green. Choose a container with two to three inches of extra room for growing and watering. Purchase a good quality potting mix that’s airy, moisture-retentive, and well-draining, as well as houseplant fertilizer. Now you’re all set! We can’t wait to hear about your artillery plant in the comments section below. If you enjoyed reading about this creeping houseplant, we recommend the following articles next:
How to Grow and Care for a Grape Ivy HouseplantHow to Grow and Care for PhilodendronHow to Grow and Care for Pothos Houseplants