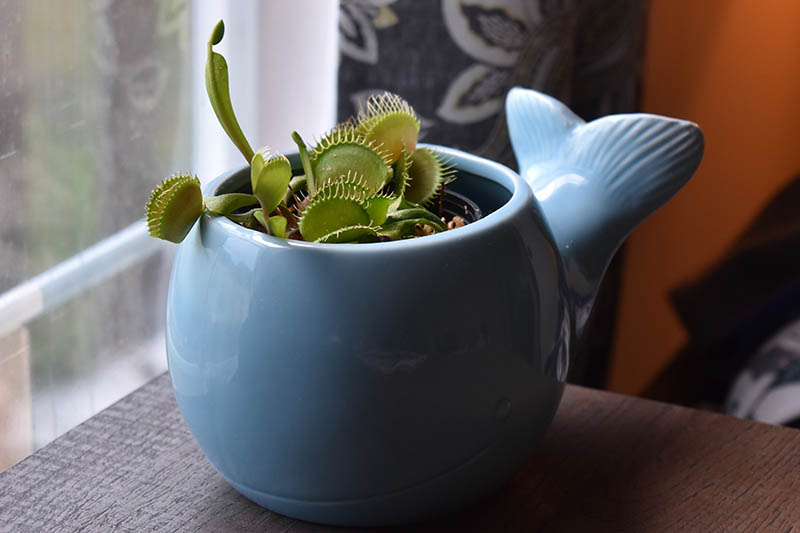
Many plants have been shown through time-lapse photography to produce some manner of movement. Known as tropisms, these movements occur to aid in growth, such as redirecting leaves to reach for sunlight. These movements are not typically visible to us without the aid of special equipment. But there are a few plants that have been observed to produce more rapid movements, such as those required to spread pollen or seeds with force, or to move parts to trap prey. These movements are not only visible to the naked eye, but extraordinary. We link to vendors to help you find relevant products. If you buy from one of our links, we may earn a commission. The Venus flytrap is one type that moves actively. You’ll need some serious knowledge to keep this plant healthy and thriving – and luckily for you, you’ve come to the right place. If you’re planning to keep a Venus flytrap as a houseplant, you’ll first need to know that this is going to be a different experience than keeping a snake plant or a ficus. To see what I mean, read on!
What Is a Venus Flytrap?
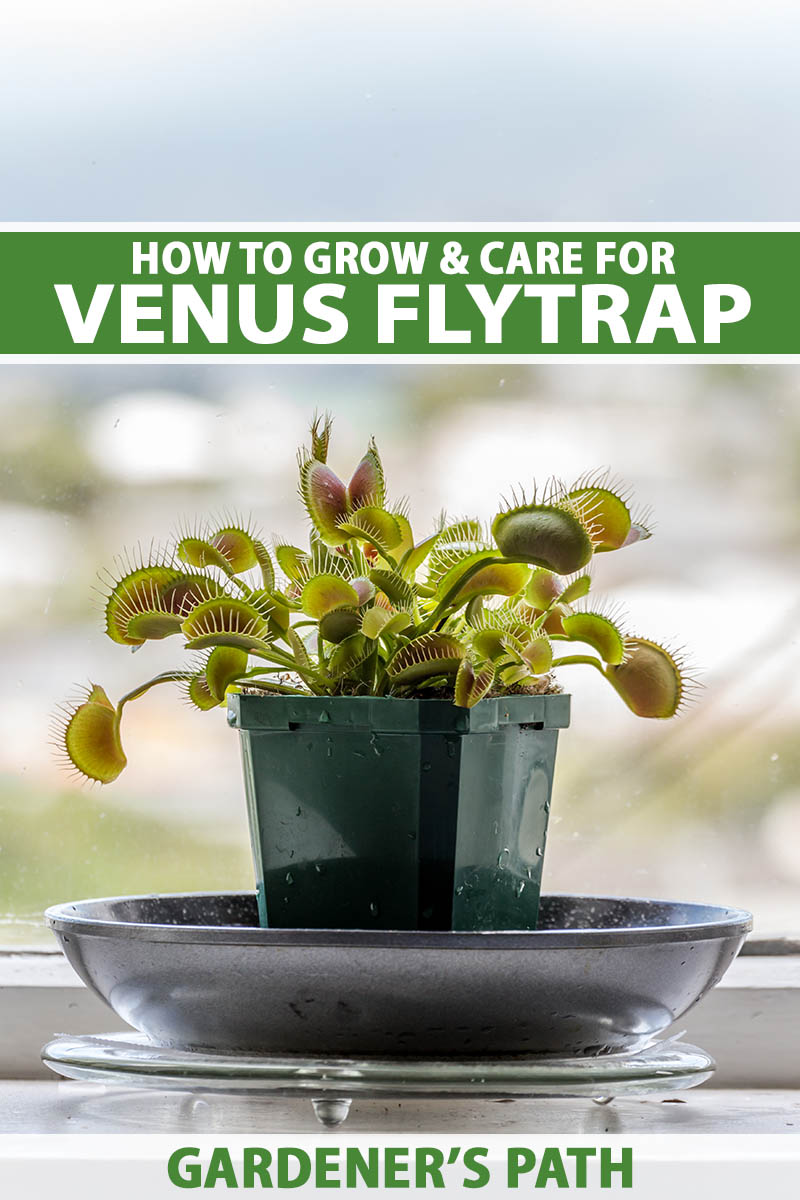
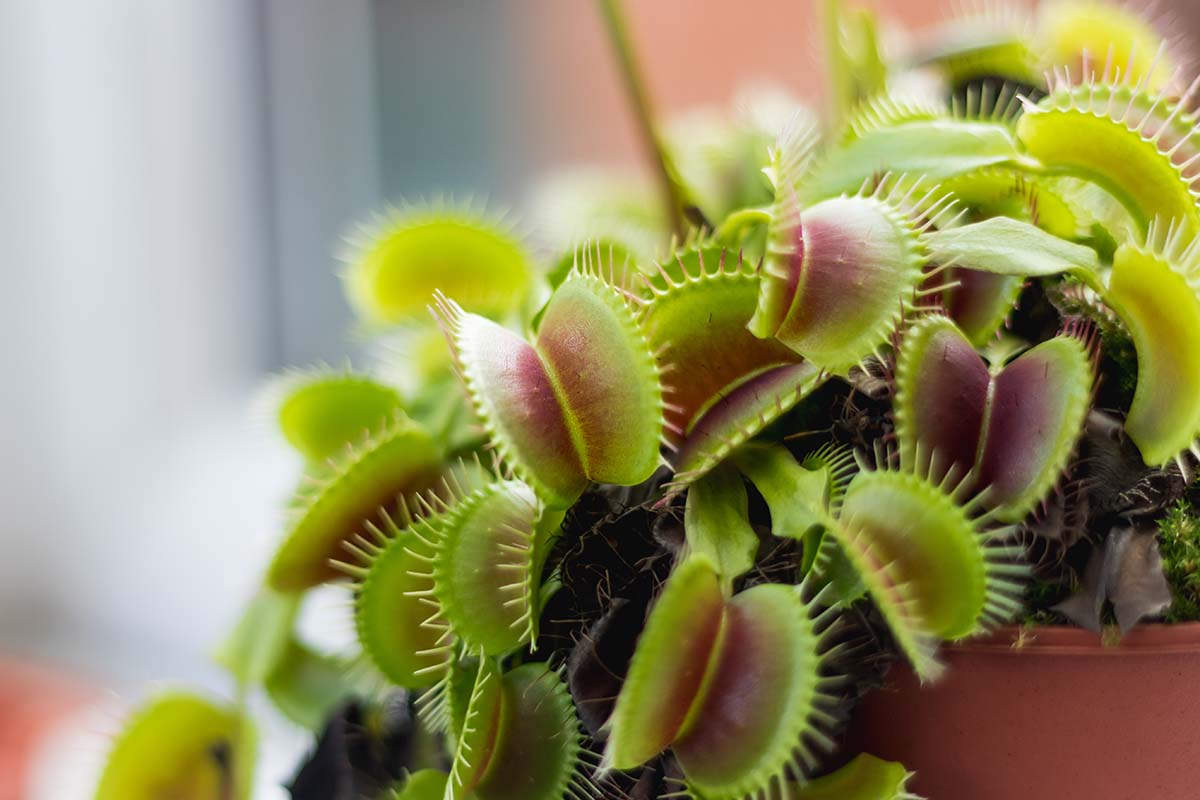
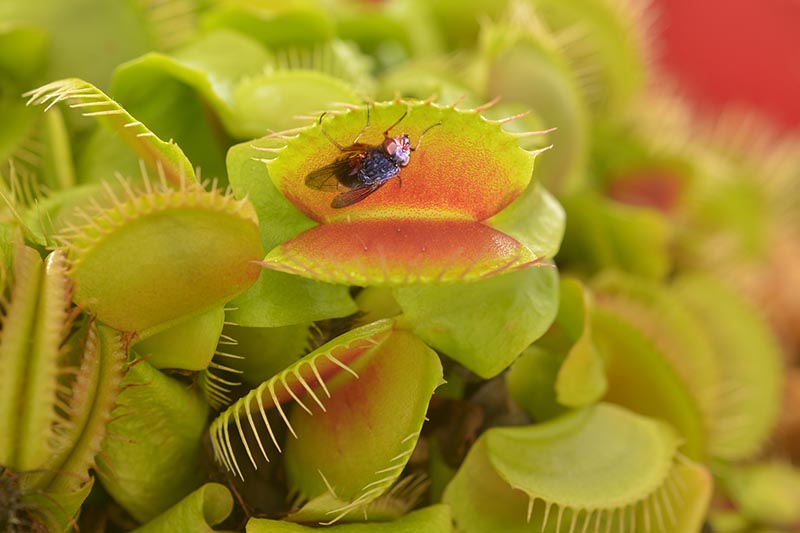
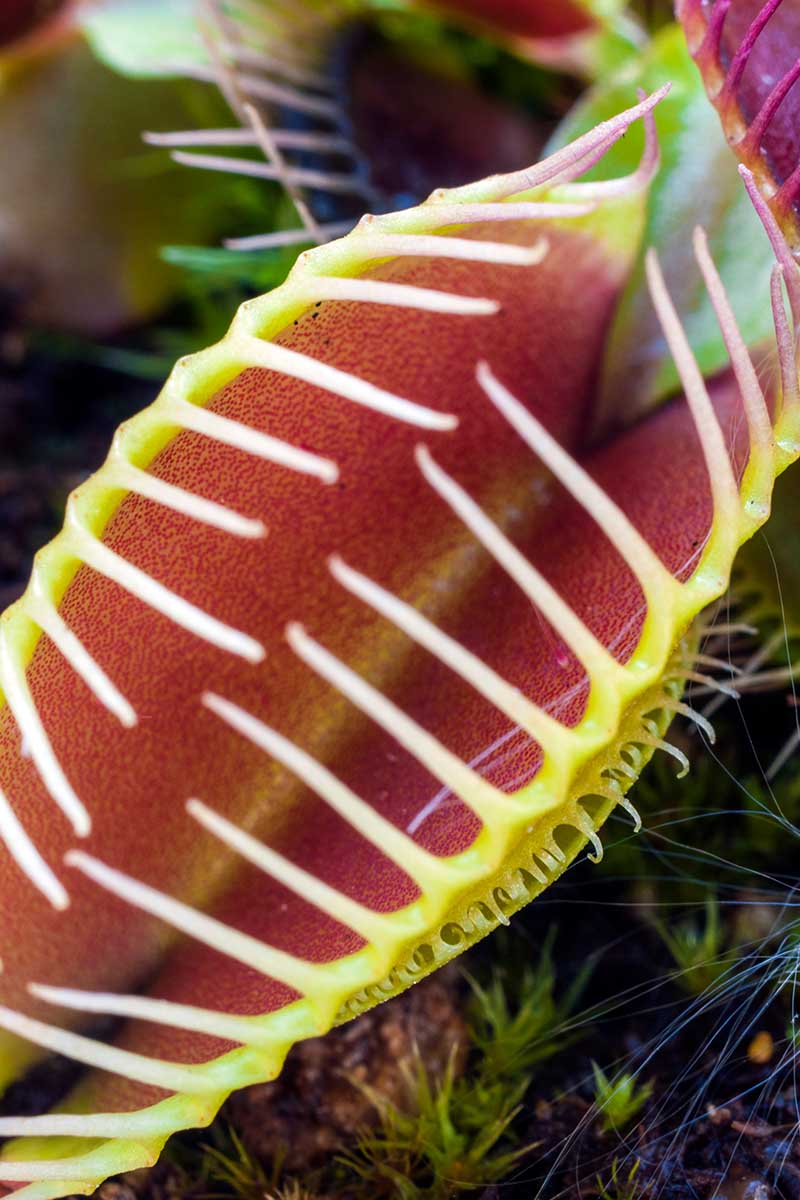
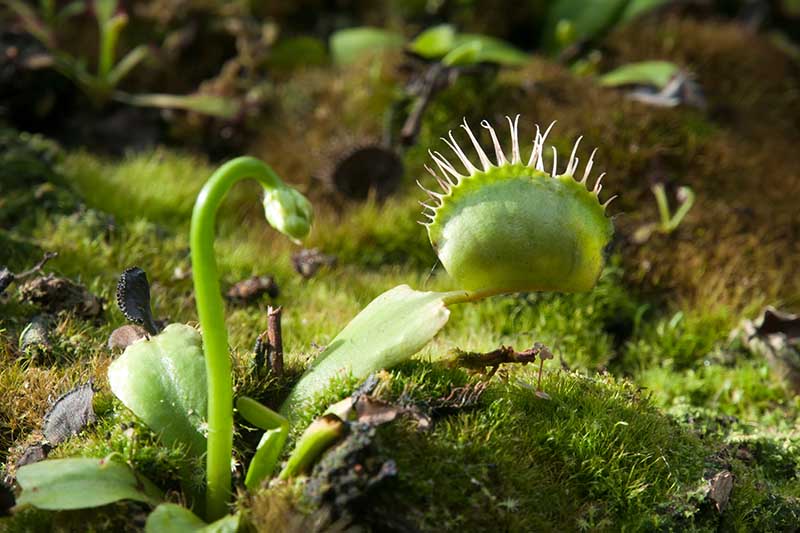
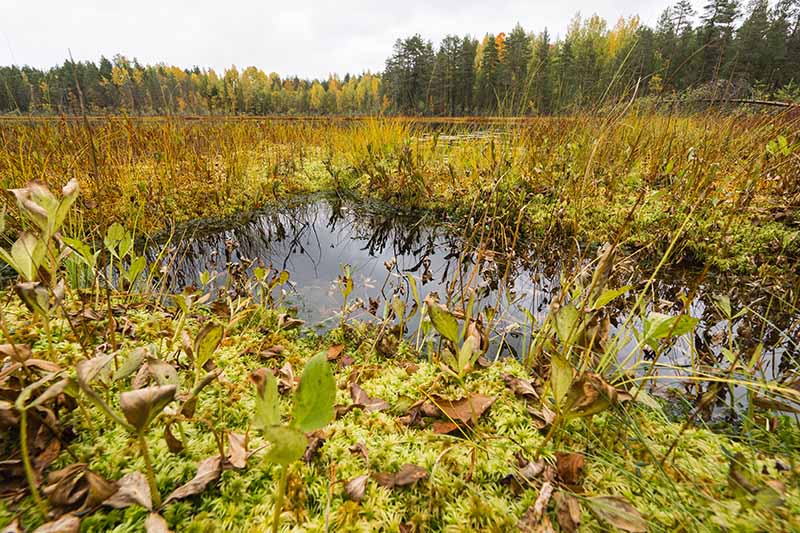
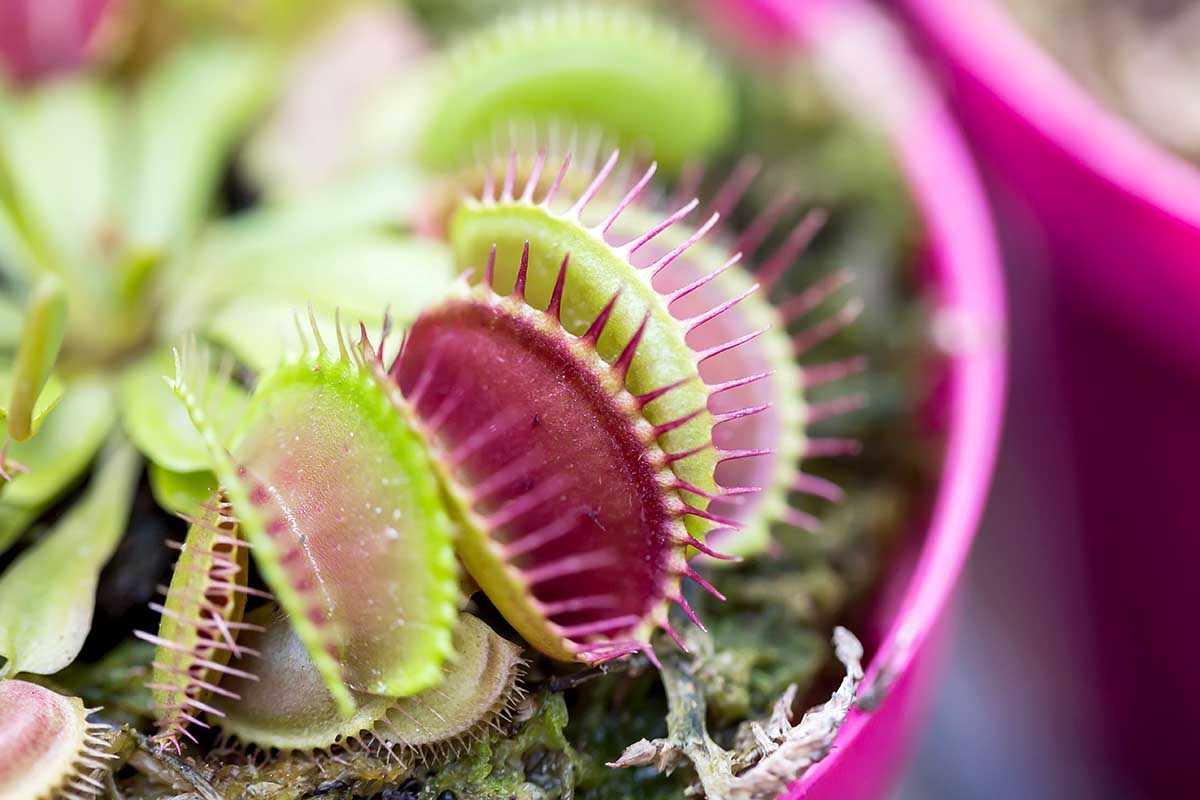
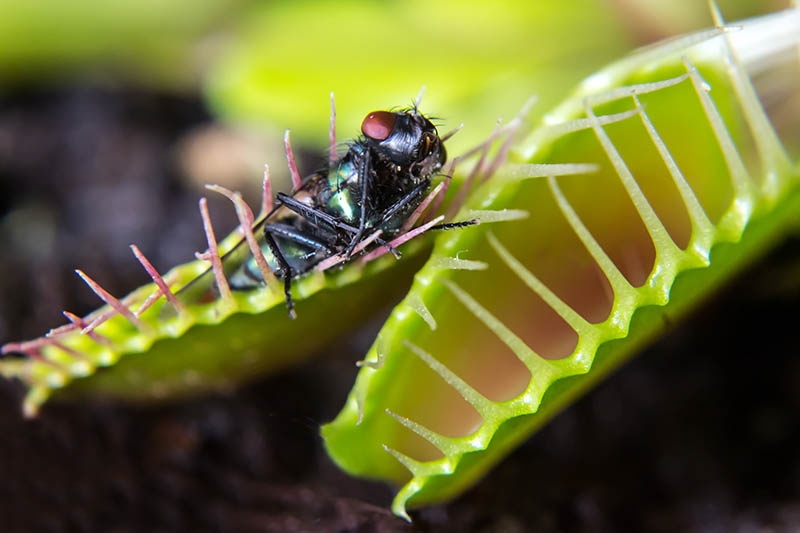
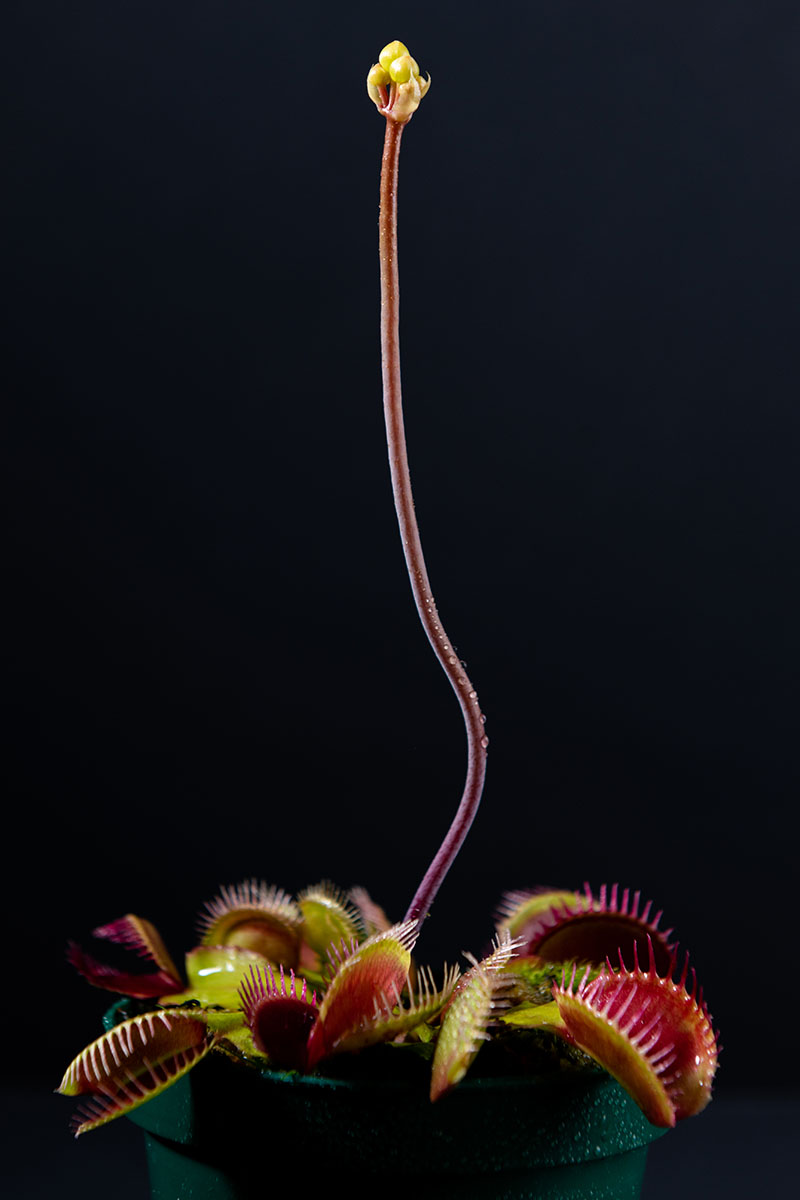
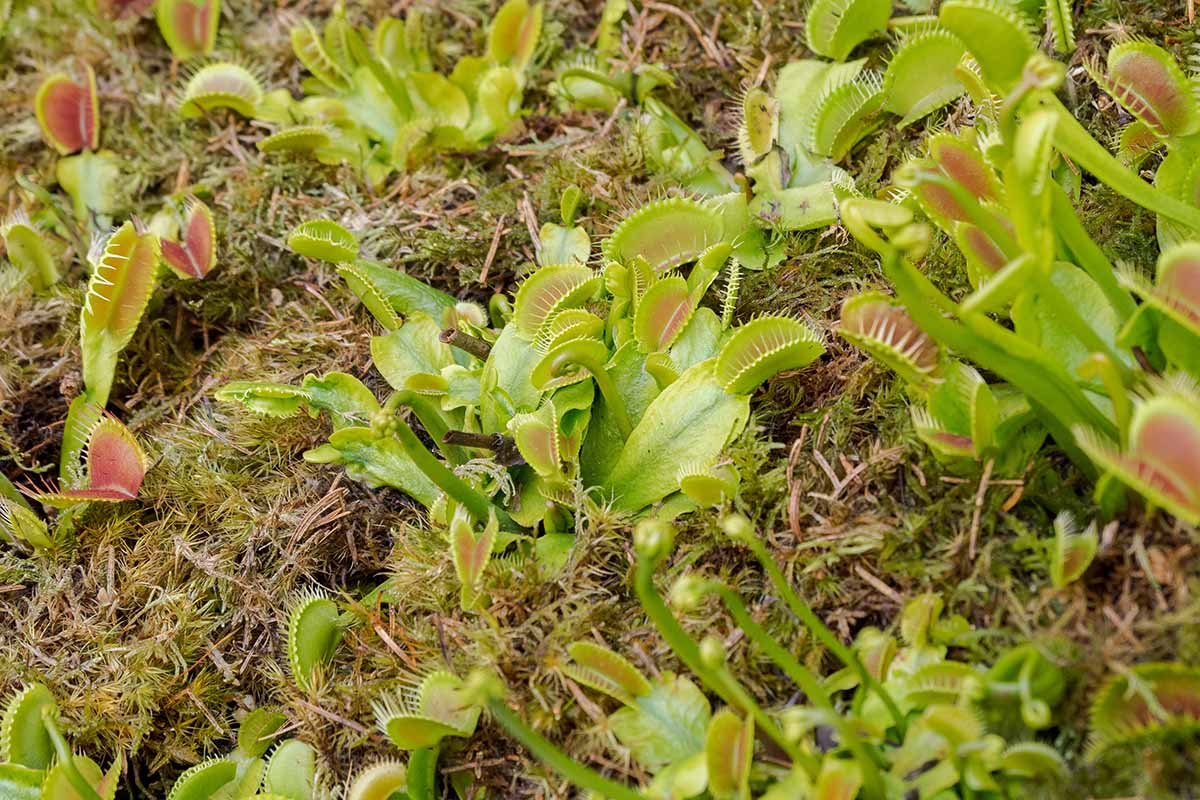
The Droseraceae or sundew family consists of three genera and over 180 species. It’s comprised entirely of carnivorous plants that lure, trap, and digest insects for nutrients, using various means. The Venus flytrap is a flowering perennial that belongs to this family. It’s native to a tiny region in the southeastern United States where it grows in coastal bogs. Unfortunately, they are so frequently poached that it’s now illegal to remove them from the wild, and they’re currently classified as a threatened species in their native environment. They thrive in USDA Hardiness Zones 7 to 10, and they’re typically found in the wild in coastal pine bogs that don’t experience low temperatures below about 40°F. While native to areas of North and South Carolina, they have been introduced to parts of New Jersey and Florida as well. But they can’t withstand hard freezes without protection, such as a layer of pine needle mulch, if temperatures dip below 20°F. If you happen to come across a Venus flytrap growing in the wild, don’t attempt to feed it, and never dig one up, or you could be responsible for destroying one of the few existing specimens found in the wild today. The best thing to do is avoid interaction with it and its habitat completely so you don’t cause damage – pull out your phone, snap some photos, and cherish the memory. Their habitat is fragile, and clearing weeds or brush, trimming trees, or draining water surrounding the plants can easily kill them. Overfeeding can also cause die-off, so let any wild specimens that you come across find their own food. In their native bog environment, the soil is acidic and low in nutrients, and the water table is high, keeping the ground moist year-round. Coupled with the high humidity and warmth of the spring and summer months in their native region, these growing conditions are perfect – except for the fact that the plant needs nutrients to thrive. So, what’s a plant to do when it can’t find what it needs in the soil? It adapts. In this case, the species evolved to develop a means to lure and digest nutrients in other ways. While it does photosynthesize, the Venus flytrap also produces a clever apparatus at the end of several stems, or petioles. These traps are known as laminae, and they consist of two lobes that are hinged at the back and surrounded by margins of large, spiked “teeth.” Nectar is secreted inside the lobes. When an insect is lured by the nectar, it lands on the trap and begins to feed. This plant is known to be indiscriminate about its prey. It will close on live arachnids and insects of all sorts including beetles, bees, flies, mosquitoes, moths, caterpillars and worms, and even grasshoppers and crickets, as long as they’re large enough to set off the traps. Three hair-like protrusions are attached to the interior of each lobe. These “hairs,” called trichosomes, sense the movement of the insect as it brushes by unknowingly, in search of nectar. In recent years, scientists studying the plants have learned that two triggers must be set off before the trap will prepare to close. When the trichosomes sense movement, the plant essentially begins “counting.” One movement alerts it that something is inside the trap and a second causes the plant to release calcium ions, flooding the lobes with fluids, and snapping the trap closed quickly, in under a second. If the insect inside the trap freezes rather than struggling to break free, and there is no third movement detected, the laminae will reopen. If the insect continues to move, a third movement will trigger the plant to secrete digestive enzymes much like those in our own stomachs, and begin to dissolve its soft tissues. Large spikes on the edges of the laminae overlap to form a cage. Over the course of a few days to a week, the soft tissues of the organism are digested and the laminae reopen, using the remaining parts, such as exoskeletons, to lure more insects. This specialized system is designed to conserve energy, as it takes a great deal for the plant to force the traps closed. If there is no movement detected, such as if a leaf or other inanimate material falls into the trap and then fails to move again, the plant will not waste energy closing on it. Nutrients that are absorbed from each meal can last several months. After closing and devouring several insects, each individual trap will die and fall off. Most Venus flytraps are relatively small, growing only four to eight inches tall with the exception of the long stalks the blossoms form on, which can be about 12 inches in height. The traps are typically three-quarters of an inch to one inch long. The blooms are white with green veining, and about one inch in diameter. In the spring, plants produce three to five blooms on long stalks. The flowers are held high above the plant, to avoid luring pollinators into a trap accidentally, prior to pollination. The Venus flytrap grows from rhizomes, or bulb-like roots that go dormant underground through the winter, so it’s important to observe its natural life cycle when growing this species as a potted specimen. The petioles sprout from the rhizome, and over time as the plant matures, the rhizome may split and form new clusters of petioles. Even as a houseplant, the Venus flytrap will often die back to the soil between fall and winter as it prepares for the next spring growth cycle. Don’t panic or discard it – this is normal, and it will return as long as it’s cared for properly.
Cultivation and History
So, now that you know what it is, here’s a little information about the discovery of this species, and how this funny little bog plant came to become a beloved houseplant. Venus flytraps evolved from simpler carnivorous plants over the course of 65 million years. Their early ancestors weren’t confined to such a small range, thriving throughout the Americas, and in parts of Europe and Asia. The first known recorded history comes from a letter written in 1763 by Arthur Dobbs, then governor of North Carolina, who reported that the plant was a great wonder. At that time, they were much more commonly found in the wild. Because of the process by which it traps and digests insects, the Venus flytrap garnered a sort of cult following, motivating poachers to collect large numbers from the wild for sale and export. It was at this time that they were first sold as houseplants, even though they need very specific growing conditions to survive. They were first exported overseas to Europe in 1768, where a British naturalist named John Ellis became enthralled with them. He assigned the scientific name Dionaea with reference to Dione, a figure in Greek mythology often regarded as the mother of Aphrodite, the goddess of love (Venus is the Roman goddess of love), and muscipula, Latin for mousetrap. Ellis was so fascinated with the plant that he sent a letter to Carl Linnaeus, the Swedish “father of taxonomy,” explaining the plants’ odd habits. Linnaeus rejected the description, essentially calling Ellis a liar – he did not believe a plant could be carnivorous as this would go against the will of God, from his point of view. In the mid 1860s, the nature of the species captivated Charles Darwin, who experimented with feeding them an assortment of foods. He found that they would eat almost any insect and even meat and cheese, although it’s been confirmed since then that feeding them anything other than insects can cause damage. Since the 1800s, these plants have been poached from the wild in such large numbers that they’re considered vulnerable and under consideration for endangered status, inhabiting only about one hundred square miles of land in the Mid-Atlantic and southeastern United States. In some instances, thousands have been seized by customs agents and other members of law enforcement from people who planned to sell or propagate them with no regard for the environmental destruction caused by removing them from their native habitat. Poaching aside, Venus flytraps are also threatened in their native environment by several other obstacles including development that is rapidly reducing the area of suitable terrain, and the destruction of bog territories because of their “undesirable” status as habitats which are known to attract copperheads, water moccasins, and alligators, while producing smelly, stagnant water. The suppression of wildfires in these areas is also impacting their habitat, as this species relies on the fires to clear away brush, allowing sunlight to penetrate the understory canopy. When wildfires are suppressed to protect people and property, this further reduces the range of suitable growing areas in the wild. Because they grow only in very specific conditions, keeping them as houseplants requires quite a bit more work than simply potting them and placing them in a sunny window. Many people who purchase plants to keep at home don’t realize this, and give them as gifts to kids or assume they’ll grow like any other houseplant. The plant either dies, or they believe it has died when it goes dormant in the winter, and they throw it out. It is extremely important to only purchase ethically sourced plants and seeds when growing this species at home, and take good care of it once you have one. Botanical gardens, society sales, and reputable growers are all good sources for getting started. A number of Dionaea muscipula cultivars have been bred for specific features and many of these are available to home growers. I’ll offer some selections below, so keep reading!
Propagation
While there are a few different methods you can use to propagate Venus flytraps, you’ll want to be sure to follow the directions for each very closely. Otherwise, you’ll likely be disappointed when they fail to germinate or quickly die off.
From Seed
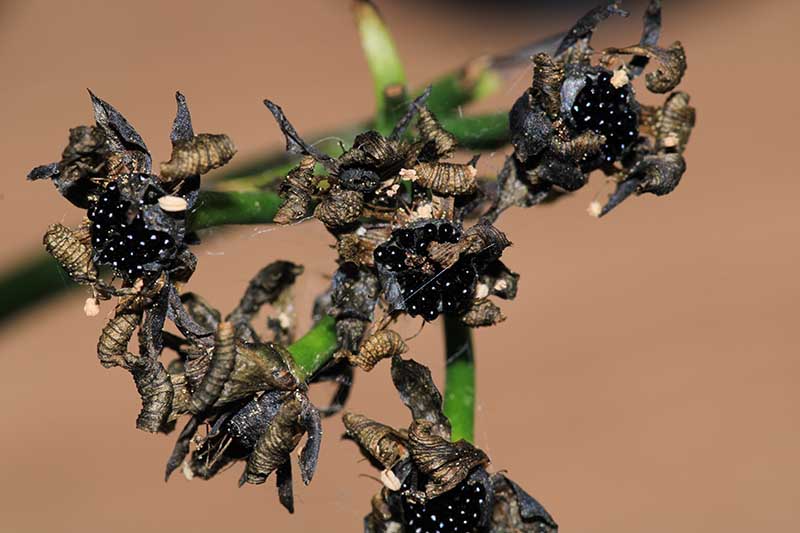
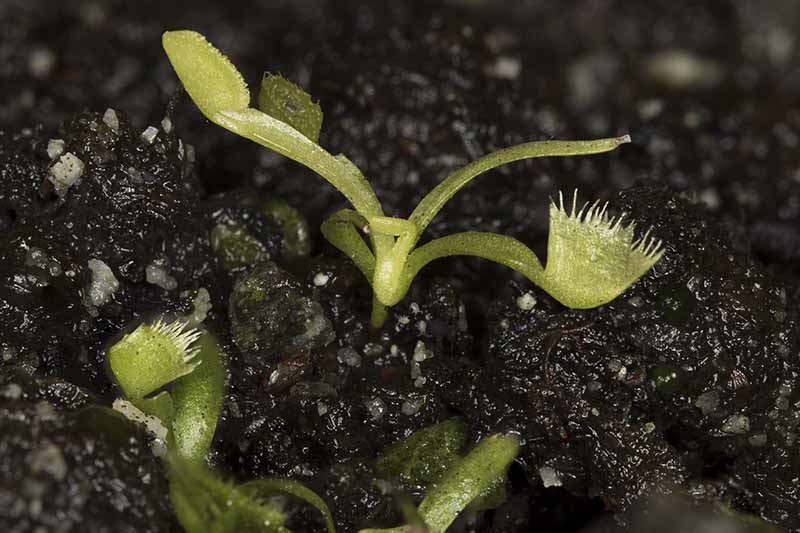
Maybe you already have one that is healthy and that has produced seeds that you’ve gathered to use. If not, you can purchase them from a grower, nursery, or botanical society that has sourced them ethically. Note that the growing medium is extremely important, and a bag of conventional potting soil will not be suitable. Carnivorous Plant Soil Mix Only distilled water should be used. Note that seeds may not produce plants with characteristics identical to that of the parent. Venus flytrap seeds are super tiny – less than one-eighth of an inch wide – and jet-black with a teardrop shape. You’ll want to handle them carefully as they’re very easy to lose track of, and they tend to stick to the interior of plastic bags and containers due to static cling. Many potting mixes that are available for growing carnivorous plants can produce excellent results. If you decide to mix your own, you’ll need to mix one part peat moss or coconut coir with one part coarse silica sand or perlite. Be sure to rinse homemade mix very well in distilled water prior to use to flush out any impurities. Use a shallow planting flat or individual two- to four-inch pots with drainage holes, and fill them to the brim with the potting mixture. Moisten the potting mix with distilled water, and press it down into the container to drain off any excess. Adding the seeds works best if you handle each one individually, rather than scattering them, as they tend to clump together when they’re moistened. Place the seeds about two inches apart on the surface of the soil. It’s not necessary to cover the seeds, but you might want to add a thin dusting of peat moss over them to anchor them in place if you’re concerned that they might shift when you water, as this can make it difficult for the tiny roots to hang onto the soil. Once the seeds are placed, dampen them with a gentle mist of distilled water. If you have a heat mat, you can place the pots or flat directly on it and keep the temperature at a consistent 80 to 85°F. Warmth is extremely important in helping the seeds to germinate. To keep the potting medium moist, add a sheet of plastic wrap over the top of the planting container or use a dome cover, but be sure to vent it to prevent too much heat from collecting. Venus flytraps are very slow growing, and they can stay in a flat for six months to a year before they need to be transplanted. These seeds don’t need sunlight to germinate, but once they sprout, you’ll want to move the seedlings to a sunny location. LED Grow Light Seeds can take anywhere from three weeks to two months to germinate, so patience is essential. Once they do, they’ll look like tiny versions of the adults, with visible laminae of adorably miniscule proportions. I prefer to place each pot or flat in a shallow dish or tray of water, and leave it there to keep the soil moist at all times. Remember to add water as needed. Once they’re about two inches tall, you can move them to a terrarium or individual pots if you started with a flat. It can take one to two years before those grown in containers develop enough to be transplanted, so again, be patient.
From Cuttings
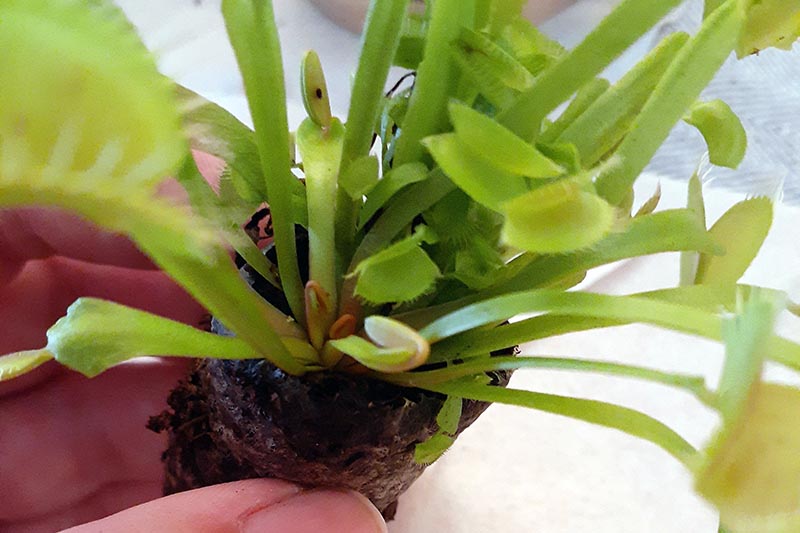
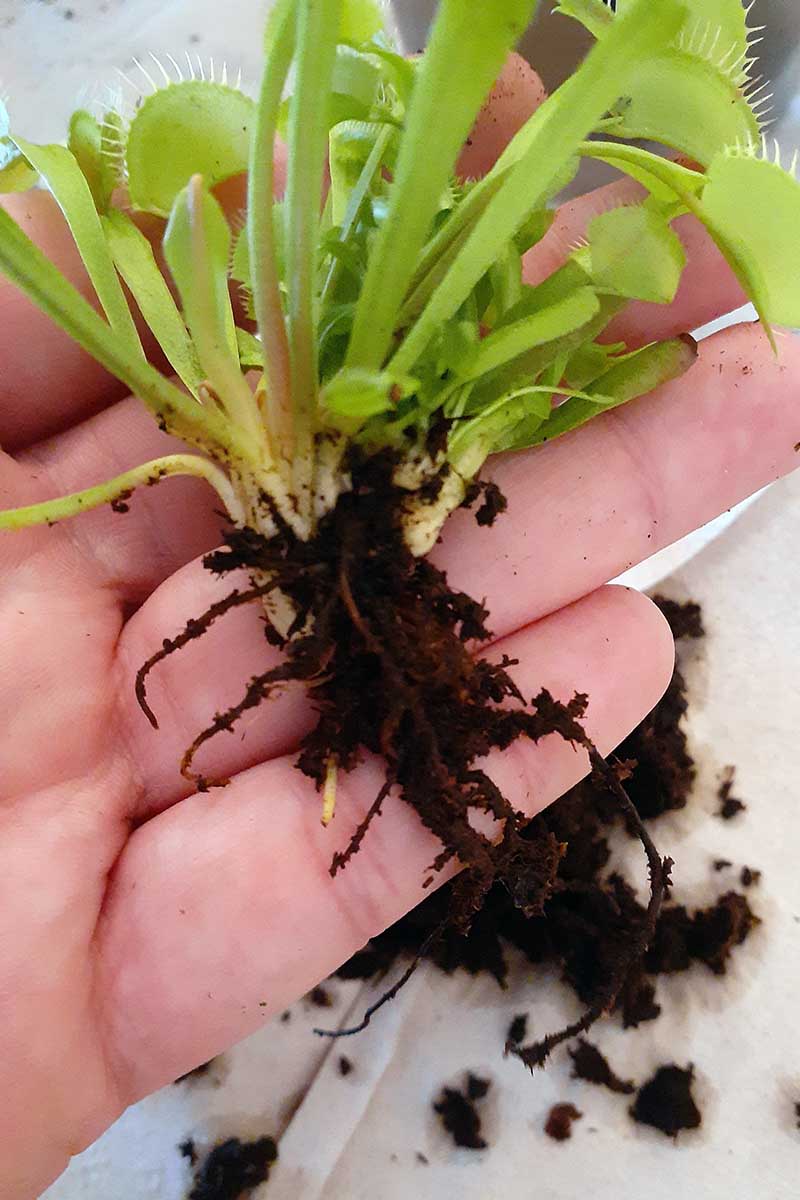
The best time to propagate leaf cuttings is when you repot a mature plant. This usually becomes necessary every two to three years, as they are fairly slow growers. You’ll notice the rhizome at the base where the leaves and stems sprout from is essentially a layered bulb of stems or petioles, with roots primarily growing from the center. Traps grow at the ends of some of the petioles. Moisten the mix well, and press it into the container to drain off any excess water. Planting trays with humidity domes are a good option, such as these from True Leaf Market. Seed Starting Set This is a great choice because it also includes a drip tray that can be used to water your plants from the bottom. On top of the potting mixture, spread a layer of rinsed sand about one-half to one inch deep for the cuttings to root in. Very gently, remove the plant from the soil either by tipping the pot and turning both the soil and roots out, or by using tweezers to pull it up if it’s loosely rooted in sand. To take cuttings, observe where the leaf stems are attached directly to the rhizome. Gently peel the petioles away from the rhizome but don’t remove more than a few, as you don’t want to shock or stress the plant. If the cuttings have traps on the end, cut them off to divert energy to rooting. Keep the cuttings moist on a wet paper towel while you return the parent to its container or terrarium. Work quickly but carefully so it doesn’t dry out. Once it’s been returned to the soil, you can begin to insert the leaf cuttings into the wet sand. Make a small slot-shaped hole about three-eighths of an inch deep in the sand and place the rhizome end of a cutting inside. Don’t compact the sand around the base. Do this for each cutting, and lean them against the rim of the pot or flat for support if necessary. Once they’re all in place, sit the container in a dish of water about one-third as deep as the pot and mist the cuttings well. Place them in a warm, humid location such as a domed tray or terrarium, and monitor the moisture level to be sure the soil stays consistently damp. Be sure that the cuttings are exposed to at least six hours of direct sunlight per day, preferably 12 hours if possible. Use a grow lamp if you don’t have adequate indoor light available. If any part of the cuttings begins to blacken, cut those parts off and discard them. It can take three to six months before you see signs of life, usually beginning with a new trap developing on the end of the leaf. Once the cuttings have developed roots and traps, allow them to grow for six to eight weeks before you transplant them to individual pots.
From Rhizome Divisions
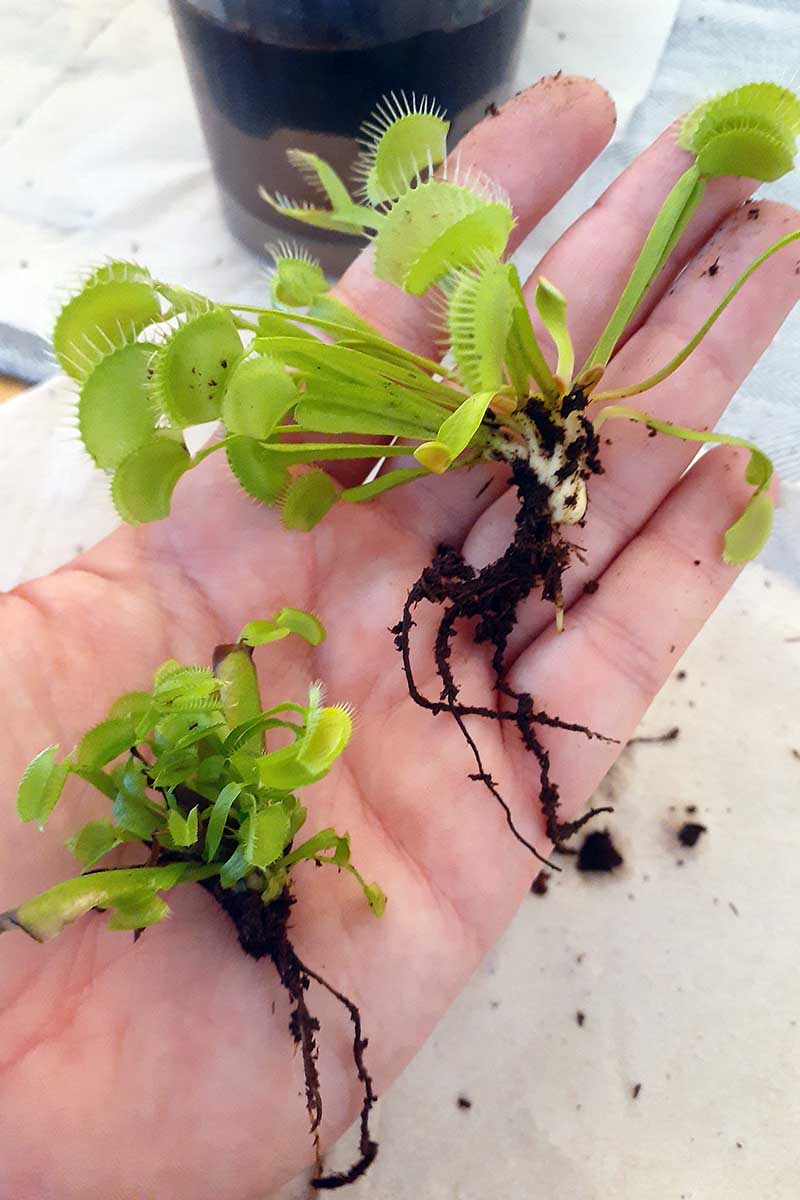
While cuttings and seeds are viable options for propagation, one of the most successful means is rhizome division. Use this method when an existing mature plant is ready for repotting to a larger container to complete both projects at once. The rhizome is essentially a fleshy bulb that roots sprout from. The leaves grow from the bulb arranged in a layered pattern. As the rhizome matures, it typically splits, forming more rhizomes that then generate additional plants. The offshoots will produce clusters of smaller leaves. When you notice that your plant has started producing offshoots, you can split the rhizomes to grow them separately. To begin, prepare individual pots for planting. Four- to six-inch pots are usually adequate for dividing most mature specimens. Fill the containers to the brim with carnivorous plant potting mix, or mix your own. Water the potting medium well with distilled water and press it into the containers to remove any excess fluid. Gently turn the Venus flytrap out of the pot it’s in and carefully shake the soil free from the roots. You should be able to see more than one rhizome at the base of the plant, with one from the parent and one or more where additional rhizomes have formed smaller offshoots. Normally, you can pull the rhizomes apart by grasping both gently and pulling in opposite directions, but if they’re well attached and resisting division, you can use a sharp knife to carefully cut between them. Be sure that both rhizomes retain roots when you do this. Repot both plants in the prepared containers. Use your finger to poke a hole in the potting medium the same depth and width as the root system. Place the roots in the hole just up to the base where the leaves are more white than green. Gently press the potting medium around the base of the plant and mist it well with distilled water. Move them back to the location where the parent was growing and continue to provide six to 12 hours of direct sunlight, humidity, and consistent water.
Transplanting
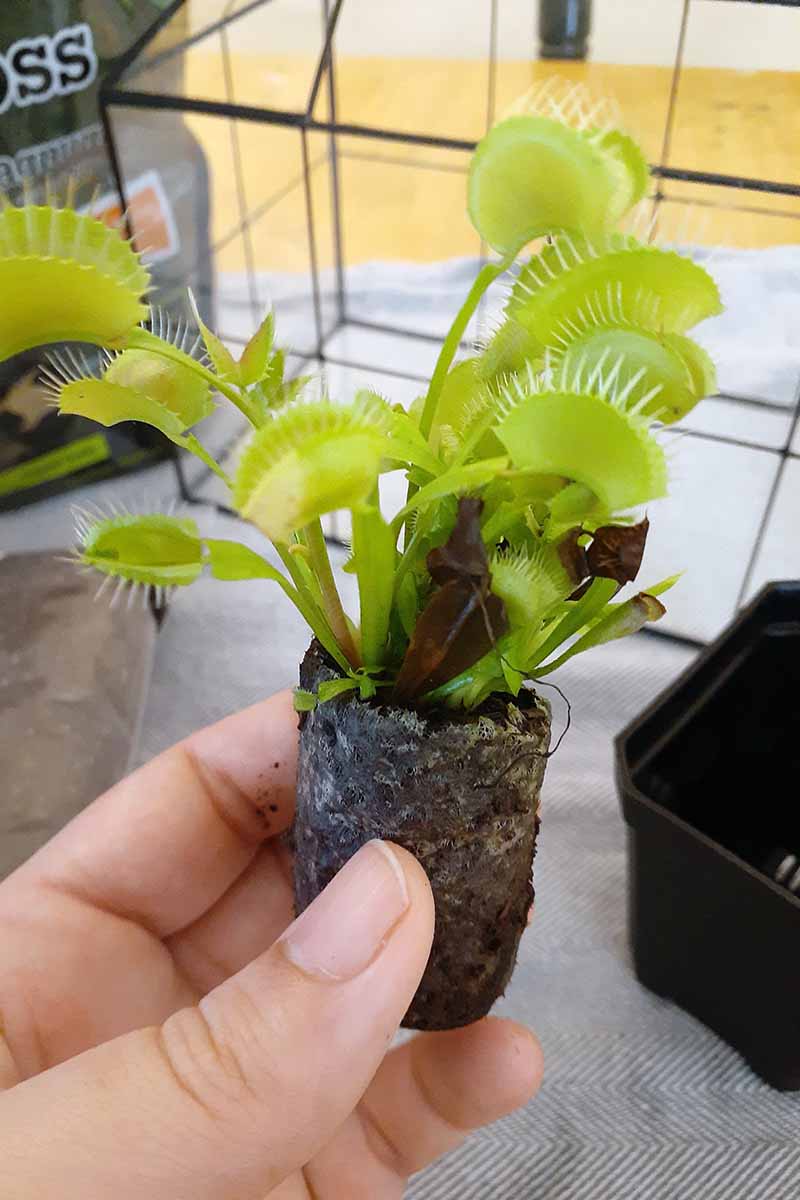
If you’ve grown plants from seed or cuttings, or purchased new ones, you’ll eventually need to transplant them to their permanent home. After one to two years of growth, they’ll be mature enough to require a deeper pot to accommodate a larger root system. Choose a container that is one to two inches larger than the one it is currently growing in. A container that does not transpire much is the best choice to prevent the potting medium from drying out, so plastic or glazed ceramic pots with drainage holes work well. Fill the containers to the brim with carnivorous plant potting mix, or mix your own. Water the potting medium well with distilled water and press it into the containers to remove excess fluid. If you’re moving the plants to a terrarium, press the moist medium into the base of the terrarium to a depth of four to six inches – just be sure that the one you’re using will not leak! Depending on what your plants were growing in before, you may need to remove the old potting medium. Some purchased plants may arrive with rubber bands holding cloth or plastic around the root system. Be sure to remove any bands and cloth or plastic prior to transplanting. If they were propagated via tissue culture, they’ll arrive potted in a gelatinous substance known as agar. It’s perfectly safe to touch, and you’ll want to wash it off as much as possible prior to transplanting. Fill a bowl with room-temperature distilled water and dunk the roots into the water. Use your fingers to very gently rub away any remaining agar under the water. Take care not to damage the roots as you do this. Once the plant is free of the previous potting medium, you can make a hole the same width and depth as the root system in the new medium, and place it in the hole. Don’t bury the leaves deeper than the white section that’s showing at the base. All green leaves should be seated above the surface of the potting medium. Carefully press the soil around the base of the plant to secure it in place, and sit the container in a dish of distilled water about one-third the depth of the pot. Move the pot to a sunny location where it will receive six to 12 hours of direct sunlight per day. Bare root plants can be transplanted in much the same way. Be sure to transplant them soon after you receive them. The roots may be soaked in room-temperature distilled water before planting, if they look desiccated. Prepare containers with potting mix, create a hole to accommodate the roots, and settle it in the same way you would a live plant that arrived in soil.
How to Grow
Once you’ve transplanted your propagated plants or one purchased from a reputable grower, you’ll need to know how to keep them healthy over the long term. If you want to repot your Venus flytrap, use a container that is well insulated so it doesn’t transpire so much that the soil dries out fast. The roots can reach four to six inches deep, so choose a pot of adequate size to accommodate the root system. They will only grow in acidic soil, with a pH between 3.9 and 4.8. If you make your own potting mix at home, you can conduct a soil test to ensure that it meets this requirement. Additional coconut coir or peat moss can be added to increase acidity. They need a moist environment. Soil that is allowed to totally dry out will definitely kill the plant. Keep the potting mix moist but not saturated at all times. Do not use tap or bottled water. Using distilled water is crucial, as other types of water will introduce nutrients and other substances that may kill it. It’s also important to rinse homemade potting mix well, to remove minerals such as calcium and salts, as they will also lead to damage or die off. I prefer to bottom water container-grown plants, though some growers recommend against this since you run the risk of oversaturating the soil and inviting pests or fungal pathogens to take hold. Sit the container in a dish or tray of water about one-third the depth of the pot, and leave it there. Refill the water every two days during the spring and summer, and every three to four days in the fall and winter when plants are dormant. If the soil feels oversaturated, bottom water only as needed. If you’re using a terrarium to house your Venus flytraps, you can add water every one to two days or simply place the potted plants inside with saucers of water beneath them if your terrarium is large enough. If you add a layer of pine needle mulch or sphagnum moss on the surface, you can cover the pots up and no one will ever know they’re in there. Ventilation helps to prevent the terrarium from holding too much heat, and reduces the likelihood that mold and bacteria will cause the soil to develop an odor over time, or lead to disease. Large Glass Terrarium I chose this one specifically because it has a small door on top to vent, and it’s designed not to leak. If your terrarium collects condensation that drips back onto the foliage, you should be sure to vent it and gently blot dry any droplets that collect on the leaves. High temperatures over about 90°F can damage these plants, especially if the heat is coupled with exposure to direct sunlight. The soil will dry out fast and the plant will begin to turn red, as a form of sun protection. If leaves are scorched by overexposure to sunlight, they will turn white, brown or black, and begin to die back. Sunlight is another absolute must for Venus flytraps. You’ll want to be sure that they receive six to 12 hours of sunlight per day with at least six of those hours being direct exposure. As I mentioned, they do undergo photosynthesis, and they require a lot of light. If you don’t have a suitable location inside your home to provide light on this schedule, consider purchasing a grow light to meet this requirement. Be sure to position the lights so they are close enough to provide light, but not so close that they scorch the plants.
Growing Tips
Provide at least six hours of direct sunlight per day; 12 hours is ideal.Use a grow light if you can’t provide enough direct sunlight indoors.Never use conventional potting mix or add fertilizer.Only use distilled water.
Maintenance
Venus flytraps have a natural cycle that includes winter dormancy. Typically in November, you’ll notice some of the leaves beginning to blacken and wither. This is normal and no cause for alarm. They may die back to the rhizome every year at this time. You’ll want to move the dormant plant to a cooler location, such as an unheated garage. Keeping them above freezing but no warmer than 55°F is recommended, for two to three months. If you live in a region that doesn’t experience cold winters, you can place the rhizome in a sandwich bag filled with moist sphagnum moss, seal it, and place it in the refrigerator. It’s best to keep dormant rhizomes in cold temperatures between 35 and 40°F, but avoid letting them freeze. Though they can withstand some frost or brief temperatures below 32°F, rhizomes will likely be killed by prolonged freezing temperatures. Be sure to keep the medium around the rhizome moist, even during dormancy. If your plant does not die back fully, continue to water it but reduce the frequency as it won’t need as much water. You can add an inch-deep layer of pine needles to the soil surface as mulch, to help keep it moist. In mid- to late February, repot the rhizome if you’ve refrigerated it. Place it back in a sunny but cool location where it can emerge from dormancy gradually. Once you notice that it is actively growing, move it back to its usual location with warmer temperatures for the rest of the year. As I previously mentioned, this plant will need to be fed on a regular basis. Live insects are the best source of nutrients to offer as opposed to fertilizer, which can kill the plant. Insects such as live mealworms, small crickets, or even small roaches are perfect choices for feeding your Venus flytrap. Dried or freeze-dried insects might also be a possibility, but they’ll be harder to feed as the laminae may not stay closed when the insect doesn’t move or struggle to escape. Plan to feed one insect per plant every four to six weeks as over-feeding can cause damage, leading to die-off. It’s also important to only choose insects that are small enough to fit completely inside the trap. There are a few reasons why traps may not close, and you can learn about what causes this and how to deal with it in our troubleshooting guide. (coming soon!) Regular pruning is not necessary as parts of the plant that are damaged or dying will most likely fall off, but if they do not, you can use a small set of sharp scissors to snip them off and dispose of them. Venus flytraps remain compact and won’t become overgrown, even in ideal conditions. Repotting will eventually be necessary if the plant is growing in a tiny pot, such as the two-inch pots that many growers use. A plant that is three to four inches in height can have a root system of about the same size, so plan to move it to a container one to two inches larger than the one it’s in currently. Use the same potting mix for carnivorous plants or a homemade mix that’s been rinsed well. Moisten it well and add a layer in the bottom that’s deep enough to keep the plant positioned at the rim of the pot. Place the roots in the pot and backfill around it with soil. Mist the soil well or bottom water by placing the pot in a container of distilled water filled one-third as deep as the pot. Plants may bloom in spring and summer, and the production of blooms is a sign of good health; however, it is very taxing on the plant. If you don’t plan to collect seed after the blossoms have been pollinated, snip them off before the buds open to conserve energy. If you want your plant to produce seed, you’ll most likely need to hand-pollinate, which you can only do if more than one bloom is open at a time. With consistent maintenance, Venus flytraps can live for 20 years or more, and provide a lot of enjoyment.
Managing Pests and Disease
Since you’ll be growing your plant indoors, you won’t need to worry about animals munching on them… unless you have furry friends in your home, perhaps. All of them are suitable for indoor growing, and generally have the same basic needs and caretaking requirements. Let’s take a look at a few of the most popular selections out of the more than 130 named cultivars.
B52
‘B52’ is highly sought after, for two reasons. First, it’s been bred to have extra-large traps over one inch in length at mature size. And second, the traps can be a deep, scarlet red. ‘B52’ These features achieve the look that many people typically associate with the Venus flytrap, inspiring some to create artwork and stage characters with it in mind.
King Henry
One of the top three largest varieties in cultivation, ‘King Henry’ has been bred for size. The traps on a mature specimen can be over an inch long, with rosy red interiors and long “teeth.” This is also a fast-growing cultivar that has a habit of forming clumps, so it can easily be split into individual plants, making it a good candidate for propagation by rhizome division. ‘King Henry’ If you’re looking for a type that is easier to propagate, this may be the one for you.
Red Dragon
As if this plant were not interesting enough as it is, selective breeding has produced this incredible cultivar, which mixes live action with spectacular color. ‘Red Dragon’ grows to an average four- to six-inch size, but as it matures, its color deepens from green to deep maroon throughout the plant. This is unique since most flytraps only redden when they’ve been exposed to bright sunlight, which may lead to sunscald. ‘Red Dragon’ So, now you know where they come from, how to grow and care for them, and a little about the cultivars that you can choose from. What’s next? Let’s cover some challenges you might face from pests and disease, which are thankfully few.
Pets
Insects
There are very few insects that will bother your Venus flytrap, and most that will are common among houseplants and garden plants alike. Ventilated Plant Dome If your pet may try to push it off of the table or surface it’s on, you can secure it in place using clear museum putty. A terrarium is also a good choice for keeping plants contained and out of reach. Note that both of the pests mentioned below that are known to cause issues in Venus flytraps can also spread pathogens that may cause diseases, such as botrytis and root rot, which we’ll cover in the next section.
Aphids
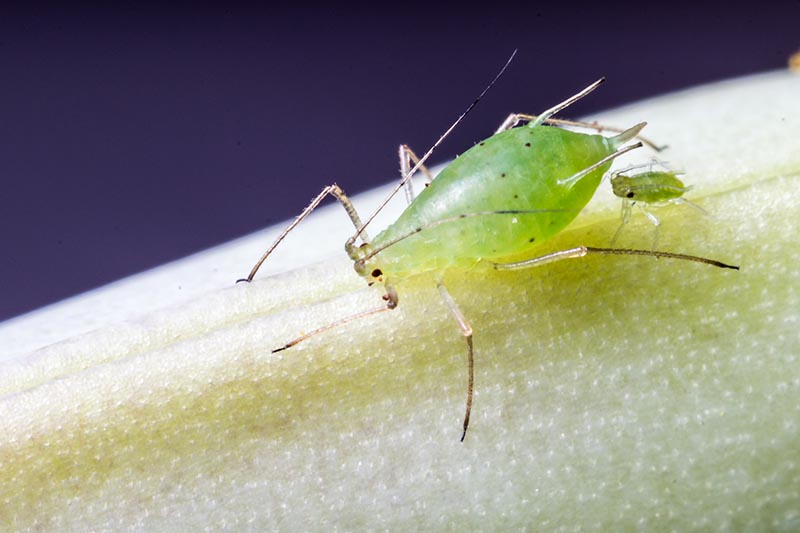
Always, always, the aphids! They show up everywhere, every year, sneakily breeding and feeding off the fluids contained within your plants. If your Venus flytraps are growing in a terrarium indoors, it’s unlikely that you’ll find aphids on them. Potted plants are more susceptible to being infested – but keep an eye on both, just in case. Aphids are tiny, and while they can range in color from nearly translucent white to bright red, many are green and able to blend in well with plants. It might seem counterintuitive that a carnivorous plant could suffer a pest infestation, but aphids are usually much too small to trigger the traps. These insects also particularly relish the Venus flytrap because it’s very succulent. Signs of an infestation include stunted or curling leaves, especially young ones emerging at the base of the plant, and black spots on leaves and traps. Be sure to nip an infestation in the bud – even though they’re unlikely to kill the plant, they can introduce pathogens that cause disease. While we do have a complete guide to dealing with aphids available for you to read, this plant requires a different approach than most for the best results. Fill a container with distilled water to a depth sufficient to fully submerge the plant, and put it inside. It’s not necessary to remove it from the potting medium as long as it drains well. Make sure the entire plant is submerged, and leave it there for 24 to 48 hours. Remove it from the water, and allow the excess to drain off. If there are water droplets resting on the leaves, blot them dry. Be sure to avoid overwatering as the soil returns to a normal moisture level, and keep an eye on your plant to monitor for signs of ongoing infestation. This process can be repeated after about a week if necessary. Eggs can often survive being submerged, so more aphids may hatch out. If they have a serious infestation and submerging them in water isn’t doing the trick, you can apply neem oil or insecticidal soap according to package instructions.
Fungus Gnats
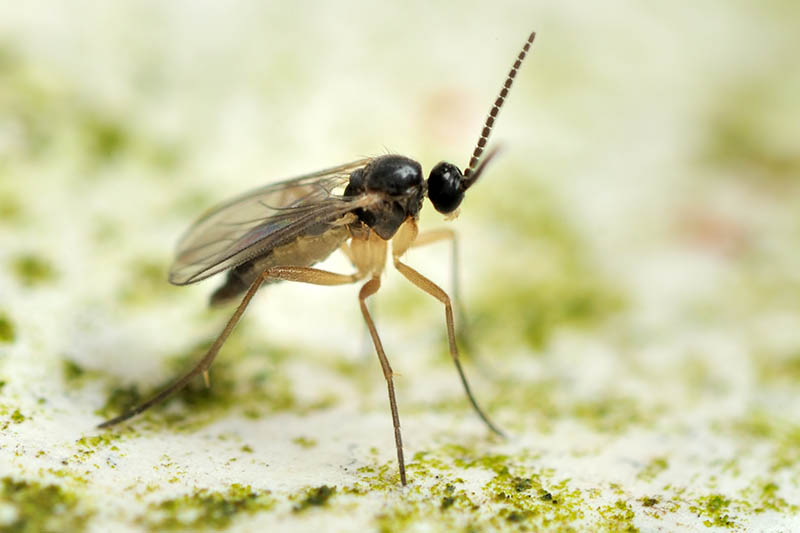
Fungus gnats are tiny flying insects that may be found buzzing about around plants that are growing in damp soil, where they’ll lay their eggs. There are many species of fungus gnats belonging to the Sciaridae and Mycetophilidae families. As you may have guessed, they’re attracted to Venus flytraps thanks to the wet growing environment that they require. Just as with aphids, these gnats are too small to trigger the traps to close. They’re typically about one-sixteenth of an inch in length, which can make them hard to spot, and once you see them, they’ve probably already laid eggs. The larvae that hatch are less than a quarter-inch long, but you probably won’t see them since they spend most of their time under the soil, devouring the roots. You may notice shiny, thread-like trails on the soil surface, an indication that larvae are present. Your plant will probably make it known when the roots are damaged and it will begin to wilt, or it may lose leaves to a fungal condition known as damping off. While all of these methods are usually very effective for potted plants, fungus gnats can pose a particular challenge when they infest a bog plant such as the Venus flytrap. Cinnamon is also an effective fungicide, depriving the gnats of their food source so they move on. Sticky traps such as these, available from Arbico Organics, can be placed near potted plants or inside a terrarium to catch adults. This aids in preventing them from laying eggs in the soil. Yellow Sticky Traps Beneficial nematodes can also be added to the soil. They’re predators, seeking out the larvae and consuming them before they can pupate. You can also add Bacillus thuringiensis, which is a type of beneficial bacteria that the larvae ingest, causing them to die. If you’ve tried these options and you’re still seeing gnats, you may need to completely repot the plant in fresh soil and a disinfected pot. Companion planting is another good option for controlling pests such as fungus gnats, if you choose another carnivorous plant such as a sundew or pitcher plant to grow as well. Insects that are too small to trigger the traps to close can get caught in the sticky substance secreted by the sundew, or lured inside pitcher plants, where they’ll be trapped in the liquid inside the pitchers. Find more tips on combating fungus gnats here.
Disease
Just as with pests, there are remarkably few diseases of major concern when growing Venus flytraps. Let’s take a quick look at a couple of the most common culprits and how to treat them.
Botrytis
As I mentioned, certain pathogens are commonly spread by pest infestation, especially by aphids and fungus gnats. One such pathogen, Botrytis cinerea, spreads through spores that are carried by insects and passed between plants. If these spores are relocated to a plant or soil in favorable conditions – with high humidity, warm temperatures, and standing water – they’ll colonize and cause disease. As you can imagine, this spells trouble for the Venus flytrap. While they need consistently moist soil, the leaves and other parts of the plant should not remain wet for long periods of time. Water droplets or wet surfaces on the plant can invite the fungi to colonize, which leads to wilting, the development of brown and black spots, and the growth of fuzzy gray mold. To prevent botrytis, be sure that your plant does not remain wet. If it’s growing in a terrarium especially, make sure water is not dripping or settling on the leaves. If you see spots or mold developing, cut affected leaves off and discard them in the trash. You’ll also want to be absolutely sure that the plant has good ventilation, as inhibited airflow can lead to disaster. Fungicides may be applied, but because the Venus flytrap is rather delicate, this should be avoided if possible.
Root Rot
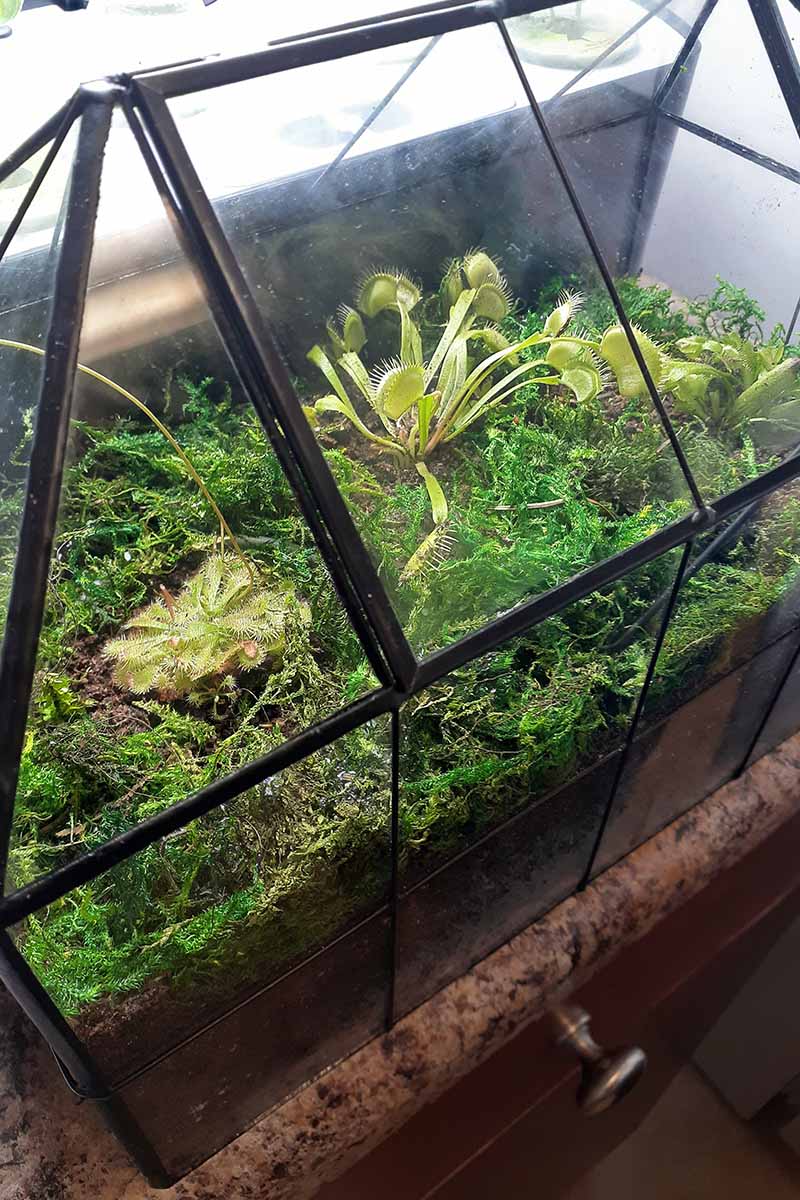
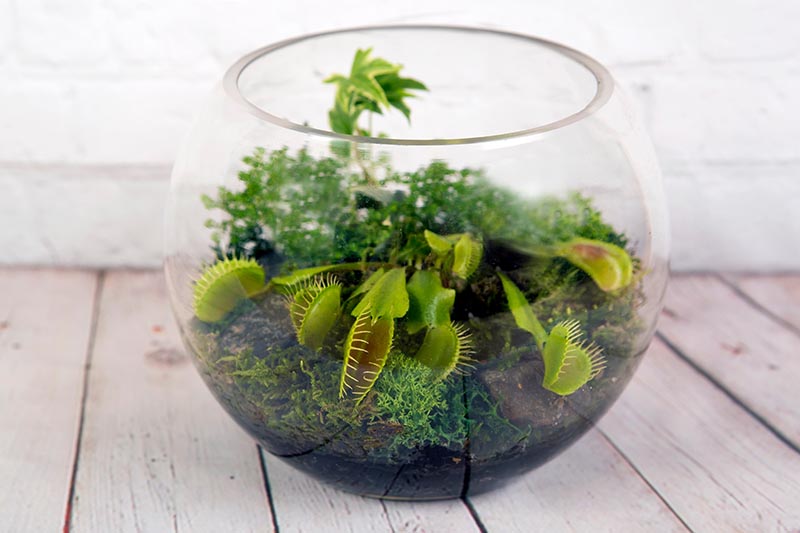
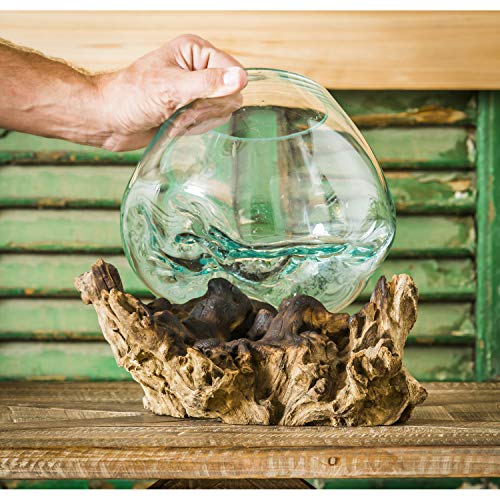
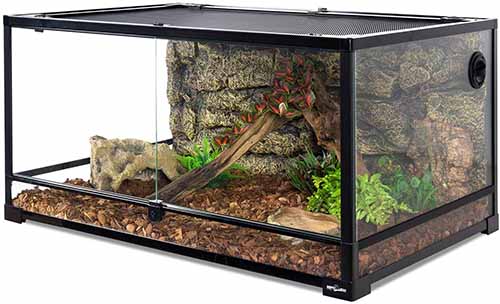
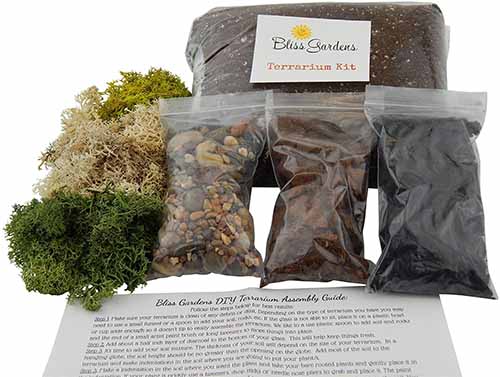
Even though the Venus flytrap needs consistently moist soil to survive, it does not tolerate overwatering. This may seem like a contradiction, but in reality, these are bog plants that need access to water but don’t grow well in water. If you’ve overwatered your plant, the soil will feel soggy rather than simply being moist. Your plant will alert you to the issue by wilting and losing leaves, turning black, and beginning to die off. You may also notice an abnormal, strong odor coming from the rhizome. Too much water can not only damage the plant, but it can spread fungal and bacterial infections as well. Signs of infection are the same as those caused by overwatering. To confirm that the plant is suffering from root rot, you’ll need to remove it from the soil and examine the root system. Healthy roots should be white or brown, and the rhizome should be firm and white with pink and green edges. If the plant has root rot, the roots may be brown or black and slimy, with a bad odor. The rhizome may feel soft or have dark spots where the fungus or bacteria are breaking it down. Trim away any dead or dying leaves and traps, and use a sharp pair of clean scissors to remove any affected parts of the rhizome or roots. You can dust the rhizome with a sulfur-based fungicide or neem extract if you’re concerned about infection. Empty the old soil from the container or terrarium. Disinfect the pot or terrarium, and let it dry thoroughly before repotting. Replace the soil with fresh carnivorous plant mix and moisten it with distilled water, but avoid overwatering again. Press out any excess water. You can also add more sand to your potting mix to allow for better drainage. Repot your plant, and continue to water it as needed, but avoid overdoing it. You want the soil to feel moist, but not wet. If you can press water out of it, you’ve added too much. Don’t sit the pot in a dish of water to prevent it from drying out until the moisture level is adjusted sufficiently – the soil should not be holding excess water or feel oversaturated. The roots need to have access to the water at the bottom of the pot without having the rest of the root system or the crown of the plant sitting in soggy soil. If it’s large enough, you could also add other bog plants such as pitcher plants, sundews, various types of mosses, and butterworts. Just be sure that whatever terrarium you settle on doesn’t leak. I love the mystical touch that a terrarium can add to the home, tiny microcosms of thriving life that require little intervention. Cape Craftsman Hand Blown Terrarium Glass Geometric Terrarium Large Reptile Terrarium Screen covers can be wrapped in plastic or covered with plexiglass to retain moisture. While a model such as this could also house reptiles or amphibians, or even insects, I wouldn’t recommend adding them with carnivorous plants, though bromeliads and ferns can make nice additions to a terrarium used to house animals. Be sure to purchase enough planting medium to fill your terrarium to a depth of at least four inches, so your plants have room to grow. You can also spring for some decorative items, such as stone and bark, to complete the natural look. Cactus and Succulent Set Self Watering Planter Plants can also be grown in colonies for mosquito control indoors, or outside if you live in an appropriate growing zone. We cover growing Venus flytraps outdoors in a separate guide. (coming soon!)
Quick Reference Growing Guide
Feed Me, Seymour!
Don’t be deterred by the special caretaking that this plant requires – Venus flytraps are well worth the effort to keep. Even though you might feel like you have more of a pet than a plant, if you enjoy distinctive botanicals, these are must-haves. We’d love to see your carnivorous plants and hear about your caretaking routine in the comments section below! And, if you’ve found this guide to one of the most beloved carnivorous plants useful, you might want to read these selections next:
How to Grow and Care for Sundew PlantsGrowing Pitcher Plants Outdoors
