Spotting a nice design in the neighbors’ yard or at your local cafe is all it takes to get the itch to plant your own. But where do you start? How many plants do you need to fill a container? And how do you design it, and then take care of it? We link to vendors to help you find relevant products. If you buy from one of our links, we may earn a commission.
Start Smart! Spring Container Design 101
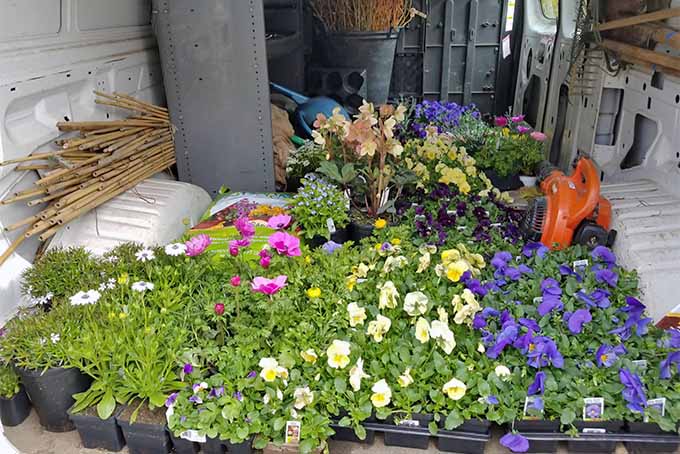
When it comes to design, there are no hard and fast rules for what does or doesn’t work. In general, you’ll want to choose a color palette to work with, and consider the shapes and textures of your intended design. Buying in bulk is a good idea for spring planters. If you run out of room in a container, you can add overflow material to your garden beds or stuff them into other pots.
You can also work with a wider range of color and structure when you have more containers to work with. Let’s take a closer look at the various elements that you want to consider, and keep in mind:
Crazy for Color
Carrying a color or theme through each container allows each individual planter to stand out by itself, while still belonging to one overarching design. For example, including yellow flowers in every pot and window box syncs the whole scheme, even if each planter is otherwise unique from the others. Quick tip: Add some pansies with colorful faces to add more subtle color gradations. Your finished container should look like a completely natural design, as if it’s one giant plant with elements that complement each other.
Texture and Shape, With Attention to Growing Requirements
It’s tempting to focus entirely on the flowers included in your spring planter, but we’re not going to fall for that. We want to consider foliage, the shape of leaves and flowers, and the general growing habit of each plant as well. Quick tip: The bluish-green and frilly foliage of a columbine is as appealing as its flower, and when that columbine is between blooms you’re still left with its lovely leaves. They pair well with a variegated ivy, and add interest and color even when the flowers are long gone. It is imperative that you select the right plants for your design, and that decision starts with where your planter is located. Consider the following:
Sunlight
How much exposure does your planter receive? You’ll have different options if your planter is fully exposed to the sun all day long, or tucked into a corner that’s shaded from most of the sun’s rays.
Water
Will your planter receive ample rainwater, or is it up to you to water it? A plant’s drought tolerance is an important factor when deciding on your spring planter design.
Space
How large is the container you are planting in? A large 14-inch planter requires far more plant material than a few 6-inch pots lining your steps. If you’re working on a tight budget, you can purchase plants that will fill the space over time. Designing planters is also an excellent project for small space gardeners. Just keep in mind what you have room for and what the growing conditions are there, purchase pots that will fit, and get growing.
Annuals or Perennials
Do you want your plants to have some staying power and multi-season interest, or will you refresh with new items on a continual basis? I like to design planters with a mix of annual and perennial plants. Many springtime blooming annuals will burn out in the summer heat and will need to be replaced with fresh material, while perennial plants can be added to your garden when their season is gone and past, and with good care they will grow for years to come. Your selection of potting mix, fertilizers, and accent material makes a big difference, too. See more on these items in the sections to come.
How Many Plants Do I Need?
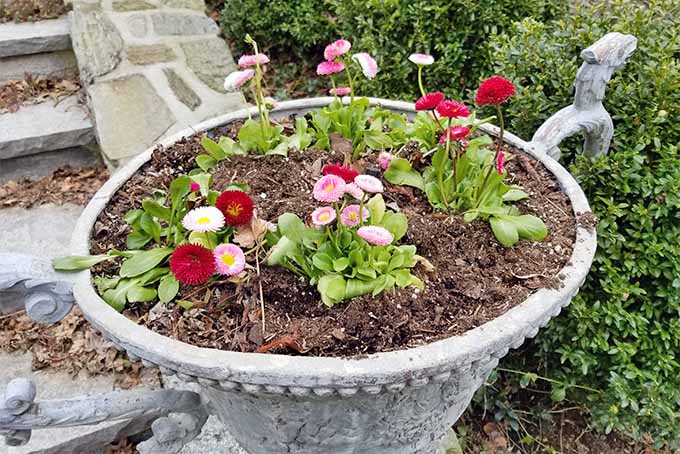
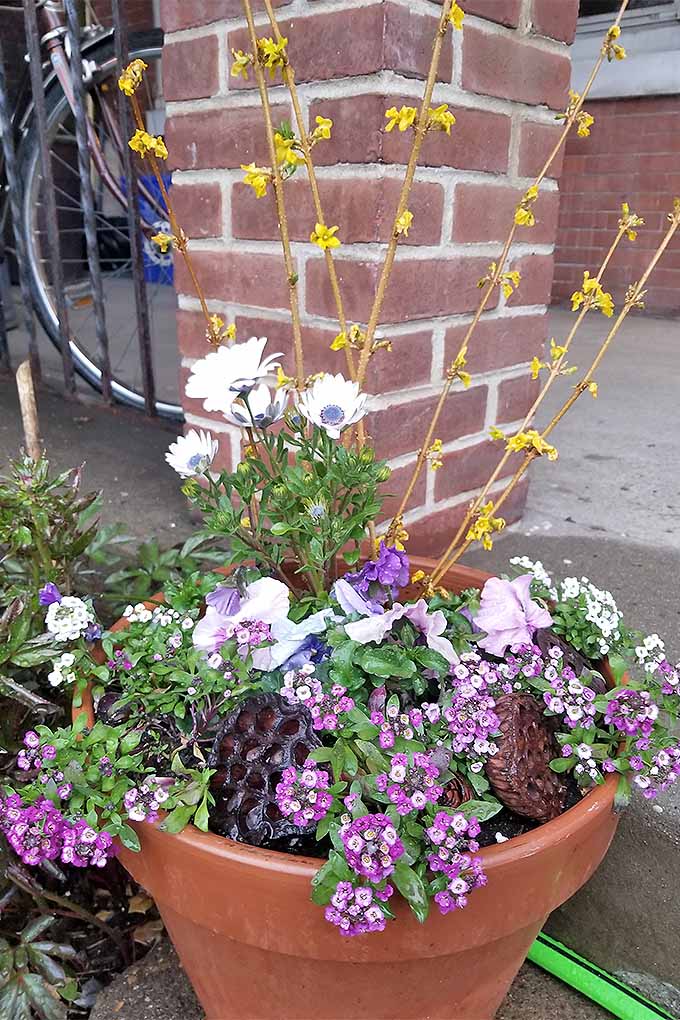
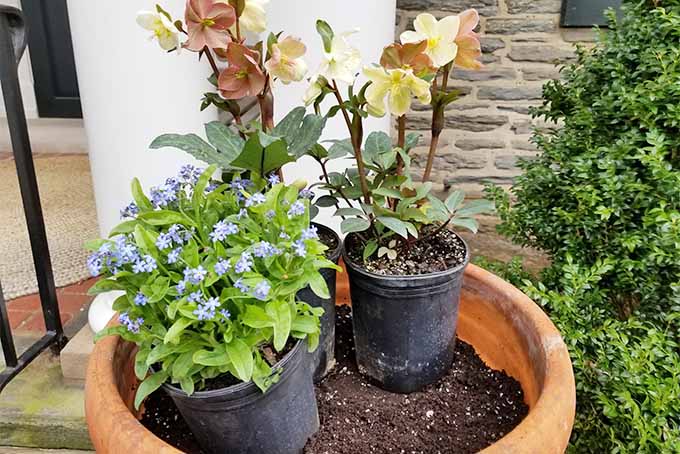
No hard answers exist to determine how many plants you will need. This relies entirely on the style of planter you’re shooting for, what you’ll be growing, and the budget you have to work with. If you’re the patient type and want to see your spring planter fill out over time, you won’t need much! As the season warms up, the plants will happily fill out and erase any gaps or negative space. Here’s a container with a 12-inch diameter that only required six 4-inch annuals to fill it out over time.
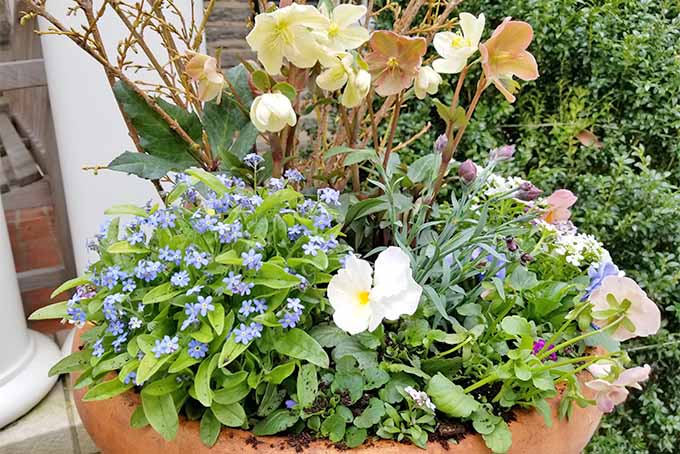
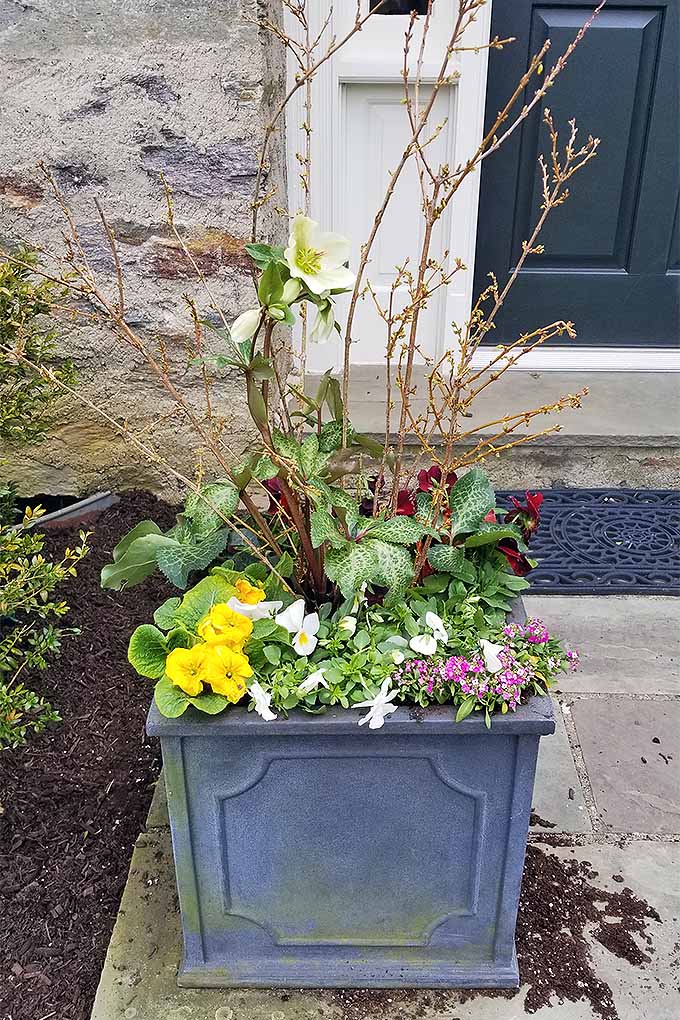
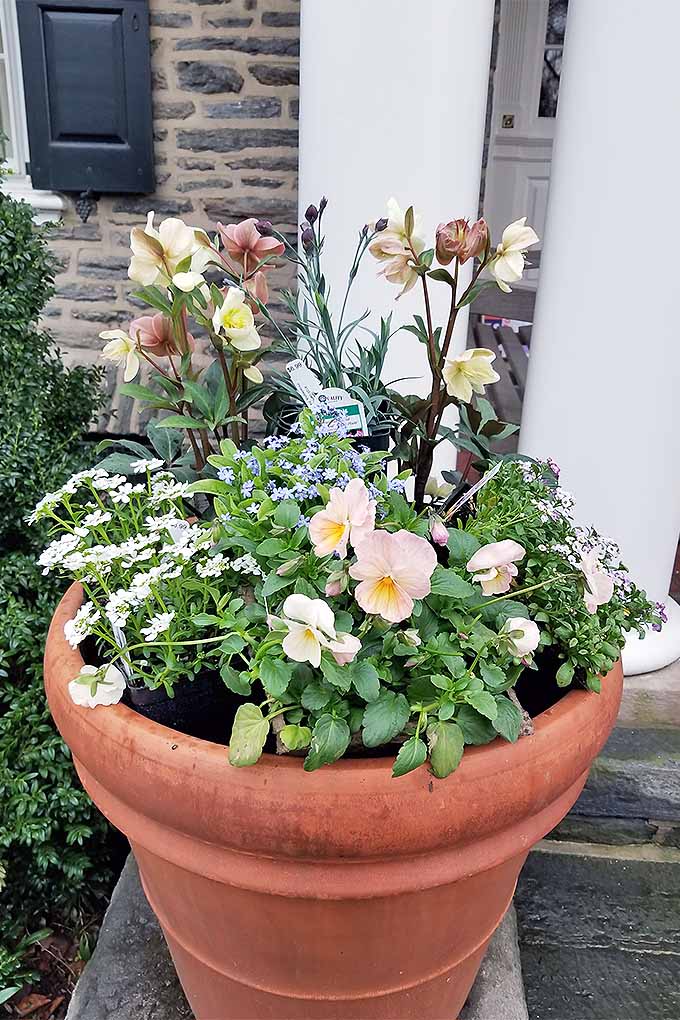
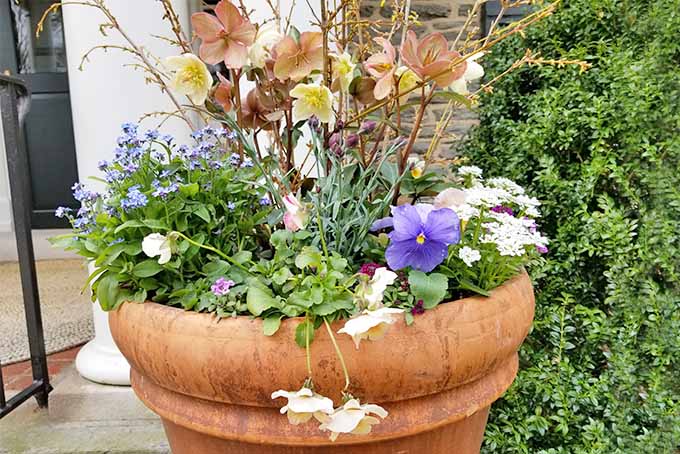
On the other hand, if you want to see that container packed full from the very beginning, you’re going to use a lot more material. The container pictured below is 12-by-12 inches and contains four 6-packs of annuals (three pansies, one alyssum), one 1-gallon hellebore, two 4-inch annuals, and an entire bundle of forsythia branches.
The total quantity of plants you need is entirely up to you and your tastes, with an understanding of the growing habit of the individual species and cultivars!
Thriller, Filler, and Spiller
When constructing your spring planter, remember the three elements of successful container design: thriller, filler, and spiller. Let’s take a look at each of these individually:
Thrilling to Behold
The thriller is the main eye candy of the design. It may be the brightest color, or maybe an interesting and eye-catching foliage. The thriller is the focal piece of your container, and everything else should compliment it.
Fill It Out
The filler is the material used to eat up space and cover soil. These are usually flowers or grasses that add some variety, color, and interesting textures without becoming the main draw.
No Need to Catch Those Spills
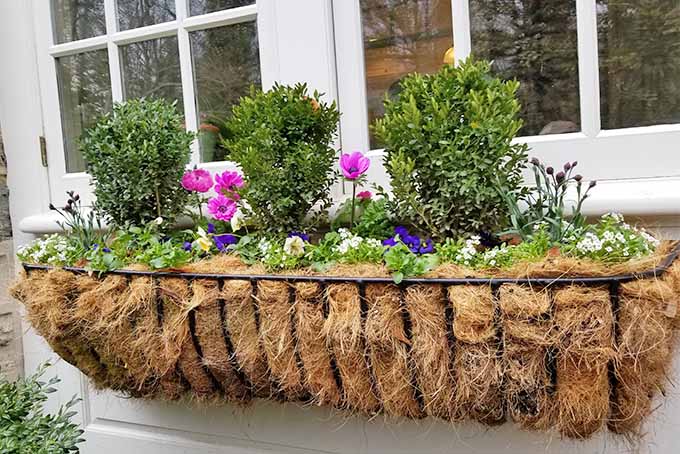
The spiller is anything that spills over the side of the container. It could be a trailing material like a variegated ivy or vinca vine, or a bushy bunch of flowers that pours over the edge.
With an Accent
Anything beyond the thriller, filler, and the spiller is an accent. I like to make the accent unique to each container. I’ve used cattails and dried lotus seed pods; willow branches are also popular additions to a container. I highly recommend sourcing these additional materials from your own yard and garden to tie everything together. A spring planter with some curly willow branches might look nice, but the design will be 100% yours if you include some colorful evergreen branches or interesting twigs from your own yard instead.
Multiple Containers (and Letting Go)!
Many gardeners love symmetrical design, but when it comes to spring planter design, it’s necessary to give up a bit of control. The plants will grow at different rates, or maybe something dies along the way and cannot be replaced. Simply put, it’s impossible to make two planters truly identical.
I suggest celebrating the variances you will inevitably encounter by inviting a bit of whimsy into your spring planter design. You’ll see how in the instructional portion below. Planting containers of various shapes and sizes and clustering them in groups around the porch or patio can also add visual interest on a shared theme without being too matchy-matchy. Just remember that pots of a different volume or material from each other may have different watering requirements. For some assistance in choosing the best pots for your home and garden, read our guide to selecting the best containers and materials.
Onward to Construction
Alright, here we go – let’s put together our spring planters! Potting mix or potting soil is the way to go in most cases. You could concoct your own blend using raw materials like peat moss, perlite, coconut coir, and compost, or buy a bag of it pre-made. For my clients, I alternate between Pro Mix and Espoma Potting Mix. Both products are lightweight, reliable, and are reusable for years with just a bit of upkeep and amendment. If I had to choose one over the other for my own containers, I’d choose the Espoma product. You can add some compost to your potting medium if you like, or use some slow release fertilizers combined with a fast acting liquid fertilizer. I’ve used Osmocote for more than ten years and have never had a problem with it. Combine this slow-release fertilizer with a fast-acting water soluble or liquid one like Jack’s to see those spring planters really take off. Be sure to follow the printed application directions for your fertilizers, to avoid leaf burn. If you’re hitting your containers with a combination of slow-release and fast-acting products, use less than directed. Here is a comprehensive list of what was used in the design of this container, followed by my easy instructions to put it all together:
Two 1-gallon Hellebores (Thriller) One 6” Forget-Me-Not (Filler) One 4” Dianthus (Filler) (an African Daisy would work well here, too) One 4” Candytuft (Spiller/Filler) One 6-pack Alyssum (Spiller/Filler) Two 6-packs Pansy (Filler) One bunch of Forsythia branches (Accent) 1 cubic foot Espoma Potting Mix 1 small handful of Osmocote mixed into the potting medium
Step 1 – Lay Out Your Design
To play it smart and safe, experiment with the composition of your spring planter. With the plant material still in its containers, move them around into different arrangements to see what you do and don’t like. Remember that lighter and brighter colors are best used up front, with darker colors serving as a backdrop. Look at the texture of foliage and consider the plants’ growing habit(s) while setting up your container. This is just a starting point – you can modify your plan and design as you’re planting.
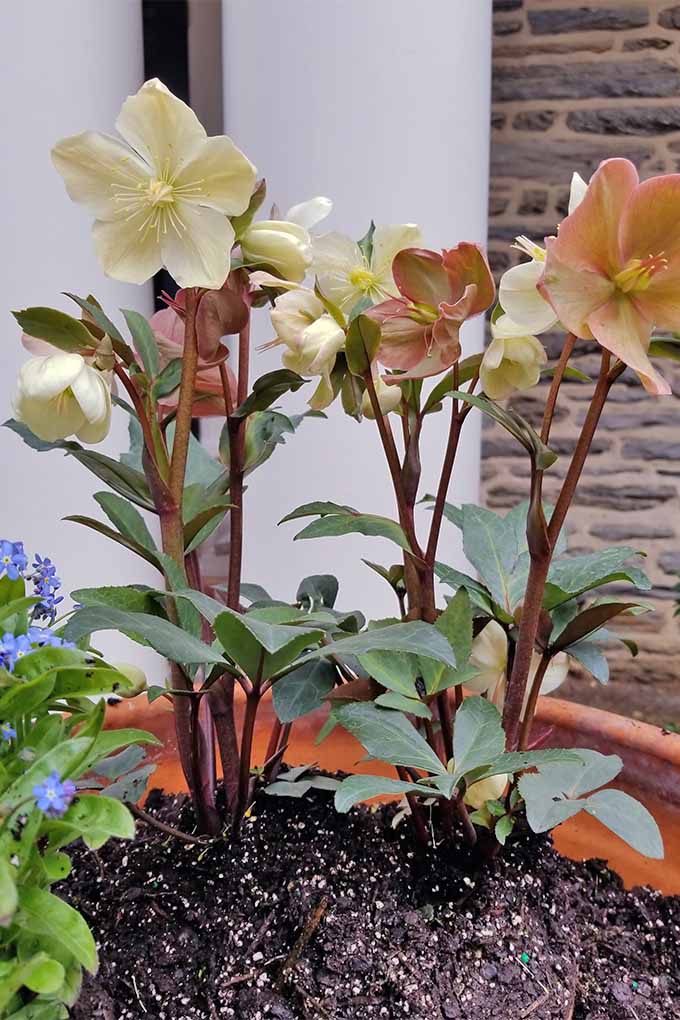
For this container, I crammed two hellebores together to give the illusion that it is one single plant. I placed them near the center of the container and pushed towards the back a few inches. The dianthus and forget-me-not are a little at odds with each other, but I’m alright with this. The candytuft and alyssum work together to fill in the edges of the container, while the pansies are sprinkled around the interior areas of the container.
Step 2 – Plant the Big Boys
Okay, we’ve got an idea of where we’re going now! The next step is to pot the biggest plants. It’s much easier to add small plants than bigger ones to a container construction once you’ve gotten started.
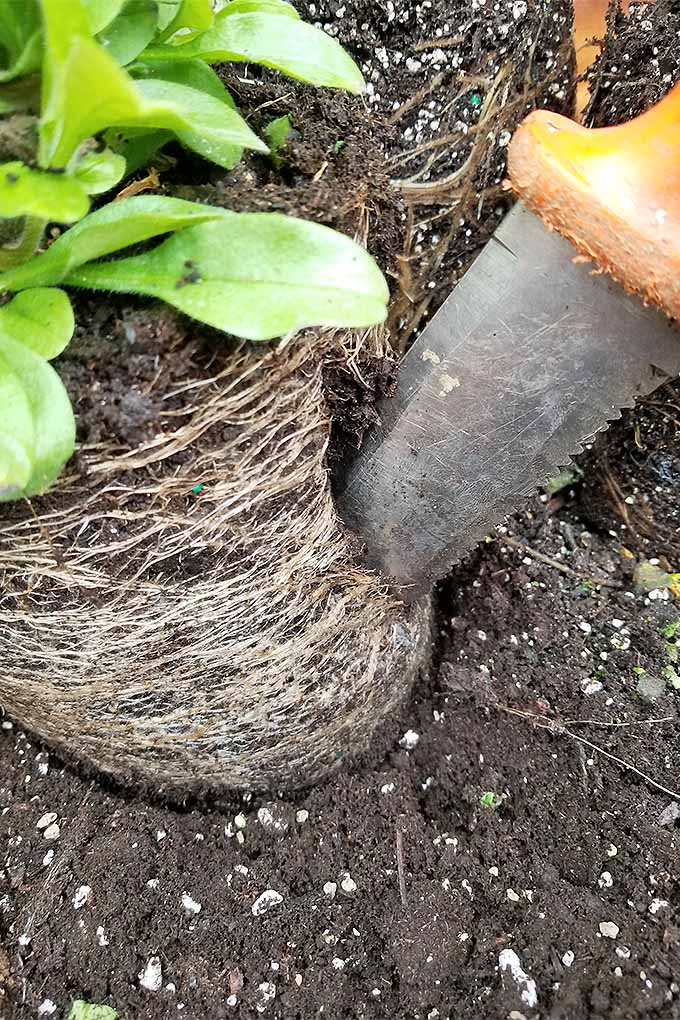
If your plants are rootbound, you can yank or cut off the bottommost roots, or slice the entire root ball.
This aids the growth of the plants, and also makes the container easier to work with.
Arrange the plants as you like them, and don’t worry about filling in the soil just yet.
Step 3 – Plant the Filler Material
At this point, I add most of the pansies and some of the alyssum. I leave a bit of room between each plant and modify my design; the forget-me-not works better when swapped with the candytuft. Instead of potting the alyssum, forget-me-not, and candytuft upright, I add them to the container at about a 45° angle. This handy trick allows the plants to spill over the edge freely, and also allows the spring planter to look fully formed and natural.
As I’m potting these plants, I also add a few handfuls of soil to keep each plant in place. The spring planter fills up quickly, and it’s easier to add soil now, when the gaps between plants are larger. Step back every few minutes and take a look at the container. Is it balanced? Maybe the right side is dense with plant material while the left is a little sparse. Fixing things is easier now than it will be at any other time!
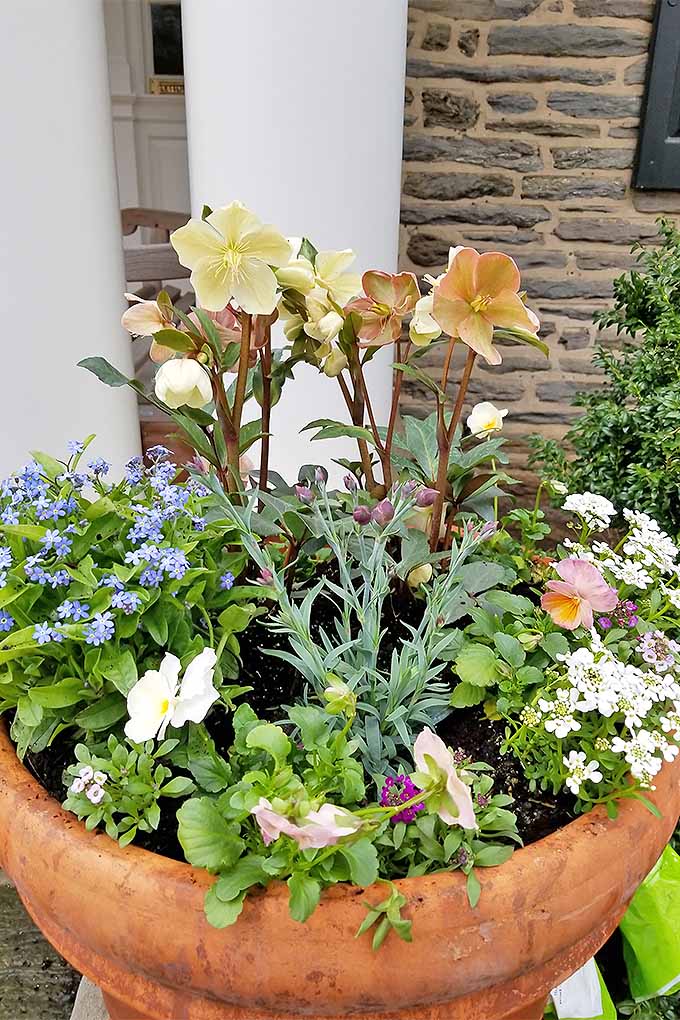
Step 4 – Add the Final Touches
Now you’ll add the last of your plant material. Fill in any gaps in the soil, reposition plants to where they’re at their best, and add your accents. I added the dianthus near the end of my spring planter construction because I wanted its position to work with the whole structure rather than fighting it.
For my accent, I used a bundle of forsythia branches. There are about ten total in this design, each cut to a different length. These accents add some vertical interest to the spring planter design and can serve as a focal point even when flowers aren’t in bloom. I cut the branch ends with my pruners at a 45° angle to make them easier to add to the spring planter. They all radiate from a central area about the size of my palm, and spread out in all directions. If one doesn’t work, I’ll pull it out, cut it to a shorter length, and incorporate it at a different angle. Give your spring planter a healthy drink of water, check for any gaps in the potting medium, and step back to appreciate your hard work.
Enjoy for the Rest of the Season
There you have it, a beautifully designed spring planter! The plants we’ve used for this arrangement are at their best in cool weather, so as the summer heats up, you can expect to lose a fair number of them. When summer arrives, all you need to do is add some fresh material to your container and you’re set for another season. And speaking of spring, have you read our spring gardening checklist? It’s a handy resource to utilize at this time of year. Have any questions or suggestions? Share them with us in the comments section below! Photos by Matt Suwak, © Ask the Experts, LLC. ALL RIGHTS RESERVED. See our TOS for more details. Product photos via Premier Horticulture, Espoma, Osmocote and J R Peters.